Preserving meat and poultry to ensure your family will continue to have protein to consume during a SHTF disaster does not require any expensive equipment, or even a dehydrator.
Drying meat for long-term preservation involves cutting it into small pieces of meat, and decreasing the amount of water or moisture in the meat to prevent the growth of bacteria and spoiling.
Bacteria require moisture to grow, some species of microorganisms can thrive in even miniscule amounts of water.
Eating rancid meat even before things go critical and you have access to a fully-functional hospital can be lethal.
Drying food to keep it from spoiling is one of the oldest food preservation practices.
Because the drying process eliminates as much moisture as possible, it makes the meat far more lightweight and portable – a big plus during a doomsday disaster when you may have to bug out.
Dried meat does not require refrigeration, another huge bonus during a long-term disaster.
Table of Contents
Can You Sun Dry Meat?
Sun drying meat is an ancient practice as old as cooking on fire or smoking meat for preservation.
The sun produces a similar dry heat to that of a fire which makes it perfect for evaporating moisture from within. This is perfect for dying out meat for extended storage.
The temperature and humidity needs to cooperate for it to work properly though, since humidity keeps moisture in the air and makes it longer for evaporation to happen.
It’s why it’s always suggested to sun dry meat at a high temperature, low humidity, and good airflow.
This method of meat preservation is viable as long as you can control the environment from pests and have optimal drying conditions. The finished product should come out similar to beef jerky which makes it easily identifiable when done.
How Long Does It Take To Sun Dry Meat?
Keep in mind that sun drying meat has many variables attached to it aside from the type of meat you’re looking to preserve.
You’ll also want to keep your pieces small enough to dry out quickly and remember to take off as much of the fat as you possibly can.
That being said, here are the approximate times for sun drying different meats based on optimal conditions.
If your meat takes 48 hours or more to dry, there is a chance that it is not fit for eating as the moisture has sat for too long.
| Meat | Drying Time |
|---|---|
| Beef | 12-14 Hours (Thin strips) |
| Salmon | 8-10 Hours |
| Rabbit | 8-10 Hours |
| Turkey | 8-12 Hours |
| Chicken | 10-14 Hours |
Best Types of Meat For Drying
Lean meat is always the best type to dry, or really preserve in any manner for its lack of fat content.
As noted above, always strip away as much fat as possible before drying meat of any variety. Make sure there are no bones in the meat as well.
- ✅ Turkey
- ✅ Deer
- ✅ Buffalo
- ✅ Goat
- ✅ Brisket
- ✅ Pork Tenderloin
- ✅ Pork Chops
- ✅ Mutton
- ✅ Lean beef
- ✅ Salmon
- ✅ Pork Shoulder
- ✅ Pork Ribs
- ✅ Chicken
- ✅ Elk
- ✅ Squirrel
- ✅ Venison
- ✅ Rabbit
Note: to speed up the drying process, you typically need to provide a low humidity environment, not to increase temperature!
Low humidity can be achieved by speeding up the air current. Relative humidity is also of concern, and should carefully be monitored.
Sun Drying vs. Oven Drying
An interesting study compared the two preservation methods with regards to the loss in nutritional value. It’s pretty clear that the dried pieces of meat will still retain a lot of micro and macronutrients when subsequently consumed.
All in all, both preservation methods are excellent for survival and prepping purposes. The sun drying method doesn’t even require electricity, so it can be employed in a grid-down situation.
Solar drying and sun drying are not exactly the same thing – yet both use air circulation and sunshine to preserve food.
Sun drying is the hanging of foodstuffs outdoors, usually from a rack or tree branch, and exposing it directly to the air and the sunshine.
Sun drying is great for preserving herbs, nuts, and some types of fruit and vegetables, but not for meat. It would become rancid far before the meat would actually dry from too much exposure to air flow.
There are just two important components to solar drying: sunshine and air circulation.
Keeping the temperature as controlled as possible in a solar oven is essential to thoroughly and evenly drying meat to remove moisture and to kill bacteria.
To use the sun to dry meat, the temperature must be at least a minimum of 85F (or 30C) throughout the entire process. The higher the temperature, the more moisture will be removed in a timely manner.
A humidity level at or below 60% will be most beneficial or solar oven drying – particularly for meat.
A commercially manufactured solar oven, a homemade solar oven, or racks and screens placed up on blocks – or the cleanest screening material you can find placed over a concrete slab.
The screens and food being dried cannot come into contact with the ground because that would infuse the moisture from the grass, dirt, wood, dirt, debris, or concrete back into the food, and prevent necessary airflow.
The same thing can happen if you place your food to dry in a windy area: dust particles will go right in if you don’t offer adequate protection!
To keep bugs and debris off of the meat, place a screen both on top of and beneath the meat being dried if going an open rack method. Ideally, the screens and racks should be placed on top of a sheet of aluminum foil inside a DIY solar oven or manufactured solar oven.
The aluminum foil will also help increase the drying temperature, especially when the racks and/or screen are placed inside a solar oven:
It is highly recommended to avoid using racks or screens that are made out of aluminum, copper, or hardware cloth (rabbit hutch wire) because it is essentially galvanized metal that can oxidize, creating residue on the food being dried.
When using an actual solar oven, whether it is homemade or manufactured, you should leave the door propped open slightly to enhance the circulation of air – about two to five inches should work just fine.
Leaving the door open to create more air circulation around the meat will cause the temperature to fluctuate more during the drying process.
For the sake of safety, place a meat thermometer or an oven thermometer inside the solar oven to gauge the temperature, then check it every 20 to 30 minutes.
Drying meat in a solar oven can take up to two days, depending upon the density and the amount of meat, the quality of oven construction, and of course…the weather.
The most distinct disadvantage involved with sun drying is caused by the exposure to debris during the preservation process.
Wrapping the food in cheesecloth will help reduce debris from touching the entire surface of the food stuff, but will not prevent microbial contamination from debris that either touches the food or sinks into the cheesecloth.
If this type of solar preservation is your only option for meat during a SHTF situation, it might be feasible if the meat is first coated thoroughly in salt before being suspended and allowed to air dry.
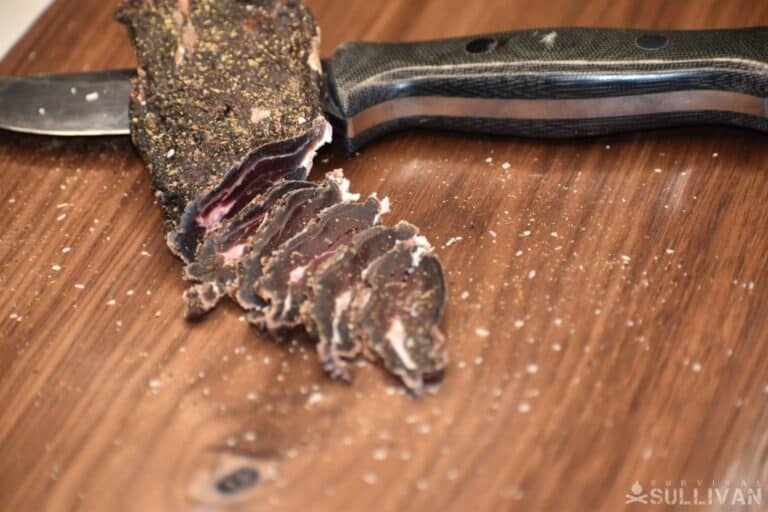
One particular meat solar drying technique / recipe is biltong, which we have outlined here. This South African beef jerky, as it is sometimes called, is a prepper’s favorite along with pemmican.
There are two primary methods for drying meat in the sun; However, the fundamental requirements stay the same: heat and air. As long as nature provides the right balance you can dry meat with no hassles.
Sun-drying Meat – Hang and Dry Method
Think of this as the primary, primitive way of drying meat and still works in these modern times. It is simple to prepare but needs to be monitored so that no insects come by to grab a snack. Here are the steps to sun dry your meat using the hanging method.
- Prepare your meat by cleaning and thoroughly drying your meat. To make your life easier you can then cut your meat into thin strips that can be hung over a line or tied from one. Pick a spot with direct sun since drying your meat becomes difficult without it.
- Tie a line (paracord or twine) between trees, high enough so that no animals will try and get at it. Estimate between 6.5 to 7 feet off the ground.
- Hang your strips over the line you tied and ensure the meat is right in the sun’s path. Thin strips make it easier to drape over the line and they dry evenly and quicker.
- Keep an eye on the meat for any flies that could come by. If they get too intense you can build a small, smoky fire nearby to deter them.
- You know the meat is finished when you can bend it and it snaps cleanly. Some people like it a bit less done but in the wild you should be as careful as possible.
Sun-drying Meat With a Solar Oven
A solar oven can be used for more than drying and is a versatile piece of equipment for baking and cooking food.
It requires the same kind of sunny day that hang-drying meat needs and a nice breeze would help as well.
- Get your solar oven ready by putting in a wire rack across the inside. You want your meat to be prepared in the same way as if you were going to hang dry it.
- Lay your meat strips across the wire rack evenly and so that the pieces aren’t touching each other.
- Angle the solar oven so that the reflective parts are funneling the sun into the oven. Make sure to monitor the temperature as you want to dry your meat and not cook it.
- Keep an eye out for insects and rotate the strips if needed.
- You will know the meat strips are done when they have a clean snap.
Drying Tips
- Cut away as much fat as possible before drying to help prevent bacteria growth and to deter drying time.
- Boil the meat cubes or strips for about five minutes before drying to get rid of bacteria before oven drying. Allow the meat to air dry completely after boiling, before placing it in the oven. If you do not boil the meat before oven drying, use a meat thermometer to ensure it reaches a safe temperature.
- Ground meats and pork should reach 160 F internal degrees (71 Celsius). Roasts, steaks, and various types of chops should hit 146 F internal degrees (63 Celsius). Poultry should reach 165 internal degrees.
- When the meat is thoroughly dried, it possesses a leathery texture and feels somewhat sticky.
- Cutting the meat uniformly will foster better and similar drying times.
The evaporation of water content during the drying process will cause the meat and connective tissue to shrink at least somewhat, and alter its shape slightly.
Some of the meat might appear to be darker in surface color and more wrinkly, than other portions of the same piece or from other chunks or strips being dried.
The process of drying meat (and to a lesser degree, produce) is a slow one.
Never attempt to speed up the drying by increasing the temperature, or you run the risk of cooking the meat (or fruits and veggies) instead of drying it.
When the humidity is high, it will take longer to dry the meat due to the added moisture in the air.
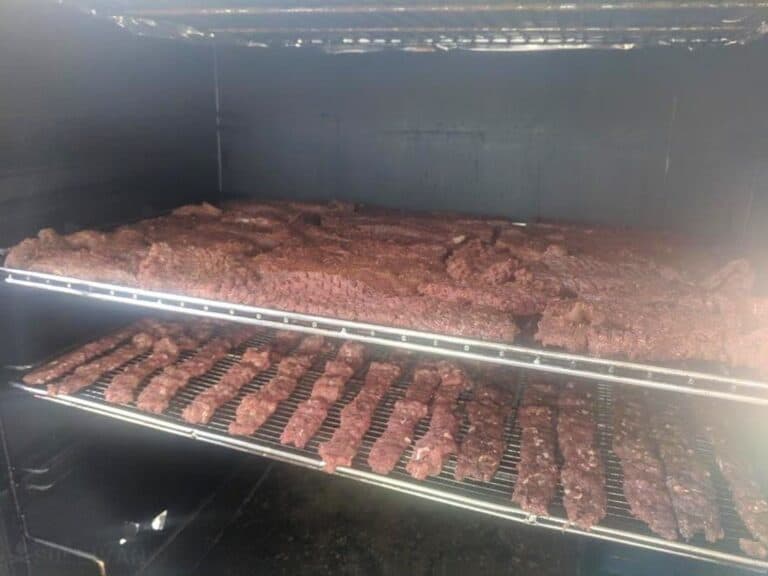
It is possible to dry larger chunks of meat, but doing so in either a kitchen oven or solar oven would likely be extremely time prohibitive. That type of meat preservation is best conducted in a smoker or smokehouse outdoors.
Shelf Life
Properly dried meat can be stored for many months, up to several years. The meat should be stored in a cool and dry place to further deter exposure to the elements and increase the chance of bacteria growth.
Storage
All smoked meat must be stored in airtight wrapping or airtight container to ensure moisture does not have the chance to reach the dried meat and once again infuse moisture into it.
- Make sure the meat is completely cooled before placing it in its airtight container for storage. Any steam created after the meat is placed in the container will create moisture and enhance the chances of bacteria and mold growing on the preserved food.
- Pack the meat as tightly as possible into the airtight container. Avoiding air pockets will also reduce the chances of moisture forming.
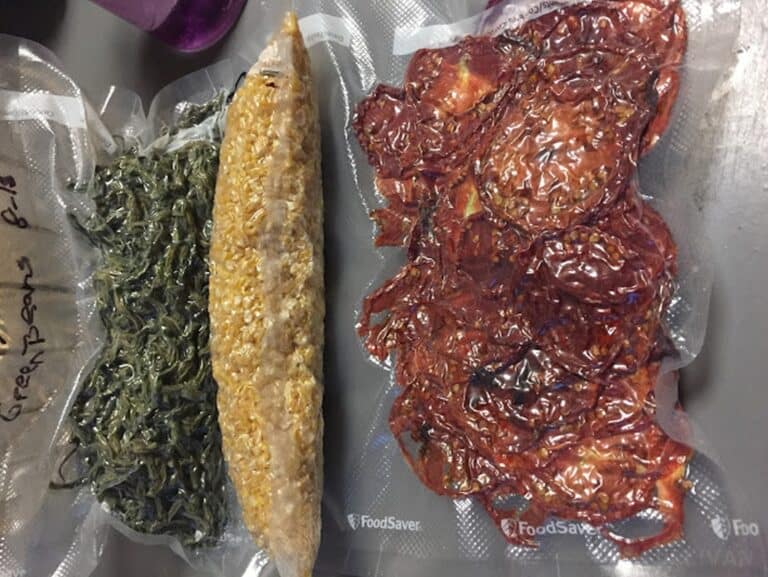
- The best storage containers for dried meat include: Mason jars, vacuum sealed bags, and metal containers with a firm fitting lid. Use glass containers and not porous plastic containers whenever possible.
- Ideally, store meat in recipe or meal size amounts to reduce waste. Once you open a container of dried meat, moisture is allowed inside the bag, can, or jar, and vastly reduces the shelf life of the preserved food.
- Storing dried meat (and produce) in a cool dark area has been known to safely preserve it for 12 months.
- The hotter the temperature is in the storage area, the shorter the shelf life of the dried meat. Attempt to keep dried food in a storage area that remains roughly around 60 degrees and never exceeds 80 degrees.
- In addition to preserving and storing whole chunks or strips of meat, you can also use the preserved protein to make a powder. The meat powder can be used in stews, soups, gravy, or in other recipes to enhance the level of protein in the dish and to help keep the family strong and healthy during a long-term disaster.
- To make powder from dried meat strips or chunks, pound a single piece with a wood kitchen mallet to create small particles or flakes.
How To Rehydrate Meat
To rehydrate protein powder, combine the meat flakes with lukewarm water at a 1 to 1 ratio. Allow the meat particles to soak in the water for 30 minutes to a full hour, stirring occasionally.
If rehydrating (or reconstituting) dried meat strips or chunks, place the protein in a bowl with lukewarm water (cold can work in a pinch, but may increase rehydration time) and allow it to soak for 60 to 90 minutes – also stirring occasionally.
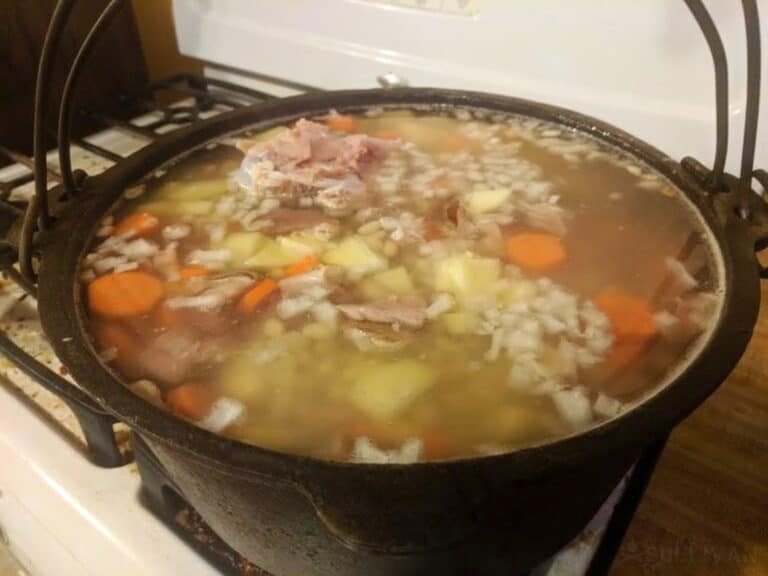
The dried meat will not need to be reconstituted if it is being used in a soup, stew, gravy or similar dish where the preserved protein will be mixed with liquid in a cook pot.
Frequently Asked Questions
The only real disadvantage is that you’re at the mercy of the weather. If there isn’t a lot of sun and the day isn’t hot and dry then it’s going to take a while.
This can lead to mold growth which could spoil your meat. Insects are also another cause for concern.
Sun dried meat is healthier than smoked products as they don’t have the nitrates baked into the meat. If the process was done correctly then there is no harmful bacteria within that could make you ill.
While you can surely dehydrate ground meat, sun drying it might be a different story.
The issue with ground meat is that it is too small in size so bacteria has a chance to grow in the small nooks and crannies.
Additionally, you want to hang meat on a rack and that is difficult to do with ground meat.
No, sun dried meat is not harder to digest. It is, however, harder to chew and difficult for liquids such as saliva to penetrate.

Tara Dodrill is a homesteading and survival journalist and author. She lives on a small ranch with her family in Appalachia. She has been both a host and frequent guest on preparedness radio shows. In addition to the publication of her first book, ‘Power Grid Down: How to Prepare, Survive, and Thrive after the Lights go Out’, Dodrill also travels to offer prepping tips and hands-on training and survival camps and expos.
*** 2. Preheat the oven to 160 degrees – or 180 if your oven does not go down that low. ***
As soon as I saw that sentence I realized this was probably going to be a first-class how-to article. The preliminary boiling of the meat will have removed much of the troublesome fat – the part which will go rancid and possibly ruin all the hard work involved. Then always keeping the meat at “cooking-level” temperatures will ensure safety and efficiency for the rest of the process!
This is also a timely piece – I keep seeing news articles how there is a huge stockpile of meat in cold storage which can’t be kept there forever. I’m currently paying $2/lb for pork loin, and relatives have reported sales for $1.5/lb. These prices could go even lower, and now is a perfect time to capitalize.
https://www.wsj.com/articles/meat-piles-up-as-production-grows-and-exports-slow-1532268000
Being of the lazy sort myself, I’m going to suggest an alternative method of turning the meat into small pieces. I have some large hand-cranked meat grinders, and because I hate eating “sawdust-beef” chili from commercially ground hamburger, I grind my own meat using grinder plates with really large holes.
http://smokehousechef.com/12-x-3-4-holes-stainless-meat-food-grinder-mincer-chopper-plate-disc-screen/
Naturally each person would have to buy the sizes of plates to fit whatever grinders they own, but I’ve found bits of meat ground in the 3/4″ hole plates cook down to about the size of small marbles, and for me that’s the perfect size for meat in chili. I’ll suggest more experienced folks than myself consider whether these small pieces wouldn’t also be fine for drying. It IS a fast and easy process. I cut the pork loins into three or four long strips so they go into the relatively small grinder mouth easily, then dump the resulting pieces into boiling water for their defatting/cooking. Seems to me these would dry rather quickly if spread in single layers on metal cookie sheets in the 160 degree oven.
A second suggestion is one I’ve never yet tried, but I’m going to soon buy the necessary stuff.
https://www.amazon.com/FoodSaver-FCARWJAH-000-Wide-Mouth-Regular-Accessory/dp/B016OL1AB6/ref=sr_1_3?ie=UTF8&qid=1534447319&sr=8-3&keywords=wide+mouth+vacuum+sealer
Put the dried meat into glass jars with new mason lids, and use a vacuum sealer to evacuate the air and make a tight seal with the flats. This gives protection from large insects and rodents which might penetrate the plastic sacks from the same vacuum machines.
Finally, it occurs to me that an intermediate step might be useful in extending the storage life of the oven dried food. People who own a freeze-dry machine could squeeze the last bits of water out of the meat before vacuum-sealing it. Not owning one of those, but possessing a dehumidifier, I think I’d build a large box to surround the dehumidifier and put the oven dried foot inside the box. I’ve tried this (in a tiny room) with dried seeds and watched the volume of those seeds drop significantly as they dehydrate in the desert-like atmosphere.
Again, excellent article.
Zachary,
Thank you for your kind words about the article and also sharing your own valuable tips and links.
I make beef jerky in the oven at 165. To get some circulation and let moisture escape I prop the oven door open about 1 inch. You are now drying the meat, not baking it. Great read!
Dann,
Great tip for oven drying meat, I use the same method when drying corn husks and herbs in the oven. Glad you liked the article and thank you for sharing the tip!
good article. found you through The Prepper Website
Tracy,
Glad you found us and enjoyed the article. I also enjoy The Prepper Website.
Hi Tara. Great DIY! I love your post. I’m a beginner cooker and finding tips and how to do and keep meats. I’m looking a small tools for my new kitchen. Your informative post will help me a lot for beginner like me. I’m looking Meat Grinders as shown here https://www.eathealthyandthrive.com/best-meat-grinders/. I think it small and fit for a fix area. What do you think about that? Could you give me suggestion about kitchen tools? I have to buy for my new kitchen at my new house.
The temperature mentioned in oven process is in centigrade or F ??
Since pre-historic times, meat has been sun-dried to preserve it, generally on wooden racks high enough to keep it away from dogs, coyotes, rodents, etc. Humankind did well. I think you must be missing something or your lawyers are talking.