The daily life on Native Americans is quite fascinating. From the way they acquired food to the way they preserved it, you can’t help but wander how they did it with their seminomadic lifestyle. Many Native American peoples used to change camps several times a year as they followed the animal herds, and their scouts spent a lot of time on the trail.
Born from a need for portable food that could sustain them on the trail, came this mixture of dried meat and rendered suet or tallow. Called pimikan in the Algonquin languages. The term stemmed from the Cree root word, Pimii, which meant rendered fat.
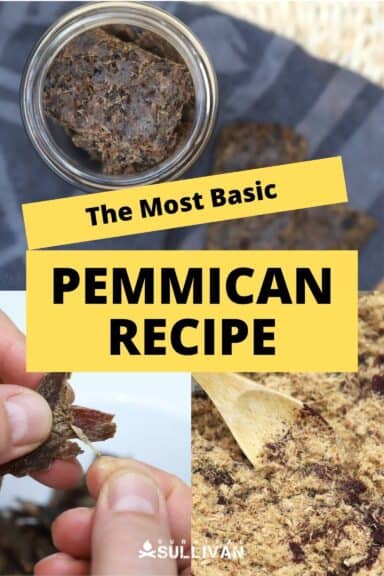
Just What Is Pemmican?
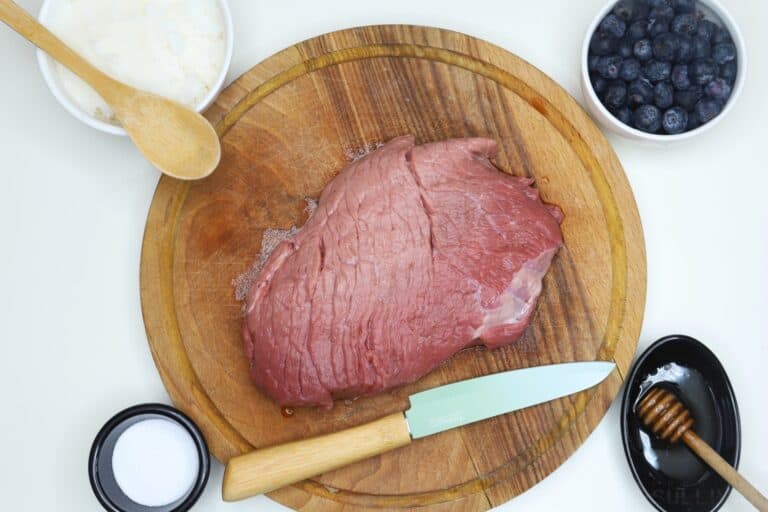
Pemmican is made from powdered dried meat (historically moose, bison, elk and deer) combined with rendered fat and dried berries. Used for generations by the natives and then adopted by fur traders in the 18th and 19th centuries, it is basically a mix of shredded or pounded meat and lard, compressed into cakes.
Known as the “ultimate survival food”, Pemmican is lightweight, easy to carry, and when prepared carefully, can be stored for an extended time without spoiling.
It’s so calorically dense that a small piece provides a full day of energy for a grown adult. It can sustain you during a bug out situation or simply save time if you can’t cook an entire meal.
Note that pemmican shouldn’t be consumed too quickly. It’s best to chew a small bite over time, similar to gum. It is packed with energy in the form of fat which breaks down slowly.
It can take a while to digest but will fill you up and give hours of consistent energy. The practice of adding dried fruit (for flavor) became more common among non-natives, or those used to Euro-American sweet sausages.
Preservation of the meat, whether deer, bison, or even beef is done by drying, and fat by rendering. Careful prep of both meat and fat is the key to preventing spoilage.
This perfect prepper food can be stored for years or even decades. For extended outdoor trips, Pemmican is packed tight in sealed containers and makes an excellent source of energy in cold weather or when hunting is poor.
The Basic Steps To Making It
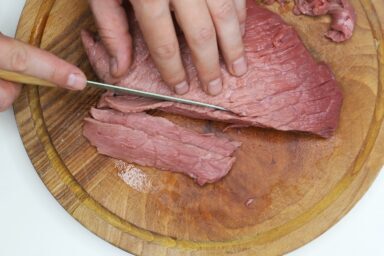
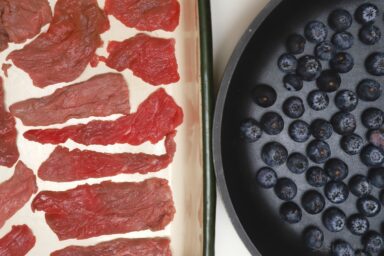
The road to delicious pemmican begins with dried meat, basically the same way you would make typical jerky. Meat from various big game animals, typically bison, moose or deer, but potentially even various species of fish or even ducks, would be cut into thin strips and then dried over a low fire or by the hot sun.
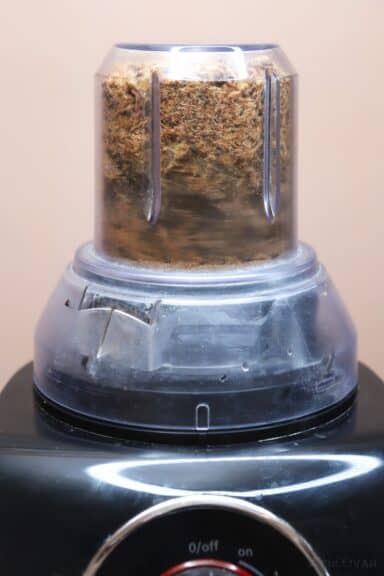
Natives would wait until this proto-jerky was so dry it became brittle, and the next step they would take was grinding it or sometimes flogging it until it had a consistency similar to coarse flour or powder.
From here, animal fat was rendered and melted, typically into tallow but sometimes even suet would be used and mixed with the dried, powdered meat in equal proportion. No matter what variation of pemmican was on the menu this was always the first step and is the quintessential combination of ingredients.
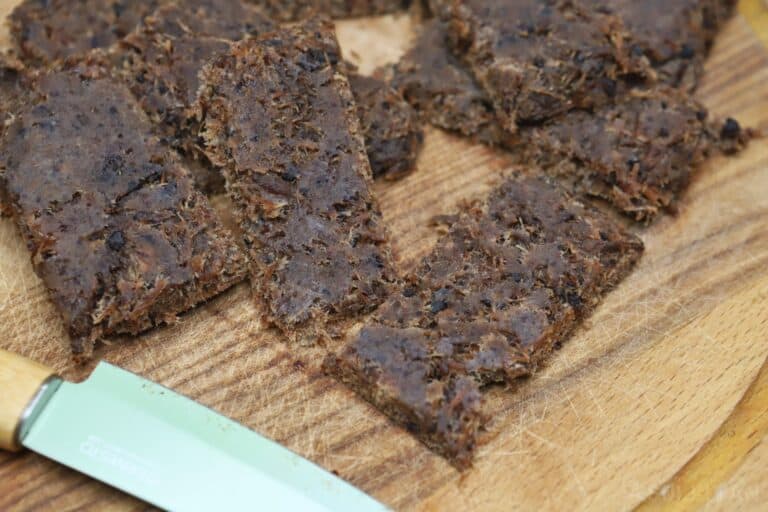
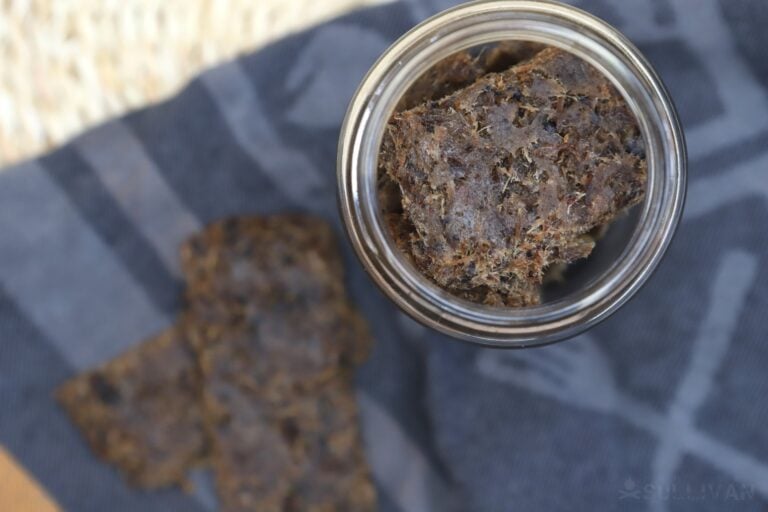
Optional, but typical, ingredients included ground, dried berries or other fruits; usually blueberries, Saskatoon berries or cranberries. Once the entire mixture was incorporated, it would be placed in a vessel or bag and then allowed to cool and harden into the dense bar or chunks known as pemmican.
Once it was ready, portions of the pemmican could be incorporated in various ways. It was often eaten raw as a high-energy, on-the-go food, but could added be to a variety of other dishes, including a type of soup called rubaboo, or even fried up like a pancake or hash in a skillet.
Everyone had their favorite method, but no matter which method was chosen, the pemmican was always ready to eat upon completion. Further tinkering was only to stretch what supply was available or improve palatability.

Ingredients
Equipment
Method
- Remove any remaining fat from the meat with a knife.
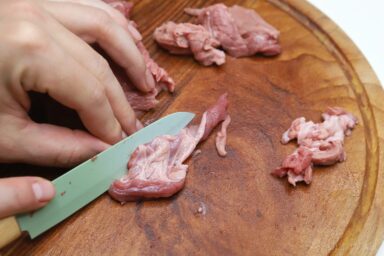
- Slice the meat as thinly as you can (thinner than ¼ inches or 6 mm) and ensure all fat and connective tissue is removed.
- Add the berries in your dehydrator or oven at the lowest setting along with your meat (or separately if both can't fit together). It took us
- Dry the meat and berries in a dehydrator or oven for at least 12 hours at 170 °F or 75 °C. Open the oven door every now and then to release moisture.It took us 12 hours to dry the meat in the oven and 18 hours for the blueberries. Be sure to check both every hour or so after the 12-hour mark.
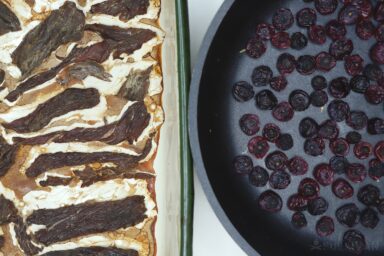
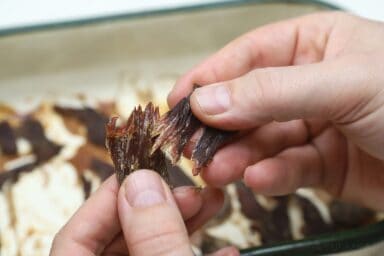
- If, when you bend the meat and it cracks, it's ready; if any parts remain rubbery, it’s not done yet.
- Again, remove any fat from the meat if you spot any, because we want the meat to be as lean as possible.

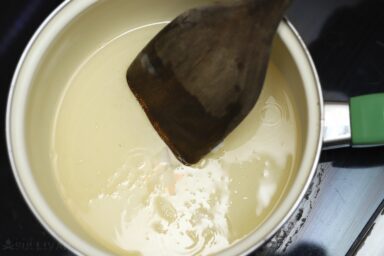
- Put the fat into a big pot on the stove at a low setting (using a spoon or even cut it into chunks if you have a large piece). Some folks use a double boiler at this step.
- Melt the fat stirring occasionally until it stops bubbling.
- Grind the meat. Put all the dried meat pieces into your food processor or blender and grind it into a powder. In an outdoor or bug out scenario, you can mince the meat into small pieces and then crush with a stone, mortar and pestle, or other tool.
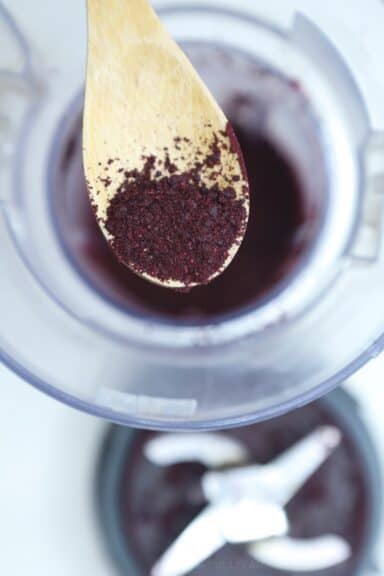
- Crush berries, other fruit or nuts into a fine powder,
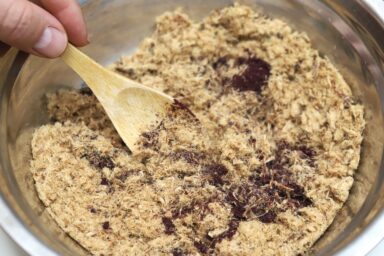
- Mix the meat and berries. Mix thoroughly with dried meat mixture in a bowl large enough to add the fat later.
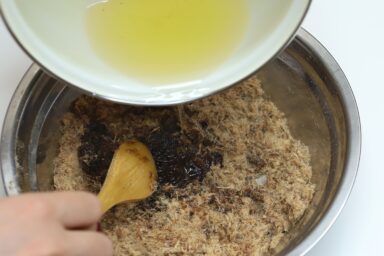
- Add the fat. The formula is one part dried meat mixture to one-part fat. While still hot, pour the fat evenly into the meat and berry mixture slowly, and stir thoroughly. Keep pouring until the mixture holds its shape.
- Add honey.

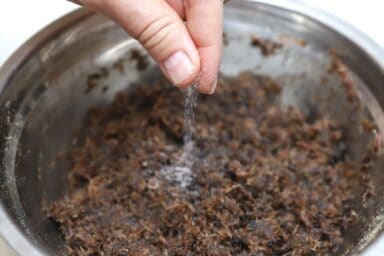
- Add a pinch of salt for taste if you like. Salt also acts as a preservative
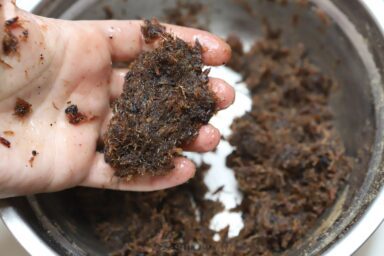
- Keep stirring or kneading until everything is thoroughly mixed. There shouldn't be any lumps of fat or white spots. The end result should have the consistency of a dough.
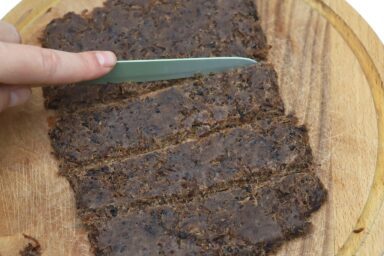
- Spread into a casserole dish, let harden for a few hours in the fridge.

- After it's cooled, cut the pemmican into bars or squares, or simply roll into small balls if you prefer.
Notes
- Don’t worry if you’re left with larger pieces of fruit in your pemmican. These will actually make it taste better! You do want the meat to be as finely ground as possible…
Tips & Tricks
- Use lean, organic meats when possible, and ensure meat and fruit ingredients are completely dried prior to mixing.
- Any meat used should be as lean as possible. Venison thigh and shoulder is ideal.
- Your local butcher may be able to provide organic meat choices.
- The greater the humidity, the more thinly you need to slice the meat for drying. Up to ¼ inch (6 mm), is as thick as you should risk and only in dry climates. If conditions aren’t ideal, smoking can be used to help with the drying process.
- Dry meat in one day if possible to reduce chance for spoilage. If you cannot dry in one day, refrigerate indoors overnight to prevent meat from reabsorbing moisture.
- The meat should crack when bent and be brittle prior to mixing.
- Take care not to burn the fat or suet or make it smoke while rendering it.
- The amount of fat ratio for the pemmican can be less in warmer climates or summer and should be more in the winter or in cold climates.
- Use raw honey for recipes. It is a great survival food to have on hand, and it’s ideal for preservation of food. In this case, it also works as a binding agent, but don’t overdo it as you don’t want too much sugar in your pemmican.
Cautions
- You can also store the dried meat as soon as it’s done: it is just jerky! It doesn’t have much fat and so should NOT be used as a long term survival food. Trying to survive on jerky can be risky.
- Because of its high fat content, pemmican should be eaten sparingly. Use only when you are physically active and for short periods of time as needed. Pemmican may not be good for you if you’re typically sedentary.
- An overload of protein, from any source, can cause a build-up of uric acid and lead to gout or kidney stones due to too much of the mineral calcium oxalate.
Pemmican Variations
Pemmican has many, many variations both tribally and regionally when it comes to ingredients. Even so, pemmican is a very simple dish and the way you choose to prepare it will probably boil down to your preferences or what you have available.
Note that the more ingredients you add, especially moist ingredients, the worse the shelf life usually is if not refrigerated or frozen. Less is more if you want max longevity.
Most pemmican recipes follow the same basic instructions for drying, rendering, mixing, and storage as above and include three main ingredients: meat, fat, and extras.
Start with the ones below and experiment to find the one that suits your tastes and works well for you. Mark your pemmican with ingredients and amounts used so you can modify in the future.
Woodsmen’s Pemmican
- 32 oz. lean meat of your choice (moose, beef, deer)
- 24 oz. dried fruit (for a fun texture, try chunkier dried fruit)
- 16 oz. fat
- Unsalted nuts
- Honey to bind
Fruit Pemmican
- 2 pounds’ beef, kidney, or other meat dried
- 12 ounces of your favorite dried fruit
- fat or suet (enough to hold mixture together)
Bacon Pemmican
- 12 to 16 ounces dried bacon
- 4 ounces melted coconut oil
- 8 ounces dried cranberries
Vegan Pemmican
- 16 ounces’ dates
- 24 ounces powdered tofu jerky
- 16 ounces’ raisins
- Honey as needed (use for binding, add bit by bit and mix well each time)
- 16 ounces your choice of nuts
Modern Day Pemmican
- 16 ounces Dried lean beef or venison
- 8 ounces Beef suet
- 8 ounces Seedless dried fruit (apricots, plums, grapes)
Mountain Man Survival Pemmican
- This is a basic paste of dried meat, melted beef or pork fat, mixed with dried berries or nuts.
- Dry meat until harder and more brittle than other recipes. Cut in strips 1 inch by ½ inch and as long as possible.
- Pound jerky strips into powder.
- Heat fat gradually in a large pot over the fire and let cool.
- Set aside only the hardest and purest fat, the softer fat can be utilized for soap making if desired.
- Mix powdered meat and fat in equal parts (50/50) with the powdered nuts and fruit.
- Pemmican balls can be rolled up in cheesecloth and dipped in fat, wrapped in wax paper and dipped in fat, or in classical, mountain man style, simply dip the balls uncovered into melted fat.
- Store in a cool dry place.
Pemmican Storage
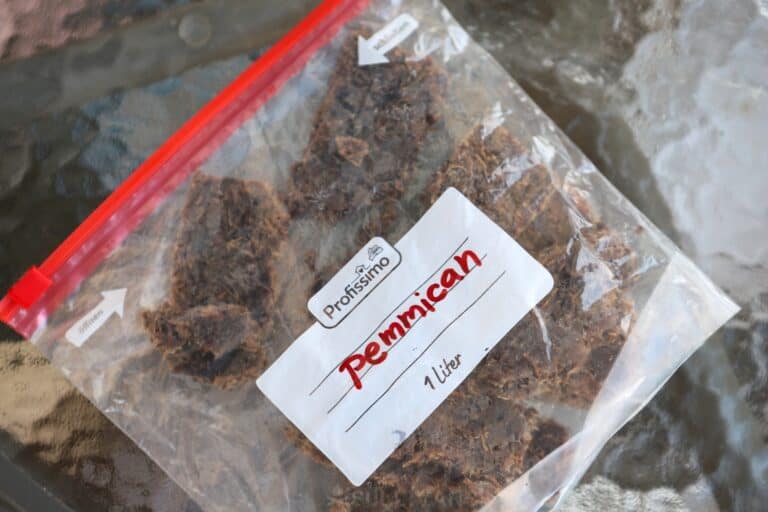
Store squares or balls in zippered bags in the freezer for maximum longevity. Lacking refrigeration, put in airtight containers and store in a dry place, cool and dark to extend shelf life. Glass jars, plastic, or pottery containers are all good. Even bark containers can be used.
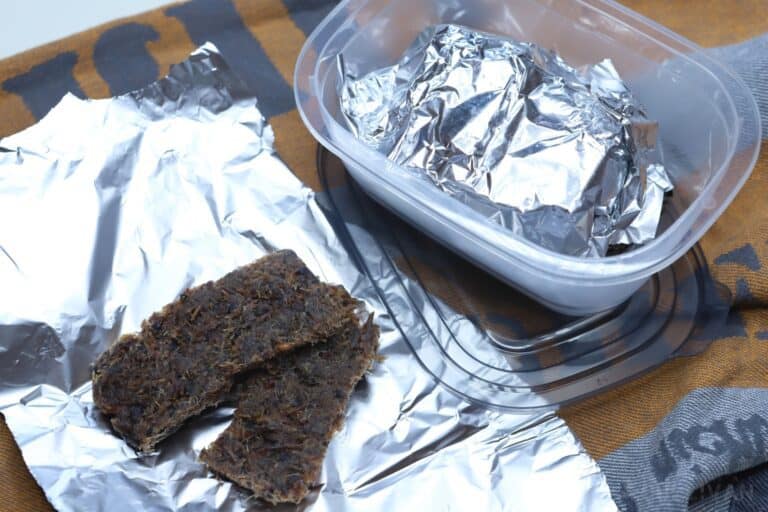
To further improve shelf life, you can wrap each individual square or ball with plastic wrap. You can also wrap it in aluminum foil, then place it in airtight plastic zipper bags. Whether you have a freezer, fridge, or neither, rest assured it’ll keep.
Shelf Life
Long term storage capability and use of dried ingredients make Pemmican a valuable and lightweight addition to your bug out bag. It really is the ultimate survival food when made correctly and actually doesn’t taste too bad either. With enough calories for a whole day’s requirements, it just could save your life…
Expect it to last anywhere between 6months and 5 years in typical storage conditions (in a cool, dry, dark pantry). Pemmican’s shelf life greatly increases, however, if you put it in the freezer and/or vacuum seal it: sealed like that, expect to last for decades.
Anyway, feel free to experiment with different meats and extras to fit your needs and tastes. If you’ve tried pemmican, share your tips and tricks below. If you’re just learning how to make pemmican, which recipe is most appealing?
Pemmican FAQ
Ready to dive in and make your own pemmican bars? Here are some of the most frequently asked questions about pemmican and how to make it store for longer.
Pemmican will taste slightly different depending on what meats and ingredients were used. Expect a greasy, meaty taste with a slight burst of sweetness from the fruit. If the fruits were not ripe then the sweetness will replaced with a tart or sour flavor.
Pemmican can be eaten on it’s own or combined with other ingredients to make a complete dish. Onions, and garlic can be added by using a pestle and mortar for a savory flavor. Since it is mostly used in emergency situations more people will just eat it as it is.
Fur traders and Native American tribes were eating a pemmican mixture far before we had modern refrigerators and vacuum sealers.
Keeping the moisture away is the first step for longer preservation. Avoiding areas that are prone to getting sunlight and heat are another trick for preserving it.
yes, you can definitely use coconut oil with no issues.
As far as caloric intake is concerned pemmican is most certainly a complete food. Up to 300 calories per serving of which is high in fat, protein, and nutrients from the other ingredients.

Born and raised in NE Ohio, with early memories that include grandpa teaching her to bait a hook and watching her mom, aunts, and grandmothers garden, sew, and can food, Megan is a true farm girl at heart.
For Megan, the 2003 blackout, the events of 911, and the increasing frequency of natural disasters like Hurricane Katrina, spurred a desire to be more prepared. Soon to be living off-grid, this mother of four and grandmother of ten is learning everything she can about preparedness, survival, and homesteading.
Thank you so much for these recipes. I will be trying this REALLY SOON!
Vegans do not eat honey, so the vegan recipe should substitute maple syrup or agave syrup.
Thank you Merrill, you’re right, honey should not be included for vegans.
A Vegan recipe for dried meat and animal fat products?? Ha ha
Being in a state of ketosis from dietary fat and protein is actually incredibly healthy!
I met a young lady just recently who is vegan that eats honey. She referred to herself as a beegan!!!
I am wondering about the principles of pemmican storage, that could help ensure that (for example) a vegetarian or vegan pemmican would keep.
I wondered that as well.
Do you just blend all and form into ball? How long is shelf life
Does it matter what kind of fat is used? Is it the kind of harder fat that needs to be rendered, or could I use bacon grease, which I usually have in the fridge?
Does it matter whether the meat and fruit is dehydrated or can it be freezed dried?