Every prepper understands the importance of water to preparedness, and to that will usually have quite a supply on hand.
However, there’s only so much water you can practically store at any one time. The best way to maintain a reliable supply of water during a long-term crisis is to collect rainwater.
Even a modest rainwater collection system can supply you with many dozens or hundreds of gallons of water from a passing shower or thunderstorm.
This is a great capability to have, but what some preppers don’t know is that this collected rainwater is not as safe as you might think.
For maximum safety and best quality, collected rainwater still requires filtration and purification if you want to drink it. Keep reading and I’ll tell you about the methods to do just that…
Table of Contents
Your Harvested Rainwater May Not Be as Clean as You Think
The process for collecting rainwater is an entire article all on its own, but for our purposes right now, there’s just one thing you need to know: collected rainwater is nowhere near as pure as you might think.
I get it. What could be purer than water that just forms and falls out of the very sky over our heads?
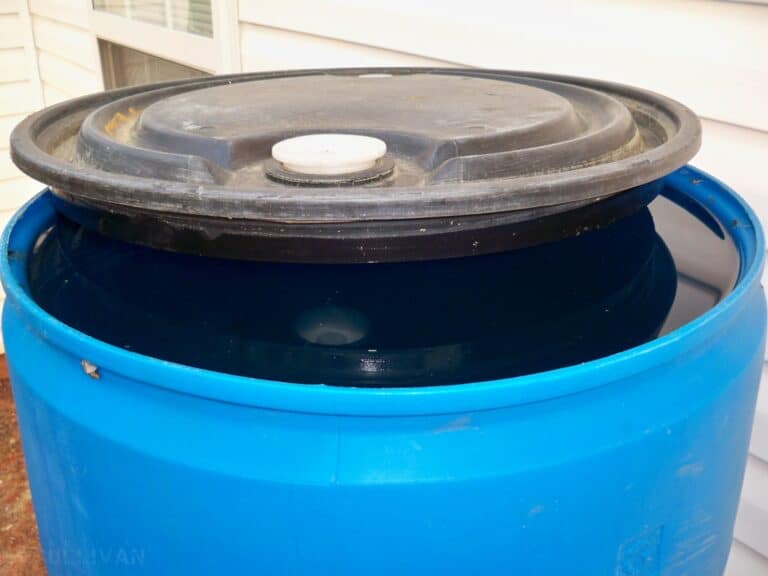
A lot, actually, thanks to airborne contaminants, and that’s before the rain actually hits the roof of our house, cascades through our filthy gutters, down the downspout, and then finally into our collection barrels.
Even if you simply set containers out in the yard to catch falling rain, if it contacts leaves on trees or any other obstacle before making its way to the container, it’s going to be pretty dirty.
It’ll contain all sorts of dust, dirt and other debris, bird and insect poop, and a lot of other stuff that can make you and yours terribly sick. Pretty gross, huh?
I think so too, and that’s why you need to filter your water at the least, and preferably purify it too afterward to make it totally safe for you to drink.
3 Ways to Filter Your Rainwater, Step by Step
Filtering your collected water is the first thing you should do.
Depending on the efficacy of your filtration method, filtering the rainwater will remove large and small debris, dissolve solids, and potentially some biological hazards like certain bacteria, and parasites.
In all cases, you’ll want to filter the water before you move to the next step of purifying it to make it totally safe to drink, or nearly so under the circumstances.
The following methods are tried and true:
Use a Purpose-Made Water Filter
One of the easiest and most reliable ways to filter water is to use the right tool for the job.
You probably already have a personal water filter in your bug-out bag, and you can use that for the purpose, or invest in a larger “camp-sized” unit or even an electric countertop appliance.
Whichever kind you decide to use, make sure you are familiar with correct operation and then do the following:
1. Collect or Add Water in Reservoir
Depending on your unit, you can scoop the rainwater out of your collection container using the filter itself, or draw it using some other tool and then add it to your water filter.
2. Pump or Run Filter According to Instructions
There are a ton of different water filter models on the market, and they all work a little bit different.
Some are gravity fed, some must be pumped, others are electric. Whatever the case, set up yours so it operates correctly.
3. Collect Processed Water in Clean Container
Some filters work a little bit faster and others are slower, but all will reliably produce water that is dramatically cleaner and far freer of contaminants once they are done.
Make sure you collect this water in a clean container; otherwise you’ll just be re-contaminating it.
Water filters are among the most convenient options you’ll have, especially if they’re designed as a part of your rainwater collection system itself.
But do keep in mind that those filters don’t last forever, and they will eventually lose effectiveness and then fail entirely.
Have backup filters on hand for the purpose, and make sure you have a realistic understanding of how much life a filter has under real-world conditions.
Build a DIY Water Filter
Sometimes you don’t have a purpose-designed water filter, or maybe your filter is just kaput. This doesn’t mean you’re out of luck.
With some very basic materials and a little bit of ingenuity, you can craft your own surprisingly effective DIY water filter that will work nearly as well.
The following steps will tell you what to do, and make sure you check out our other, in-depth articles on making your own:
1. Gather Materials
You’ll need a few things for this project; find a 2-liter plastic bottle, a clean cloth like a bandana or old t-shirt, a coffee filter or cheesecloth, pea-sized gravel, seed-sized gravel, clean sand and finally ground activated charcoal.
That’s activated charcoal, not the stuff that goes in your barbecue!
2. Prepare Bottle
Cut the large end off of the plastic bottle. Leave the neck intact, but remove the cap.
3. Add Media to Bottle
Now assemble your filter.
From bottom to top, with the narrow end being the bottom, at the cheesecloth or coffee filter, the activated charcoal, sand, the fine gravel, the coarse gravel, and then top it with your bandana or t-shirt swatch.
Except for the cloth, you should strive to have about 2 inches of each material per layer.
4. Place Clean Container beneath Filter
Ideally, you’ll get your filter to stand up on its own using an improvised tripod, but you can hold it if you have to. Be prepared for a long wait.
5. Add Water
Pour your collected rainwater into the top of the filter. If you’ve assembled your filter correctly, it will take some time to work its way through the filter, so you might have to add a little at a time.
6. Wait
This filter definitely works, and works surprisingly well, but it doesn’t work quickly. A trickle of water out of the bottom is normal and generally means the filter is functioning correctly.
If your filter is working properly you shouldn’t see any particulates at all in your collected water. If you do, you’re probably catching some charcoal slipping out.
If that’s the case, reassemble your filter making sure to snug that bottom coffee filter or cheesecloth tightly up against the sides before placing your charcoal.
Sieve or Screen the Water to Remove the Larger Contaminants
Sometimes, all you can do is improvise with what you have. If you’re seriously pressed for materials or time, a quick pass through a relatively coarse filter is probably all you can manage.
Still, this is an important step before you move on to purification. You have nothing more than a piece of cloth or a fine sieve or other screen, you can do a passable job to prepare your rainwater:
1. Find Suitable Filter Material
Not much to this. Grab an old, clean towel, t-shirt, or bandana, or else a large sieve from your kitchen. The idea is simply to catch the larger contaminants present in the rainwater.
2. Place Cloth or Sieve Over Clean Container
Place the filter over your catchment container if you can and pour the water through it.
3. Pour Water Slowly Through Cloth or Sieve
Now pour your collected rainwater slowly through the filter so you don’t disturb it or cause a backup.
4. Repeat If Needed
If you’re dealing with seriously contaminated rainwater, you might need to repeat this process multiple times, taking the time to clean and rinse the filter to clear it.
Alternately, you can use multiple filters to speed things up.
This will improve the quality of the rainwater, but it’s unlikely to eliminate significant contaminants that can and will make you sick.
However, it does speed up and improve the effectiveness of the purification processes we’ll talk about in the next section, so even if this is all you can manage, it’s still a worthwhile step.
4 Ways to Purify Your Rainwater, Step by Step
Filtering your rainwater is only half of the process. The other half is purifying it to eliminate any microscopic life in the form of bacteria, viruses and parasites that might have made their way through the filtration process.
This one-two punch will make your processed rainwater completely safe. All of the following are easy and effective methods for purification.
Remember! Filter the water before you use any of these methods, as murky, contaminated water can interfere with the process and sometimes cause it to fail.
Household Bleach
A prepper’s best friend, right after duct tape. Household bleach has all sorts of uses, and one of the best is purifying water. Do the following:
1. Find Unscented, Plain Chlorine (sodium hypochlorite) Bleach
This is critical! You can use only plain, unscented and unadulterated chlorine bleach for this task. Scented and “splashless” bleach is right out, as is oxygen “bleach”. Regular bleach only!
2. Carefully Add Bleach to Filtered Water
Once you have a given quantity of filtered water, you’ll need to add the bleach in a prescribed amount.
This is a formula that you can use for any amount of water, but generally you’ll only use two drops of 8.25% bleach for a quart of water or six drops for a gallon of water.
3. Stir or Agitate
Stir the water up well or agitate it to make sure the bleach is fully dissolved in the water.
4. Wait
Give the bleach time to work. A half-hour is usually plenty, but if your water is cold give it longer.
5. Sniff it
After the prescribed time, give your water a sniff. You should be able to smell chlorine, a little. If you don’t, re-treat the water.
6. Ready to Drink
Your water is now safe and ready to drink.
It’s great to have extra bleach on hand specifically for this purpose, but remember that you’ll need to rotate your bleach supply: it does break down over time, and a much faster once it has been opened.
Boil
The most time-honored and time-tested method for purifying water. Subjecting your water to boiling temperature will eradicate everything that might be in it, everything living that is.
Dissolved solids and other inorganic contaminants will not be affected which is why filtration is so important. Do the following:
1. Add Filtered Water to Heat- and Flameproof Vessel
Any container you use for this process must be completely proof against scorching and melting, and so that means metal.
You can use any common cookware you have that’s safe for the stove, grill, or campfire.
2. Bring Water to Boil
Crank up the heat and let your water come to a rolling boil.
3. Keep Water at Boil for 5 Minutes
Once your water is boiling, keep it at a boil for about 5 minutes. Some people say this is wasteful because anything in the water is dead by this time, but it’s better to be safe than sorry…
4. Let Cool
Obviously, let the water cool before you handle it! Getting scolded or burned by hot water is a terrible injury.
5. Ready to Drink
Once your water has cooled, it is ready to drink.
Boiling is undoubtedly effective, but the downside is that it requires a lot of fuel for obvious reasons.
But, so long as you have a reliable source of heat, it’s a great and trustworthy method of purification.
Sterilization Chemicals
Every hiker, explorer, soldier and camper is familiar with these sterilization chemicals.
Coming in the form of powder, tablets or liquid, they definitely work, but have the downside of requiring precise measurement for safety and usually giving water a foul, nasty taste.
Nonetheless, they are affordable and very easy to store for the long term:
1. Add Chemical to Known Quantity of Filtered Water
There are many types of sterilization chemicals on the market. Follow the instructions on the package and add only the specified amount to a known quantity of water.
2. Stir or Agitate
Stir or shake as instructed to dissolve and incorporate the chemicals.
3. Wait Prescribed Amount of Time
Again, refer to the package of your chemicals and wait for the manufacturer specified amount of time.
4. Ready to Drink
After all this, your water should be ready to drink.
These chemicals are reliable, and quick and easy to administer and that makes them a worthwhile solution to the purification problem.
However, they are nobody’s first choice when it comes to the taste of the finished water!
Solar Purification
A clever method that plenty of folks don’t know about today is solar purification. Solar purification uses the limitless UV energy of the sun to eradicate microorganisms in your water supply.
It doesn’t require much babysitting, it only takes clear skies and a little time:
1. Add Filtered Water to Clear Plastic or Glass Container
Fill a clear glass or plastic container with your rainwater. Preferably this is a container with a cap or lid.
2. Leave Container in Full Sun for 8-12 Hours
Place the container outside in full sun. Sunny, clear days with a high UV index means you’ll need less time in the sun for purification. Give it 8 to 12 hours to work.
3. Reposition Container as Needed
As the sun moves throughout the day, reposition the container to keep it in full sun and out of the shade.
4. Let Cool
At the end of this process. Be careful, because the container and the water will be hot.
5. Ready to Drink
Your water is ready to drink.
This is one of my favorite techniques to use especially if I have larger containers to hold more water.
The downside is that this technique requires very clear water to work; murky water blocks the UV and gives germs places to survive.
Make Your Collected Rainwater Safer and Better with These Techniques
Harvesting rainwater is a great way to improve sustainability and also serve as a hedge against loss during any SHTF event.
Just make sure you use the techniques outlined above to make your collected rainwater safe to drink.

Tom Marlowe practically grew up with a gun in his hand, and has held all kinds of jobs in the gun industry: range safety, sales, instruction and consulting, Tom has the experience to help civilian shooters figure out what will work best for them.
I am approaching my 79th birthday and I grew up on the east coast of Australia drinking rain water that was never filtered or purified. Every house in rural towns and villages had a rain water tank or two of 2 to 3 thousand gallons (imperial, not US.), made of galvanized iron. When the tank started to leek because of rust holes it was concreted on the inside to stop the leeks and used for many more years.
I now live on a rural block on the east coast of Queensland on the tropic of Capricorn where we have 2 concrete tanks of 5 thousand gallons each and a plastic tank ( polypropylene I think) of a similar capacity. We still drink the tank water unfiltered and unpurified, and we have never been sick from drinking it.
We have lived in cities and town where we drank town water that was filtered, purified and chlorinated and it tasted foul compared to the water from our rain water tanks.
Just say’en cheers, Geoff.
I have a zero water filter with a stick to measure the purity. I put it in our rain barrel to see if it was cleaner than tap water, It was.
Your Zero Water TDS meter will not measure Coliform Bacteria.
If you’re using bleach to disinfect water try to get one that is NSF certified.