Is there anything better than cured meats? Salt, fat, and time are the best ingredients. Oh wait, this is a prepping article. Let’s start over…

Is there anything better than curing meats? Protein will be a commodity when things go sideways.
You will need the means to store meat throughout the seasons. And one of the best means is curing. Ok, that’s a little more survival-oriented.
From a prepping perspective, we need to be ready to store meat without refrigeration. Meat untreated can spoil within days or hours.
During a grid-down scenario, you need to have the skills and supplies to ensure this vital resource remains safe to store, transport, and consume.
Oh, and it’s delicious! So, let’s dive into curing meats made easy!
Table of Contents
Why Cure Meat?
Meat spoils. Protein is one of the hardest and most expensive supplies to store in bulk. Carbohydrates are simple as you can store them in the form of rice, pasta, wheat, and oats.
For a little more than a dollar a pound, you can pack them away. Further, you can put most of these up for 25 years or more if you prepare them properly.
Fats are a bit more difficult, however, you can purchase solid fats such as coconut oil, lard, and Crisco.
To get a long shelf life, you need to freeze them. Otherwise, you need to store a year’s worth, then rotate through them.
Protein is honestly a challenge. You can store beans that are high in protein, but beans are no substitution for steak. I don’t care how you prepare them.
If you want to stack meat on your shelves, then you have a few options.
The first is canning. This requires special equipment as chicken, beef, and pork all require pressured canning.
The next option is freeze drying. Unless you have spent a few thousand dollars on your own freeze-dryer, you are looking at potentially several dollars per pound for freeze-dried ground beef or pork. Despite the cost, the benefit of freeze-drying is that it lasts for decades.
Next, you can make jerky or biltong. Both use salt as the main preservative. Jerky is salted, spiced, and either dried or smoked at a high temperature.
Biltong is equally spiced and then left to cure at a lower temperature. Both methods allow you to keep meat safe to eat.
The other, other, cured meat… Biltong
Curing has long been used to extend the shelf life of pork and beef. Italians have used curing for generations for preserving pork.
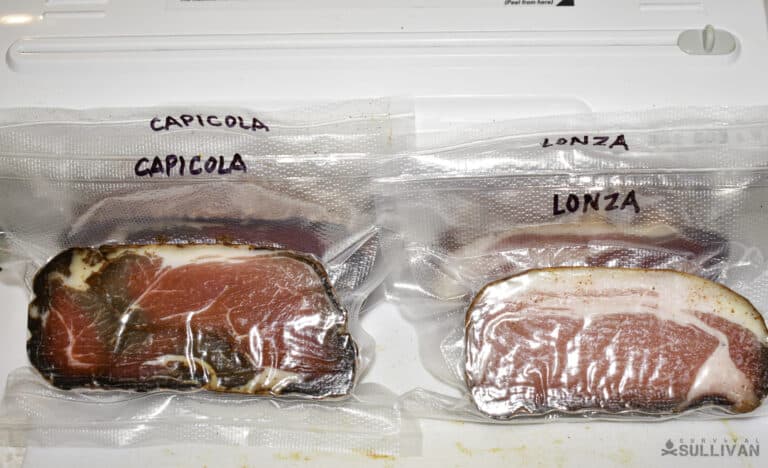
Prosciutto, Capicola, Lonzino, and Soppressata are all variations on the theme.
While you won’t be putting your cured meats up for years, curing will extend the shelf life while adding variety to your stored goods.
Aside from adding variety, the primary advantage of curing meat is that it can be done with only a few supplies, special ingredients, and the proper environment.
If things go sideways or they’ve already collapsed, then curing can be done without the smell signature of smoking meats, and the fuel consumption of pressure canning.
Once you get the hang of curing meat, you can do it with relative ease.
Left in the proper environment, cured meat can last a year. This is true, however, you will need to monitor it well.
The curing process, and the supporting environment, encourage water loss via a slow drying process. Your target for weight loss is 30% – 40%, however, you can dry it even more.
The dryer it gets, the longer it will last. Practice now so you learn the limits of the process as well as the limits of your palatability.
Historic Methods of Curing
Ever since humans desired to move around, we developed methods to preserve meat long enough for the move.
As our range increased (e.g., from continent to continent) we needed better methods for having meat that we didn’t need to hunt or trap.
Often the natural migration of game animals also influenced our need to store meat.
When caribou, elk, bison, or a myriad of other animals migrated through human territory, they did so en masse. This was the season of plenty.
That being said, with feast comes famine.
When the game moved on, humans developed more and more sophisticated methods for preserving the game until the next critter came along, or the game animals returned. Often this was 6 months or more.
Smoking and drying were the first methods used. Eventually, we discovered that salt preserved meat. The value of salt in the ancient world showed this.
“Worth their salt” applied to salt as a currency and wage. Not only was it vital to life’s functions, but it was vital for food preservation.
Initially, we packed meat in salt. The salt removed moisture and increased the salinity in the meat. The dry and salty environment is inhospitable to most critters that cause spoilage.
These include bacteria, fungus, and molds. Those that can survive the environment are beneficial or non-consequential to human health.
Early salt packing methods, also called “Excess Salt Curing” resulted in hard bricks of meat that were inedible if left untreated.
Too hard and too salty left the meat unspoiled but unusable. Unusable unless further treated.
Often the salted meat was soaked, rinsed, soaked, rinsed, etc. until the beef was rehydrated and removed most of the preserving salt.
The result was meat best left to a stew rather than a fine dining experience.
Over time, the salt was reduced and other spices were added to create a much more enjoyable product. Modern cured meats result from generations of environmental and recipe perfection.
This method is called equilibrium curing. With the proper environmental conditions, the right amount of salt slowly permeates the meat and creates the right conditions to stop bacteria growth and preserve the meat. We ain’t talkin’ fast food here!
Curing Environments and Chambers
As stated, curing relies on salt, curing salt, spices, and the proper environment. The goal of your curing environment is to support the right temperature, humidity, and airflow.
Control these and you go a long way to making a sumptuous meal. Miss one and you have wasted time, effort, and money.
The temperature of the environment retards bacteria growth during the cure. Too high and you’ll spoil the meat in a hurry. Too cold and the curing process slows to a crawl.
The ideal temp for a cure is between 11-15 C / 50-60 F. Before modern refrigeration slaughtering happened in the fall.
This guaranteed the right temps in the cellar, smokehouse, or cave for curing.
Humidity controls the drying process. A damp environment encourages mold growth. While some are ok (white penicillin) others (black) will cause you to throw out your product.
There are similar risks if the humidity is too low. Drying your primal cuts or salami too quickly will create a dry ring or cause it to case-harden.
Here, the outside dries to the point that it doesn’t allow further evaporation. Case-hardening seals the water in.
Without further evaporation, the meat never reaches the sweet spot of dry enough for long-term preservation.
Again, mother nature can provide the right environment if you are using a root cellar exposed to open dirt.
Otherwise, you need to augment with humidification or dehydration. The target is 70% humidity.
Airflow ties everything together. Moving the air around evens out the humidity and temperature. Again, it’s a balance.
Too much air and the associated evaporation causes case hardening. Too little and you’ll get damp spots.
Previous generations relied on a cellar or finding the right cave for the long cure. Nature provides all the ingredients for success.
Or it fights you all the way. Luckily we have refrigeration to help us out.
Modern curing chambers can be expensive tools or simple DIY projects.
A dorm fridge with an improved thermostat and humidity control will also do the job. You just need to supply the meat.
The good news is we can get around all the extra gear with one simple tool. We will talk about it shortly.
How Curing Works
Dry curing is the process of evolving the environment within the meat, and actually within the cells to one that is no longer suitable to bad bacteria and molds.
The curing treatment changes the environment with the addition of salts, sometimes bacteria, and removing water.
The Pink Salt, also called curing salt, furthers this preservation with the addition of nitrates and nitrites. Specifically, these guard against botulism.
They also enhance the flavor, texture, and color of the end product, but for now, we’ll focus on food safety.
You add pink salt at a surprisingly low amount. Generally, 0.25% of the weight of the meat is required.
For ground cured products such as pepperoni, salami, and Soppressata, bacteria are added.
These cultures introduce a large number of good bacteria into the mix. Over several days the bacteria multiply.
While this adds to the flavor of the Soppressata, the bacteria colonies the meat and disadvantages other bacteria in the process. Thus, only one bacteria–the good one, flourishes.
Curing Made Easy–UMAi Bags
The curing process can seem like magic until you have mastered the ingredients and, most of all, the environment.
As stated above, you must have the proper environment to ensure that the process happens neither too fast nor too slow.
Too fast and it dries before the inside is cured. This leads to spoilage. Too slow and you may encourage bacteria growth on the outside. Regardless, the environment is key to success.
Enter UMAi bags. These specially formulated plastic bags create the perfect environment for curing.
They control the oxygen exchange and moisture evaporation. You supply the temperature controls.
I first discovered UMAi bags a year ago when investigating preserving meat beyond jerky and biltong.
I had made several batches of jerky and was significantly upping my biltong game. I was making two batches of biltong per month.
The goal was to have enough on hand to bring to our off-grid cabin for the summer. Our traditional lunch is cheese, meats, and crackers.
The meat was usually some form of salami. Biltong fit the bill, but we wanted variety.
I began looking into salami and its variants, including pepperoni as well as Soppressata. Slowly this led to Prosciutto and Capicola and their cousin Lonzino.
UMAi bags were soon at the forefront of my research because of their apparent ease. Several hard-core curing forums had reviews that proved their utility.
Much of any curing method comes down to the spices however the stumbling block is often the environment. Proper curing requires exacting temperature, humidity, and oxygen.
Hobbyists usually create a curing chamber from an old fridge or other contraption. UMAi bags allow you to use a normal refrigerator for this.
The recipes provided by UMAi are very good. That being said, you can vary the spices however you want as long as you keep the salt content and pink salt (nitrates) the same.
Surf the net to find recipe modifications that suit your tastes.
Using UMAi bags reduces curing to only a few steps.
- Prep your meats
- Weigh your meats
- Calculate your spices
- Mix spices and meat
- Perform the initial cure
- Weigh the meat and calculate the final target weight
- Seal in the UMAi bag
- Wait until the meat hits the target weight
- Re-package (vacuum seal) the final product
- Enjoy
Types of Cured Meats
This article will cover two different cured meats: Whole roasts or muscles (primal cuts) and salami.
Primal cuts include what we usually call roasts. For pork, this includes country ham, shoulder, and loin. As long as you can fit it in a UMAi bag you can cure it.
The name of the final product relates to the muscle or muscle group. Regardless, the process is the same. It’s just the name that changes.
For primal cuts, the basic process is to coat the meat with the curing salt mixture, and then seal it up.
We then allow it to sit in a refrigerator for several days as the salt mixture permeates the meat.
After this, we rinse and dry the roast, then coat it in the final spice mixture. The roast is vacuum-packed into the UMAi bag and we wait.
The time of the second process is dictated by the weight loss due to evaporation. The target for this process is a weight loss between 30% and 35%.
The more weight lost, the firmer the texture of the final product. The less weight lost, the softer the texture.
The second cured meat is a sausage derivative called salami. This process differs from curing whole muscles. For salami, the meat is first cubed and then ground.
The ground pork is then mixed with salt, curing salt, spices, and a bacteria culture according to weight.
Once again it is critical to calculate the weight correctly as you need the correct ratio of salt, curing salt, and bacteria to ensure safe preservation.
Once the meat, salts, spices, and bacteria are mixed well into the ground meat, you stuff the mixture into an UMAi casing.
The stuffed casing is tied off and hung at 70 degrees F for two to three days to allow the bacteria to ferment the salami.
Once fermented, the salami then cures and loses weight in the refrigerator over the next few weeks, just like the cured primal cuts.
Once you’ve achieved your target weight, you only need to repackage your primal cut or salami into vacuum bags and refrigerate.
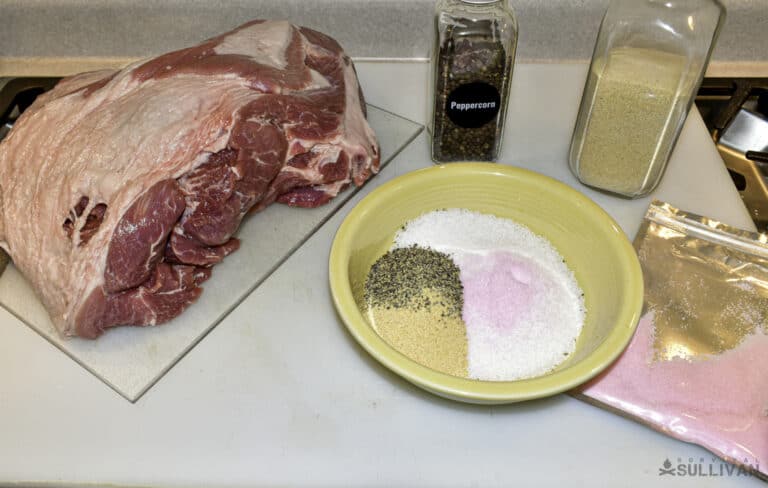
Primary Ingredients
There are three (primal cuts) or four (salami) ingredients in cured meats. These are salt, curing salt, bacteria (salami only), and spices. Let’s look at what these do.
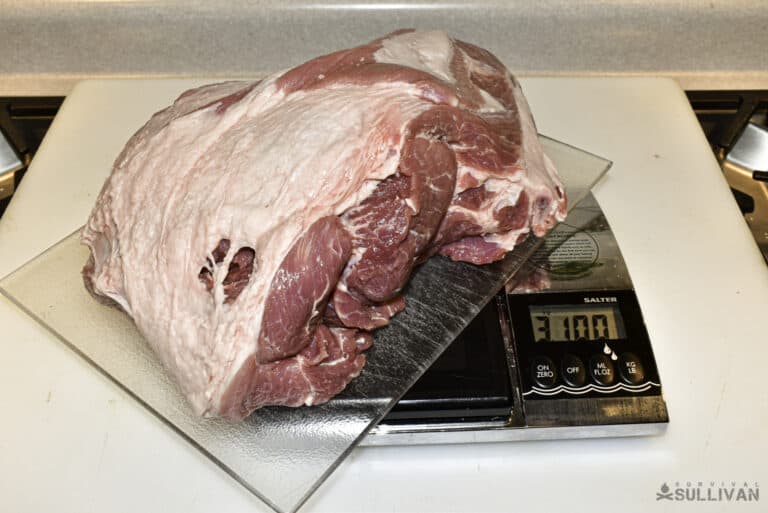
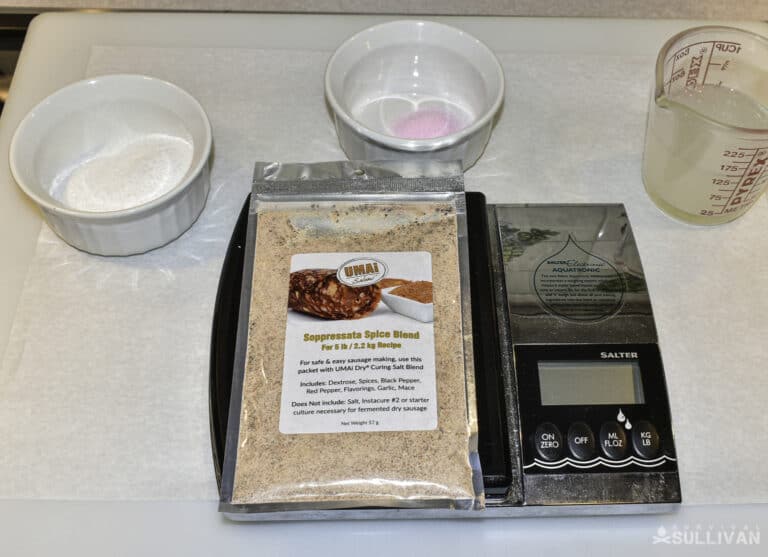
Scale
Ok, I’m cheating here. A scale is not an ingredient, but it is just as important as any of the key ingredients.
Curing and coming up with a quality product depends on accurately measuring the salt, curing salt, and spice.
Where possible measure in grams. The units are smaller and easier to get the accuracy you need out of a common kitchen scale.
If possible, pick up an accurate kitchen scale that reports to one-tenth (#.#) or one-hundredth (#.##) of a gram.
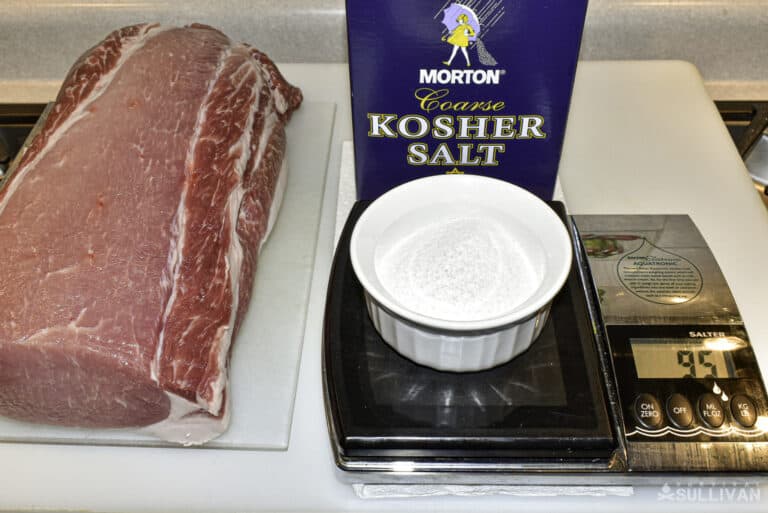
Salt
Good old salt is one of the prime ingredients in your cure mixture. During the first curing stage, the salt permeates the cells of the meat.
This changes the basic chemistry and allows, via osmosis, the moisture to come out of the meat. The change in moisture content leads to a change in salinity.
Most recipes will call for non-iodized koshering salt. You can also use sea salt. You will be using a lot of salt, so the nuances of the minerals in sea salt can take your meat from awesome to sublime!
This fundamental change in the environment helps to kill bacteria and resist the further growth of new bacteria.
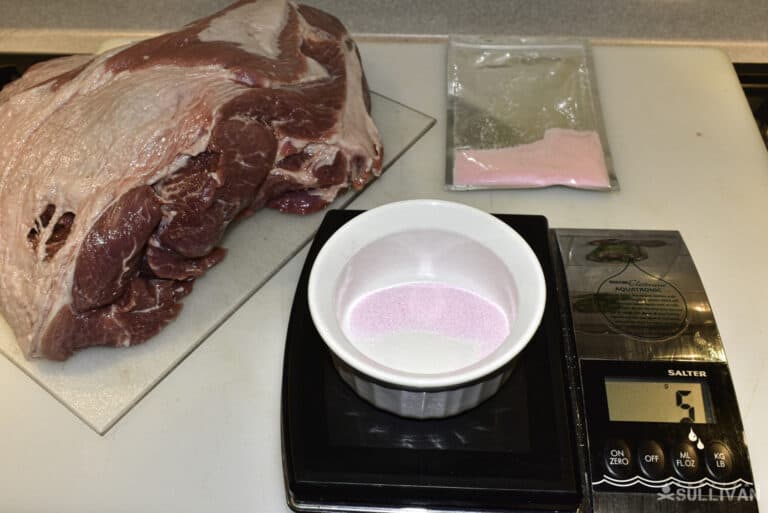
Curing Salt
Instacure, Prague Powder, Curing Salt #2, Pink salt, all describe the same thing. Curing salt is used when your process takes longer than 30 days.
This pink-colored salt contains trace amounts of Sodium Nitrate and Sodium Nitrite.
These two additions retain or enhance the redness of the meat (rather than let it turn brown), enhance the flavor, and further prohibit bacterial growth. Especially the bacteria that causes botulism.
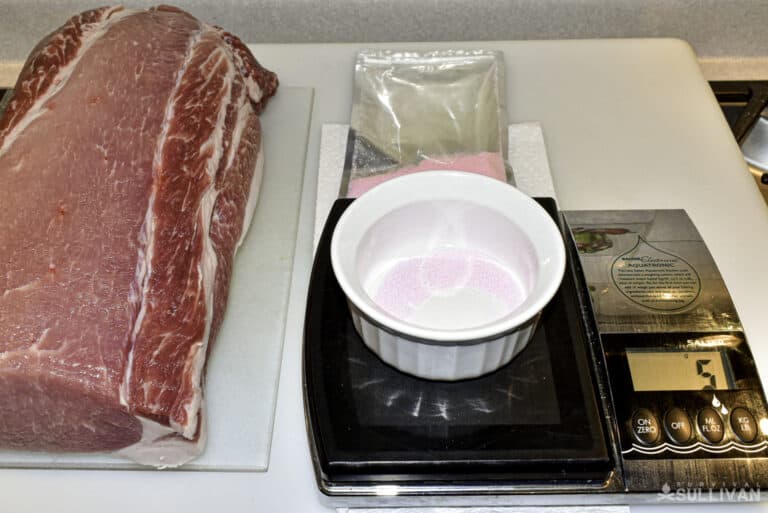
Starter Culture
Soppressata requires a fermentation process. This requires the use of a starter culture of good bacteria.
Just like using yeast to make beer, salami uses a starter culture to ensure that the right bacteria get a good foothold and colonize the salami before others can do so.
Cultures such as Bactoferm are live bacteria that you add to water and then mix into the ground pork.
Allowed to ferment for two to three days, the bacteria add the characteristic tang to the meat as well as help preserve it.
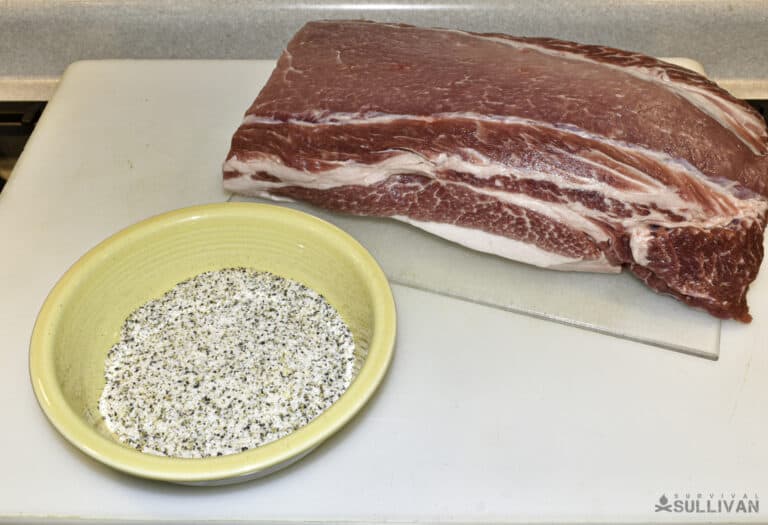
Spices
Everything else added to your cure is spice. This is where the fun happens. Without spices, you are left with salty meat.
Not that salty meat is a bad thing, but we have spices to add variety. If you like a hotter product, add dried peppers. If you love garlic, add dried garlic.
There are traditional recipes and adventurous ones. Once you have mastered the basics, venture out until you find the mix that is perfect according to your tastes.
Spice Grinder
Ok, I’m cheating again. Not an ingredient.
Like most things in life, quality matters. The fresher your spices, the better. This is food worth waiting for so pick up fresh spices and break out the spice grinder or mortar and pestle.
Once spices have been broken down, they lose their flavor and nuance. Buy fresh, grind what you need, and you will never regret it.
Curing Pork–Primal Cuts
Let’s start with curing whole muscles and muscle groups. This process requires little equipment other than a knife and an UMAi bag.
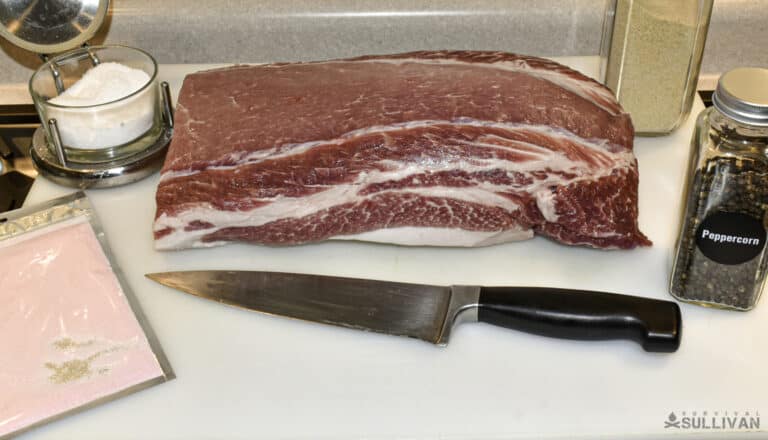
The Cuts
There are three primal cuts that I’ll focus on: country ham, shoulder, and loin. While the process is the same, each final product has a unique name.
The country ham, or pork hind leg primal cut, is the same cut that is used for traditional ham. This cut comes from the back leg and hip of the pig.
When unprocessed, it is called a country ham. When brined, and occasionally smoked, it’s called a ham. When cured it’s called Prosciutto.
This cut is often served bone-in and trimmed off the bone as needed.
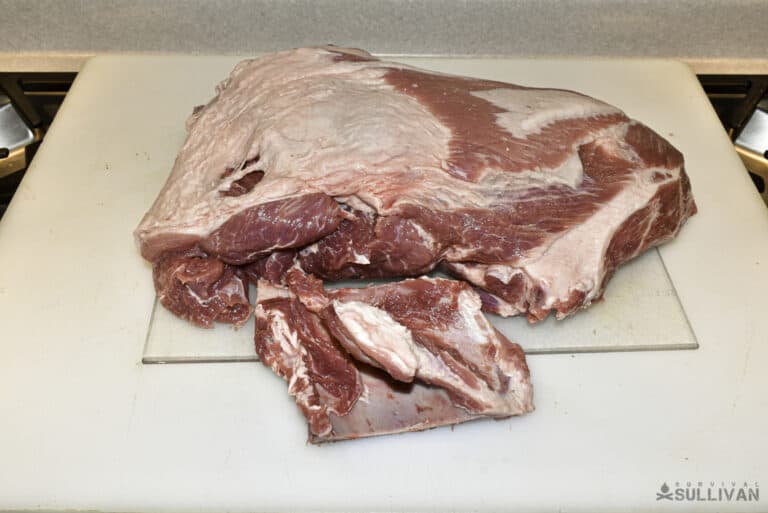
The pork shoulder comes from the front leg of the pig and is used most commonly for smoked pulled pork. This complex muscle group can be a challenge to de-bone.
But with some practice and diligence, you can reduce the shoulder to just meat. Unlike the ham, this cut is hard to serve and slice bone-in.
It is best de-boned, processed, and then tied for the final cure. When cured, this cut is called Capicola. It is well marbled with lots of intramuscular fat.
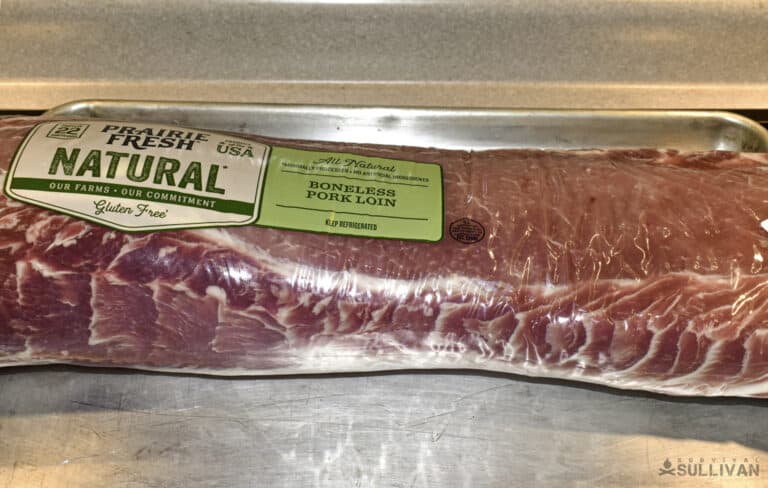
The last cut and easiest to work with is the loin. On larger pigs, this cut can be up to four or five inches in diameter, including a generous fat cap.
This single muscle may have smaller adjunct muscles around the edges. When roasted they add flavor and texture. When cured they do the same.
A cured loin is called Lonzino. Being uniform in size and shape, this is a great cut to start with as there is no waste.
Preparation
Preparing your cuts depends on the primal cut that you have chosen. I highly recommend starting with a pork loin, but feel free to choose any of the three.
Preparation for a pork loin is simple. If there is a generous fat cap, then trim it to an even ½ inch. If no cap is present, that’s ok, it won’t adversely affect the final product.
Once trimmed, wash the loin with cold water and pat dry with paper towels. Weigh the loin and record this weight. It is best to weigh it in grams if possible.
If you have selected a country ham, then the process is the same as the loin.
Trim any excess fat and then wash the cut with cold water. Pat the ham dry with paper towels. Weigh it and set it aside for the next step.
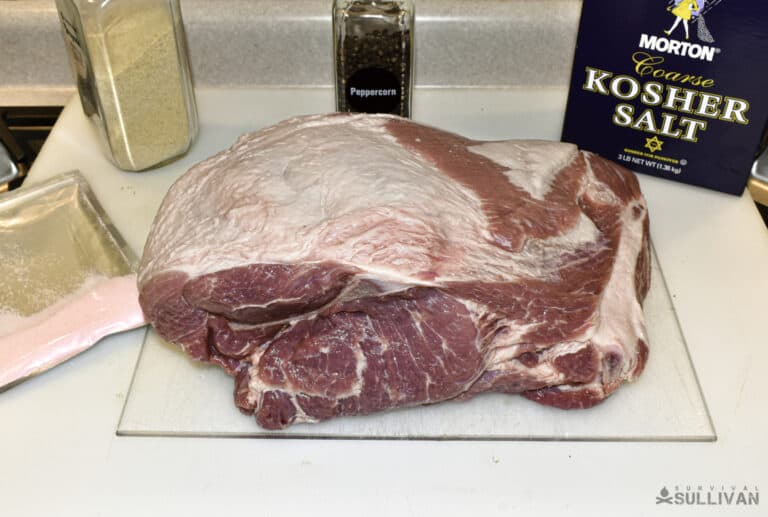
If you have selected a shoulder cut, start by trimming any fat cap to a thickness of ½ inch. Next, debone the roast.
Take your time with this, following the muscles into the bone, then separate the meat from the bone. Be careful to watch the locations of your hands.
It’s easy to get confused and nick a finger if you’re not careful. A sharp knife is a must for this process. Once fully trimmed, rinse, dry, and weigh as with the other cuts.
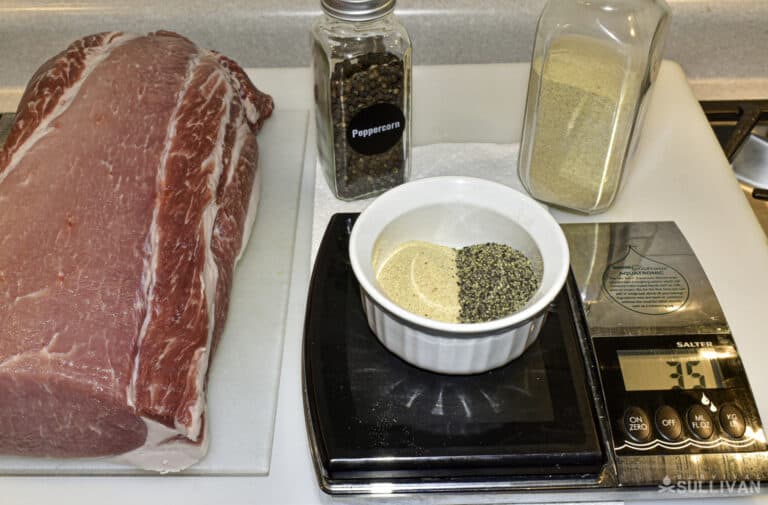
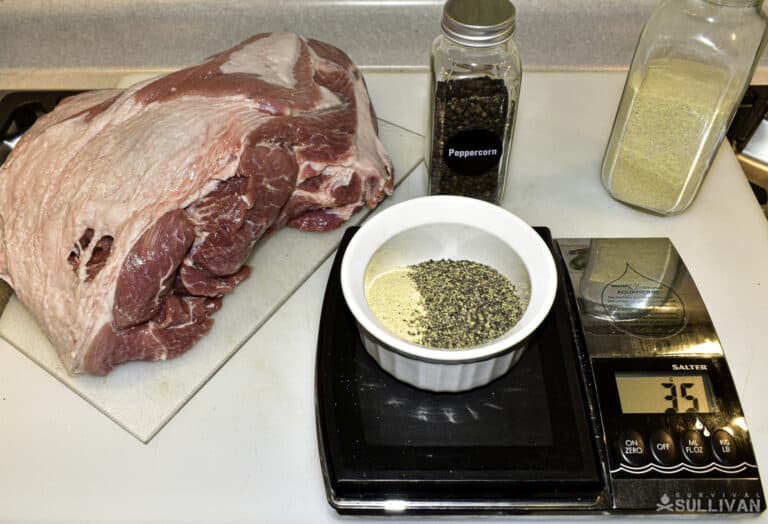
First Cure
The first cure consists of salt, curing salt, and a few spices. In my case, I used garlic powder and pepper. Weigh out all spices according to the weight of your cut.

- You must have 3% salt by weight of your original cut
- You must have 0.25% curing salt by weight of your original cut
- I chose to have 1% of additional spices by weight of the original cut
Mix the salt and curing salt and set them aside in one bowl.
Mix the additional spices in with the salt and curing salt.
Rub all the salt mixture into the meat. Make sure that you cover every inch of the surface.
If using a deboned pork shoulder, work the salt into any cuts or pockets you created. Use all the salt mixture. Do not leave any out.
Take the meat and seal it into a bag. It is best to use a vacuum sealer and vacuum bag. First, fold over the top of the bag.
Place the meat in the bag, then roll up the folded-over portion. This gives you a clean area to vacuum seal. Once the bag is vacuum-sealed, add one or two additional seals above the first.
If you do not have a vacuum sealer, place the meat in a large Ziplock bag. Seal the Ziplock most of the way and then carefully lower the bag into a large bucket of water.
The water will force any air out of the bag. Once the bag is mostly submerged, seal it up.
Be careful that you don’t get any water into the bag during this process. Feel free to double-bag the meat to guard against any leaking.
Place the bag with the meat into your refrigerator for 10–14 days. Give the bag a ¼ turn every day.
During this process, the salt is permeating the meat and drawing out some of its liquid. The bag will eventually have some loose liquid in it. This is natural and expected.
Second Cure
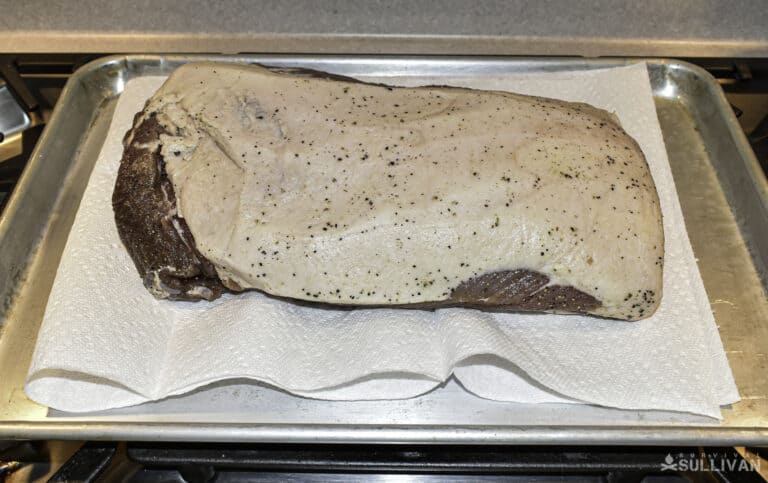
Once you have allowed your primal cut to sit refrigerated in the salt cure for 10–14 days, pull it out from the bag and give it a good rinse under cold tap water.
Dry it off, especially any cuts, nooks, and crannies.
The next decision is your flavoring spices… The salt has done its work, now it’s time to add some interest to the cut.
Again, surf the net to see what is traditional, what is possible, then add your own twist.
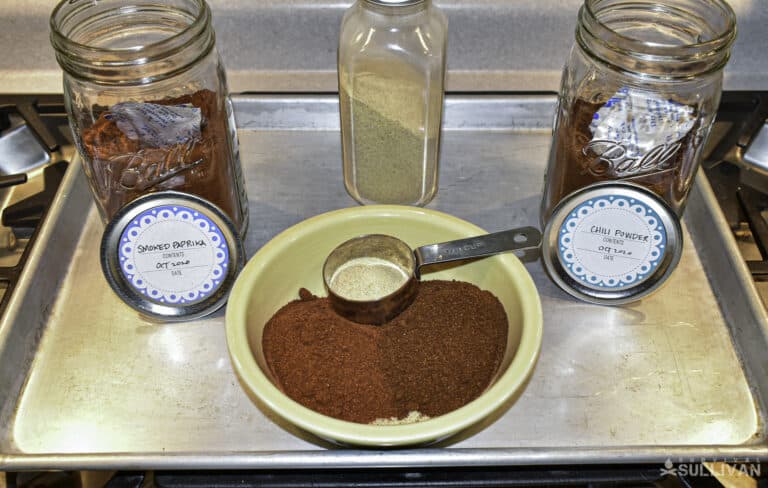
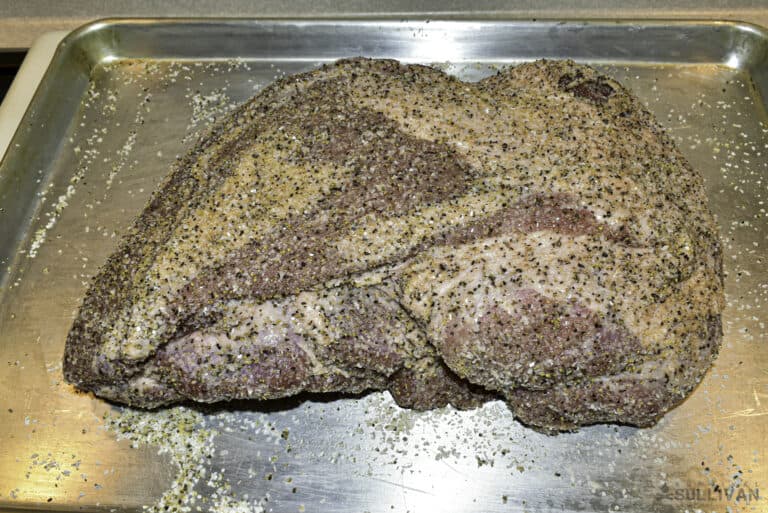
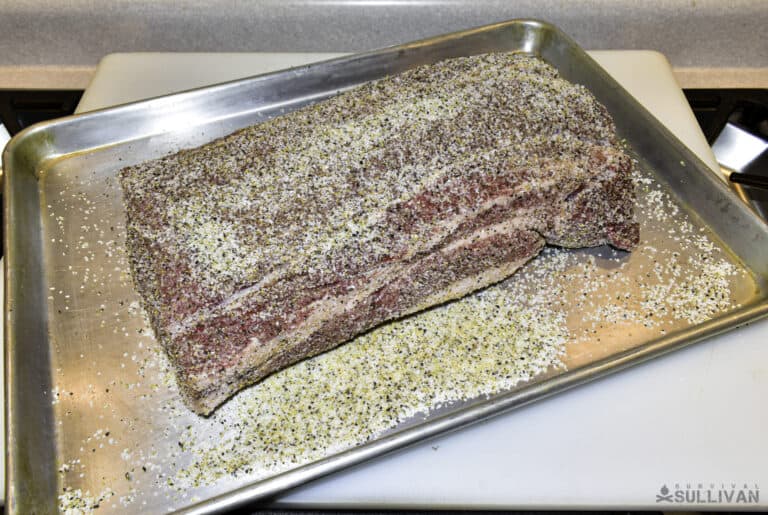
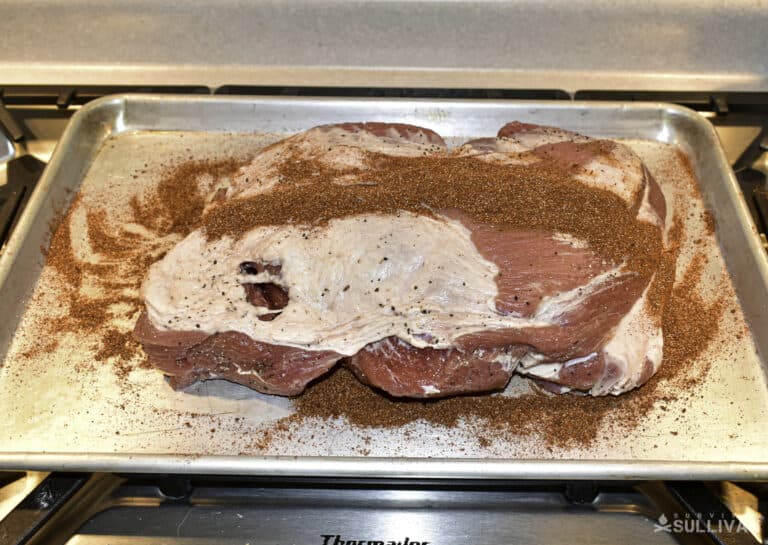
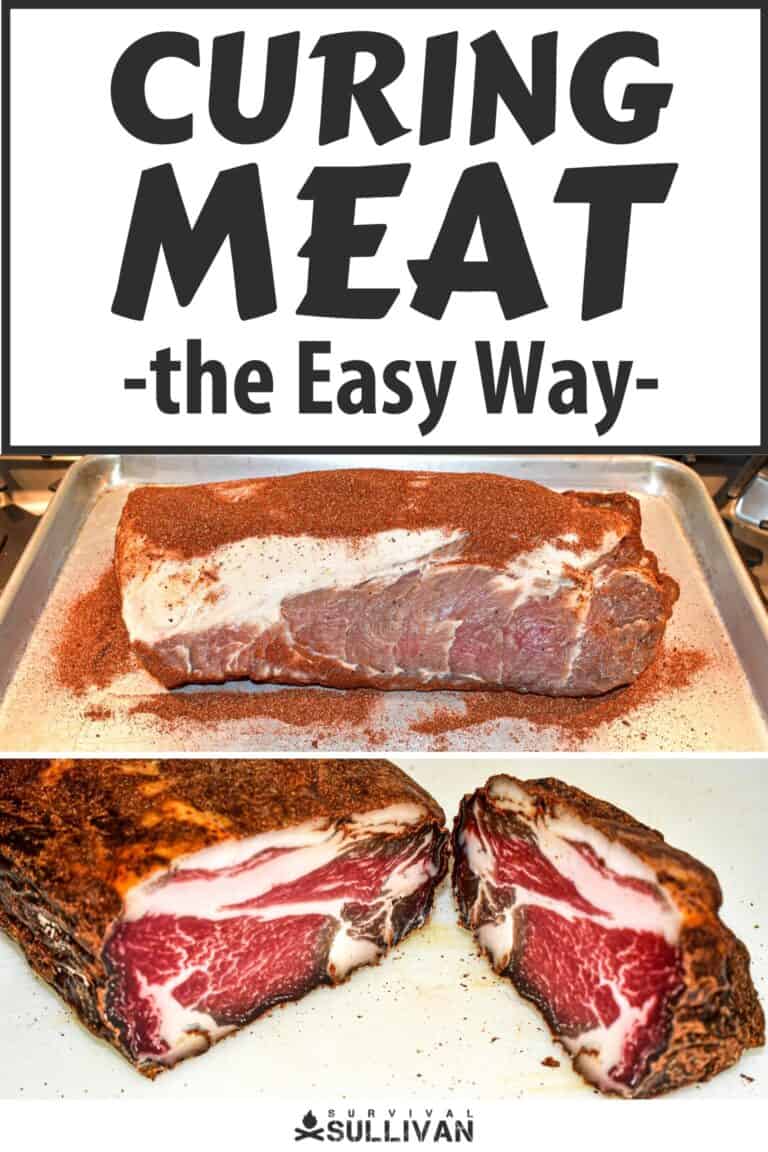
For the pictures shown I used a combination of smoked paprika, chili powder, and garlic powder.
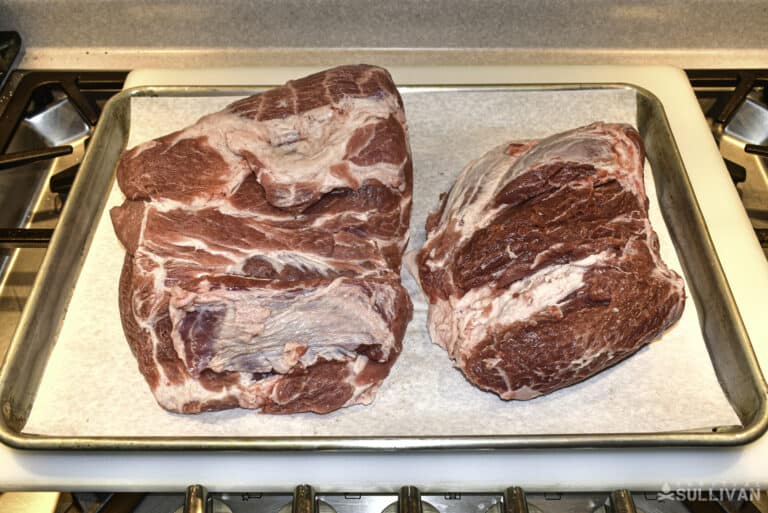
Each of the pictured cuts was about 7 pounds. For each, I used 1/4 cup smoked paprika, 1/4 cup chili powder, and 1/8 cup garlic powder.
The goal is to cover every exposed surface with the spice mixture. Just like rinsing and drying, get into every fold and hidden space.
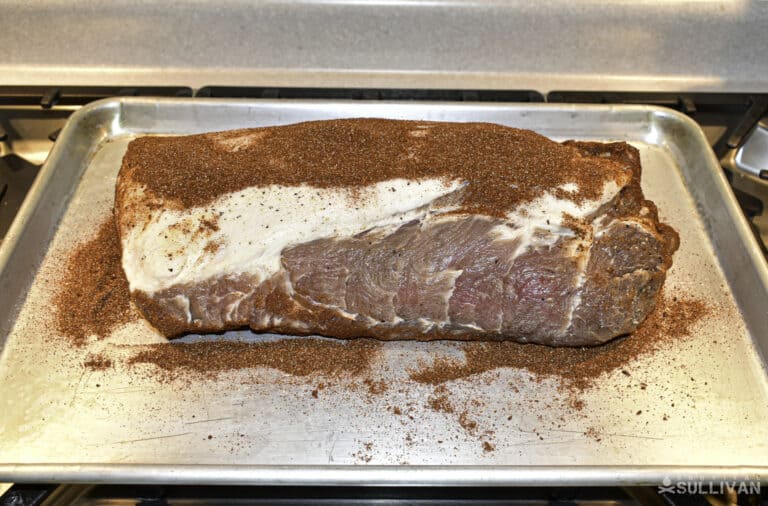
When using the UMAi bags you need to cover the roast, but not so much that you have a thick layer of spice that stays dry.
Cover them completely but don’t overdo it. You want the spices (over the first few hours) to get moist and then form a bond with the UMAi bag.
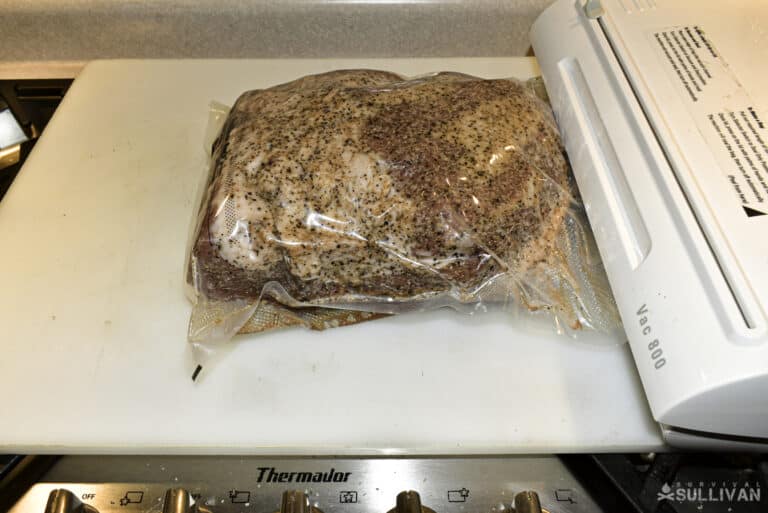
Dust your cuts then seal them into the bags. The bagging process is similar to that used during the salt cure.
If you are using a vacuum sealer, first fold over the top of the bag (e.g., like the cuffs of pants).
This process protects the edges of the bag from getting dirty. As you put the meat into the bag, you dirty the cuff and not the edge you will seal.
Once you have bagged the meat, insert the “mouse” (1” wide piece of white fabric) into the bag and seal over/through the “mouse”.
While the vacuum is working, massage the bag to work out any air pockets. The goal is to get as much contact between the bag and the meat as possible.
When the first seal is complete, add a second seal a ½” above the first. You are now ready for the second cure.
Weigh and Wait
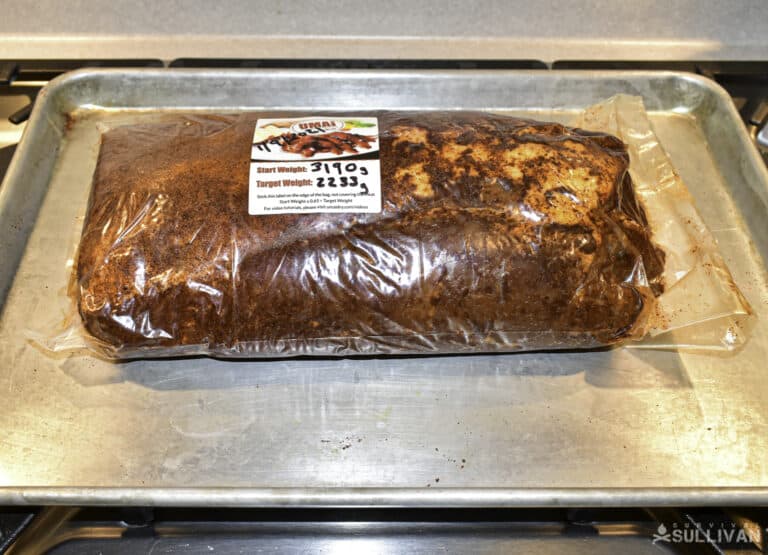
The next part is both the easiest and the hardest. First, weigh your cut to get the initial weight. From here, calculate a loss of 30%. I recommend grams as these are more accurate (smaller divisions) than ounces.
For example, my pieces weighed 3200 grams. A loss of 30% is 960 grams. Therefore, my target weight was 2240 grams.
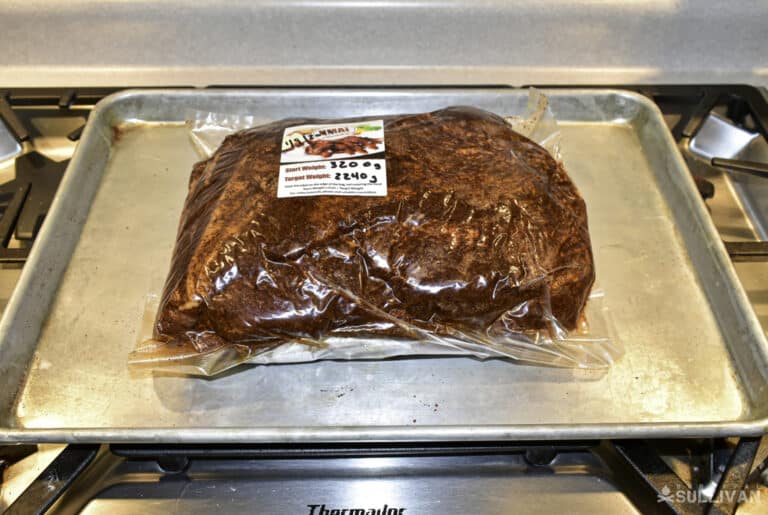
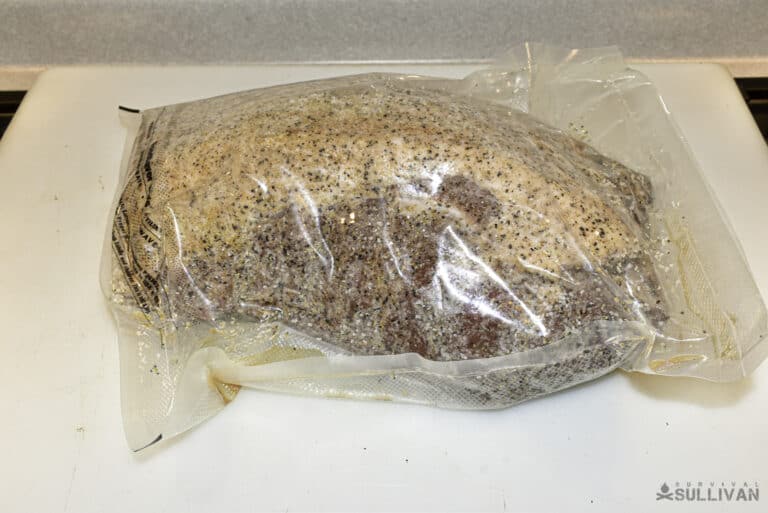
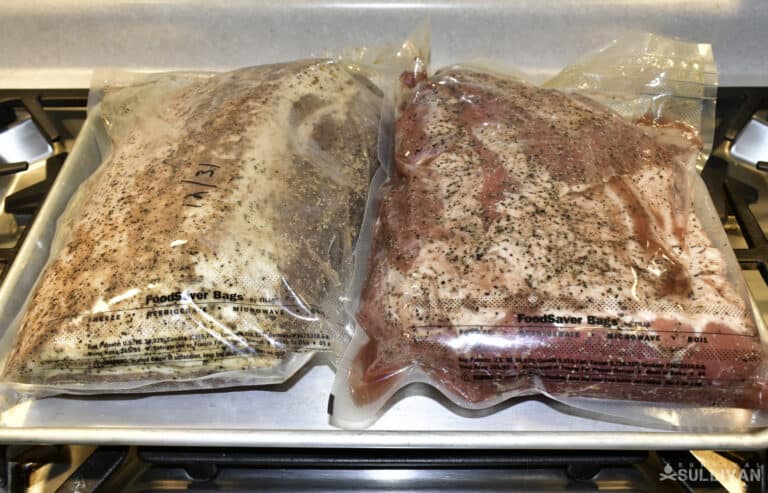
Pork shoulder weighed and sealed in the UMAi bag, I’ve written the target weight on the label
Place your sealed cut in the refrigerator. If possible, place it on a rack so that there is air circulation all around it. Every week, give it a ¼ turn.
Then wait…
And wait…
And wait…
The second cure takes about four months. Four excruciating months. I recommend weighing your cut once a month and tracking the weight.
Given the relatively consistent environment of the average refrigerator, after the third month, you will be able to predict when your Lonzino or Capicola is ready.
As the cut loses weight, it will shrink and also harden. This is natural. A side effect of this is that the UMAi bag may separate from the meat. That’s fine.
Now that I’ve done two cuts, I will adjust the weight loss up to 35% or even 40%. While the resulting product at 30% was good.
I prefer a slightly firmer product. My next batch gets prepared in September. I’ll leave a note to let them go a little longer.
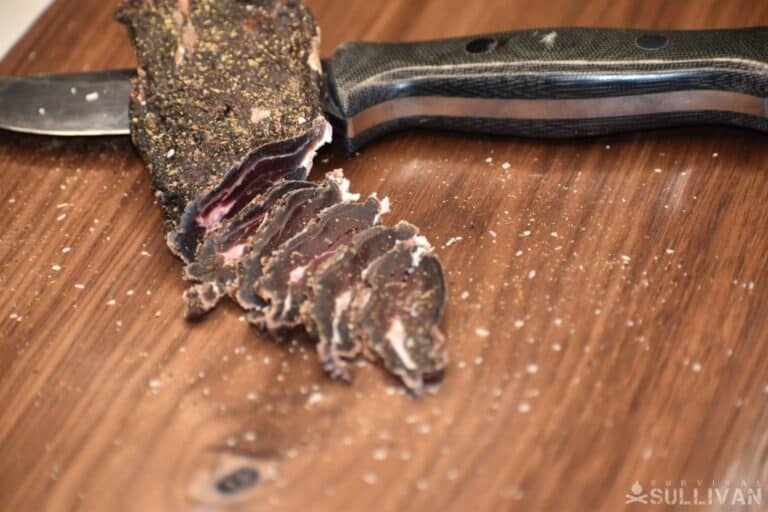
Once you have hit the target weight, it’s time to cut in and try a piece!
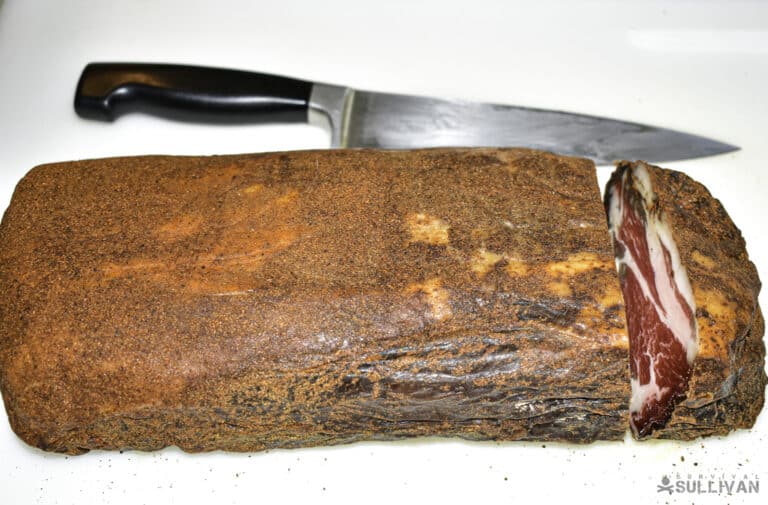
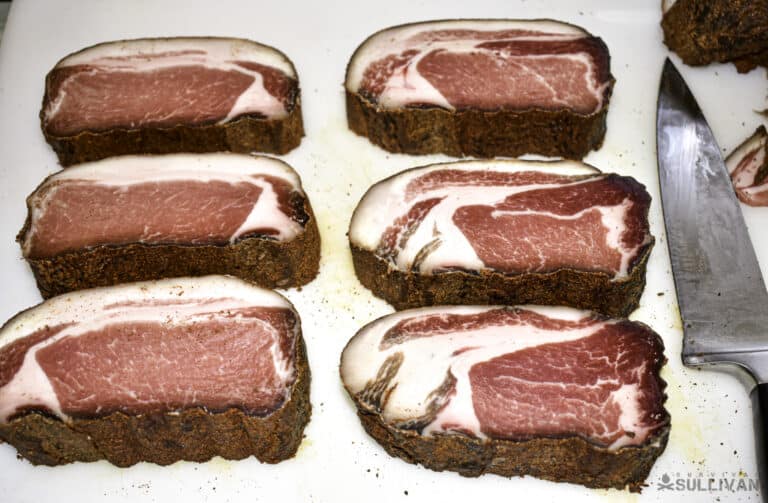
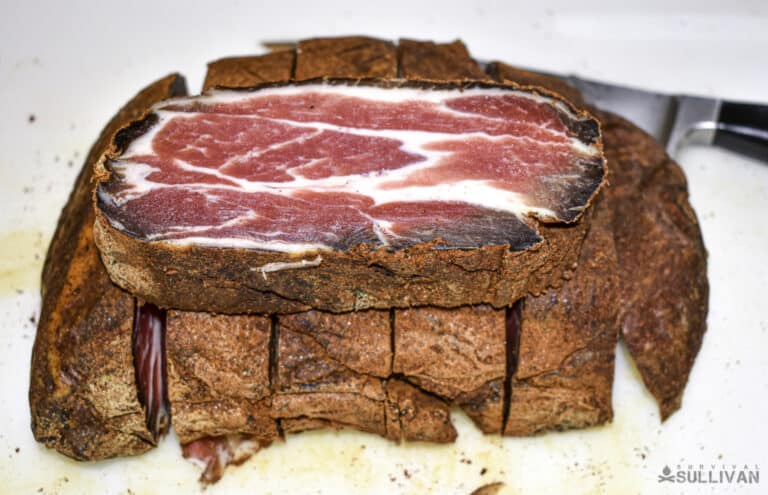
Open the bag and cut the Lonzino or Capicola into generous slabs. Then slice thin. Like “meat on one side thin”.
Each slice should be a piece of stained glass. When it’s this thin, it’ll melt in your mouth. Salt, fat, and spice are all mixed into one bite. Pure heaven.
Packaging
I’ll assume that you can’t eat 5 pounds of cured meat in one sitting. Ok, you can, but you probably shouldn’t. It’s time to pull the vacuum sealer back out.
Place each slab in a bag and vacuum seal. Sealed this way and kept in the fridge, your precious cargo should last up to a year.

Once removed from the UMAi bag and sealed in traditional plastic, the moisture inside the cut will re-distribute around the meat.
This will cause further mellowing and the development of both texture and flavor.
The outer layers have dried out and may be harder than the core. A little time in a vacuum bag will allow the moisture to equalize and the texture to even out. It only gets better with age. That is, if you let it.
Curing Ground Pork
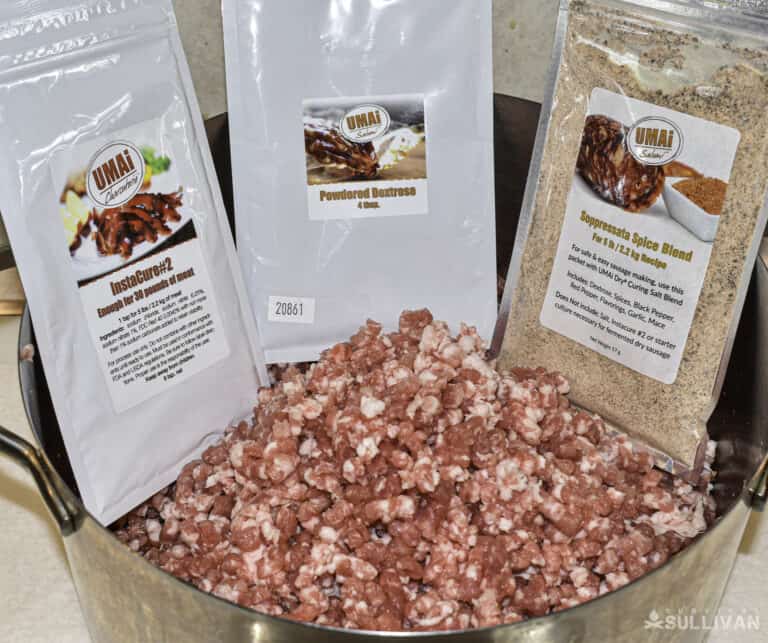
Cut from the same cloth are the many variants of salami. The example I include here is Soppressata.
For Soppressata you will need a grinder and sausage stuffer. There are many varieties.
I went the 2 is 1 and 1 is none route and purchased the grinder attachment for my Kitchen Aid mixer. The tools you use are up to you.
Preparation and Grinding
One quick note for those of you on “town” water. The night before you plan on making your Soppressata, get a glass of tap water then pour it between two glasses 10 times.
Then let the glass sit out overnight. This helps to remove any traces of chlorine from the water.
Chlorine will kill the bacteria you need to kick start the fermentation process. You may also want to boil the water to kill any native bacteria that are still lingering.
When you are ready to start grinding, add the starter culture to your de-chlorinated water. Use the recommended amounts of starter culture and warmed water. Mix thoroughly and set aside.
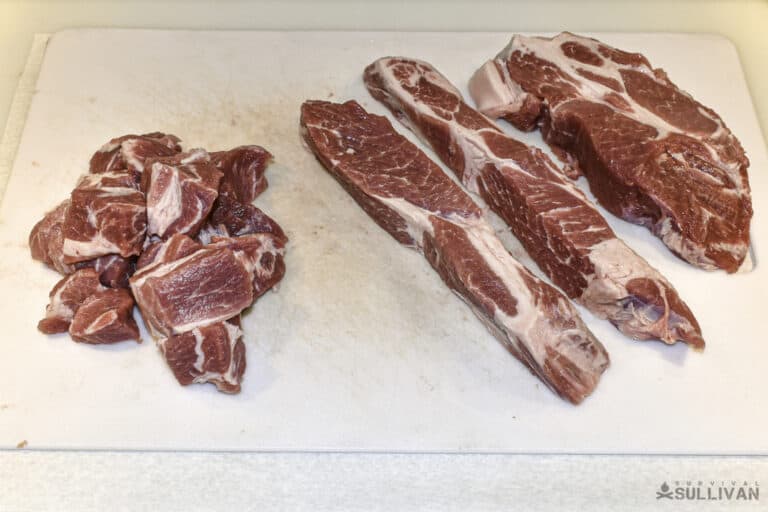
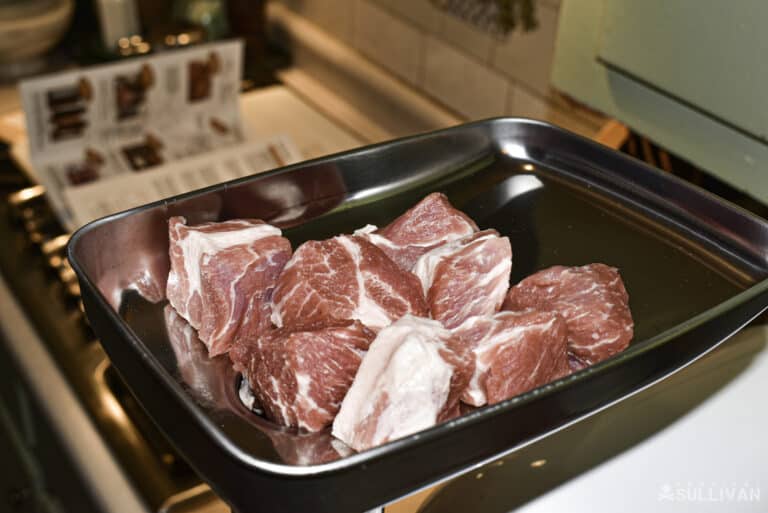
Soppressata starts with a primal cut of pork. I recommend a pork shoulder. The same cut you use for Capicola. Debone, and then cut into 1” cubes.
Measure the amount of meat then pop the cubes in the freezer for 15-30 minutes. You want them firm but not frozen.
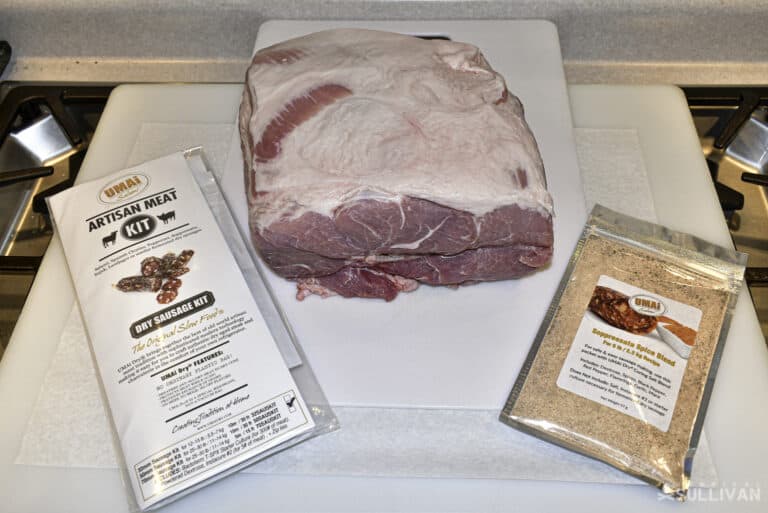
Based on the number of grams of pork, calculate the amount of spices. UMAi makes their spice packs for 5 pounds of pork. Calculate out your salt and pink salt amounts.
- You must have 3% salt by weight of your original cut
- You must have 0.25% curing salt by weight of your original cut
Assuming you have 5 pounds (2265 grams) of pork, this means you will need 68 grams of salt and 6 grams of pink curing salt.
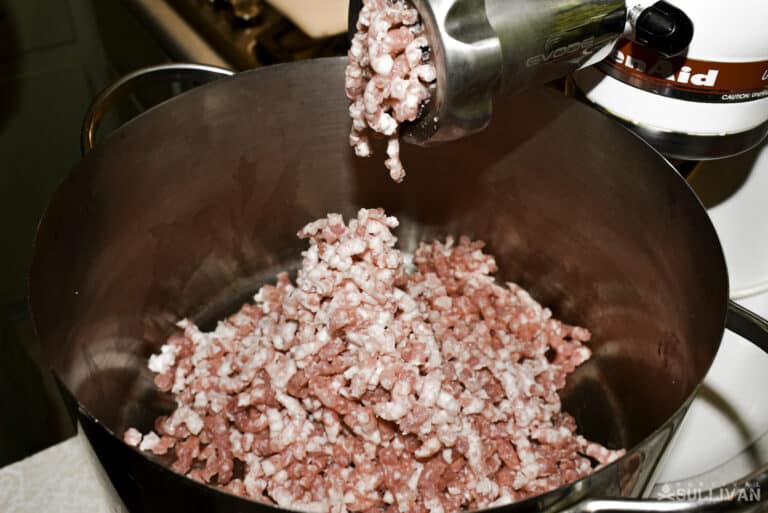
Set up your grinder. I prefer a coarse grind and used the largest plate that came with the grinder.
Note, you will grind the meat twice. So even if you like a fine grind, err on the side of a larger plate. (There dad I said it!)
Grind up 5 pounds of pork into a large bowl or pot. Mix in the salt, curing salt, and spices. Glove up and mix them well.
Add the water with the culture and continue to mix until the ground pork stiffens up. This process took me 5 minutes.
One word of warning. At this stage, the meat is very cold. Have a bowl of warm water to rest your hand in to thaw them. Five minutes is a long time to have your hands in near-freezing pork.
Stuffing
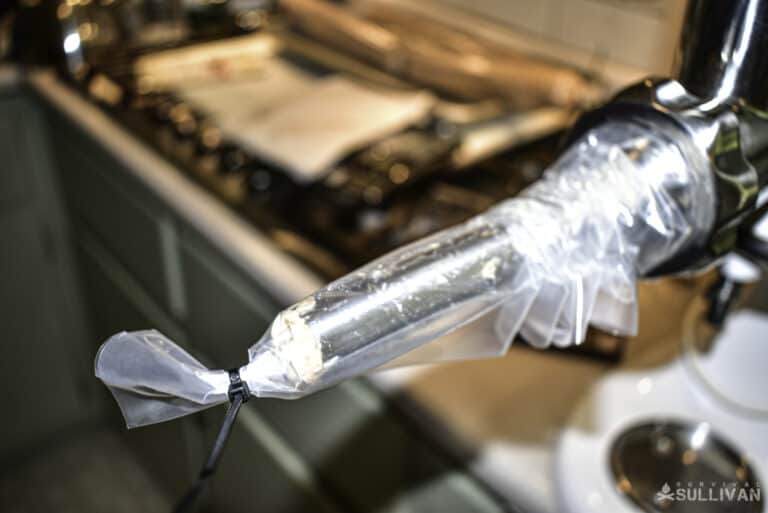
Next, prepare your stuffer, or stuffer attachment, and thread on your UMAi casing. I found it took about 8” of the casing to do a pound of meat. Your mileage may vary.
Tie off the end of the casing and start stuffing. The goal is to hold back the casing just enough to allow it to fill to its maximum diameter without air bubbles.
While a small air bubble or two is ok, try your best to minimize them. Stuffing sausage casings is more art than science. It takes a practiced hand. Take your time and go slow until your skills allow you to pack a little faster.
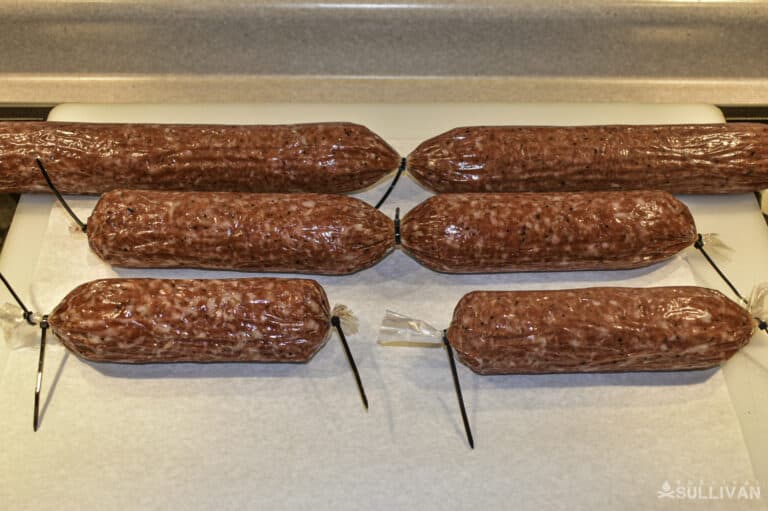
Pause every few inches and give the casing a twist and zip tie it off. This will give you links rather than a single long link.
The smaller links are easier to handle later. I also recommend putting two zip ties about ½” apart between links. This gives you enough room to bend the links in half.
No matter what you do, do not twist and tie them once both ends are tied. The UMAi casings are a lot stiffer than natural or synthetic sausage casings.
They will not stretch enough once you have tied both ends. Twist and tie as you go.
When you have packed all the meat into the casings, tie off the final end.
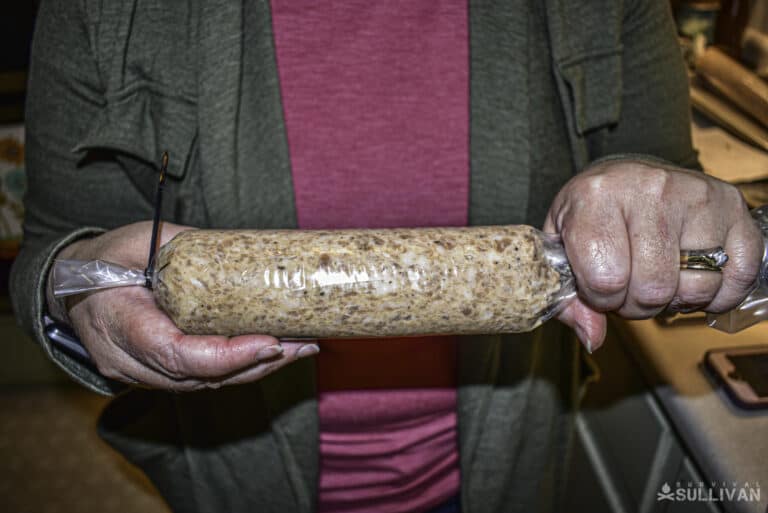
Weigh and record the initial weight in grams for each link. Then calculate the target weights. For Soppressata, your goal is a weight loss of 35% to 40%. The more loss, the harder the salami.

Fermentation and Final Cure
The first step of the cure is fermentation. You need to give the bacteria you inoculated the pork with time to work.
Hang your Soppressata in a dark closet or an unused oven. You need an area that is between 65 and 75 F. Let the casings hang for 2 to 3 days.
During this time the Soppressata will become a brighter red and firm up. Oh, and the smell. The casings will develop a nice tangy fermented smell.
After the fermentation, move your Soppressata to the refrigerator. Hang it or place it on a rack. Flip it over every week.
Next is the hard part. Waiting… Again…

The good news is that Soppressata only requires a wait of 4 to 6 weeks. My smallest links hit 35% in 4 and a half weeks.
Like the Lonzino and Capicola, the Soppressata will harden and shrink during the cure. It’s ok if the casing pulls away from the meat.
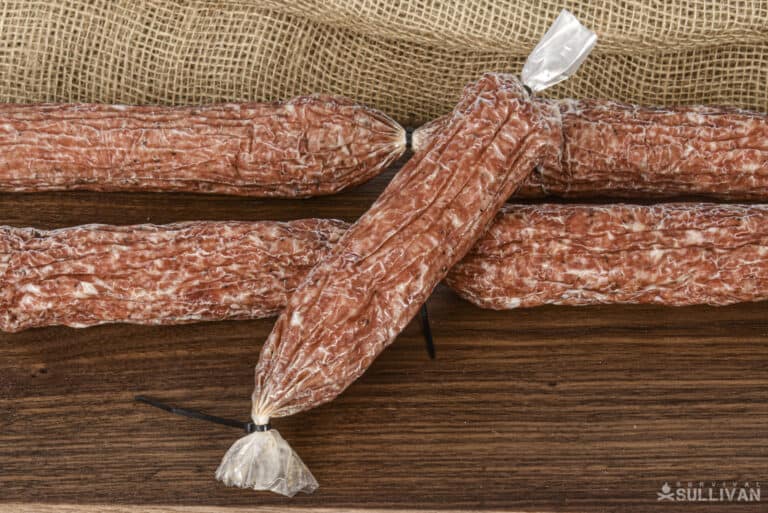
Sampling and Storing
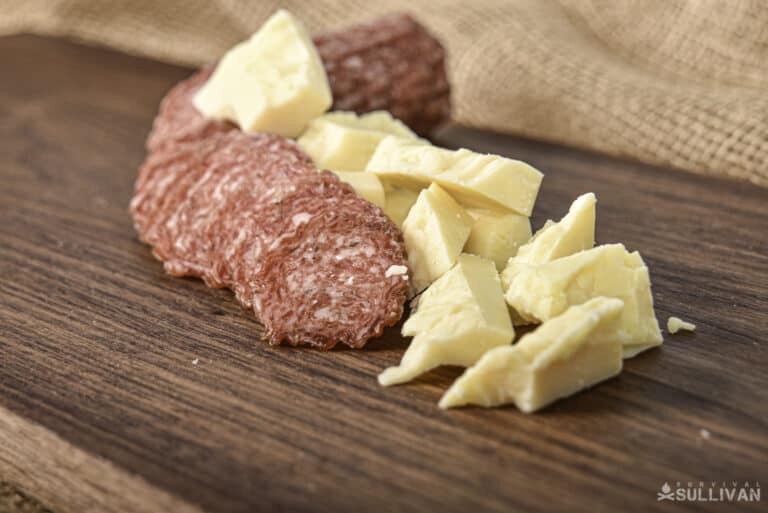
When you have hit the target weight, it’s time to cut in! Peel off the casing, slice, and serve with a good cheese!
To store your Soppressata, remove the casing and cut each link into individual portions (don’t slice). Vacuum pack each piece. It should last up to a year in the refrigerator.
Finishing Up Cured Meats
There is nothing more rewarding than providing for yourself and your family. The more complex the final product, the greater the reward.
At the top of this list, for me, is making something exquisite out of base ingredients. A part of this for my family is cooking.
It’s one thing to roast a pork loin or smoke a pork butt, it’s another to make a fine Capicola or Soppressata. The complexity that builds over time is worth the wait.
The resilience that allows the meat to last for months gives me the freedom to move about with a valuable protein source.
Most of all, it’s the satisfaction that comes from doing something myself. That sense of self-reliance.
I’m not a talented person, just interested in becoming better prepared. From food storage to food preservation.
From self-defense to urban survival skills. It’s all about relying more on yourself, and less on those around you.
Curing meat is just one more piece to this puzzle. It allows you to store meat longer, and to turn it into a delicacy. It doesn’t have to be imposing at all.
With the use of UMAi bags, you take the guesswork and risk out of the process. Honestly, it couldn’t be any easier.
Oh, and don’t forget. It’s darn tasty!
Cheese and cured meats… if you need me, I’ll be busy enjoying the fruits of my labor!

My passion is empowering people with the knowledge to prepare for personal, local, and regional emergencies. I went to school for engineering and computer science and spend my days in the security industry.