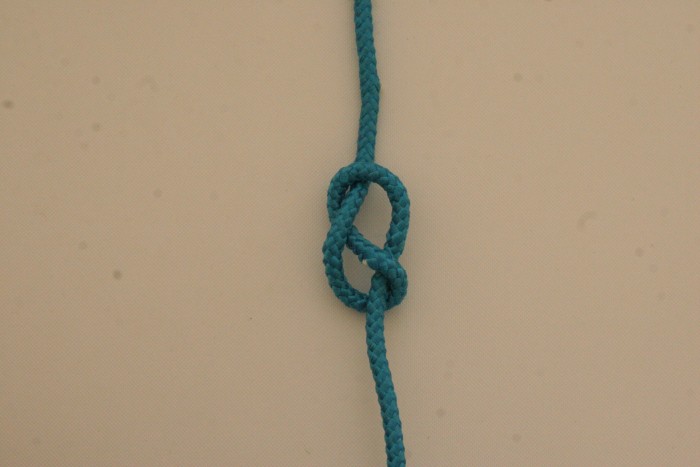
The Figure of Eight on a bight is a very strong mid loop, where the two ends come out of the knot parallel, so it is best used when the direction of the load from the knot towards the ends is similar for both ends, and the knot is loaded away from them (see comparison below).
For example, if you had tied each end of a line to either side of a sled, and wanted to tie it to a harness to pull with, you might tie a Figure of Eight on a bight in the middle of the line to equalise the load on each side, and then connect the harness to the loop.
The knot is often used by trad climbers tying into anchor points, or for small boats towing each other (where a towing ‘bridle’ is tied to each side of the towboat, and a towline from the towed boat tied with a Becket Hitch to a Figure of Eight on a bight in the middle of the bridle).
Tying on bight is probably the simpler of the two methods, but can only be used when the middle of the rope can first be placed where the resulting loop will need to be (for example, this method could not be used for tying into a harness loop, because the loops in the harness will not open, so the end of the rope must be passed through instead).
On the other hand, this method can be used without any access to the ends.
Steps
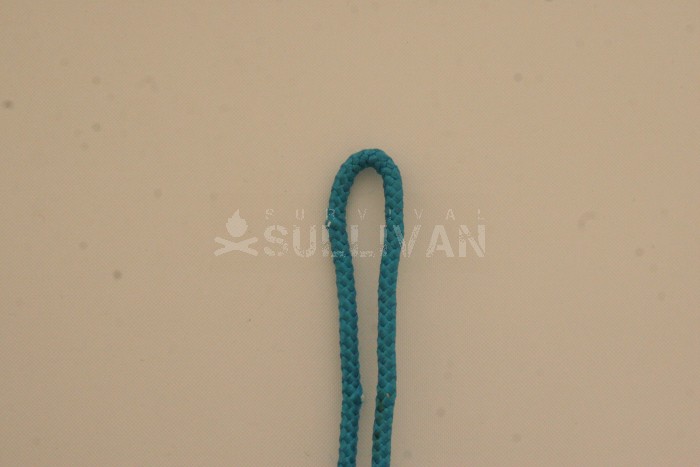
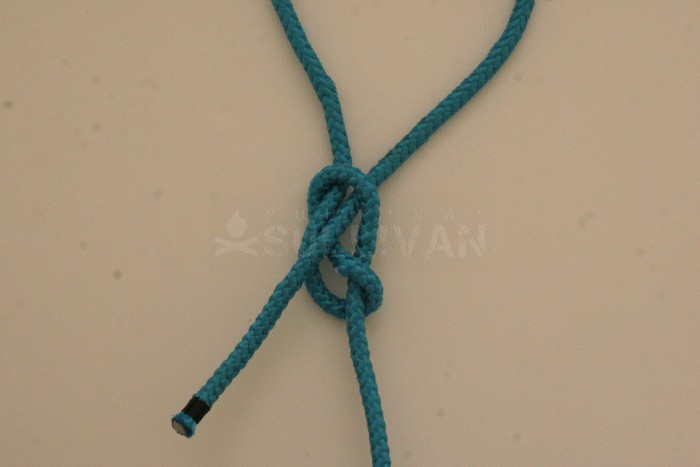
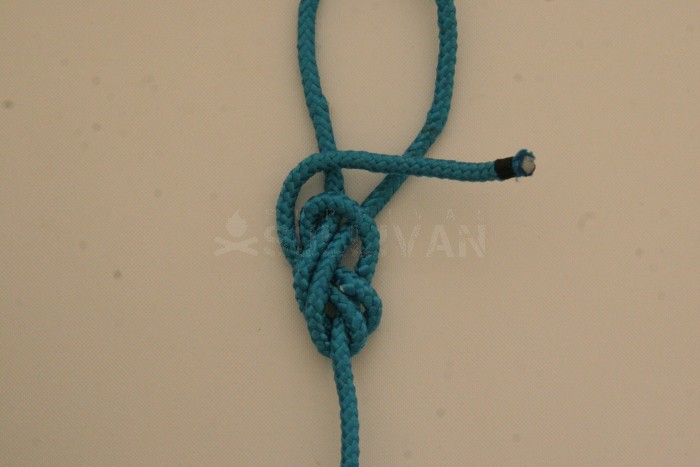
Step 1. Start with a bight. The top of this bight (as it appears in the picture) will be referred to as the ‘working end bight’:
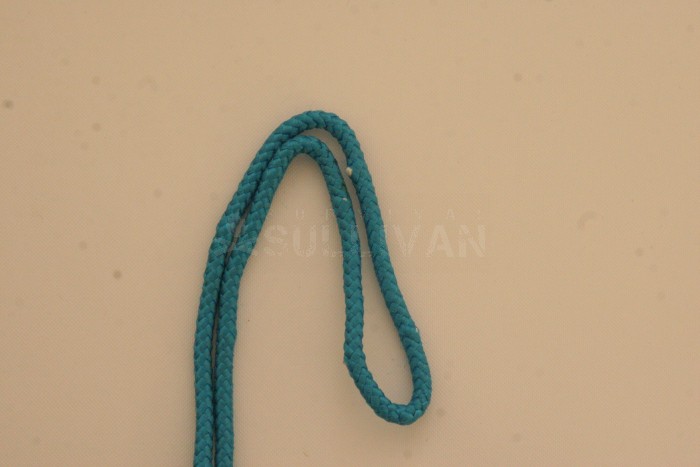
Step 2. Curve the working end bight over, making a ‘bight-in-the-bight’. In this set of photos, the knot starts by curving down to the right, but, like all the knots in this guide, the whole lot could be reversed, so long as all lefts and rights were reversed:
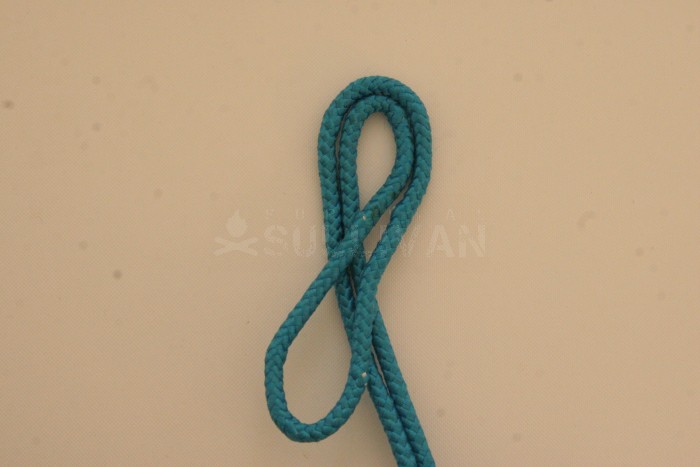
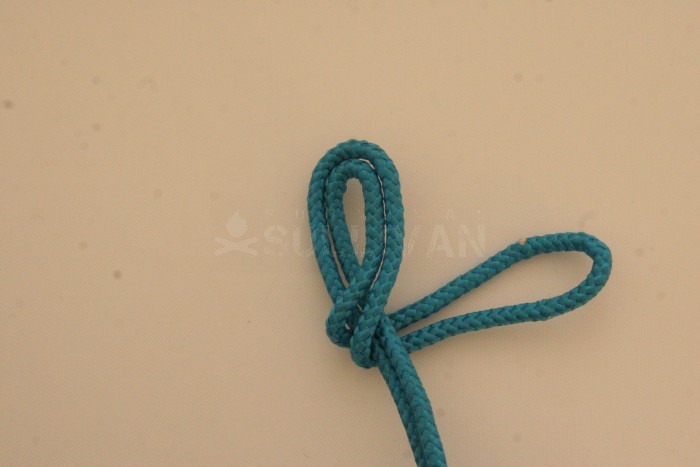
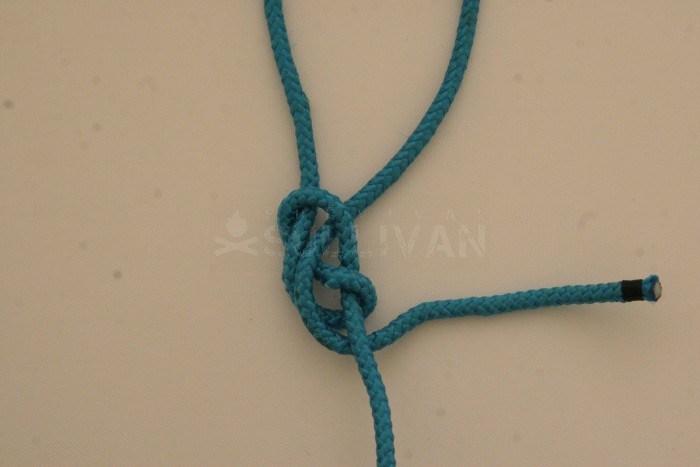
Step 3. Cross the working end bight over both strands of the standing part. This should form a two-strand loop:
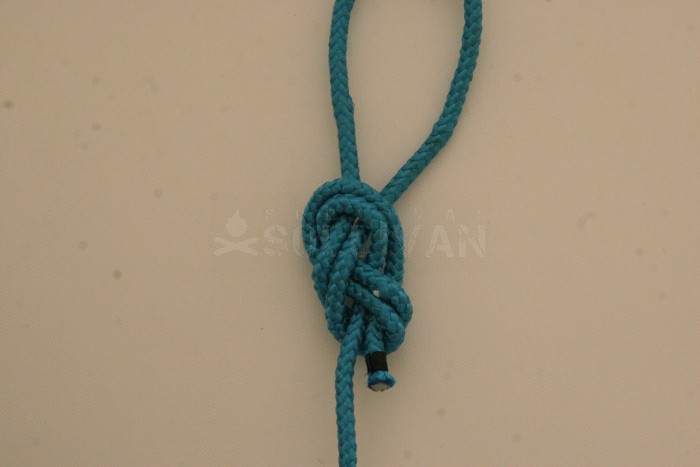
Step 4. Bring the working end bight back under the two strands of the standing part:
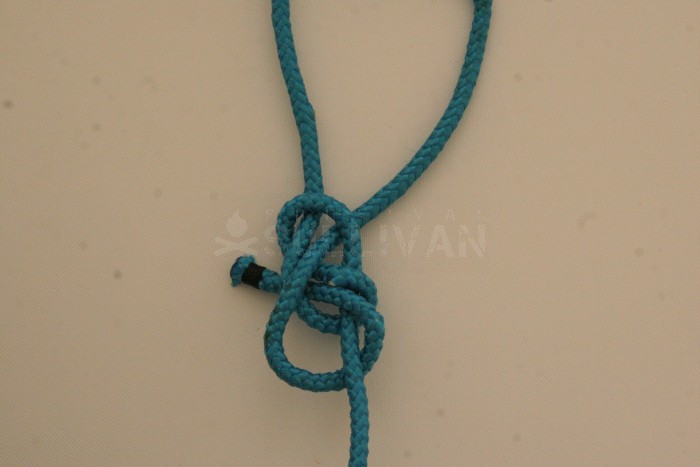
Step 5. Lay the working end bight over the near side of the loop:
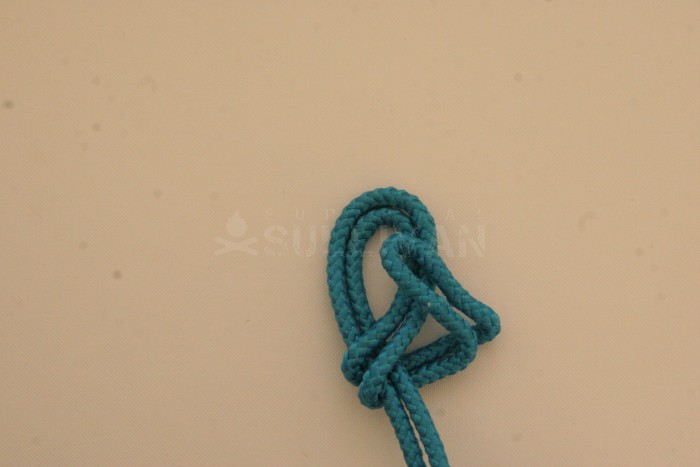
Step 6. Put the working end bight down through the loop:
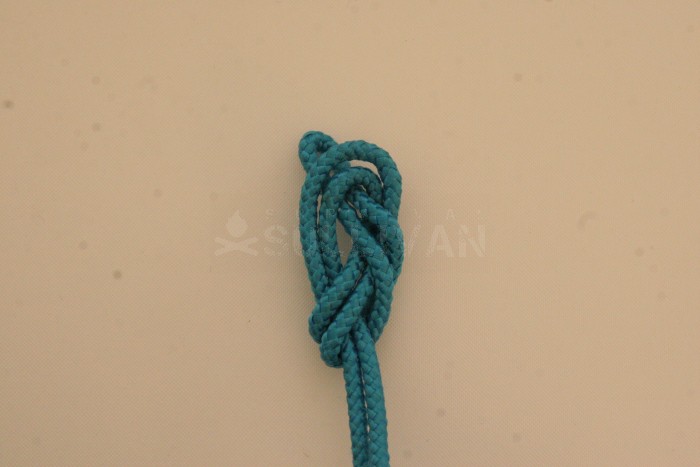
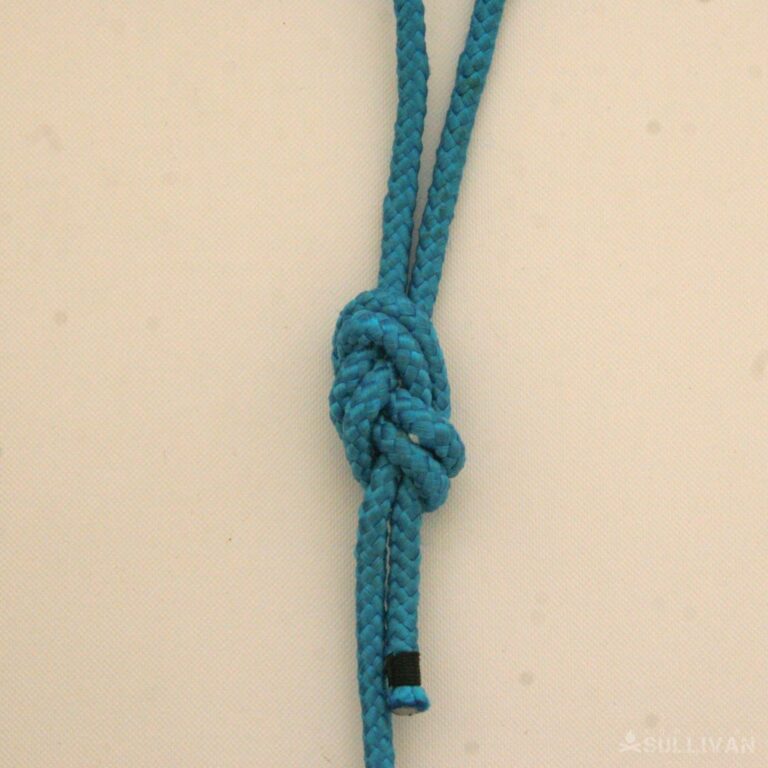
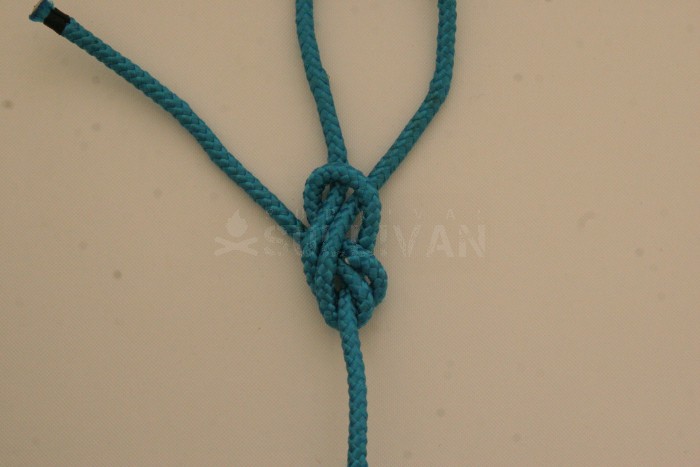
Step 7. Pull on the working end bight, then on the two standing parts to tighten the knot.
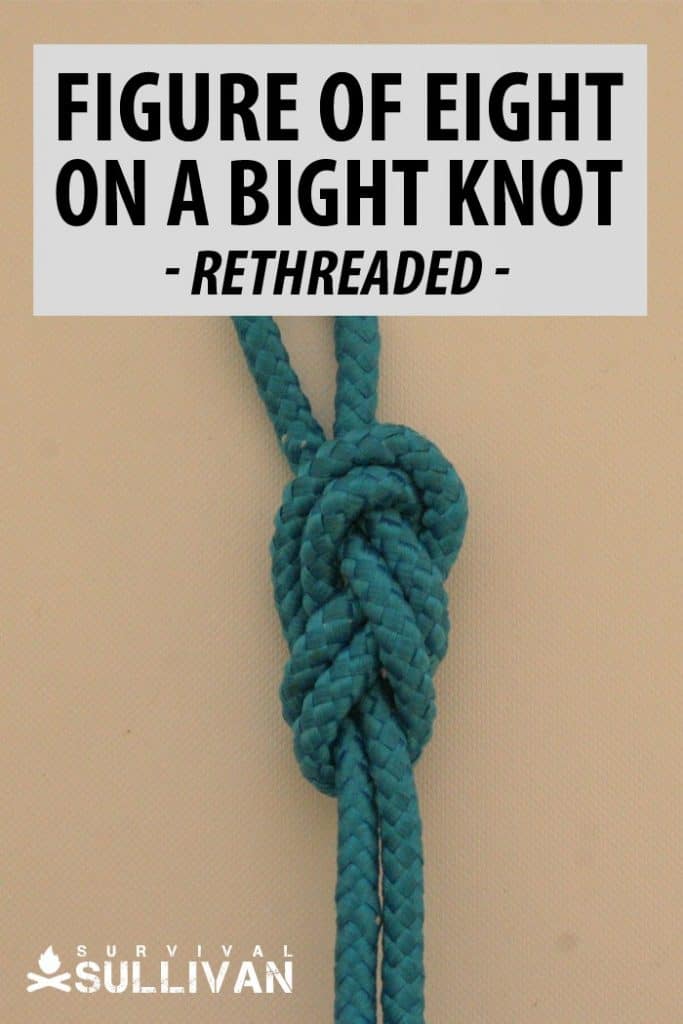
Tying Rethreaded
The rethreaded version is exactly the same knot, but can be tied if the middle of the line cannot be placed where the loop will be (without access to the ends). As such, it must be tied with one end, and is favoured by climbers tying into harnesses.
Step 1. Make a standard Figure of Eight Knot. Leave it slightly loose, as you will have to thread a line past each section of it again:
For the purposes of these pictures, it is assumed that the loop is being tied around an object just above the picture’s frame, the working end is at the top in this picture, and so that is where the loop will be.
Step 2. Curve the working end over, and thread it back on itself, exactly following where it just came from. Note that the working end is being threaded ‘inside’ the earlier line (closer to the middle of the knot):
This is not exactly necessary, but is standard practice. Pull the working through as far as necessary to produce the correct sized loop at the top.
Step 3. Continue to follow the same line through, passing the working end under the standing end:
Step 4. Follow the line back. The working end will go over the standing end (in the opposite direction to how it just went under), then under itself and the line next to the part it is going under:
Step 5. Pull any slack out.Notice how the ‘rethreading’ line never crosses the line it is ‘following’, but stays ‘inside’. Here, as the line being followed cross the knot, and comes to the outside, so does the rethreading line:
Step 6. Pass the working end over the two strands of the loop, following the line around. The working end will now be outside the line it is following:
Step 7. Follow the standing part down through the knot. The working end should go under a pair of strands, and end up at the ‘bottom’ of the knot (the opposite end to the loop), and outside the standing end:
Step 8. Pull on the loop, and then on the standing and working ends to tighten the knot up:
Related Knots
- The Figure of Eight (without being tied on a bight) is a stopper knot.
- The Angler’s Loop and Bowline (and its many variants) are other end loops and the Butterfly Loop is another good mid loop.
- The Directional Figure of Eight is a mid loop specifically for looping along the direction of the line.
Conclusion
The Figure of eight is a very strong mid loop, well worth learning for a variety of different uses.
Nick O’Law has been exposed to survival from a very young age. In his teenage years, he learned A LOT about bushcrafting, such as making snares and traps, and even how to make DIY knives.
If you haven’t ye read and tried his knot-making articles on Survival Sullivan, you should definitely check them out.