“The Bowline is the king of knots, or if you like it, bends
–A. P. Herbert, British novelist
A Bowline on a bollard is the best of journey’s ends”
The Bowline (pronounced ‘BO-lin’) is probably the most useful you could ever learn, hence the quoted poem.
The Bowline is best for attaching a line securely to an object where the line is not expected to be under load all of the time, or for creating an eye for more complex rope devices like the Trucker’s Hitch or the Versatackle.
There are a few different ways of tying the bowline, this is the ‘standard’, which is often not the most practical way to tie it, but is probably best for understanding the structure of the knot.
This way uses a mnemonic about a rabbit coming out of a hole, where the working end is the rabbit, the initial loop is the hole, and the standing part is the tree.
It’s a good way to remember how to tie the knot, but it does need both hands free and does not give you much control over the line, so it isn’t great for tying fast, or in the dark (read when it matters most).
The Bowline can be easily opened, even after significant loading, by folding down the collar (where the working end passes around the standing part).
The whole knot can also be tied the other way round, with the standing up over the working part in the initial turn, the working end going away from the tyer first etc., but it’s more often tied this way, probably because it’s simpler to remember.
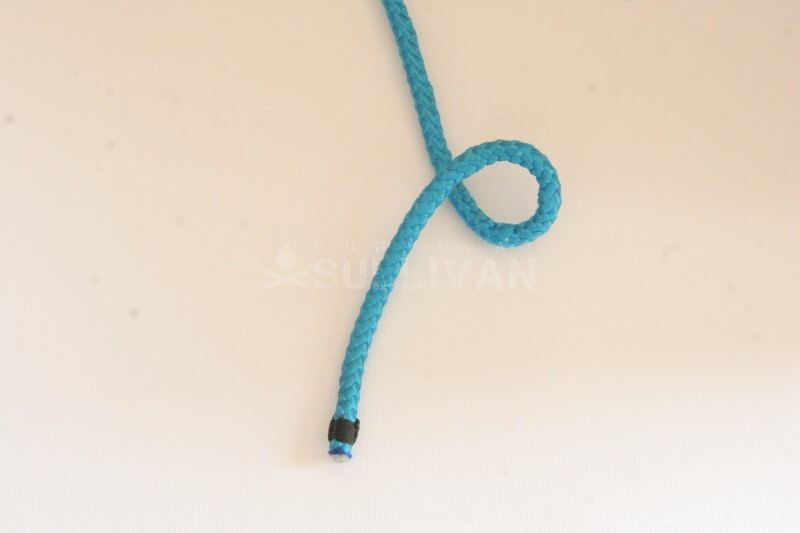
Step 1. Make a loop. This is the ‘hole’. Notice that the loop is such that the working end is above (or nearer to the tyer’ viewpoint than) the standing part of the loop:
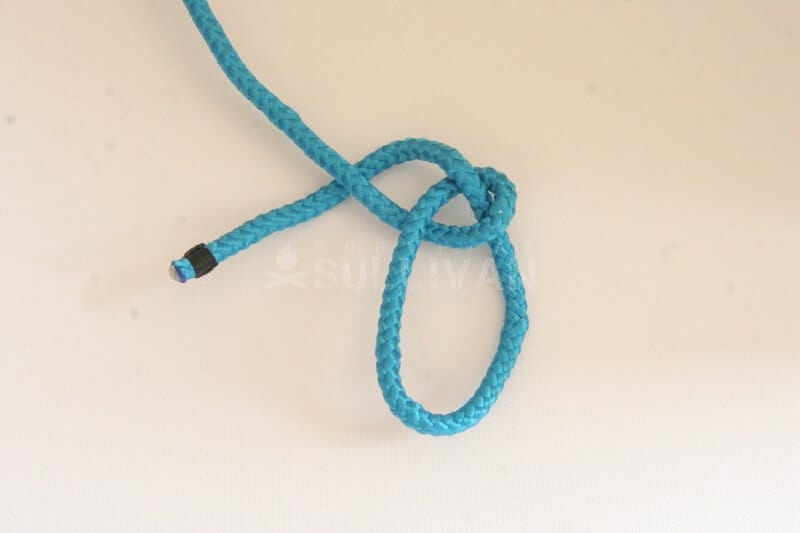
Step 2. Thread the working end (the ’rabbit’) up through the ‘hole’:

Step 3. The rabbit goes around the standing part (the ‘tree’) from right to left:
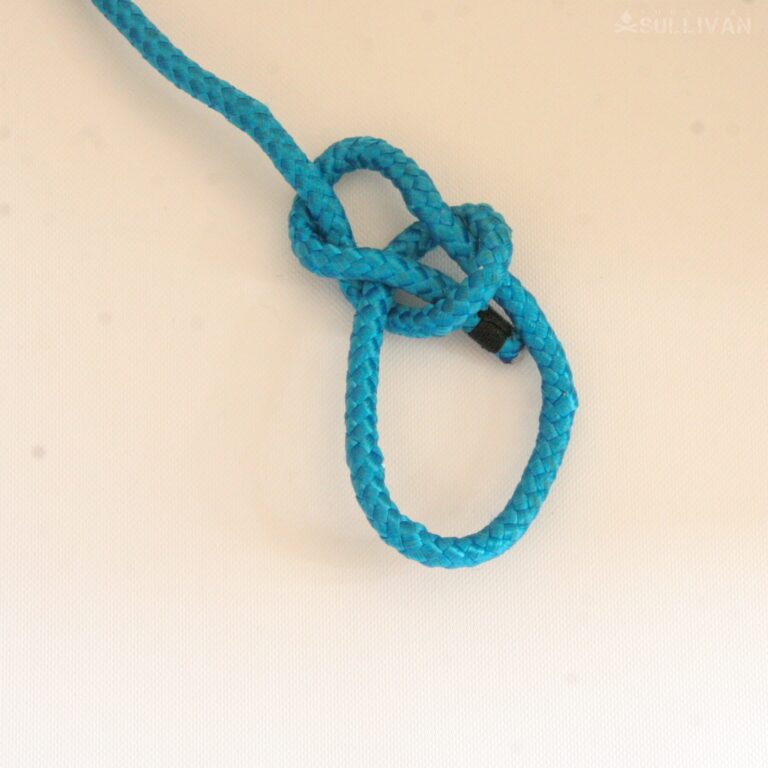
Step 4. The rabbit gets scared, and runs back down the hole, following his / her / its initial path up:
So, in summary, the rabbit comes out of the hole, around the tree from right to left, and back down the hole:
This photograph shows how the Bowline is easily opened, by folding down the collar:
Related Knots
- There are many variations of the Bowline. With two loops: the Spanish Bowline, the Portuguese Bowline, and with three loops the Triple Bowline.
- The Bowline is an end loop knot, so is related to other end loops like the Angler’s Loop and the Figure of Eight on a Bight (or ‘rethreaded’)
Conclusion
The Bowline is an incredibly useful knot, and this is probably the best introduction to how it is made, and how it can be used.
Nick O’Law has been exposed to survival from a very young age. In his teenage years, he learned A LOT about bushcrafting, such as making snares and traps, and even how to make DIY knives.
If you haven’t ye read and tried his knot-making articles on Survival Sullivan, you should definitely check them out.