The Directional Figure of Eight is a directional loop, meaning that the loop lies naturally along the axis of the rope it is tied in (unlike for example the Alpine Butterfly, which stands perpendicular to the rope).
So this knot should be used when the load on the loop is in roughly the same direction as one of the lines coming out of the loop.
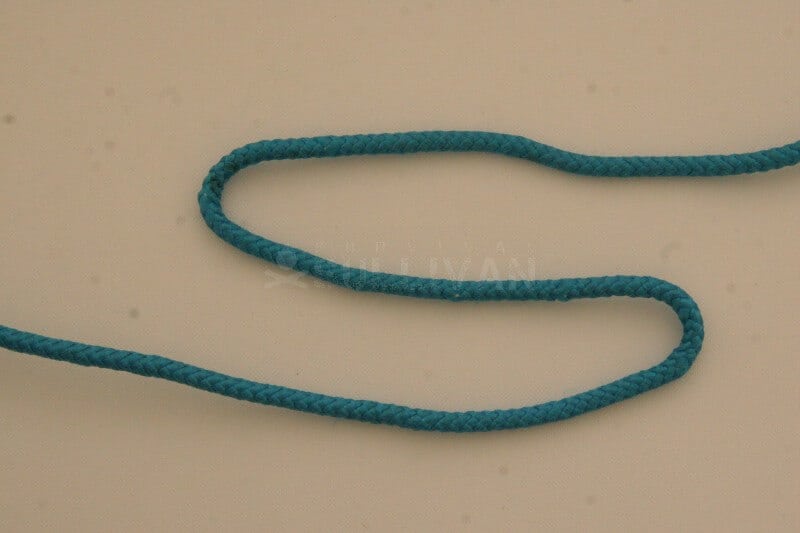
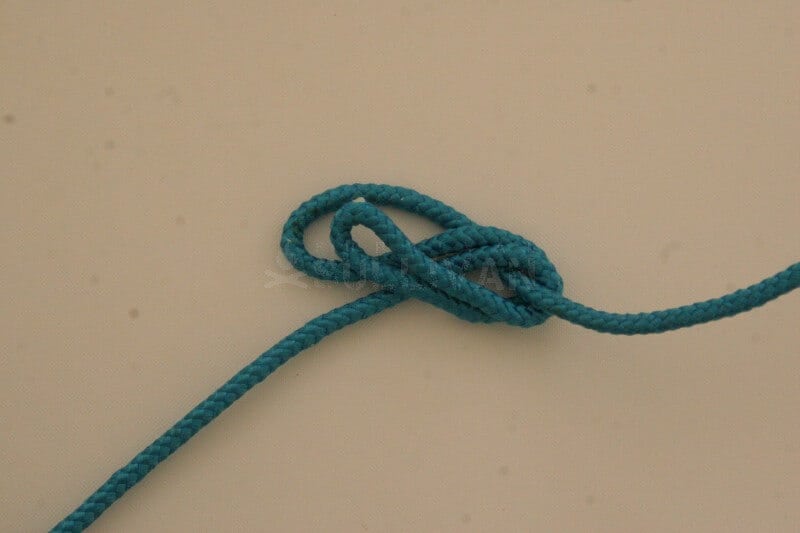
Step 1. Fold the rope in a ‘Z’ shape. See how this is effectively two opposing bights. The lower one (in this case, in this picture) will be the ‘working bight’:
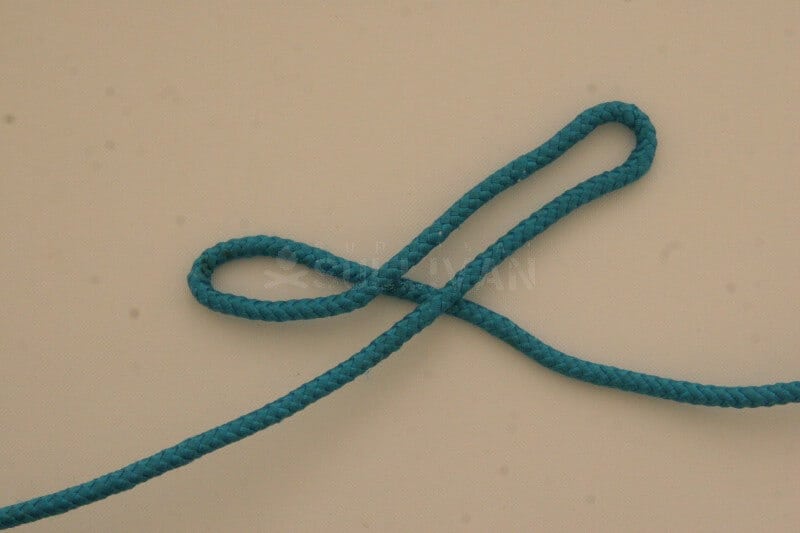
Step 2. Pass the working bight over the outer line of the other bight. Notice how the working bight does not twist and how this forms a loop (on the left hand side of the picture):
Step 3. Again without twisting it, pass the working bight under the standing end:
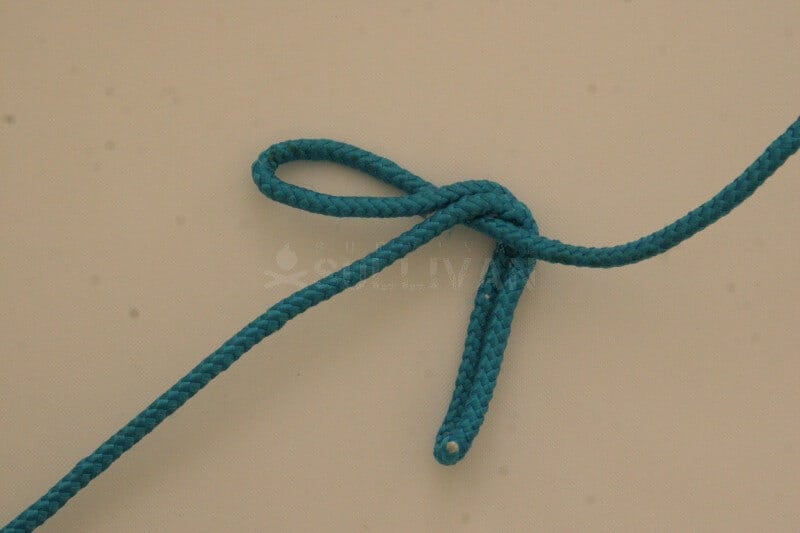
Step 4. Pass the working bight over the two strands of the standing part on the other side of the knot:
Step 5. Thread the working bight through the loop noted earlier:
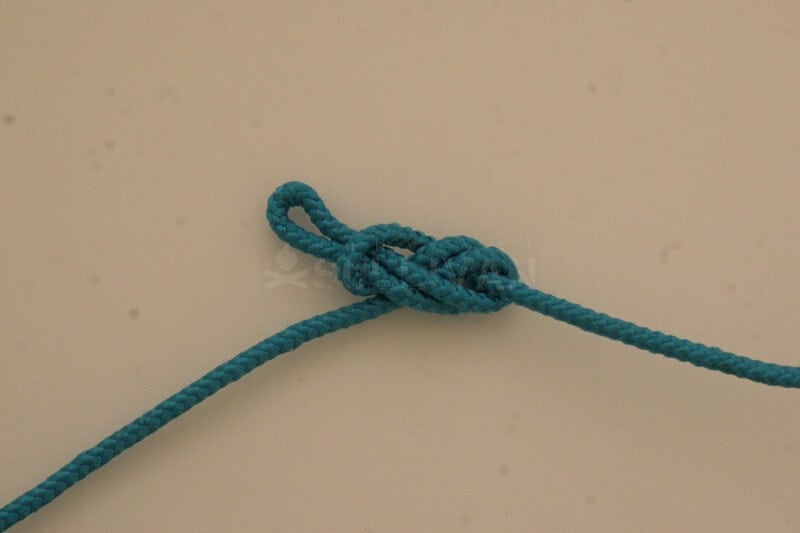
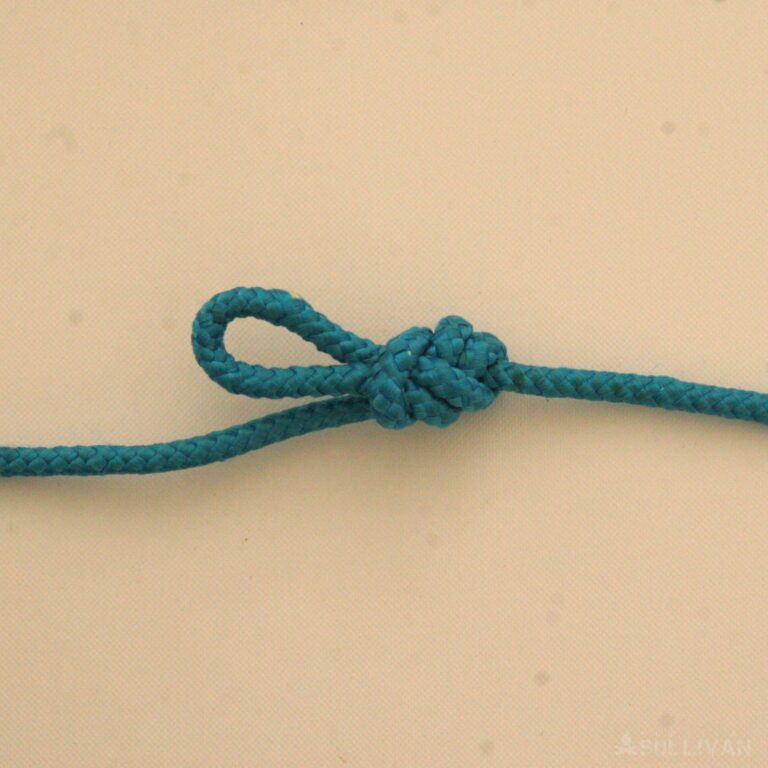
Step 6. Pull on the standing part on each end of the knot in turn to tighten:
Additional Information
- This knot is directional in only one direction. If should not be loaded in the direction opposite to where it naturally lies. If the load is likely to move around a lot along the axis of the rope, a non-directional loop like an Alpine Butterfly or Figure of Eight on a bight should be used instead.
- This knot can be used well to make hand or footholds in a single line, which can then be used as a rope ladder (with many holds) or hauling line (just enough to hang onto for a person to be pulled to safety).
- This is a really good knot for anchoring mechanical advantage systems. You might be setting up a trucker’s hitch or a versatackle, and with some hardware (pulleys) you can build a z-drag system as is often used in search and rescue.
- You can of course also tie another to line this knot, using the loop as a strong point and tying a loop or hitch through it.
Related Knots
- The Alpine Butterfly Loop and Figure of Eight on a Bight (or ‘rethreaded’) are also mid loops (loops which can be made in the middle of the line, without needing access to the ends), though they are both non-directional.
- The Figure of Eight is a stopper knot, used to stop the end of a line coming through a hole or pulley through which it is ‘reeved’ (threaded).
Conclusion
This is not a knot which does much on its own. It’s real strength is its versatility for use in larger systems, as an anchor for hardware (or other lines) or turning point for mechanical advantage. If you’d like to learn also other knots, check our survival knots guide.
Nick O’Law has been exposed to survival from a very young age. In his teenage years, he learned A LOT about bushcrafting, such as making snares and traps, and even how to make DIY knives.
If you haven’t ye read and tried his knot-making articles on Survival Sullivan, you should definitely check them out.
Every time I stop by here I see something else I’m glad is being archived instead of being lost. I’ve given my two grandsons bookmarks for your page because I can’t spend enough time with them to teach them stuff like this.
Thanks for doing what you do.
You’re very welcome, I am proud to say that here at Survival Sullivan I have the best team of prepper writers on the web!
Hi Gary here. Like your info on the knots. Can never know enough about making knots.
Again a few comments for the beginners who are reading the great articles here.
1. Only a knot which can be easily untied again after use is the right knot for the job at hand.
2. If a knot will be placed under such stress that it probably not be “untieable”, then insert something smooth and slender (Philips screwdriver) into the knot. After use, pull the helper out and you have some slack to help to untie.
3. If the knot is wished to NEVER come apart again, GET IT WET. It slips and gets even tighter than normal and is very hard to untie.
Have a knotty day. GP