Well, I wish I could take credit for this thing, but the fact is that some guy on youtube that used to be on a survivor type television show came up with it. I think it is brilliant and it is my new most favorite toy to play with.

What I am talking about is the sling bow. A slingbow is loosely a combination of a slingshot and a bow. It is a slingshot for sure, but really the only part of it that is like a bow is the fact that it fires arrows.
Unlike a bow, the sling bow fits easily in your backpack, or even your back pocket. The guy that invented it sells a take-down arrow that screws together; it made me think of a cleaning rod that you commonly find in a gun cleaning kit. I’m sure it wouldn’t take much to make up a few of your own take down arrows to go with your sling bow.
These can easily stow in your backpack, and be taken along with you and whenever you throw the pack over your shoulder you know you have a decent weapon in it that can get you some food should the need arise, and really that’s what good survival gear does. It sits there quietly, taking up little space until you need it.
The guy that invented it sells them of course, but why pay too much for something that you can make yourself for pennies on the dollar. I understand that the guy is just trying to make a living, we all are, but some information is meant for the masses.
It can be compared to the inventors of the bow and arrow, the slingshot, and the crossbow. The names of whoever thought these things up are lost to the ages, and many people now make money by selling various forms of these inventions.
So it is my contention that I am not selling the item, I am telling you how to make one in various forms for yourself for cheap, or even free.
I have made four versions of the sling bow, the first variant being as close to the guys original invention as I could get because I figured that must be the best way to do it.
Table of Contents
Design #1: Wrist Rocket Sling Bow
To make one of these first I bought a wrist rocket type slingshot at Waldo’s World of Chinese made goods for $7. Next I ordered a whisker biscuit online for $10.
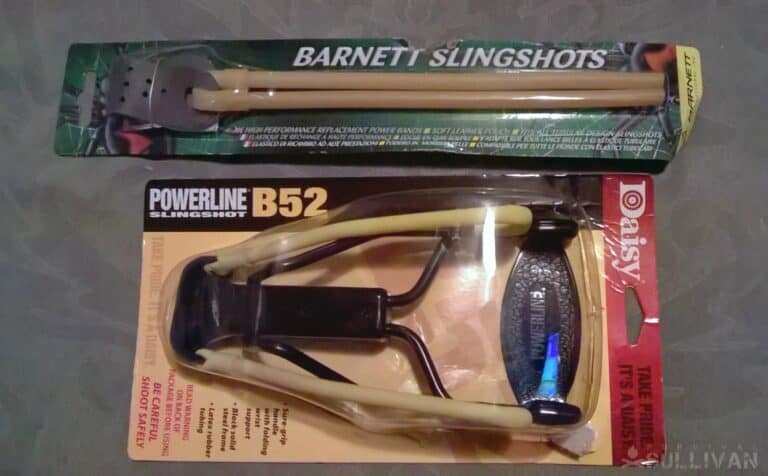
These whicker biscuits cost as much as $40 in the sporting goods store, so I looked online and sure enough they were on Amazon for 10 bux. I also bought a Barnett brand replacement rubber tubing for a slingshot to use to make the wooden version that I describe next.
I simply attached the whisker biscuit to the slingshot with a metal strip and a few screws:
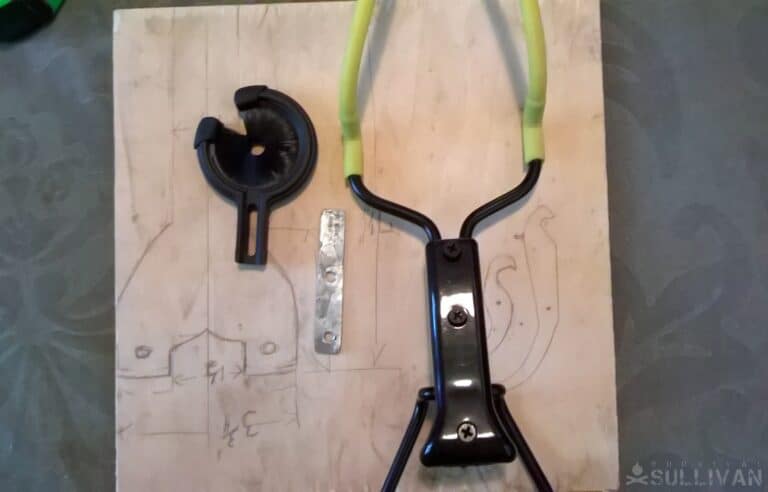
It was pretty straightforward to attach the whisker biscuit to the slingshot. I just made a metal strip and drilled a few holes in it.

Then I screwed the metal strip onto the grip using two of the grip screws. A couple of small nuts and bolts and a metal brace on the front completed the design:
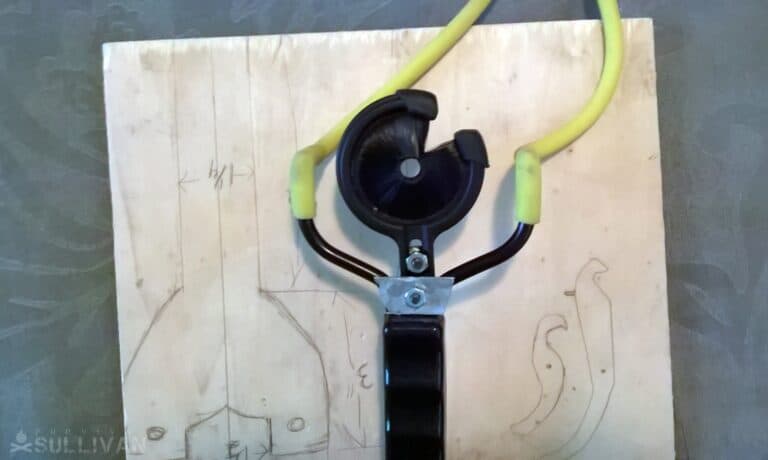
To finish it up, I tied a piece of paracord at the pouch, and left a longer piece that I then tied in to a large knot. The knot is for grasping and drawing the sling bow.
This worked fairly well, but I wanted to find an easier and cheaper way to do it because you won’t necessarily be able to obtain a wrist rocket and whisker biscuit in cases of SHTF/TEOTWAWKI. That led me to making the wooden sling bow.
Design #2: Wooden Sling Bow
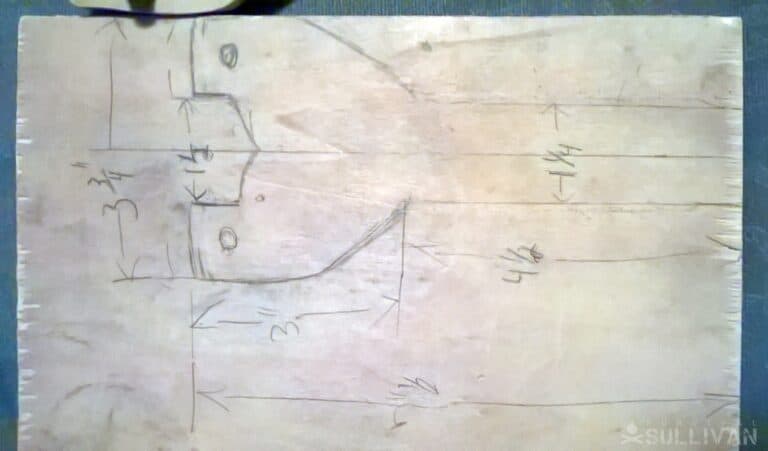
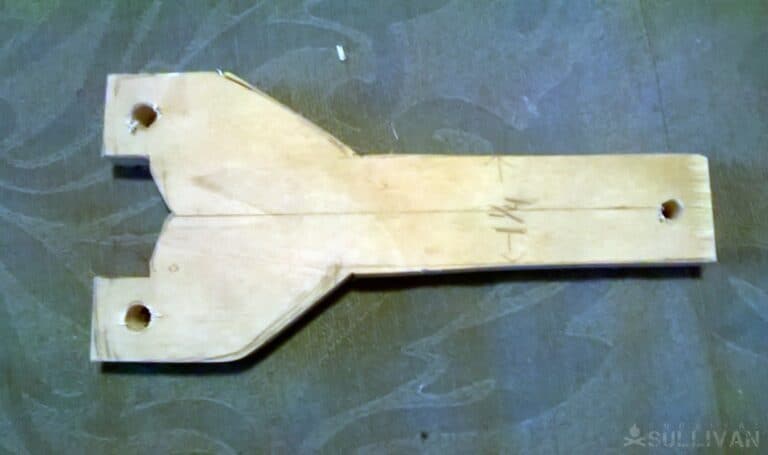
To make the wooden sling bow I cut the shape from a piece of 1/2″ plywood. I used plywood because it is stronger than just a single piece of wood due to the laminate design.
I traced a patter out on the piece of wood first, and then I cut it out with a scroll saw. You can cut it out with any kind of saw, a hand saw, jig saw, whatever you have. You can even cut it out with your knife it that’s all you have to work with. It will just take a lot longer.
You can see the dimensions for the handle in the picture below:
After I cut out the pattern and drilled the holes in it, I sanded it to smooth the edges…
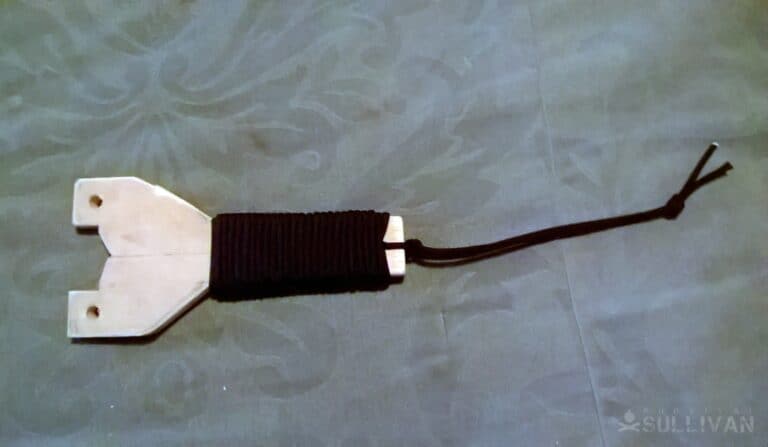
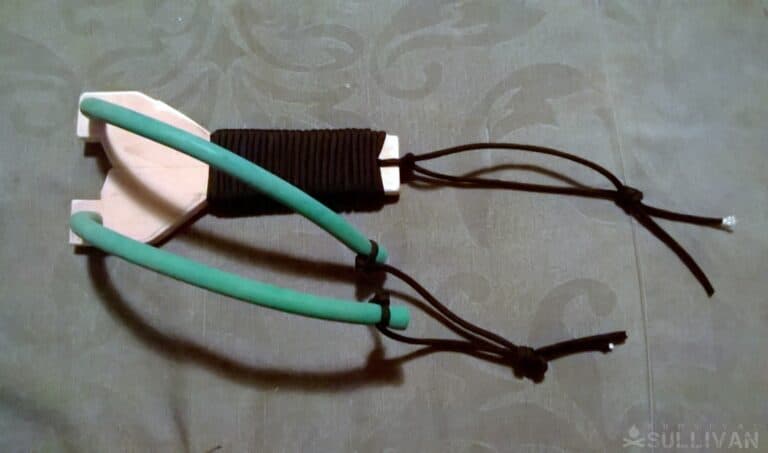
… and then I wrapped the handle in paracord:
Once the handle was wrapped I then attached the rubber tubes. The first one I made I used the store-bought bands on but for this one I re-purposed the bands from an exercise band. It was thicker than the store bought band so I figured it would be stronger (it was).
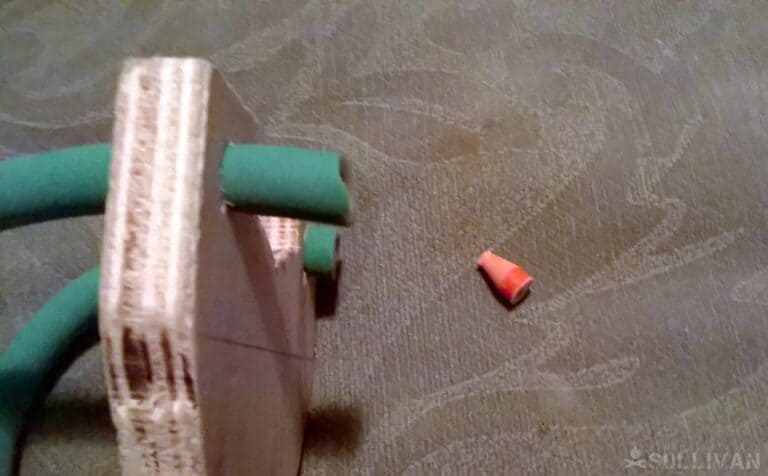
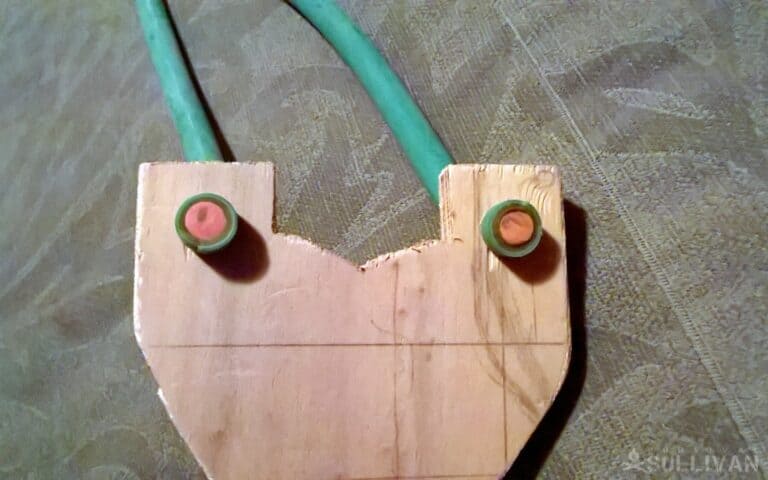
To attach the tubes you push them through a snug fitting hole, and then you insert a pointed plug into the end of the tubing.
When the tubing is pulled back it cinches the tubing against the plugs into the hole ,and holds it all together. The more you pull, the tighter it gets.
All it needed to finish it up was the paracord string at the end of the tubing.
I inserted the conical pieces into the ends of the tubing and then tied the paracord as tight as I could get it right at the plugs. This way, the cord pulls against the plugs and cinches it tight like it does on the other ends, so the knots won’t slip off the tubing.
This sling bow is very strong, it is hard to pull back on it and hold it straight though so I am thinking it needs a wrist brace. So then I figured I will just make one that has a wrist brace by making it from a length of steel wire rod.
Design #3: Wire Rod Wrist Rocket Sling Bow
After making a few of these sling bows I determined that the best method to make one would be to make it from steel rod and have a wrist brace.
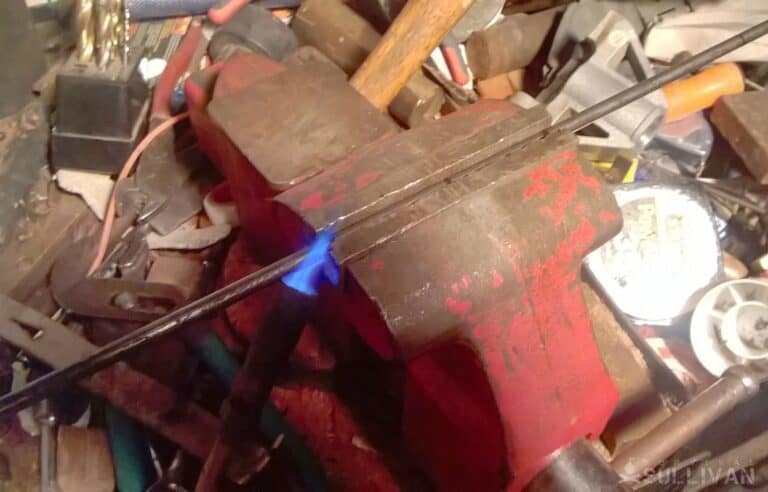
To make this one I used a four foot long piece of 1/4” steel rod. I started in the center and bent it to fit over my wrist. By heating it in the spot I intended to bend it, I minimized stress on the rod and maintained the structural integrity of the steel.
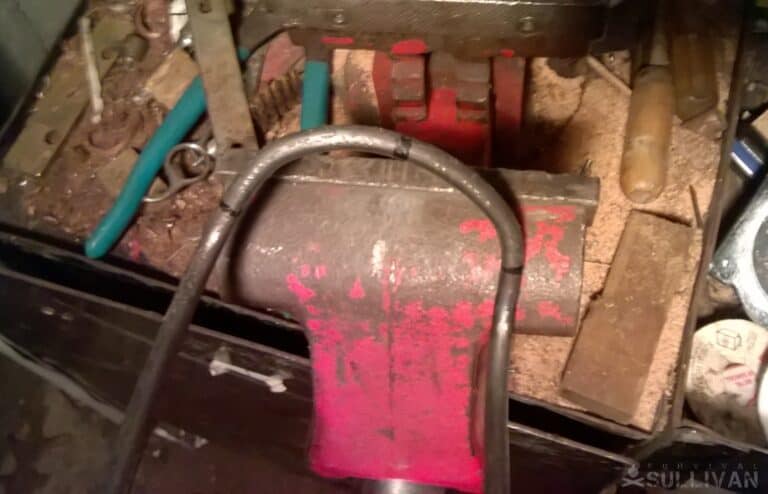
Once I had the curve suitable for my arm I bent it in another direction to make the rod reach my hand, it was at that point that I bent both sides about 90 degrees to make the grip section.
I clamped the rod in a vice and heated it; I then slid a metal tube over the rod and used that to make the bends. This keeps the rod straight everywhere else and also applies more leverage.
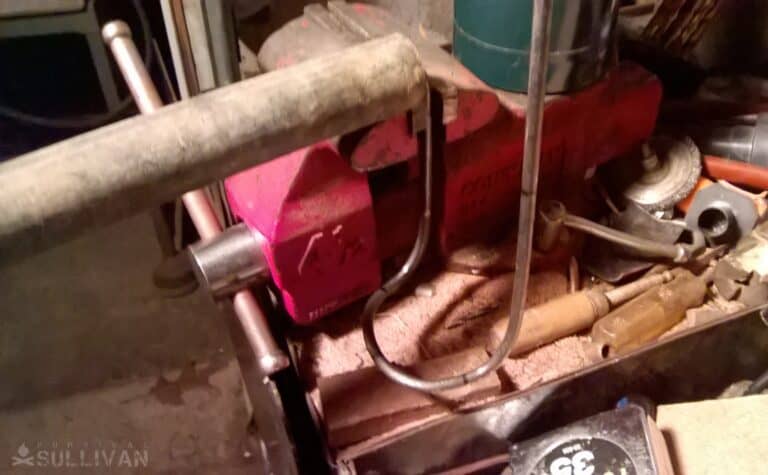
Once I got to the small, tight bends that created the ram’s horns I had to use a hammer to beat the rod into shape as it was too short and stiff to bend by hand. I used channel locks and vice grips and clamped the rod in the bench vice. It was a little bit of a struggle at the end, but I got it done. It was worth the effort too.
I tried to keep both sides uniform but they may be off a little. It doesn’t matter if it is perfect, as long as the ends are parallel with each other and with the arrow rest.
You could use heavier rod if you want to or if that’s all you have, you could use lighter rod too, like maybe 3/16″, but I don’t know if I’d go much smaller than that as the rod has to be stiff and maintain its shape.
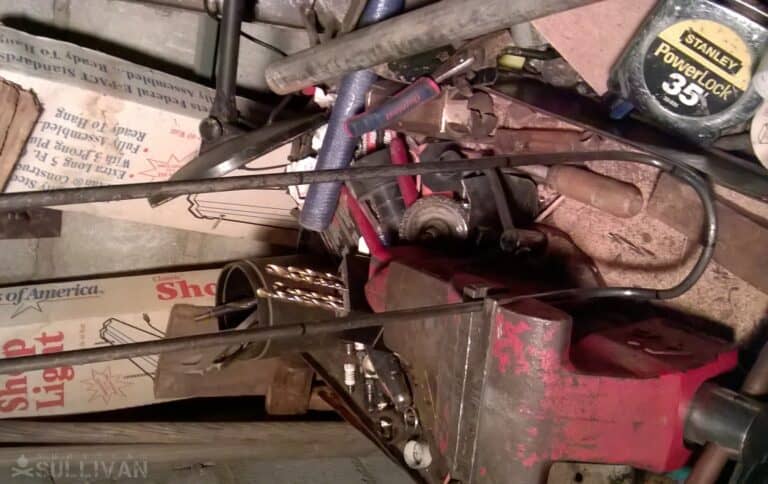
Once I was satisfied with the shape I put the rubber tubing on it. These just slide on and as long as they fit snugly you do not need to do anything else to hold them on. They stay on when you pull back because when you pull back the tubes stretch, and when they stretch they become smaller in diameter.
This acts as a clamp in itself and the harder you pull back on the tubes, the tighter they grip the steel rod. I did sort of rough the ends of the rod up with the pliers so that probably helps hold the tubing on as well from the added friction.
4th Design
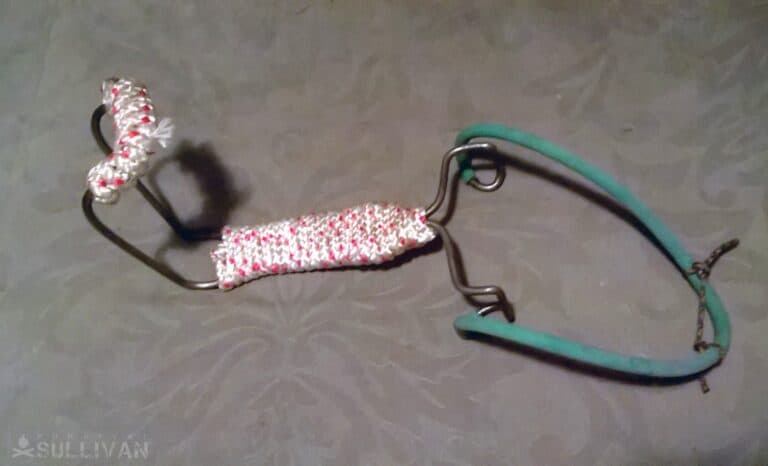
On this sling bow I tried something different with the tubing. Rather than having two short tubes, I left it as one and put the free ends onto the rod.
Then I tied the paracord in the center for the arrow nock and then instead of tying a knot to draw it back with I just used the loop of the tubing to draw it back with. This was actually easier to grip than the paracord knot.

As I mention in the video below, although this sling bow might not be the best looking or easiest to carry, I think that it shoots a lot better than the others.
If you notice in the pictures, one thing they all have in common is that the arrow rest and the tubing attachment points need to be parallel. This makes the arrow fly straight along your line of sight, and makes the sling bow more accurate.
Last Shot
This weapon is fast becoming one of my new favorites, it is easy to make one, and cheap to make one. They are easy to use, accurate (when made right) and powerful. These were sinking the arrows into the foam block as deep as a 40-50 pound draw weight bow sinks them.
They also seem like they would be much easier to wield in a situation where you have a lot of tree branches around you.
I’m sure many of you traditional bow hunters have had that shot fouled because the bow limb hit a branch that you didn’t notice because you were focused on the target. Of course that doesn’t happen with compound bows because the limbs don’t flex and rebound, but it can happen with a recurve or long bow.
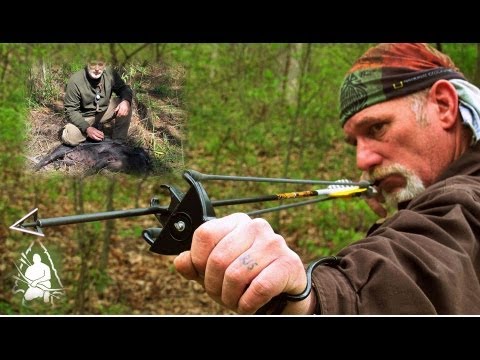
This is the guy that invented the sling bow:
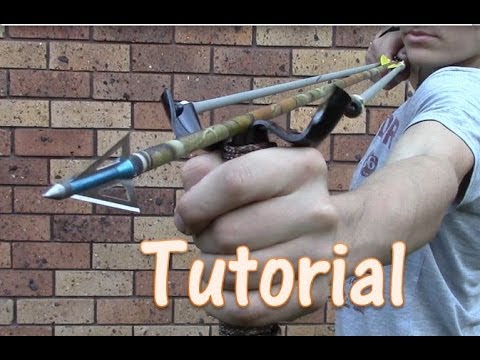
But they are all over the internet now; here is another method of making one:
Disclaimer
Please check state laws before attempting to use a sling bow for hunting. In some states, this is forbidden. Also, please note that the advice given in this article is for information purposes only. Neither the author nor www.SurvivalSullivan.com can be held liable for the misuse of the advice given in this article.


Eric Eichenberger is an avid outdoorsman, skilled marksman, and former certified range officer and instructor with nearly 40 years experience handling and repairing firearms.
A skilled craftsman with a strong love for working with his hands, Eric spent 20 years as a carpenter and custom woodworker in high end homes. As a gold and silversmith he has created hundreds of pieces of jewelry over the years using the lost wax casting method.
The grandson of humble country folk, he was raised with the “do it yourself” mentality and so is accustomed to coming up with unique solutions to problems utilizing materials at hand.
I have not been able to read all of your articles so I am not sure if this has ever been mentioned or even thought about or considered any of these items.
One can usually find all or most of these in any Dive shop and probably online if they want to look for them.
There any numerous types of these and in various lengths.
There are pneumatic guns that do not need the bands/tubing and are much faster to reload,
The can also get the bands already made for a specific length or probably online or
they can custom make their own
These are real weapons and used by snorkelers and Scuba divers
for spear fishing and getting fish.
ALL of these are range limited weapons from contact to close range depending on the power of the bands.
The pneumatic ones MIGHT have a longer range but that can vary with the gun.
First The Hawaiian Sling.
The simplest to make though usually not very expensive.
A tube, A spear, and surgical tubing.
There are other DIY videos on Hawaiian Slings YouTube. Just look for them.
I picked this one to show what a Hawaiian sling is and
how it works
This is a DIY version you can build for under $20.00
https://www.youtube.com/watch?v=mazeLj8-9-I
Spearguns
There are so many different plans to DIY Spearguns
on Youtube. I leave it up to the individual to look
through and to find one they like and have the desire
to build one the like.
Powerheads or Bangsticks
If one has access to a machine shop tools they can build
one of these in any caliber or shotgun gauge they so choose.
Simply put they are a single shot spear. and can be reloaded.
The go off on impact and normally used on large fish or sharks
These are bit more technical but are simple to build if one has the
proper tools.
Shark Dart/Fish Dart
These are very simple spear that contain more or less use a VERY large
caliber needle on the end of a pole/spear.
They use a CO2 cylinder that are similar to those used in CO2 pistol or
the small ones used in the old Seltzer Bottles.
The main difference between them is the size of the CO2 cylinder The Shark Dart uses
a larger CO2 Cylinder that is threaded and larger than the ones used into CO2 Pistols.
The Fish Dart uses the same small one used in Seltzer Bottles. Much cheaper to buy than
the ones sold in Dive Shops if the are still made
They work on impact and release the CO2 gas into the shark or fish and when injected
with the gas and causes the shark or fish to float away.
I used one of the smaller cylinders on and old pillow . The pillow literally blew up. Feathers everywhere!!
Like the Bangstick/or Powerhead they are a single shot. and they can be reloaded.
Anyway just some food for thought