Pretty much every prepared person knows that fire is critical to survival. Fire provides warmth, light, a way to cook, and a way to signal.
Valuable assets in any sort of outdoor situation, whether you’re surviving in the wild or just out for an enjoyable camping weekend!
But even if you have a lighter or some other means of easily starting a fire, if your fuel is wet, damp or just not of high quality getting that fire going is going to be a major challenge.
Even if you know what you’re doing, carefully prepare your tinder and choose the right kindling, you may need more help. That’s where a good fire starter can come in handy.
Instead of forking over even more money for overpriced factory-produced ones, why not save some cash and make your own with common and probably free materials?
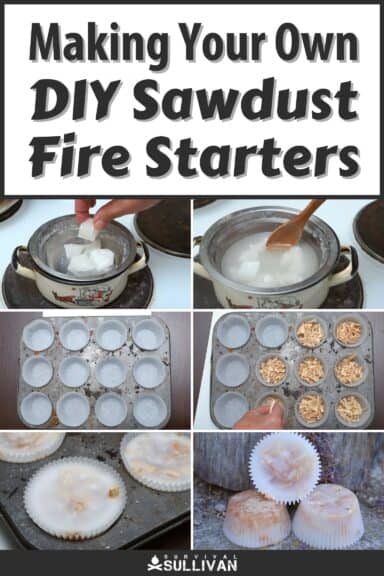
I’ll tell you how to make a tried-and-true classic using sawdust and wax below…
Table of Contents
Sometimes Tinder Alone is Not Enough
If you’re already skilled at building a fire, you might be wondering why you need these fire starters at all.
After all, if you have plenty of wood and prepare your tinder properly you should have a fire going in no time, right?
Yes, in theory: in reality, even if you’ve got the skills and the tools finding or preparing good tinder can be very difficult, even if you have plenty of fuel on hand.
Moisture can easily ruin even the best tinder materials.
This is where a reliable fire starter can help you “cheat,” in a way: a good one will light up in all conditions and burn slowly and steadily so that, no matter what, eventually your kindling and then your primary fuel will catch and burn.
I never go out without them, and you shouldn’t either. Now, with that recommendation out of the way let’s learn how to make them.
What You’ll Need
You need very little to make these effective and simple fire starters.
Chances are very good you’ve got all of the tools in your own home right now, and as for the materials, if you don’t have them a neighbor probably does or you can get them for pennies.
1. Sawdust
Sawdust has many uses, and in this case, is the primary ingredient and fuel of the fire starter. Nothing special here, pretty much any sawdust will do with a few exceptions.
Ideally, you want clean, dry and unadulterated sawdust. If you can, get some that isn’t from pressure-treated wood although that will still work.
Never use any sawdust that has been used to clean up oil or fuel spills!
2. Wax
wax is the binder that will hold the sawdust together and also moderate the burn time, along with providing a little bit of fuel itself.
Paraffin wax is ideal, but you can use any common candle wax, including palm wax, and beeswax.
This is the perfect opportunity to collect and reuse all of those leftover stumps of scented candles or scrape out the dregs of tea lights that you burned one time and then forgot about.
3. Muffin Tin (or similar molds)
I found that the ideal size and shape of these fire starters is about the same size as a common muffin tin, although you can use any heatproof vessel of a similar size and arrangement as a mold.
I also like using a muffin tin because it allows me to make many fire starters at one time, and then I’m usually set for the season.
Whatever the case, don’t use one that you actually use to bake muffins with.
4. Paper Muffin Cups/Parchment Paper
You’ll use paper muffin cups in the same way that you would if you were making actual muffins.
This prevents your fire starters from sticking to the mold and forcing you to scrape them out, probably ruining them.
Alternately, use parchment paper in place of the muffin cups, and also to wrap up and secure your finished product for transport so it doesn’t make a mess in your pack.
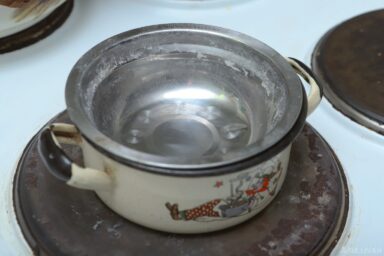
5. Double Boiler
You’ll need a double boiler or similar improvised arrangement to slowly and thoroughly melt all of the wax you’ll be using for the fire starters.
A genuine double boiler or wax melter works best, but if you don’t have that you can improvise one from a smaller pot in a large pot of boiling water, or even something like a large tin can.
6. Wooden Spoon/Butter Knife
Or any other non-marring tool to help you coax the cooled fire starters out of your muffin tin. They have a tendency to get stuck even with the muffin cups!
7. Sharp Knife
A sturdy knife or hobby saw is helpful for cutting up the wax to help it melt more quickly and evenly, and also for trimming your fire starters if needed.
8. Freezer (optional)
if you have an old freezer, or if you can make some room in your current freezer for the muffin tin, chilling your poured fire starters will help them firm up much quicker than leaving them at room temperature.
And that’s it! I told you they were simple. Now, let’s get down to the business of putting these things together.
Caution: Practice Good Fire Safety at All Times!
Before we get to the step-by-step, just a reminder that you should practice good fire safety at all times.
Sawdust and wax, whatever kind you’re using, can both burn, and you’re going to be working near the stove top or some other hot surface.
Pay attention, take no chances, and keep a fire extinguisher handy.
Making Sawdust Fire Starters, Step by Step
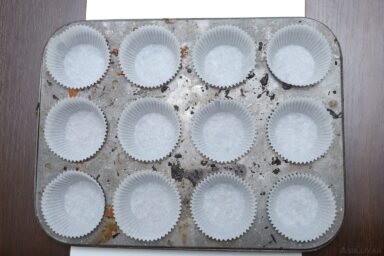
Step 1. Line Muffin Tin With Muffin Cups
Place the muffin cups or pre-cut parchment paper into each muffin tin.
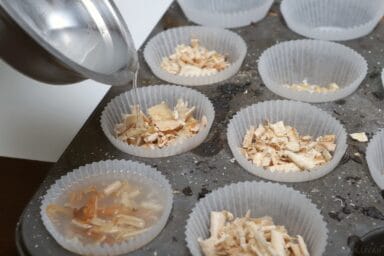
Step 2. Pour Sawdust Into Muffin Cups
You want to fill up each muffin cup until it’s a third to halfway full.
Do not fill them all the way up, as you’ve got to leave some room for the wax and if they overflow, you’re going to have a mess to clean up and waste material.

Step 3. Cut Up Wax
Gather all of your collected wax for the project. Use your knife or hobby saw to chop it up into cubes there anywhere from ¾ inch to 1 inch wide.
This step isn’t strictly necessary, but it will ensure more even and quicker melting.

Step 4. Heat Water
If you’re using a double boiler, get the water in the larger chamber going at a rolling boil.
If you’re using an improvised variation with a smaller pot or some other vessel, I like to keep the water at a simmer for best results.
If using an improvised version for melting the wax, go on and get the other pot preheating.
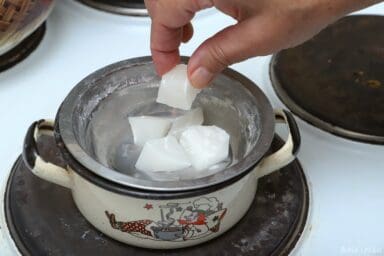
Step 5. Add Wax Cubes to Pot
Load your wax cubes into the pot a little bit at a time. Make sure you don’t overload it; half-full is best.
Step 6. Stir Wax
Using an old and sacrificial wooden spoon or other utensil, keep the wax turning so it starts to melt evenly. When the wax is starting to really melt, stir it periodically.

Step 7. Keep Stirring
You want to keep stirring the wax periodically so it doesn’t burn and also so it melts and blends completely together.
This should be a slow process, don’t try to rush it. If you do, the wax will burn and you’ll mess things up.
Step 8. Pour Wax Into Muffin Cups
When the wax is completely melted and blended together, carefully take it off of the heat and move to your muffin tin.
Being careful not to spill it around the edges or sides of the cups, pour the wax into each mold until it is nearly to the top.
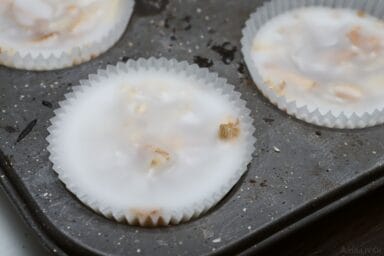
Step 9. Cool
With the wax poured, either set the tin aside carefully and let it firm up at room temperature, a process that will take a couple of hours.
If you have space in your freezer, pop the tin into the freezer for about an hour and they should be completely solid.
Step 10. Remove Fire Starters
Your fire starters are now complete. Carefully tug on the edges of the muffin cups, and they should pop right out.
If they don’t, carefully pry around one edge with a hard rubber or plastic tool to break them free. If you don’t care about the muffin tin, you can use a butter knife.

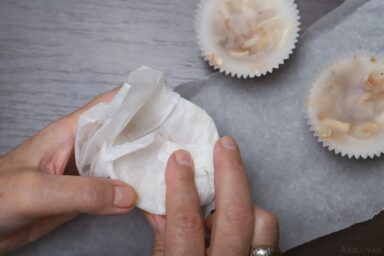
Step 11. Wrap
Peel off those cups and then wrap your newly minted fire starters in parchment paper to keep them safe and protect your gear when you have them stashed. Hold them shut with a little piece of tape.
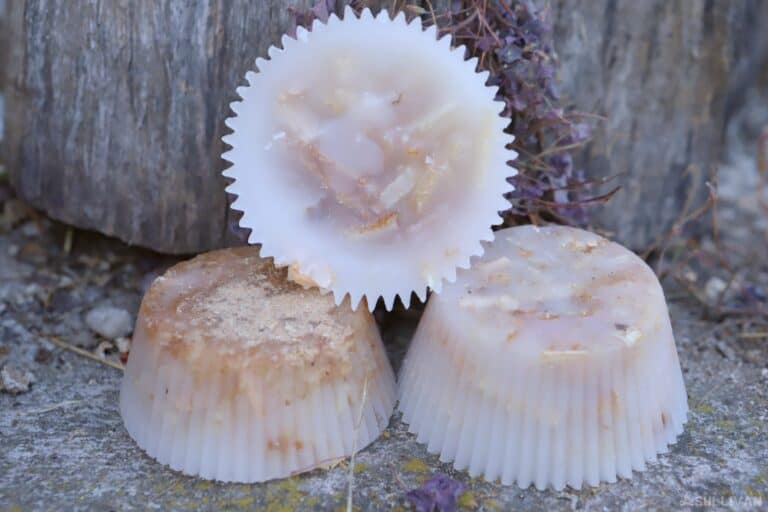
Step 12. Finished!
Your fire starters are ready for use and will keep like this for a long time.
However, because they contain wax, you should make it a point to keep them safe from high temperatures.
If you leave them in your car on a hot summer day, they can turn into a runny mess.
And that’s it. To light one of your fire starters, simply hold a match next to it or a flame from your lighter and it should light up and burn steadily in just a few seconds.
Assuming you have all the supplies and materials on hand, these are super simple and reasonably quick to put together.
As long as you’ve got a steady supply of wax and sawdust you’ll never have to buy fire starters again.
Helpful Tips
- If you’re having a tough time getting one of your fire starters going, take your knife or another metal tool and scrape away some of the wax to reveal more sawdust.
- It is possible to light one of these fire starters using a ferro rod or similar tool. I like to scrape some of the wax off of the widest side, and then make a shallow depression to help catch the sparks. A few strokes should do it!
- Don’t panic if your fire starters melt somehow. If they’re a little runny, you can pour them into any convenient tin or mold to allow them to reset. Or, drop them inside a Ziploc bag while still in the wrapper, seal the bag, and then dunk the bag in water to firm them up quickly.

Tom Marlowe practically grew up with a gun in his hand, and has held all kinds of jobs in the gun industry: range safety, sales, instruction and consulting, Tom has the experience to help civilian shooters figure out what will work best for them.
One can also use the ‘cardboard’ egg boxes to hold the saw dust & pour the the wax over the saw dust & allow it to soak the container cup. The cardboard then acts as a wick. Store them in ‘ziplock’ bags.