Every prepper loves paracord. It has many lifesaving and utilitarian applications, and one of the most common, and least appreciated, is for zipper pulls.
If you’ve ever dealt with a broken pull, you know that that aggravation will add up fast. Paracord is strong enough that you won’t have to worry about your pull snapping off or coming undone.
And your backpacks, clothing and other gear does not have to be equipped with it from the factory, either.
It is easy to make your own DIY paracord zipper pulls and a variety of styles using just a few cents worth of cord.
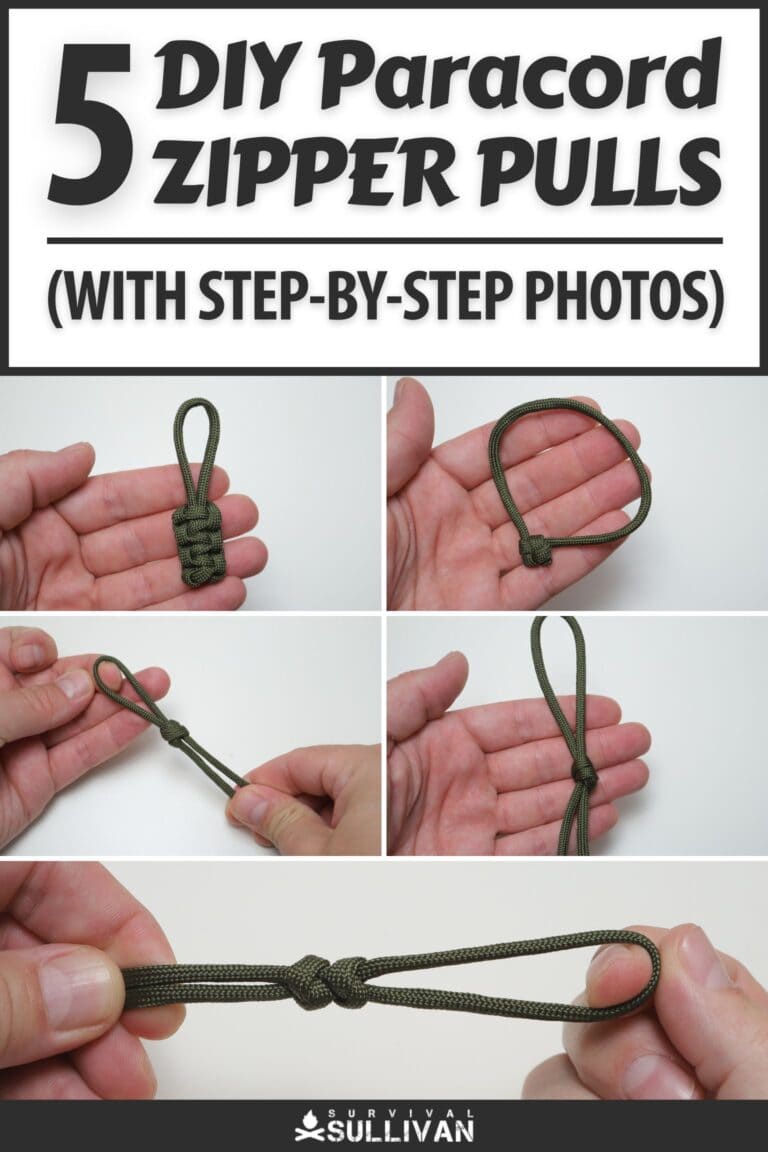
Today I’m bringing you five of my favorite zipper pull designs with intricate, step-by-step photographs for each.
Grab your lighter, scissors and cord, and let’s get going!
Table of Contents
1. Cobra Knot Zipper Pull
One of the most popular, and fairly complex, paracord knots. This one’s a mainstay of belts, bracelets, key fobs, and of course zipper pulls.
It has even been used to make rifle slings! Nonetheless, it’s simple enough to make to any length you desire.
Just remember that the length of the knot will climb closer and closer towards the closed end of the loop, not away from it.
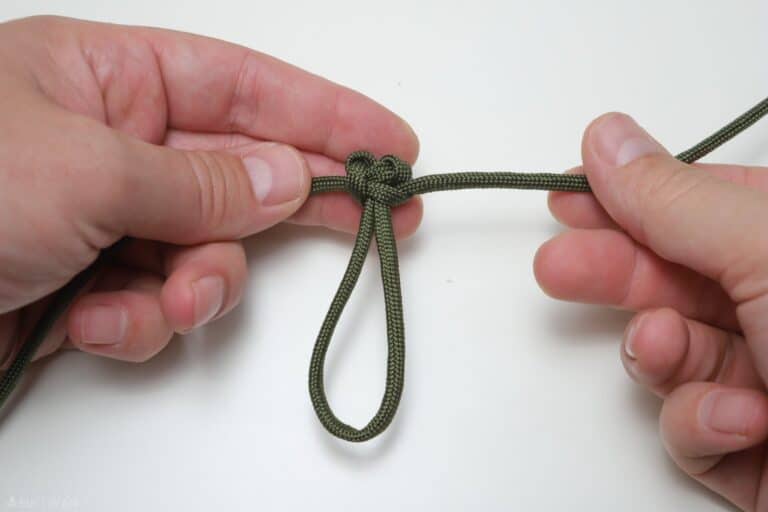
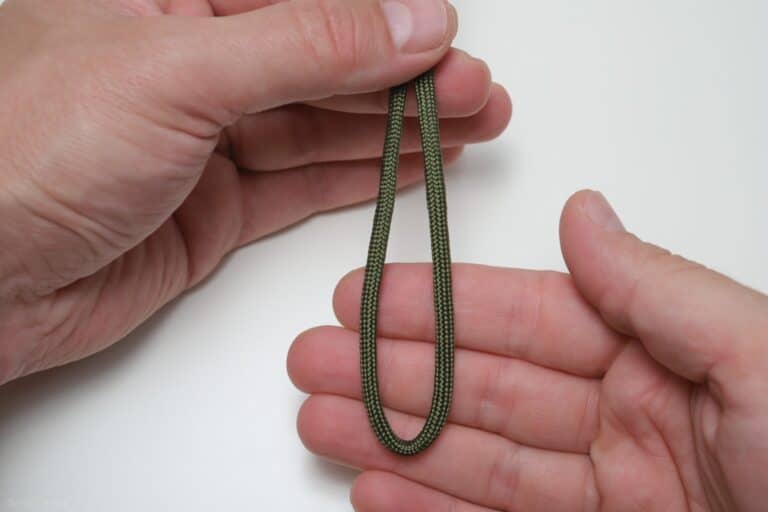
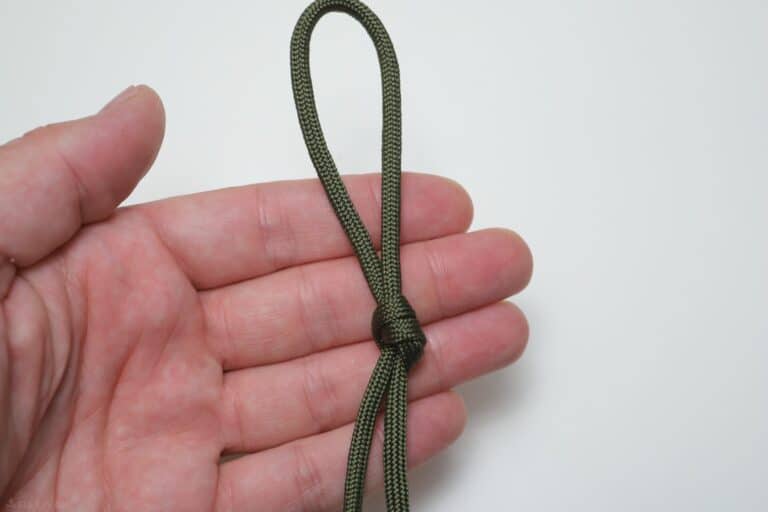
Step 1: Create a loop out of a length of a paracord with the free ends pointing away from you in your hand.
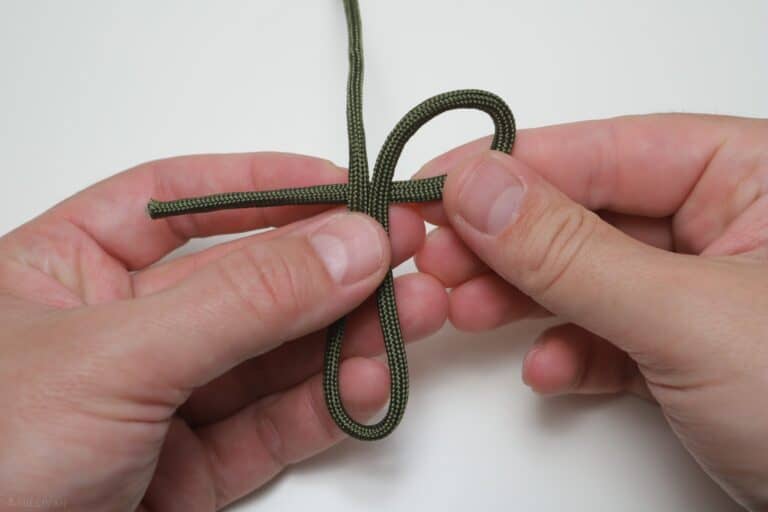
Step 2: Taking the right strand, create a clockwise loop and pass the free end of the strand behind the left strand.
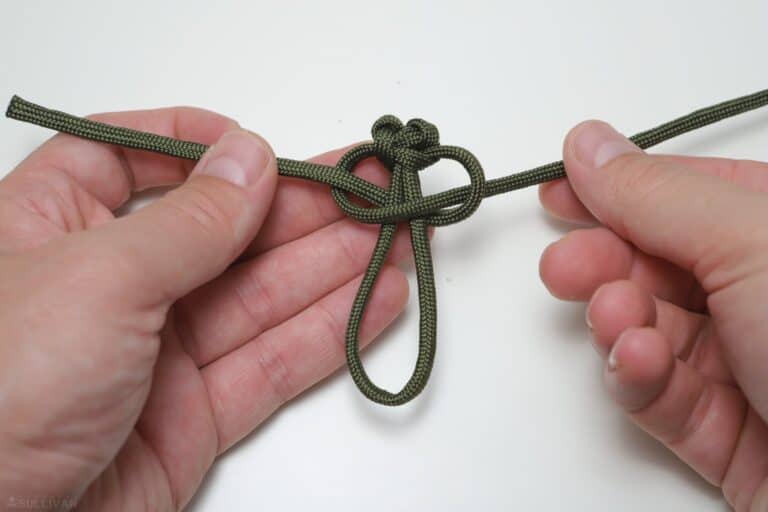
Step 3: Now take your left strand and create a counterclockwise loop passing that behind and beneath the free end of the right strand.
The free end of the left strand should cross in front of the standing strands. Look closely at the picture for reference.

Step 4: Continuing on with the left-hand strand, pass it through the loop you formed with the right strand before from above.
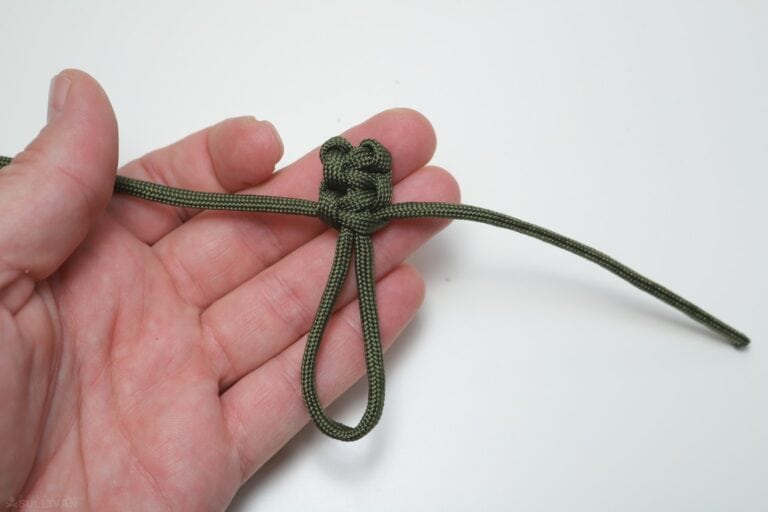
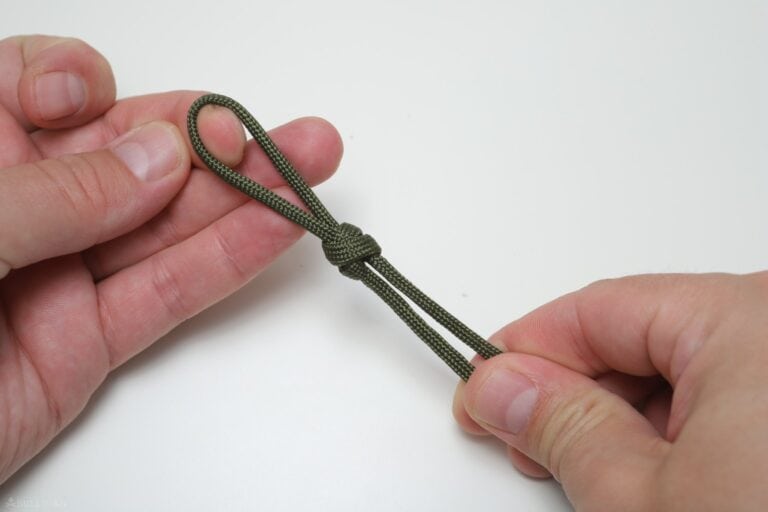
Step 5: Pull on both working ends of the left and right strands to tighten this initial knot. This is the first link in the cobra knot.
We will repeat the process, continuing downward towards the bend in our cordage to complete it.
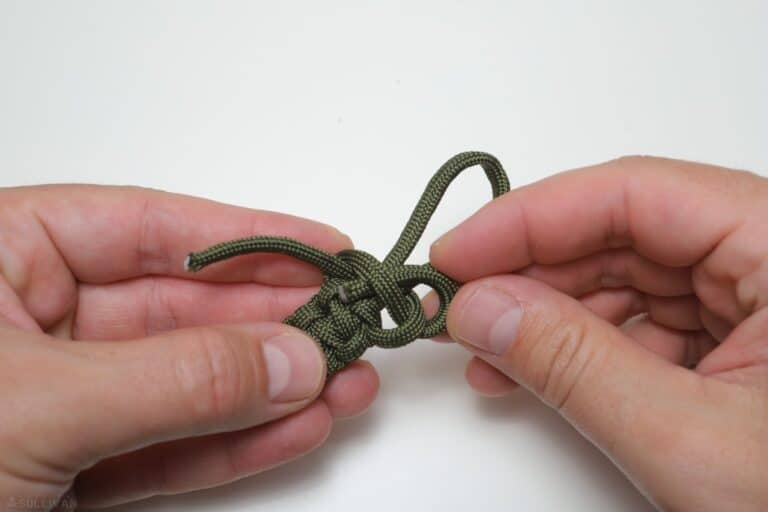
Step 6: Now take the free end on the right and curl it back towards the left side, keeping it in front of the standing part of the knot.
Step 7: Holding the right end in place, curl the left end beneath and then behind the knot you formed previously, putting that end through the loop you just formed.
Step 8: You should now have two mirror image knots on either side. Look at the picture for details and this will make more sense.

Step 9: Stabilize the central structure of the knot and then pull on both working ends to tighten these loops down and form the next link in the cobra knot.
Step 10: Now repeat the process, beginning with the working end on the left this time and crossing it in front of the standing part of the cord.
Curl the right side working side over top and then beneath into the other side through the loop as before. See picture for detail.
Step 11: Tighten both of these loops as before. Repeat this process, alternating which side goes in front each time until you have reached your desired length of zipper pull.
Step 12: When you are happy with the length of the cobra knot, you will finish and finalize it by tucking the loop that goes in front back under itself in a sort of half-knot or lashing before tightening down.
Step 13: Take the time to fully tighten and dress the knot. Once done, you should have two leftover tails (the working ends) sticking out on the same side.
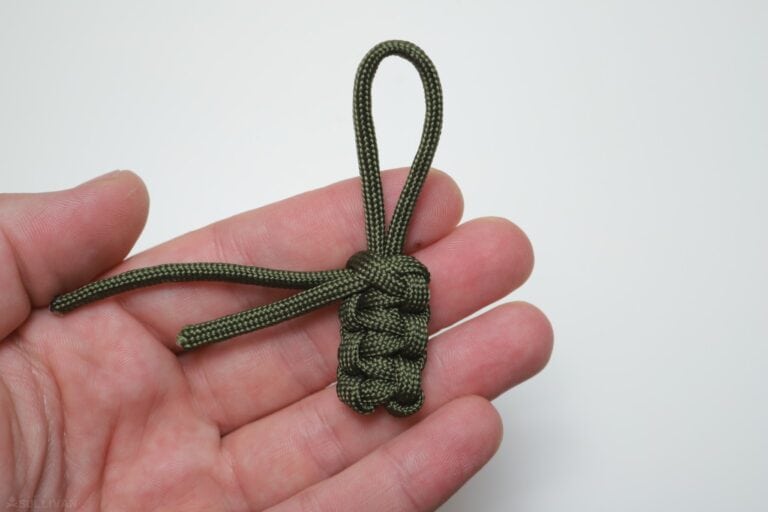
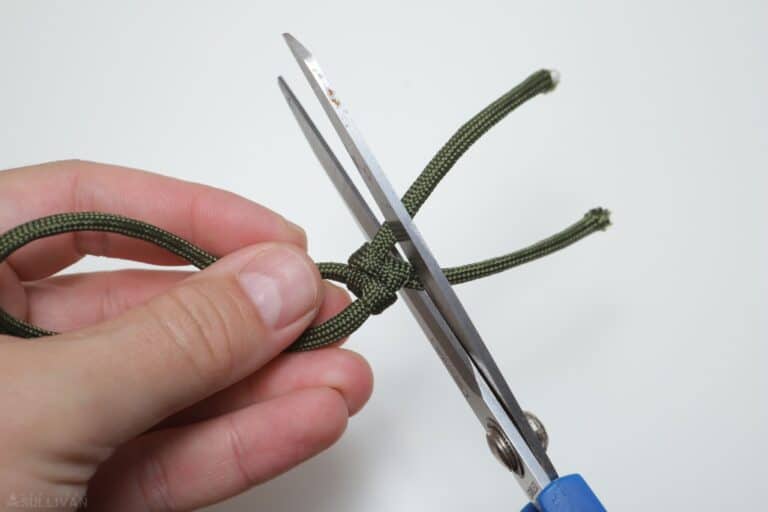
Step 14: Trim off both working ends with sharp scissors, leaving about an eighth of an inch protruding from the cobra knot.
Step 15: Melt the ends of the paracord to prevent fraying and flatten them with a metal object to lock the knot down and prevent loosening. You’re finished!
The cobra knot is versatile, attractive and durable and provides a great gripping surface if you wear gloves regularly.
However, you might need to tie it in situ on your zipper unless you want a very long loop because it is difficult to hitch it on once it has been tied owing to its bulk.
2. Cross Knot Zipper Pull
The cross knot is small, durable and classy, and is a great all-purpose zipper pull that’s perfect on backpacks or clothing.
It’s also quite simple to tie quickly with just a little bit of practice, making it a great, improved field expedient knot if you lose one of your pulls.
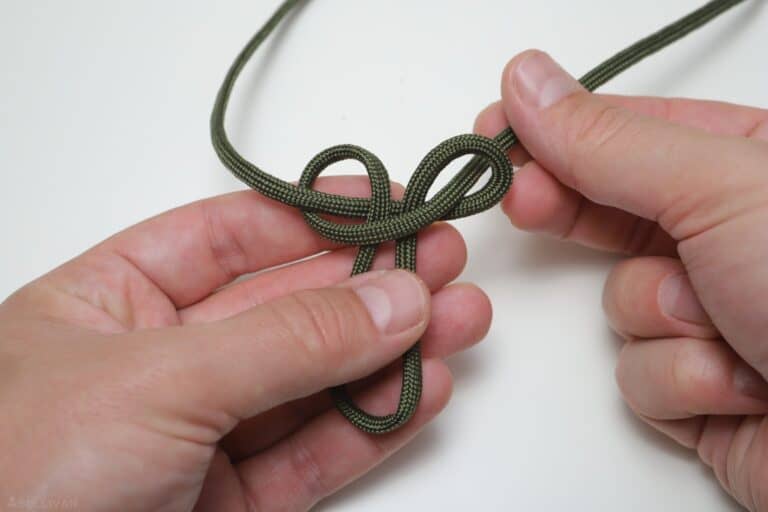
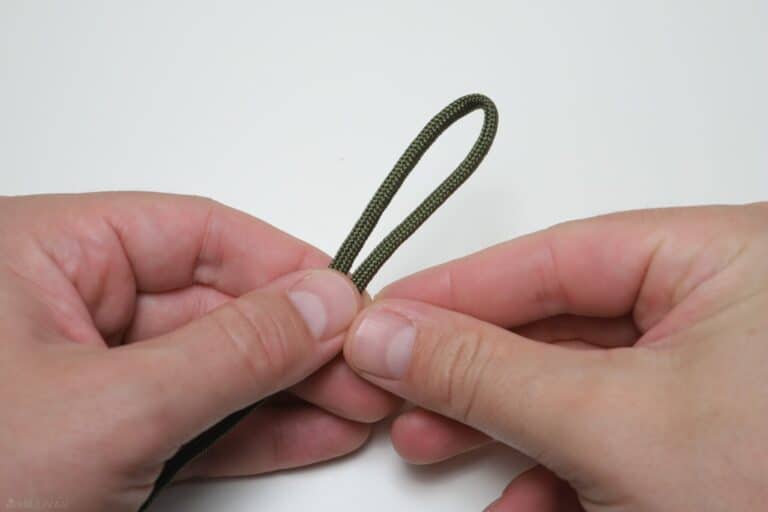
Step 1: Start with a single strand of paracord with the working end pointing away from you in your hand.
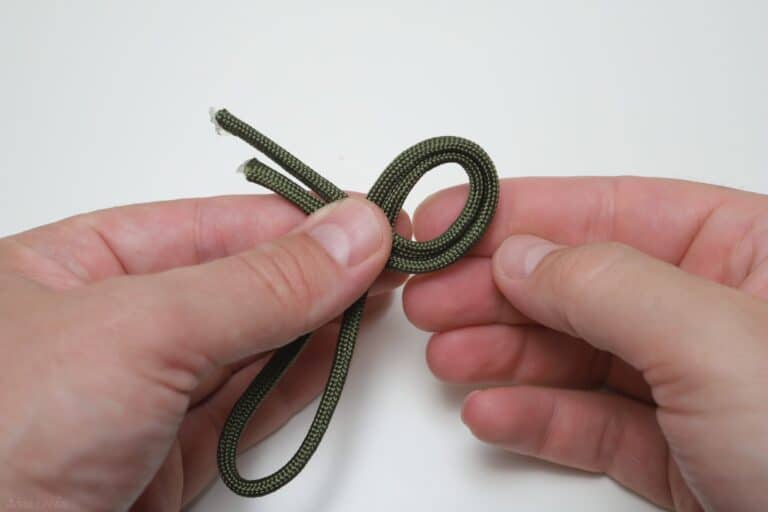
Make a clockwise loop to the right passing the working end beneath for the standing end and then make another loop crossing over the top back to the right.
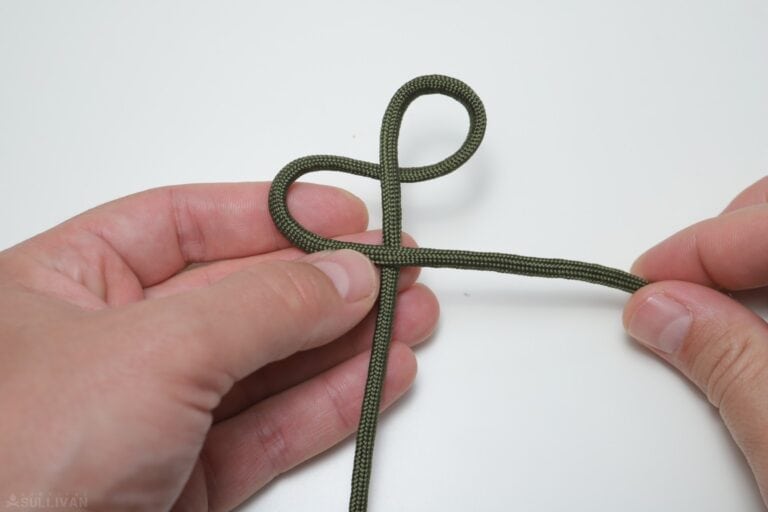
Step 2: Make another clockwise loop passing the working end underneath the standing part and back to the left.
You should have a roughly proportional s-shape with a loop at the top at this point. See picture for details.
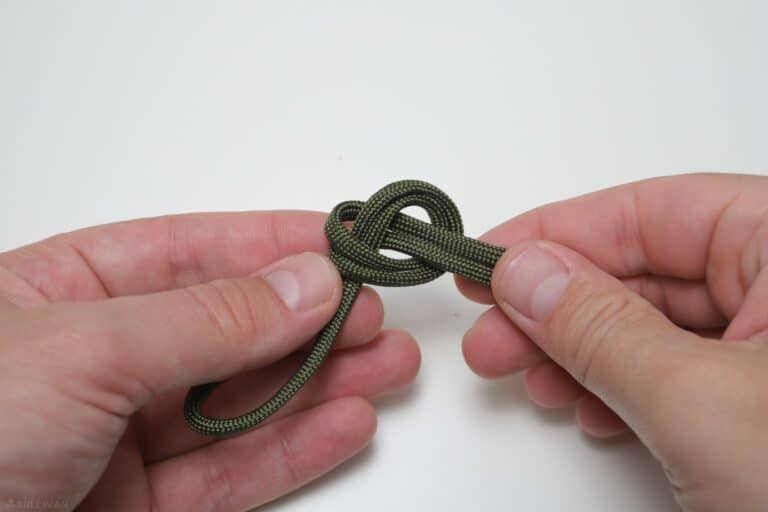
Step 3: Now bring the opposite free end of the cord beneath the loops you made and pass it through the first loop at the top from beneath.
Take care to keep the existing structure of the knot intact and stable by pinching the other working end in place where it crosses.
Step 4: Continuing on, bring the working end through the loop at the bottom on the right side of the standing part from above.
Step 5: Now holding both free ends between your thumb and forefinger, pull on the uppermost loop in the opposite direction. This will begin to collapse and tighten the knot.

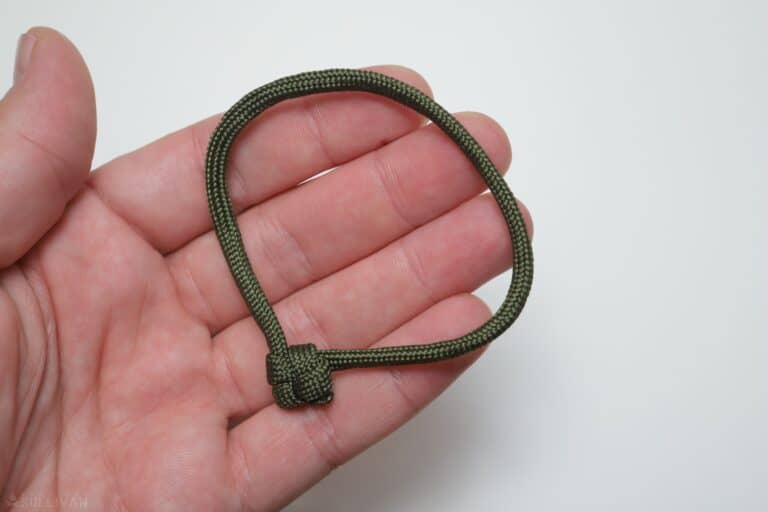
Step 6: Your knot is now formed with a loop that’s ready to attach. You should have two lengthy tails left over sticking out opposite the knot.
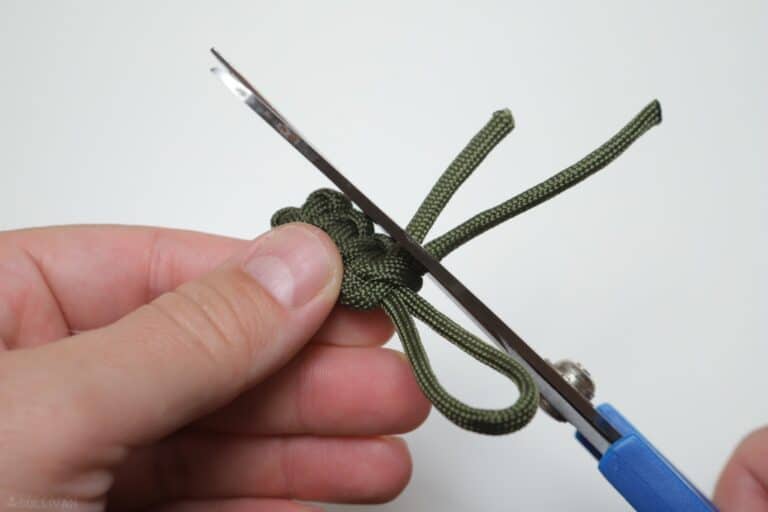
Step 7: Cut off the tails close to the knot with sharp scissors, leaving about an eighth of an inch of cord sticking out.
Step 8: Melt the ends to prevent fraying, and then press them flat with any convenient metal tool to lock and secure the knot.
Once you get good at tying the cross knot zipper pull quickly, it almost comes together like a magic trick.
This is one of the best knots if you like a larger open loop for any application, though you might need to practice tying it a couple of times so you can better anticipate how large your loop will be.
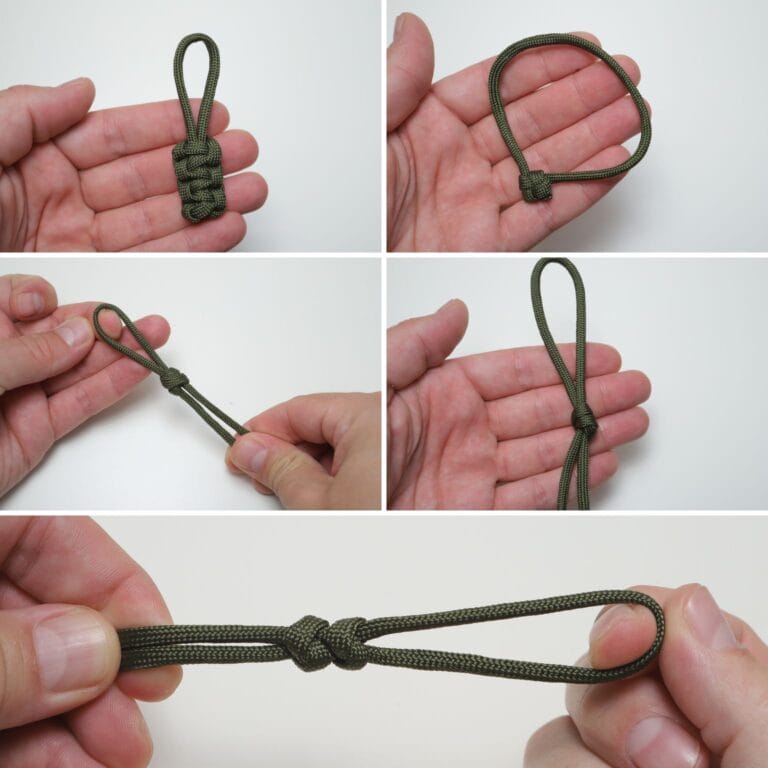
3. Matthew Walker Knot Zipper Pull
The Matthew Walker knot is tidy, compact and attractive, and is a great alternative to the cobra knot above if you prefer a sturdy but tactile knot that isn’t as bulky and prone to snag.
It looks a little intimidating at first glance, but it’s surprisingly simple and elegant to tie since you’re just making multiple passes through the same set of loops.
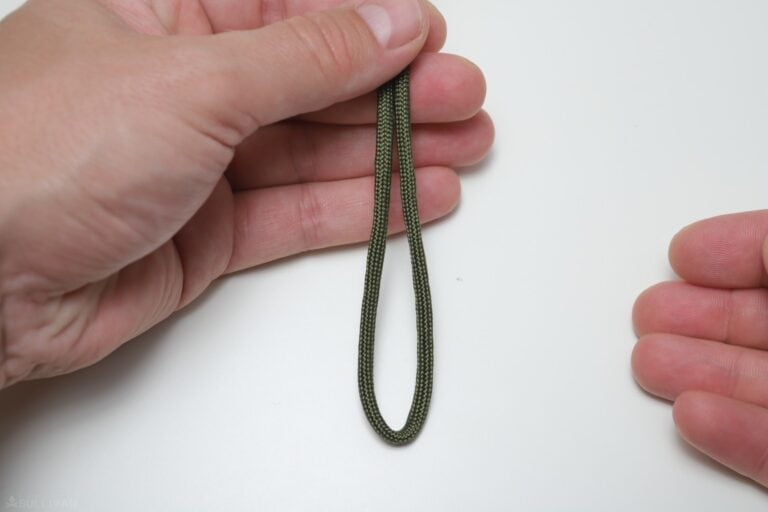
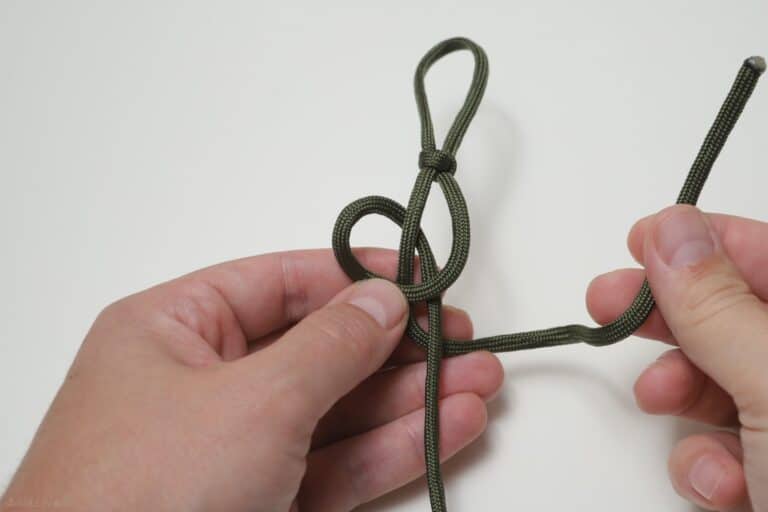
Step 1: Make a loop with your cord, both working ends pointing directly away from you.
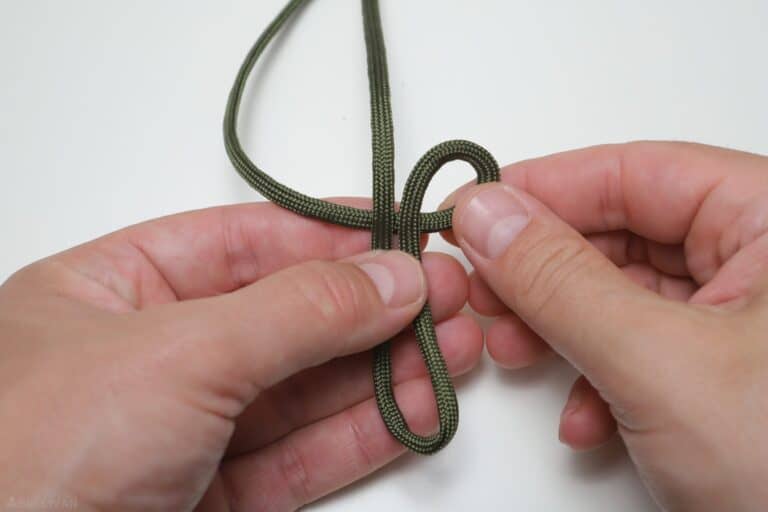
Step 2: With the right side, make a clockwise loop passing the working end beneath both standing parts, pointing to the left.
Step 3: Now take the left side and make a counterclockwise loop, passing it beneath the working end you just finished with and crossing over both standing parts on top.
Step 4: Continuing on, pass the working end through the right hand loop from above. Check the picture, as both sides should basically be mirror images of each other.
Step 5: Continuing on with the working end you just finished with, pass it through the loop on the left from beneath. Look closely at the picture for reference.
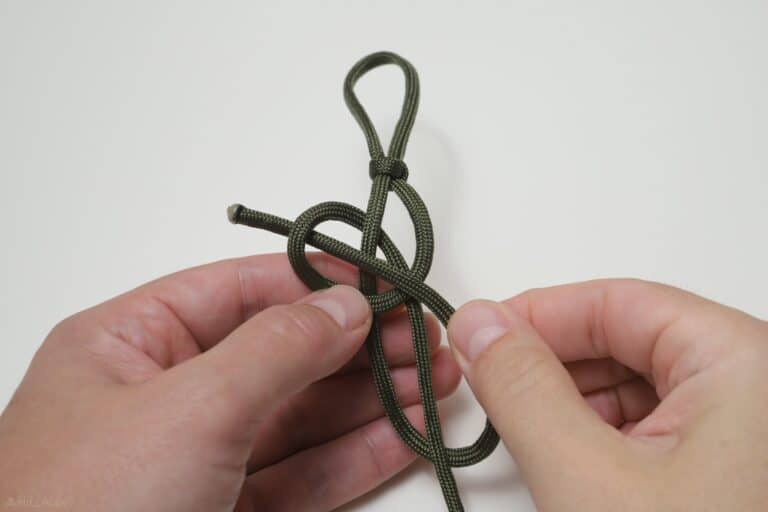
Step 6: Now take the working end on the opposite side and curl it in front of the knot passing it through the loop on the right from above.

Step 7: Holding the loop at the bottom, pull on both working ends steadily to start setting the knot. Take your time, and dress the night if needed to keep it symmetrical.
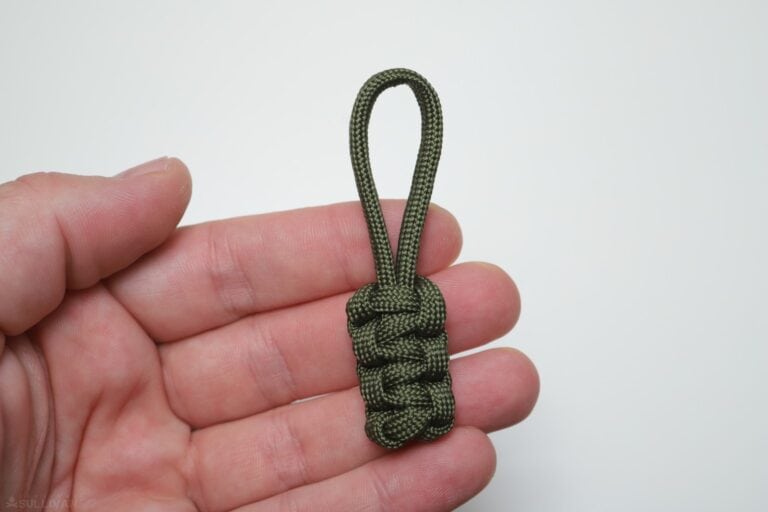
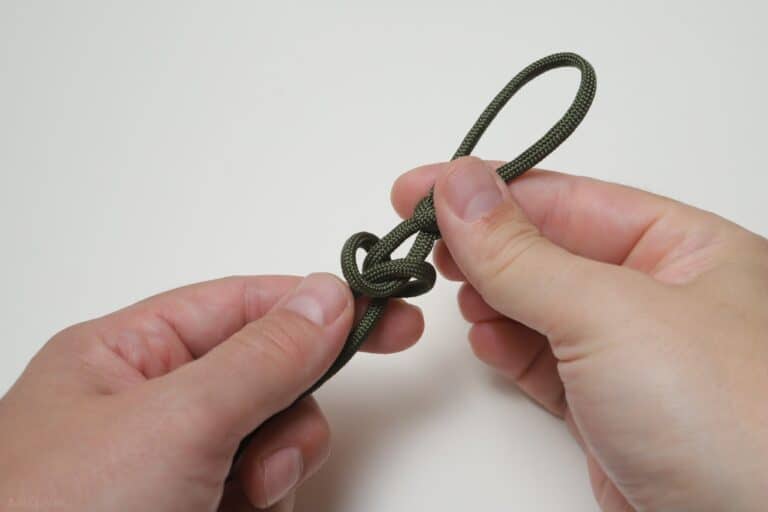
Step 8: You are finished. If desired you can cut off or shorten the tails but with this knot they don’t really get in the way. Remember to melt and flatten your ends if you do shorten.
This is one of my favorite zipper pull knots around, as I think it offers an ideal combination of tactility, security and strength without being prone to snagging.
It is also easy to hitch on if you want to tie a batch and put them on later. Something else to keep in mind is that you can repeat this knot similarly to the cobra knot above if you want to lengthen the pull.
4. Overhand Knot Zipper Pull
Probably the simplest knot around, and certainly the simplest zipper pole you can make with paracord, the overhand knot is nonetheless useful and surprisingly strong.
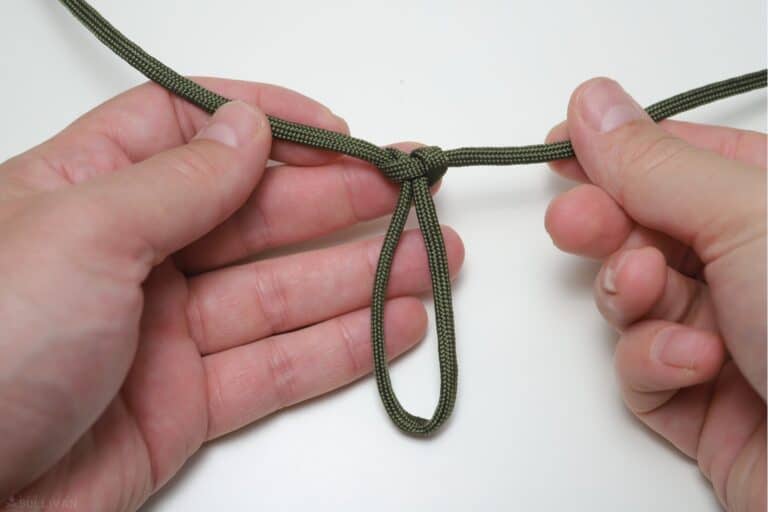
Step 1: Make a loop with a length of paracord.
Step 2: Keeping both working ends together, make a clockwise loop over the standing parts of the cord.
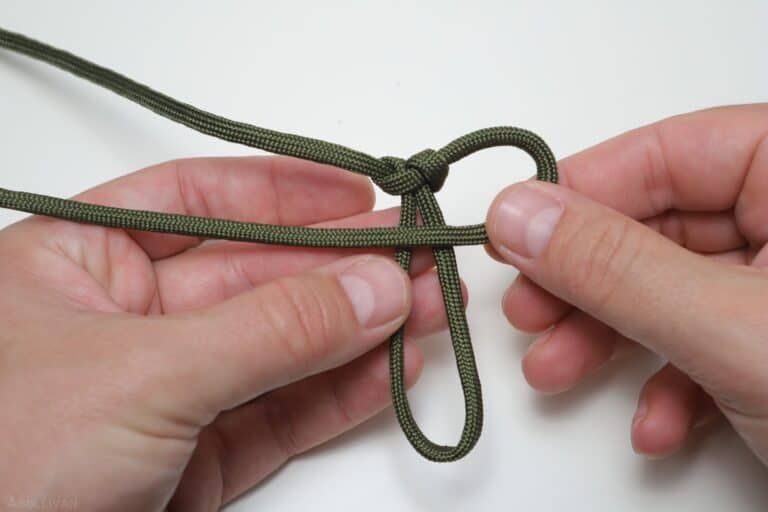
Step 3: Now simply turn both working ends beneath the standing parts and through the loop you just made from below.
Step 4: Pull both working ends and the loop formed by the standing parts to tighten the knot.
You can cut down the tails and melt the ends if you want, but be careful to lock the knot down if you want to cut it close.
And that’s all there is to it. I told you it was simple. This is a great pull to tie in a hurry or if you just don’t care about aesthetics.
However, it doesn’t offer much security if you are working with numbed fingers or gloved hands, so it’s worth making a more intricate knot if you think you’ll be dealing with either of those conditions…
5. Snake Knot Zipper Pull
The snake knot is one of my very favorite zipper pull knots, and decorative knots in general.
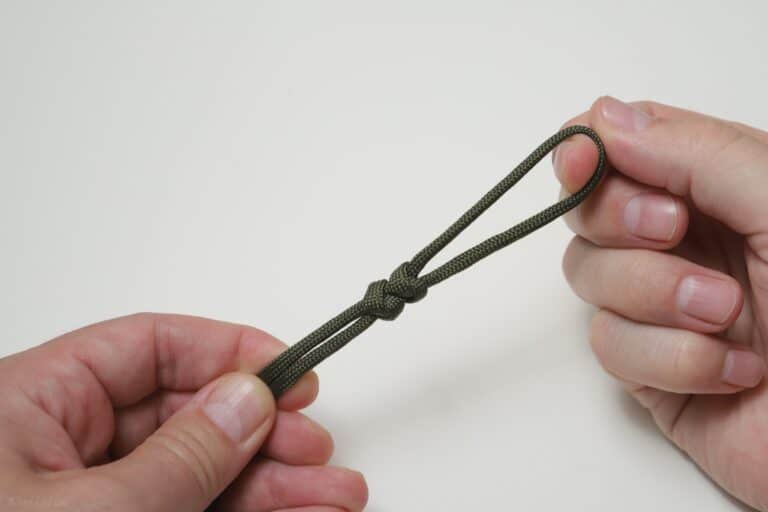
Like the name suggests, it resembles the body of a snake, or perhaps some other scaled pattern.
It’s low profile, resistant to snagging, and offers good traction. You can also repeat the knot over and over to make a pull of any length that you desire.
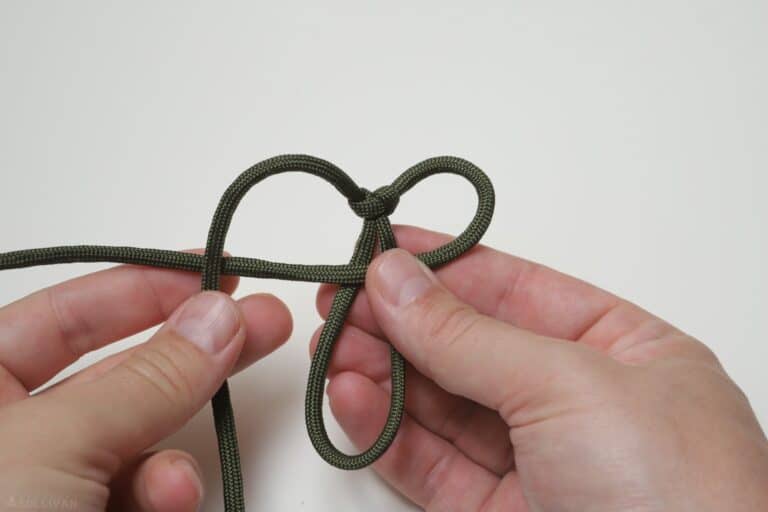
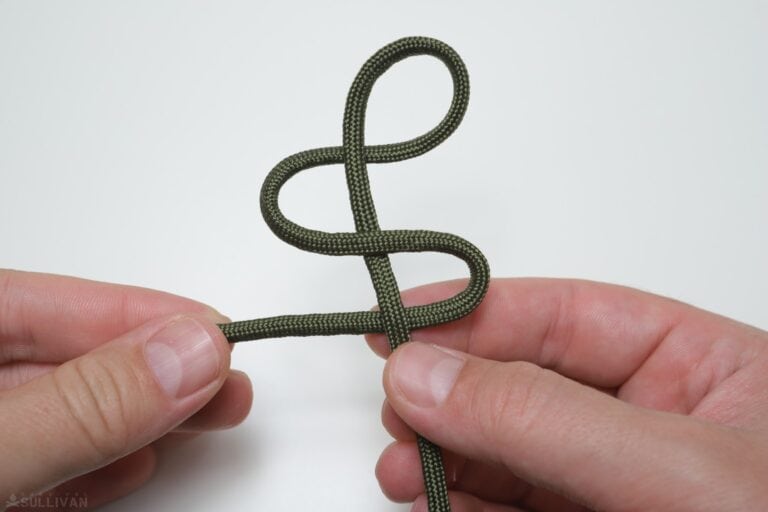
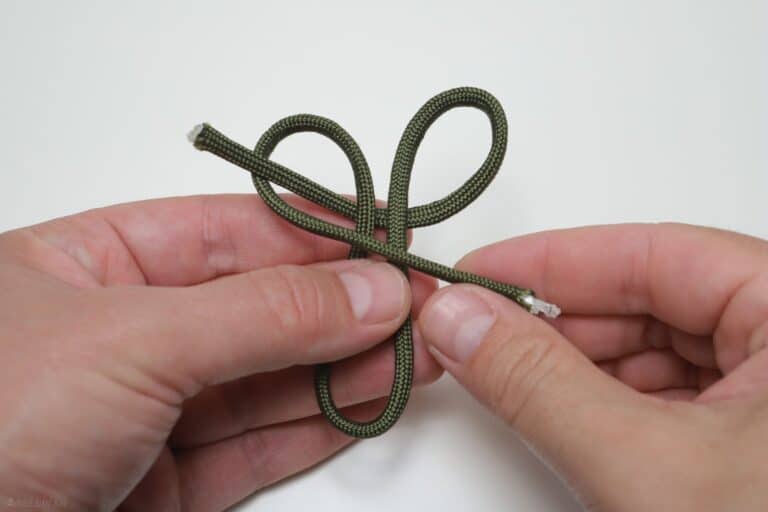
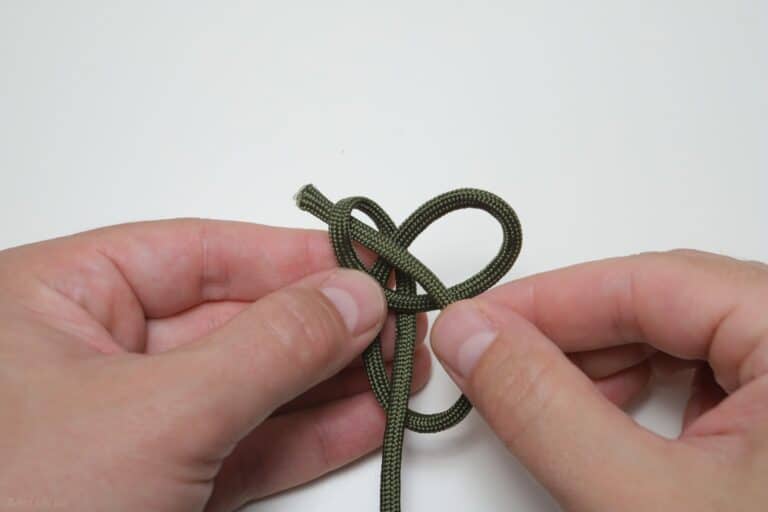
Step 1: Make a clockwise loop with your cord, facing away from you. Pass the right side to the left on top of the standing part.
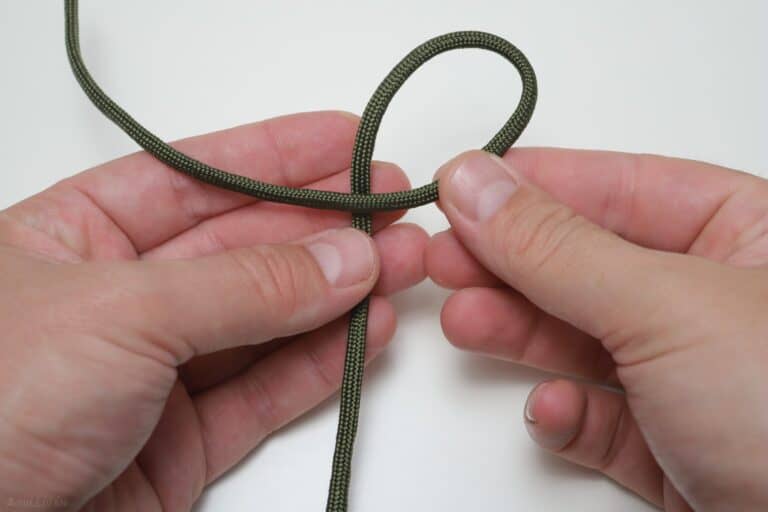
Step 2: Continuing on, make a smaller loop bringing the working end back around beneath the standing part you just passed. The working end should be parallel with the standing end.
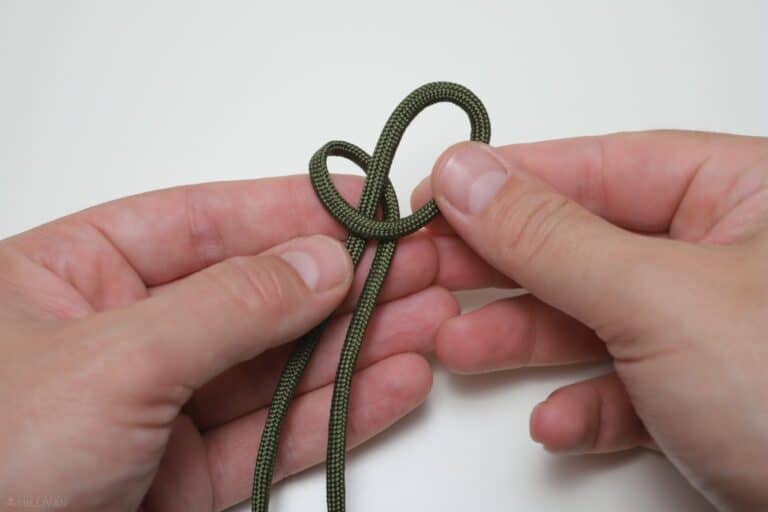
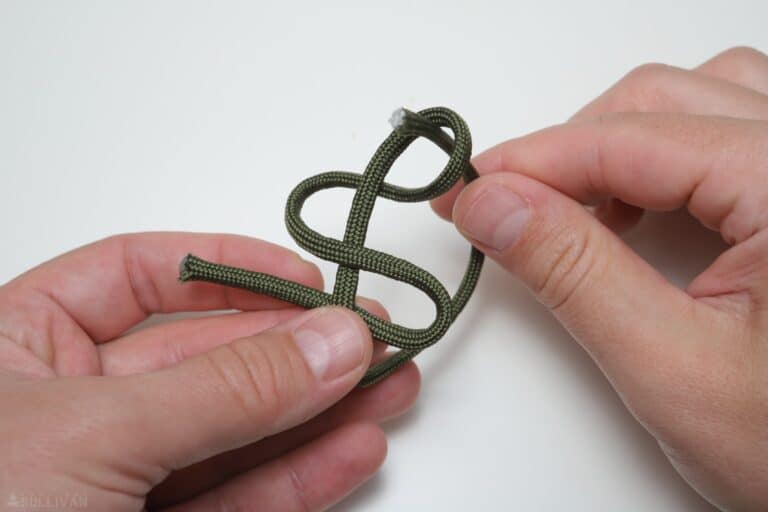
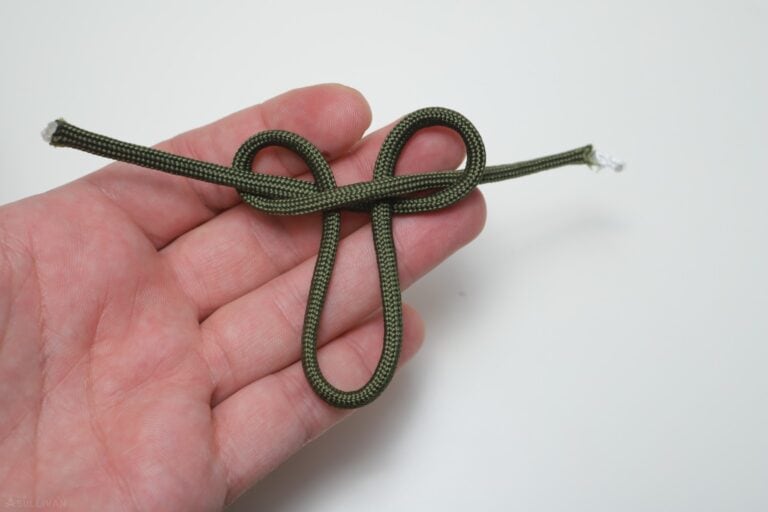
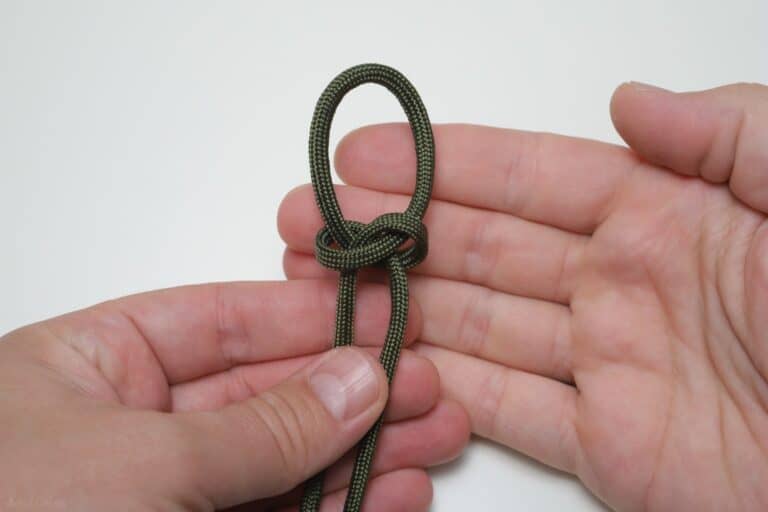
Step 3: Now take the standing end and bring it around to the right beneath the end that you just finished with.
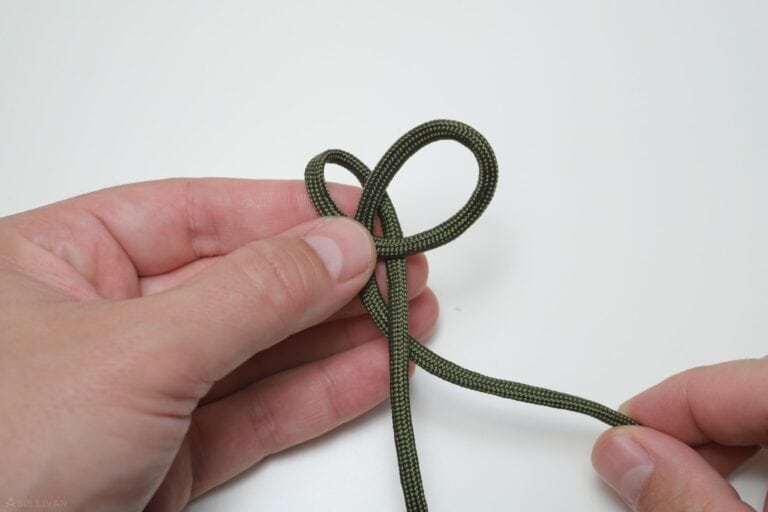
Step 4: Continuing on, bring that working end up over top and pass it through the loop on the left from above.
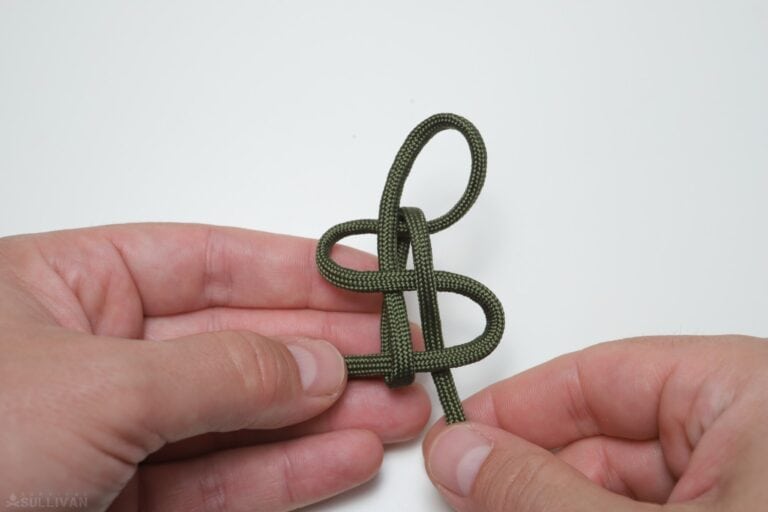
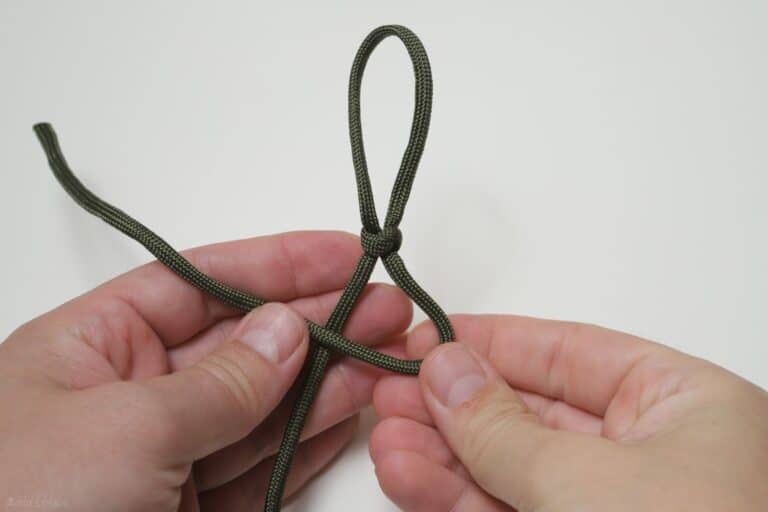
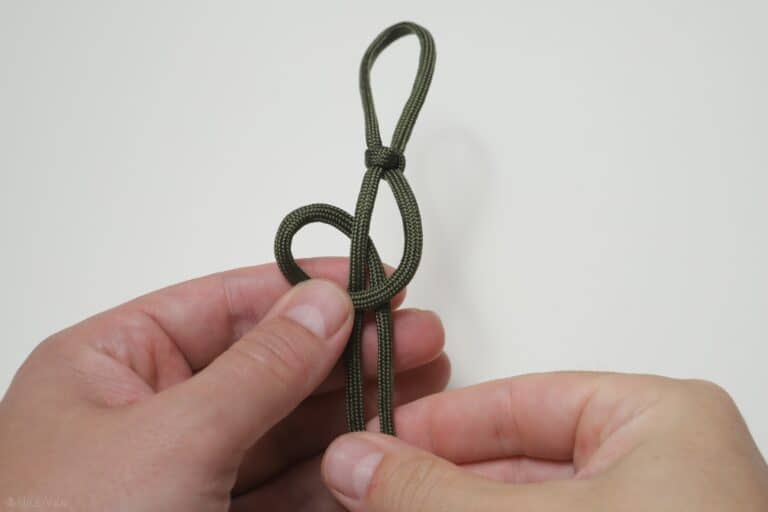
Step 5: Both ends should be parallel as you tighten the knot which resembles a figure eight beneath the loop you formed in the beginning.
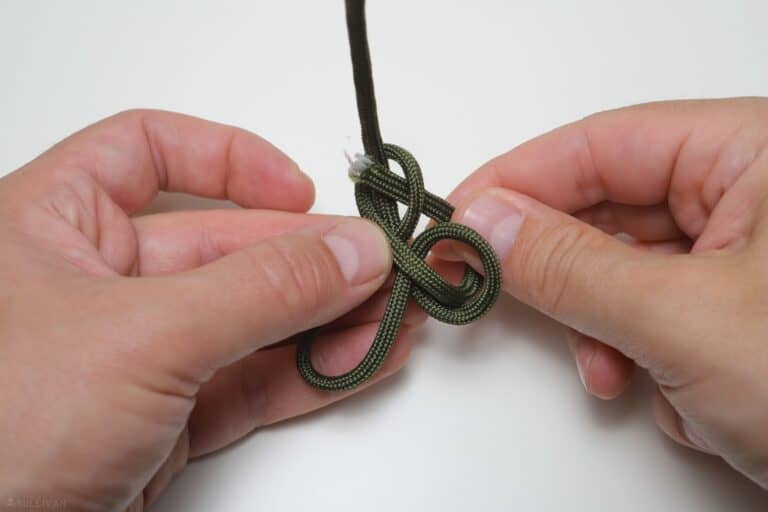
Step 6: Now all you need to do is repeat the process again and again to lengthen your pull. Pass the right side over the left on top.
Step 7: Continuing on, form a loop by bringing it back around beneath the standing part leaving it parallel with the opposite side.
Step 8: Taking the standing part now bring it to the right beneath the part of the cord you just finished with.
Step 9: Bring it over top and then through the loop on the left from above as before.
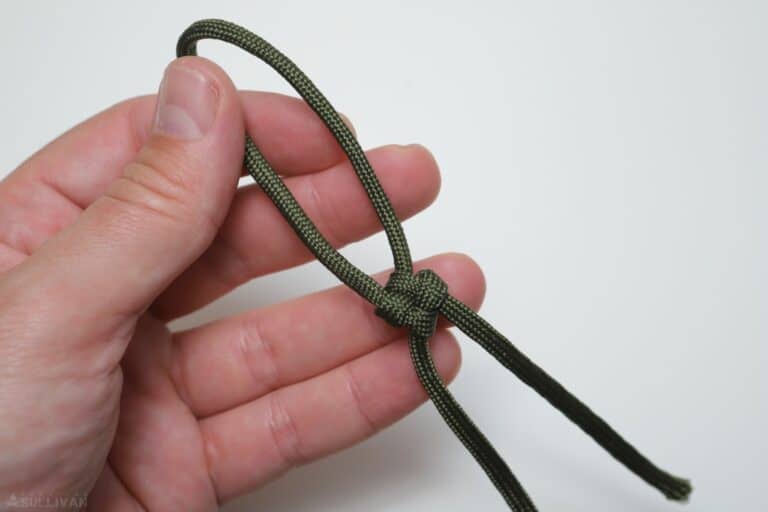
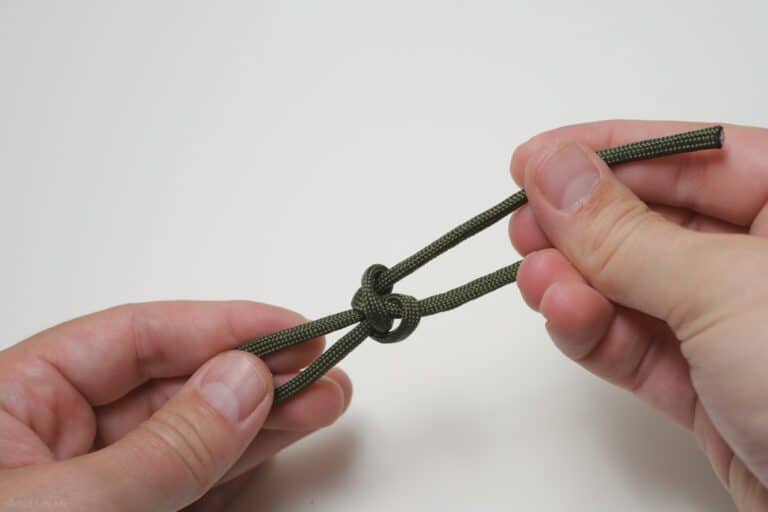
Step 10: Dress and tighten these loops to form another link in the snake knot.
Step 11: If you want to stop here, you’re finished. Trim the free ends as desired. Otherwise repeat steps 6 through 10 again and again until you have reached the desired length.
And that’s it. The snake knot is a little deceptive because it really isn’t as difficult as it looks, and the only place you’re going to get tripped up is when it’s time to switch the working ends.
It is one of my favorite knots as I mentioned, because of its ideal combination of low profile and grip. Give it a try and I’m sure you’ll like it.

Tom Marlowe practically grew up with a gun in his hand, and has held all kinds of jobs in the gun industry: range safety, sales, instruction and consulting, Tom has the experience to help civilian shooters figure out what will work best for them.
Snake knot for my keychain !!
Thanks, an informative little post, BUT item 4 “overhand knot”, should be a “figure 8 knot”, more secure, just as easy to tie. easier to untie, and more pleasing to the eye.
Best regards,
Chas.
This is very helpful but lighter colored paracord would be easier to see in the pictures.
The background is white so lighter-colored paracord would be harder to see..