Paracord is a mainstay item for preppers, hunters, outdoorsmen, EMS, police officers, soldiers, and anyone else who needs to get things done in the field or just outside.
Paracord is always a great thing to have with you, but it’s not always convenient to carry a significant quantity. That is, unless you wear it in the form of a bracelet!
Paracord bracelets have turned into an industry unto themselves, and you’ll regularly see folks selling a few cents of paracord for $20 or more!
I think that’s crazy, and it’s incredibly easy to make your own customized bracelet using whatever pair of cords you might have handy and a simple buckle you can get anywhere.
Keep reading, and I’ll give you a step-by-step guide…
First, you’ll need to measure your paracord. To do that, measure the circumference of your wrist. You’ll want one foot of paracord for each inch of circumference, plus one extra foot.
As an example if your wrist is 8 inches in diameter, you’ll need 9 feet of paracord.
The other thing you will need is a standard paracord bracelet buckle, cheaply available from most places where paracord is sold, some scissors or a sharp knife and a lighter. That’s it! Now, let’s get to the steps.
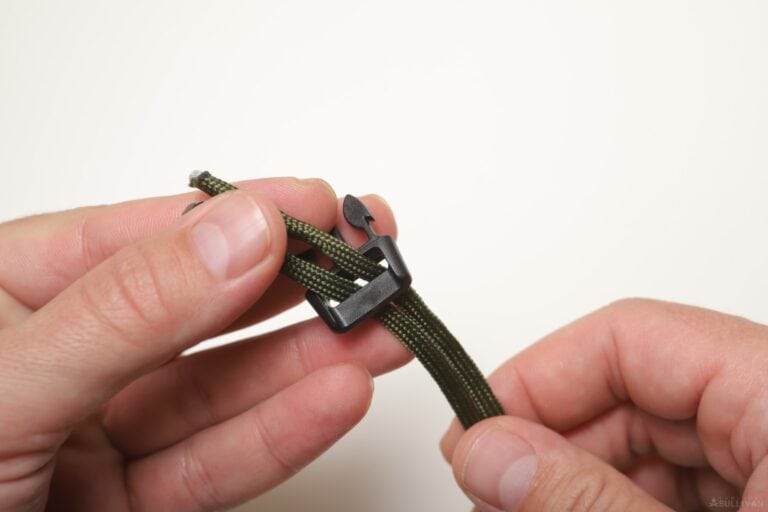
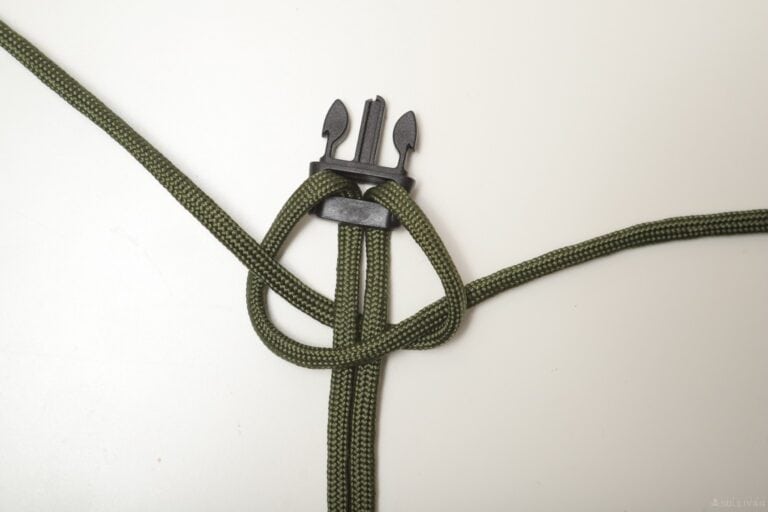
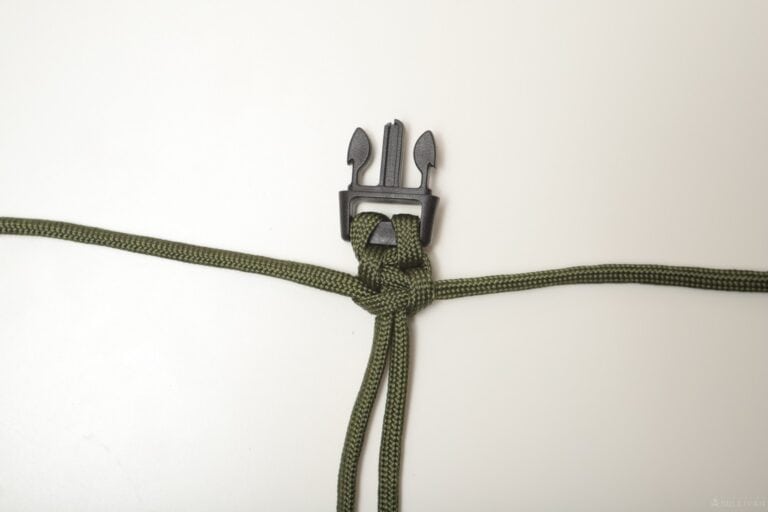
Step 1: starting with one half of the buckle, find the midpoint of your length of paracord and fold it in half. Pass the loop through the opening of the buckle from below until a couple of inches protrude.
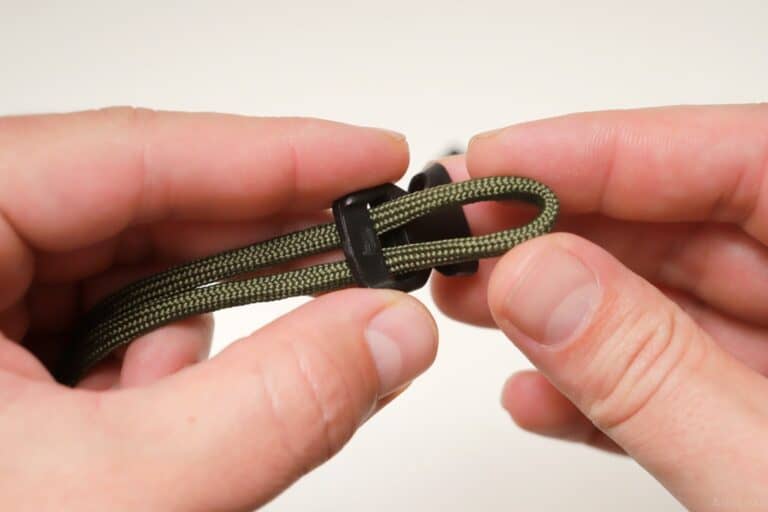
Step 2: now reach through the loop with your other hand, grab the standing ends of the cord and pull them through to form a girth hitch.
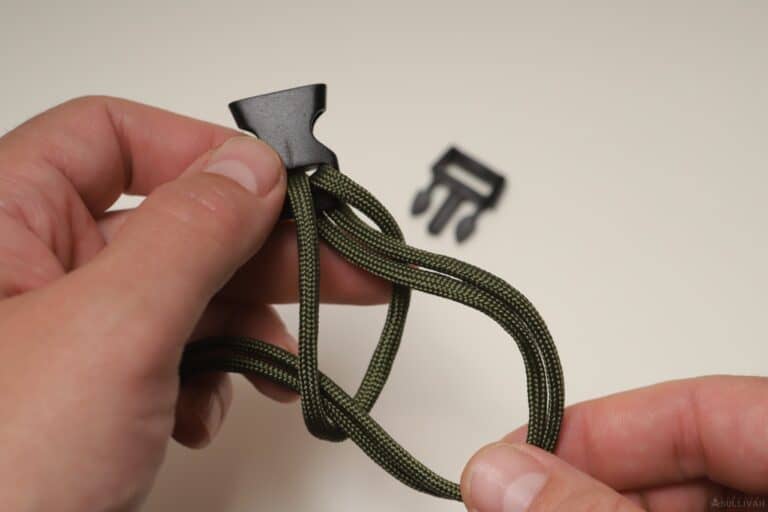
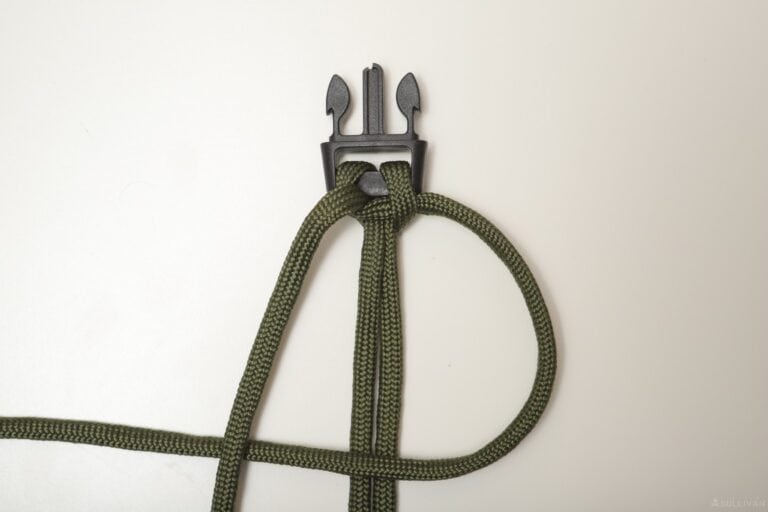
Step 3: keep pulling on both standing ends after pulling them through to tighten the hitch around the opening of the buckle.
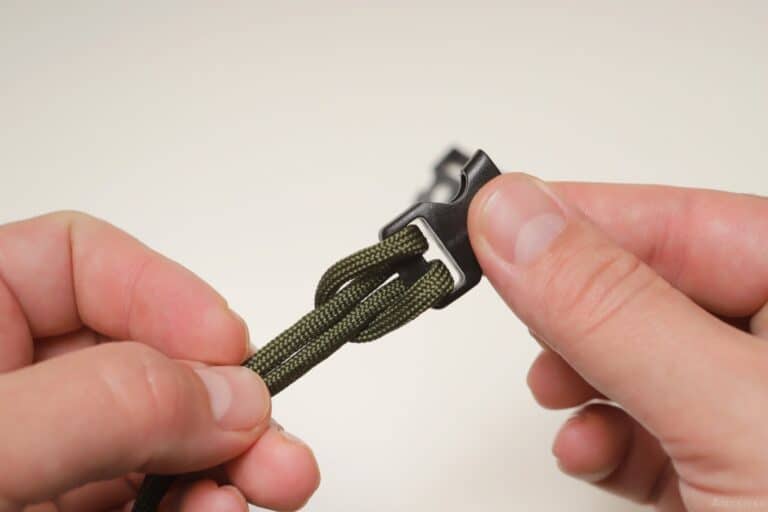
Step 4: continuing on with the free ends, pass them through the opening in the other part of the buckle from below.
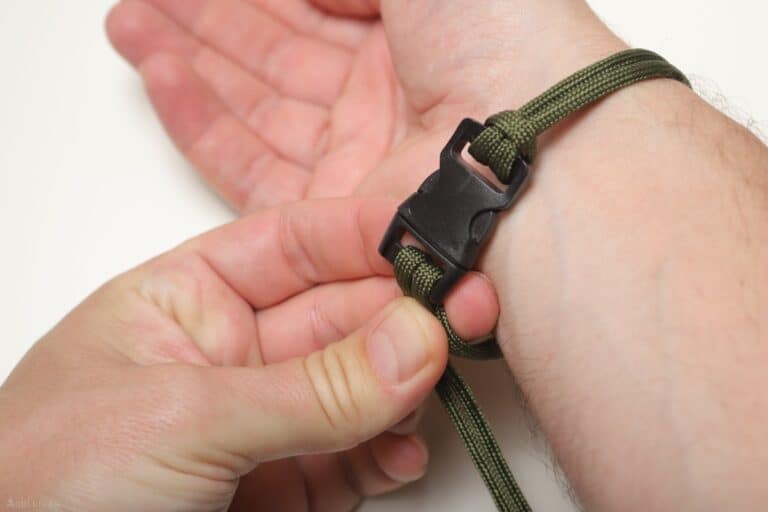
Step 5: now, carefully buckle the cord around your wrist to check for size. You don’t want the bracelet to be so snug that it’ll cut off circulation or chafe you, but not so loose that it can slip over your hand even when it is buckled.
Once you have the sizing dialed in, pinch the cord in place on the free end and then undo the buckle.
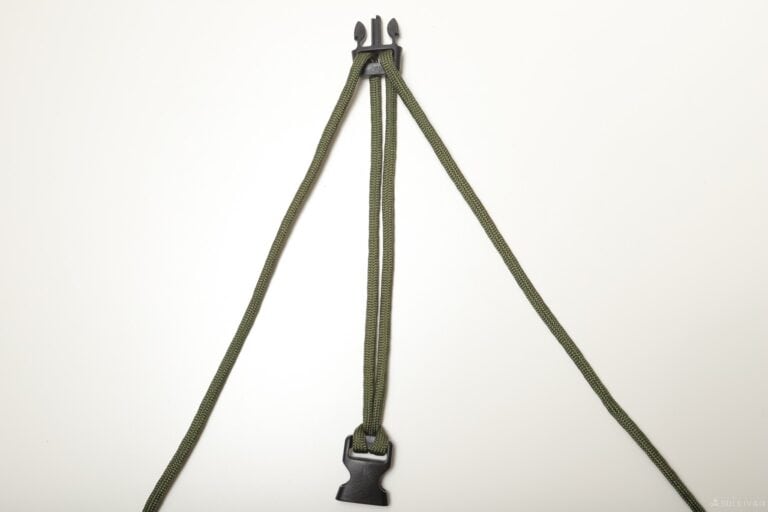
Step 6: you now have your bracelet sized, and both free ends protruding from the second part of the buckle should be pointing back towards the part that you hitched.
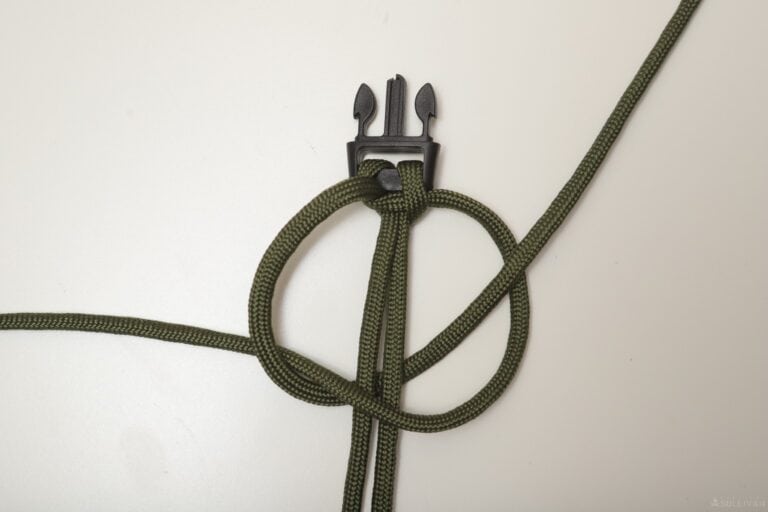
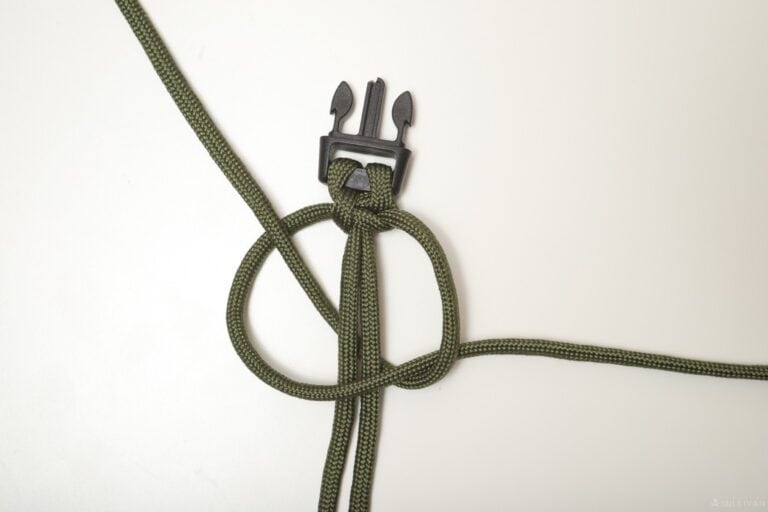
Step 7: being very careful to maintain the length that you set, cross the left end over the standing part of the bracelet. Place the right end over the left after it crosses over.
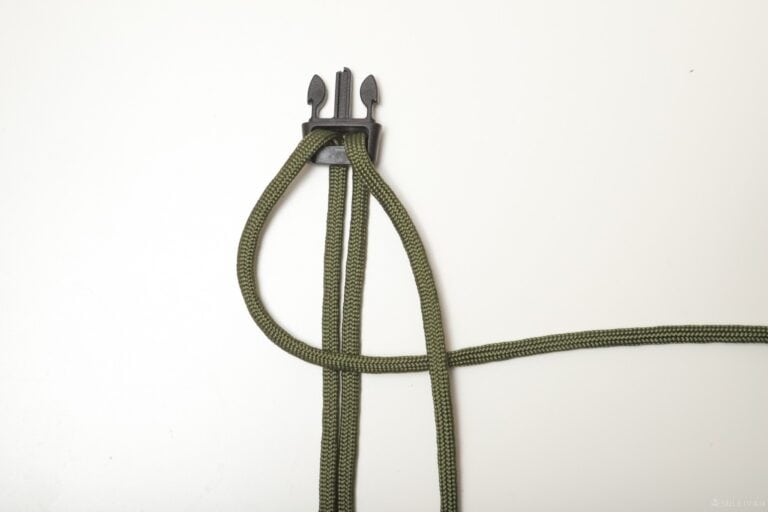
Step 8: now take the right side and loop it under the left side and beneath both standing parts, passing through the loop you formed on the left from below.
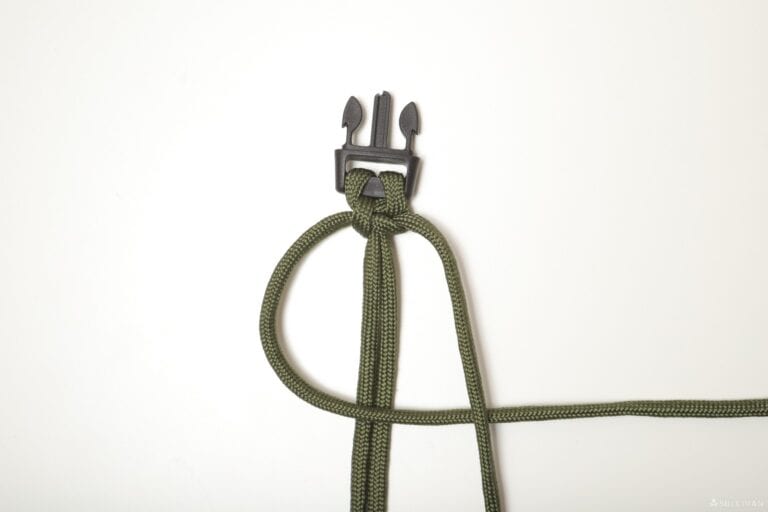
Step 9: being very careful to maintain the length that you set, carefully pull on both free ends to tighten this first weave.
Once this is done, the length of the bracelet will be locked in, so check it around your wrist one more time and adjust as necessary before continuing on.
Step 10: now you will simply repeat steps 7 through 9, but beginning with the opposite side this time.
Cross the right side over the standing part of the bracelet, then pass the left side under the right side, beneath the standing part and through the loop on the right from below. See picture for detail.
Step 11: pull on both free ends to tighten the next weave. Begin again as before on the opposite side, crossing the left side over the standing part, and place the right side over the left free end where it crosses.
Step 12: continue on, passing the right side under the left end, beneath the standing part of the bracelet, then through the loop on the left from below.
Step 13: pull on both free ends to tighten the knot as before.
Step 14: repeat these steps again and again, alternating the side you start on each time.

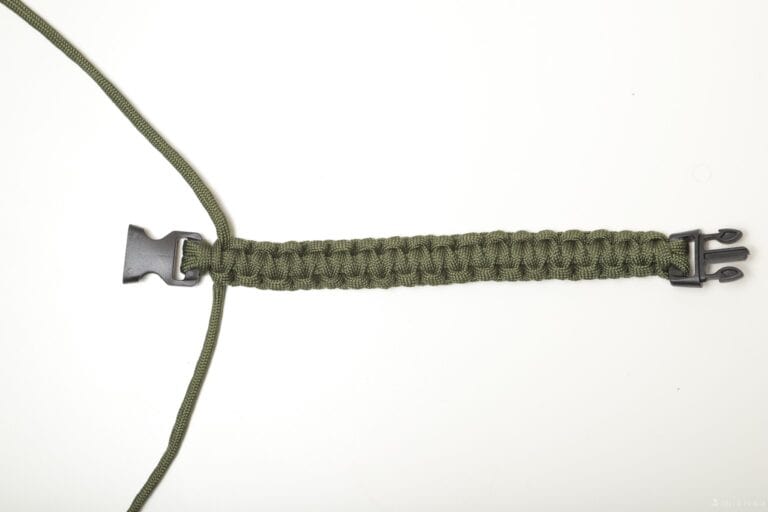
Step 15: once you’ve made your weave all the way to the opposite buckle, you should have some free ends sticking out on either side. Give them one more good tug to tighten everything.
Step 16: cut these free ends where they protrude from the weave you made leaving about an eighth of an inch. Take care that you don’t damage the weave or the buckle.
Step 17: use your lighter to melt the remnants where you cut them, then press them flat with a metal tool to lock the bracelet in place and keep it from loosening or unraveling.
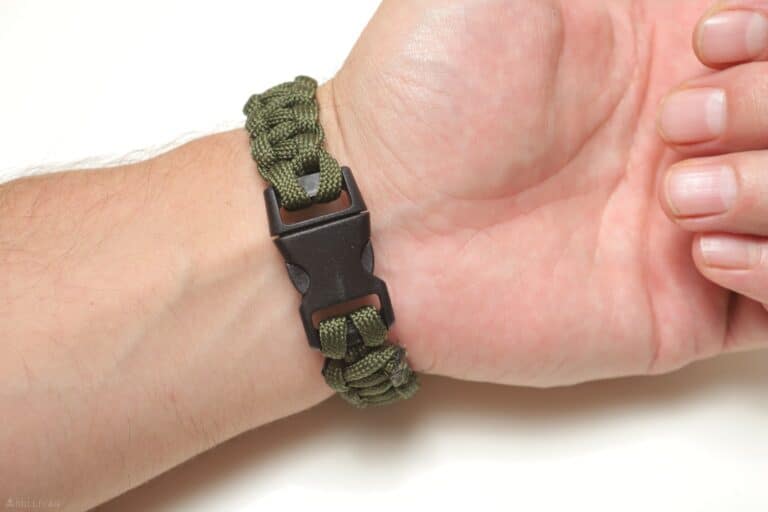
Step 18: finished! That was probably a lot easier than you were thinking, wasn’t it?
Looking at the finished bracelet, it looks incredibly complex, but all you are doing is making a series of simple knots, alternating the side you start on each time.
Also note that you can use this exact same technique with any other type of buckle, fastener or closure you prefer, and that’s an easy way to spice up your look or customize your bracelet.
After you finish this bracelet, also try our other guide on making a snake knot paracord bracelet or a slim trilobite paracord bracelet.

Tom Marlowe practically grew up with a gun in his hand, and has held all kinds of jobs in the gun industry: range safety, sales, instruction and consulting, Tom has the experience to help civilian shooters figure out what will work best for them.