It’s always a good idea to keep some paracord on you, but you don’t really want to carry around a roll or hank of it unless you’re out camping, working, or bugging out.
Luckily, you don’t have to do that if you have a paracord bracelet or keychain that’s both stylish and functional.
And wouldn’t you know it, Paracord has become so popular that people charge a fortune for these things…
The good news is that you can make your own using just a few cents worth of paracord and a little bit of your own time. And, of course, this handy guide!
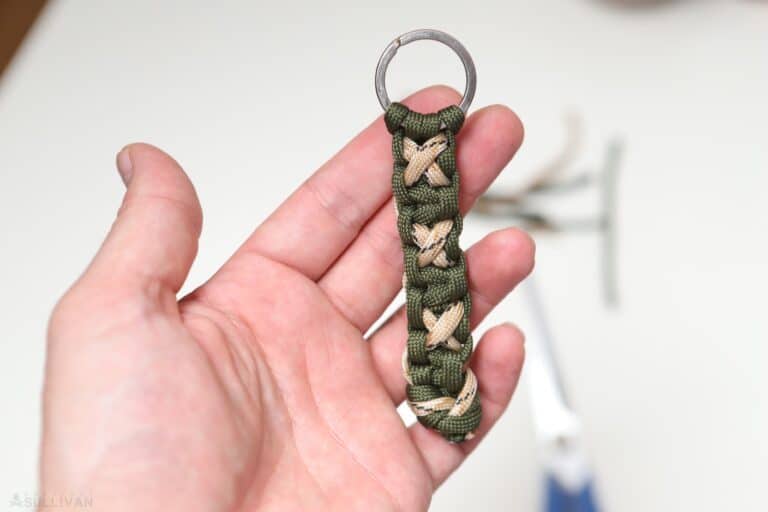
Below I’ll tell you how to make the crisscross Solomon keychain, an intricate and truly impressive variety that will let you carry three separate lengths of paracord in one handy package.
Getting Started
To make this keychain, you’ll need just a few of things…
You’ll need three different lengths of paracord that are at least 1 ½ feet each. Two of them should be identical in color and one should be a contrasting color so it looks really neat.
You also need a key ring or a shackle depending on what you want to attach it to. And then, of course, you’ll need the usual Paracord weaving tools: scissors or a sharp knife, a lighter, and optionally a paracord tool to help you seal those edges after you cut them.
If you don’t have or want to get a Paracord tool, know that you can use any sturdy metal object for the task, including the side of your knife or scissors. And that’s all you need. Time to get going.
The Steps
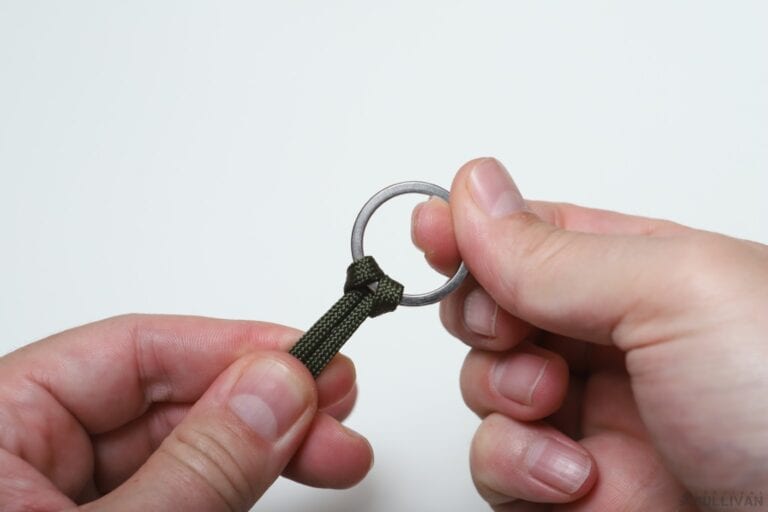
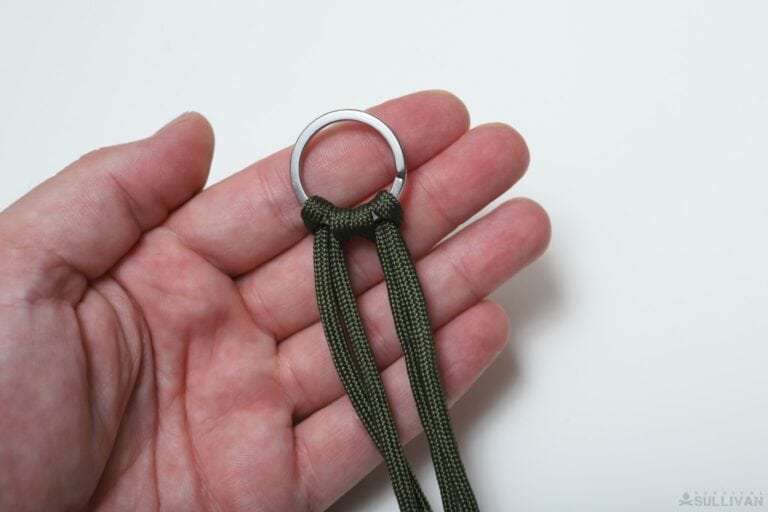
Step 1: taking one of the two identical lengths of paracord, fold it in half in the middle and pass this bight through your key ring.
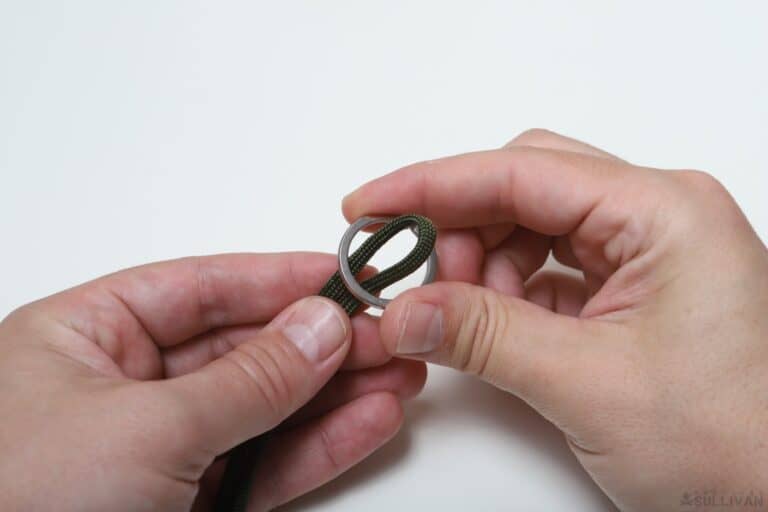
Step 2: now pull the free ends of the same cord through that loop you formed.
Step 3: snug it down to form a cow hitch with the first length of paracord.
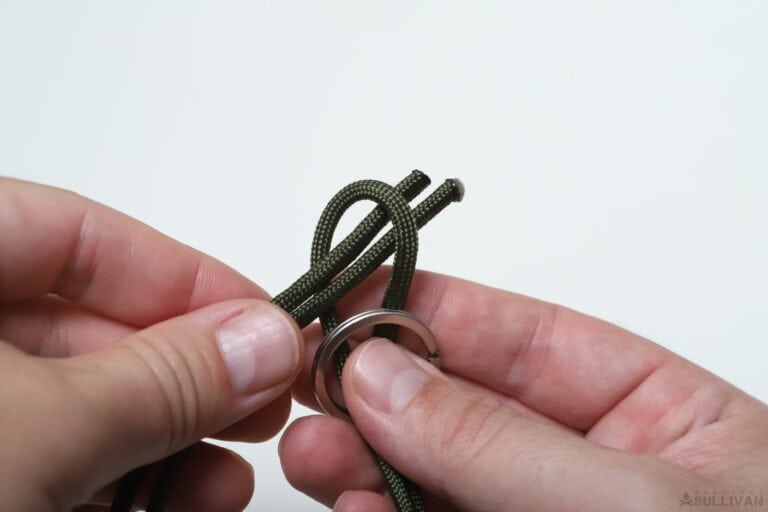
Step 4: repeat this process with the second identical length of that first cord color to form a second cow hitch, side by side. Make sure you tie it in the same direction, and that all the ends are basically the same length.
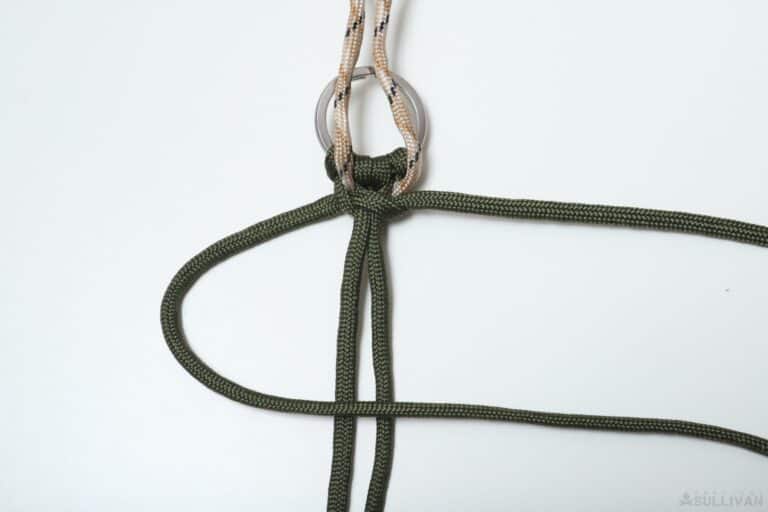
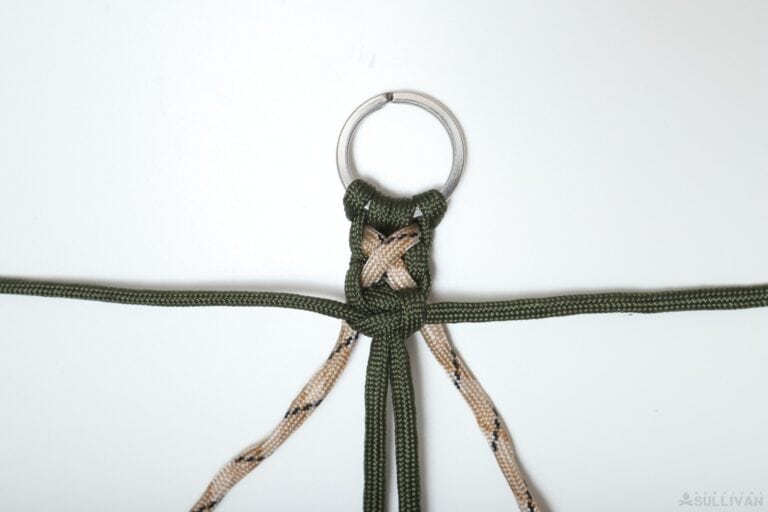
Step 5: now take your third piece of cord and pass it beneath the two inner strands as shown, with these ends pointing up and away from you on the table.
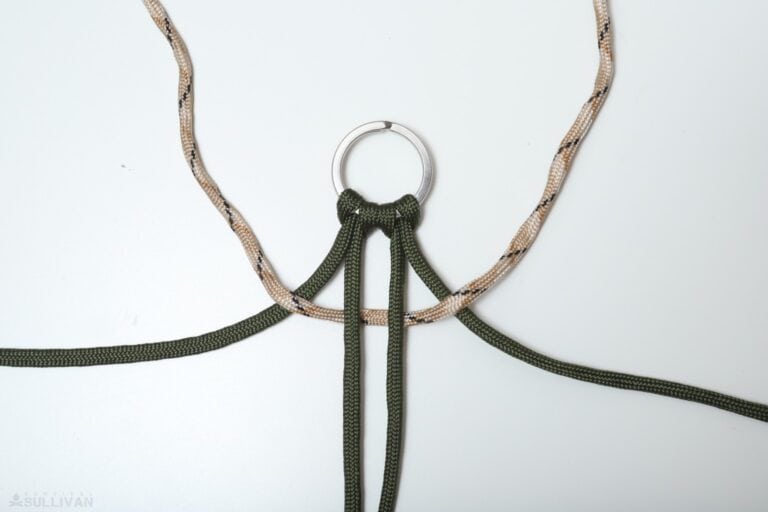
Look closely and note that the two outer strands tied to your key ring, which we will now call the working ends, are beneath this third length of cord starting out.
Step 6: taking the right side working end, and lay across the top of both standing parts in the middle.

Step 7: switch sides to the opposite working end, turn it under the part you just got finished with, pass it below both standing parts, and then through the loop on the right side from the bottom.
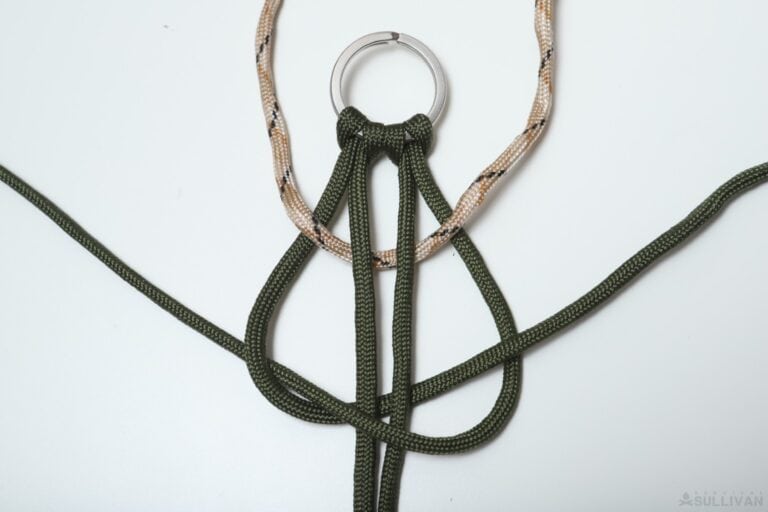
Step 8: carefully pull on both working ends to snug this knot down as you cinch it up towards the keyring. Your keychain, starting out, should look like this.
Step 9: now repeat those steps starting on the opposite side. With the left working end, turn it to the right laying across both standing parts of the cord.
Step 10: now take the right side working end and turn it under the part you just got finished with, passing it below the standing parts in the middle and then through the loop on the left.
Step 11: pull on both working ends to secure the knot while snugging it up towards the key ring as before.
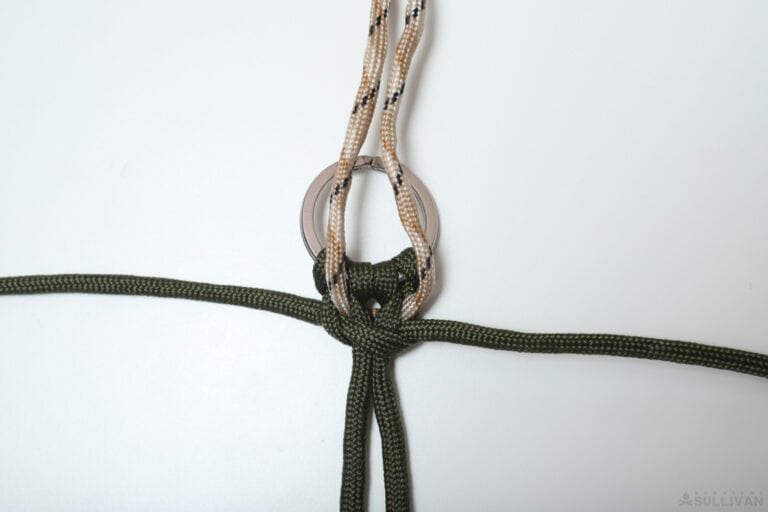
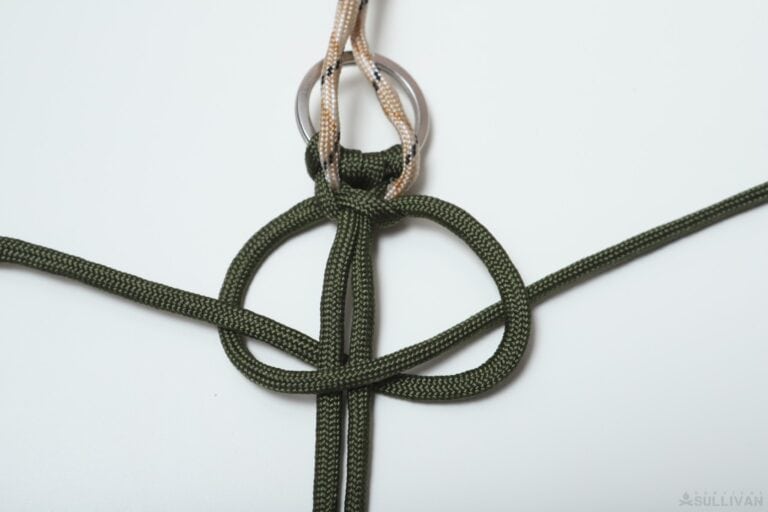
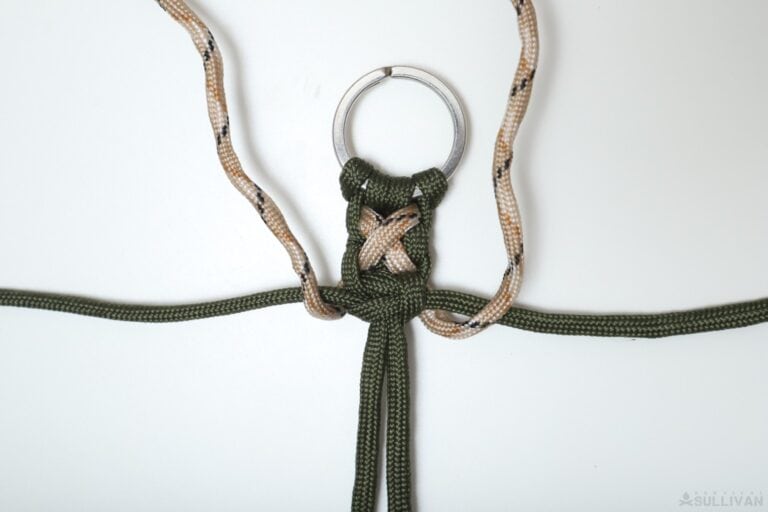
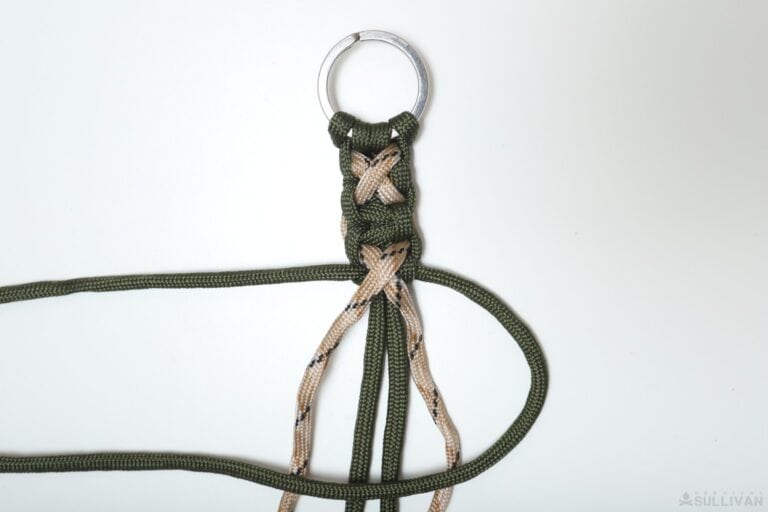
Step 12: now take that third piece of cord, the contrasting color, and it turn both ends down, laying one over the other to form an X as shown.
Step 13: moving on, grab your right side working end, and lay it across all standing parts as shown.
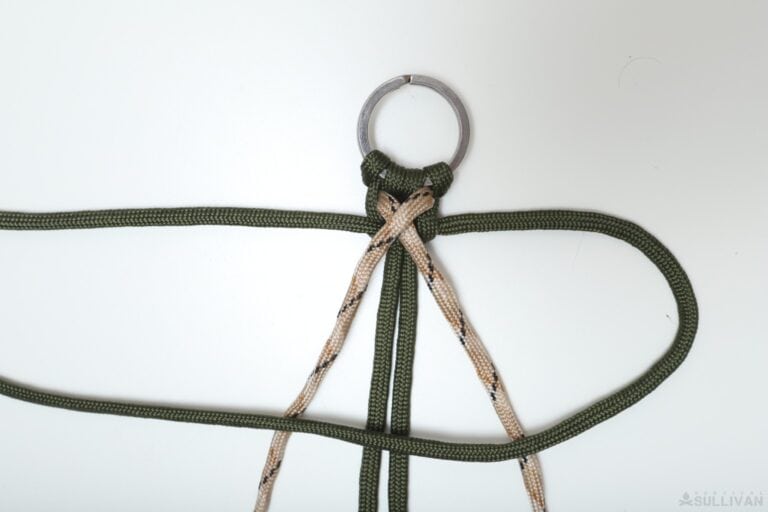
Step 14: switch to the opposite working end, turning it under the working end you just finished with, passing below the standing parts in the middle and through the loop on the right as before, making sure that it passes over the right side of the contrasting cord. Look closely at the picture for details.

Step 15: pull on all the working ends to start snugging up the knot. Do so carefully to keep everything even, and make sure you pull on the ends of the contrasting color cord when necessary.
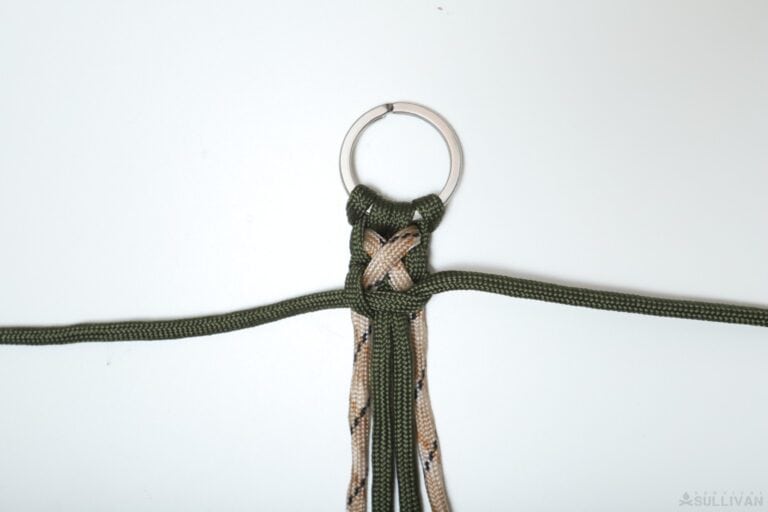
Step 16: now repeat the process with the opposite working end, turning it and laying it across all standing parts as before…
Step 17: before turning the opposite working end under, passing beneath the standing parts and then through the loop on the left side making sure to keep it above the contrasting cord just as we did before.
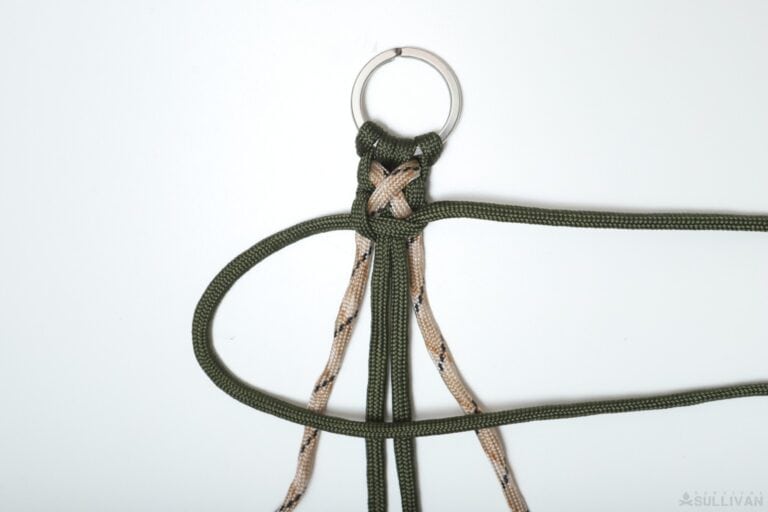
Step 18: once again pull on all the working ends, including the contrasting cord, to cinch up and secure the knot. Take your time and keep everything tidy. When you are done, leave the working ends pointing out straight to either side as shown.
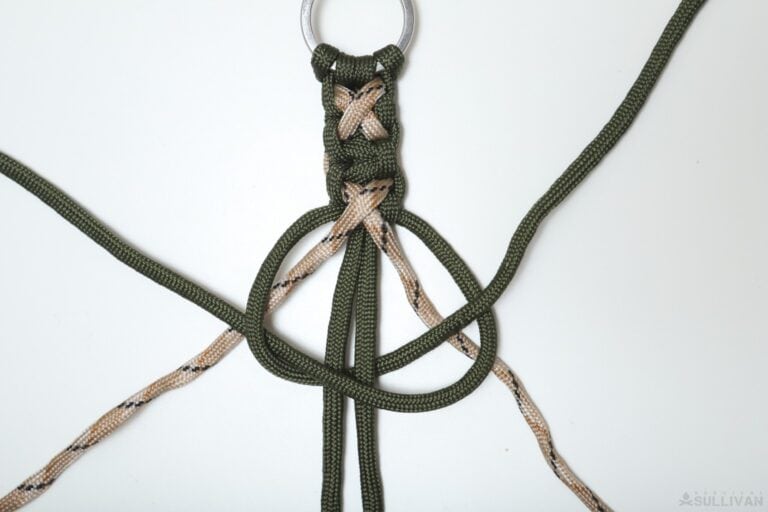
Step 19: now take your contrasting cord and turn them up pointing directly away from you and over the working ends as shown.
Step 20: and we keep going as we have before, starting with the right working end. Turn it to the left and over the standing parts of the cord in the middle.
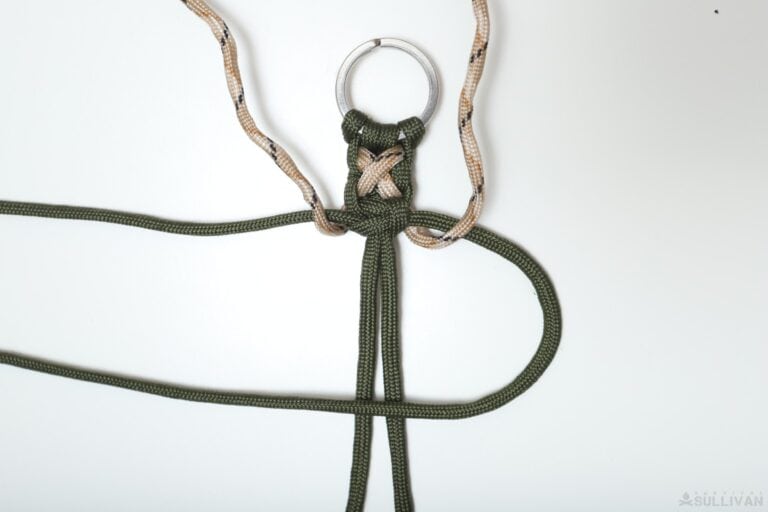
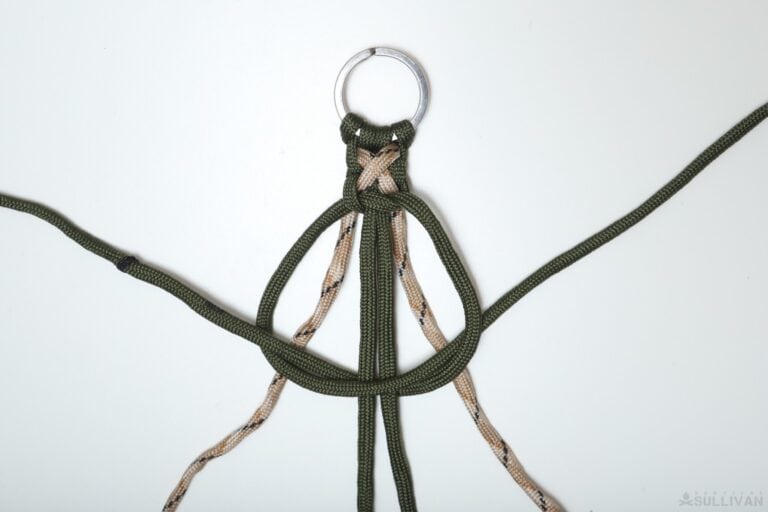
Step 21: now switch sides and take the left working end, turning it under the one you just finished with, beneath the standing parts and then out through the loop on the right side.
Do not pass over the contrasting color cord this time. Look closely at the picture for details.
Step 22: pull on both working ends to cinch everything up. Then continue on, switching sides. Take the left working end and turn across the standing parts…
Step 23: before switching to the opposite working end, turning it under and passing beneath the standing part and out through the loop on the left.
Step 24: cinch everything up again, continually pushing it upwards towards the key ring.
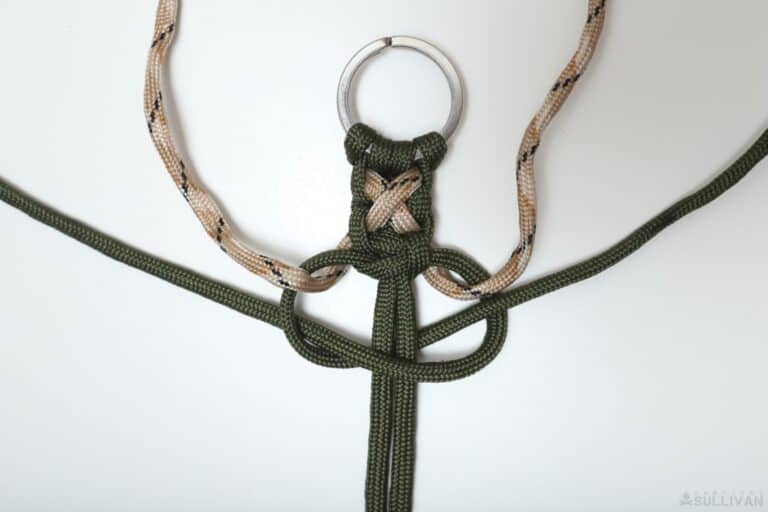
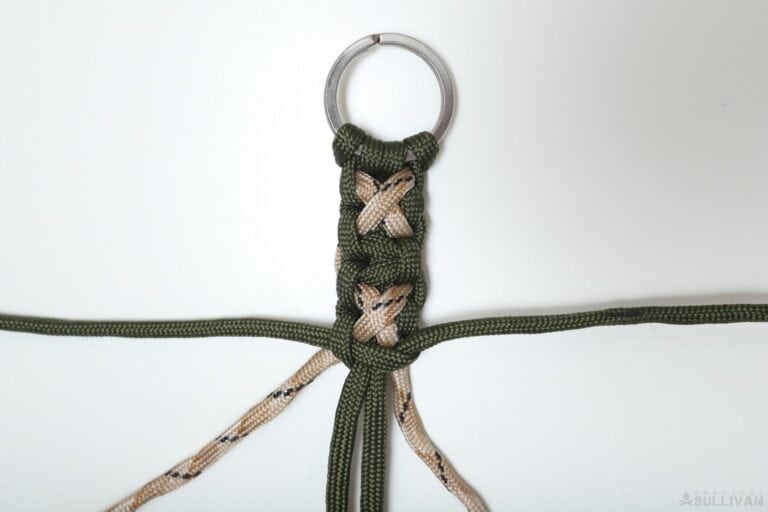
Step 25: now take your contrasting color cord and lay them back down, crossing them just as you did before.
Step 26: start over once again, taking the right working end and turning it across all standing parts of the cord to the left.
Step 27: switch to the opposite working end, turning it under the part just finished with, beneath the standing parts in the middle and out the loop on the right side making sure to keep it above the contrasting cord just as we have done every time.
Step 28: pulling on all the working ends cinch everything up towards the key ring, taking as much time as you need to make sure it stays tidy.
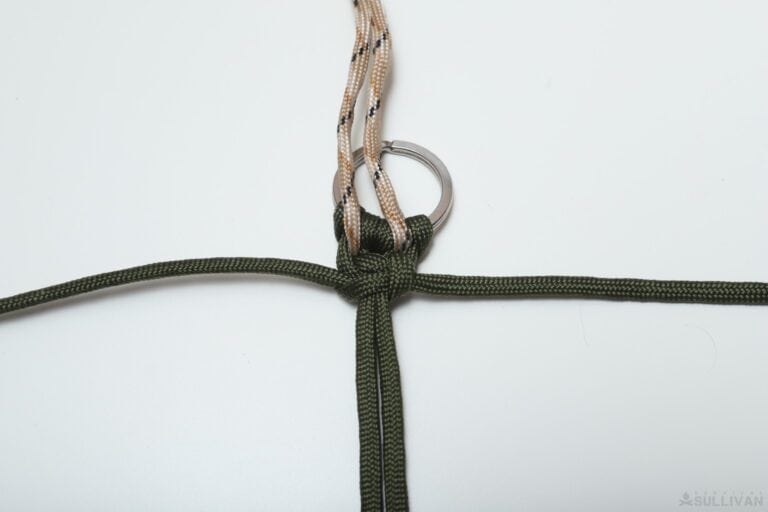
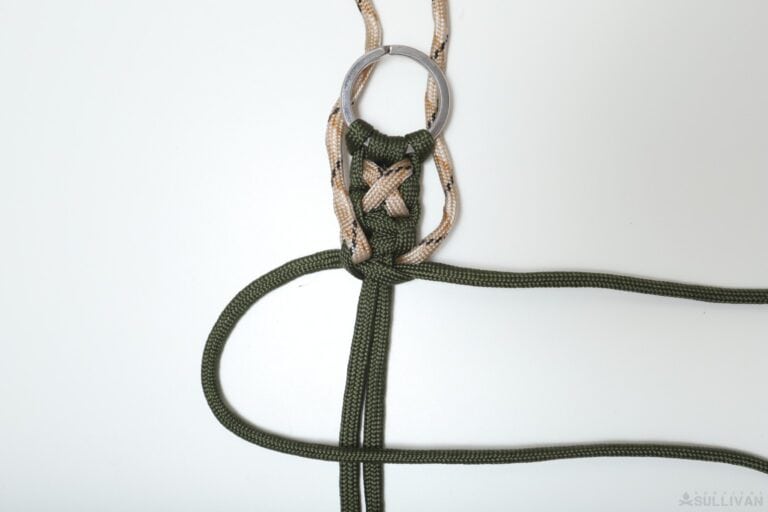
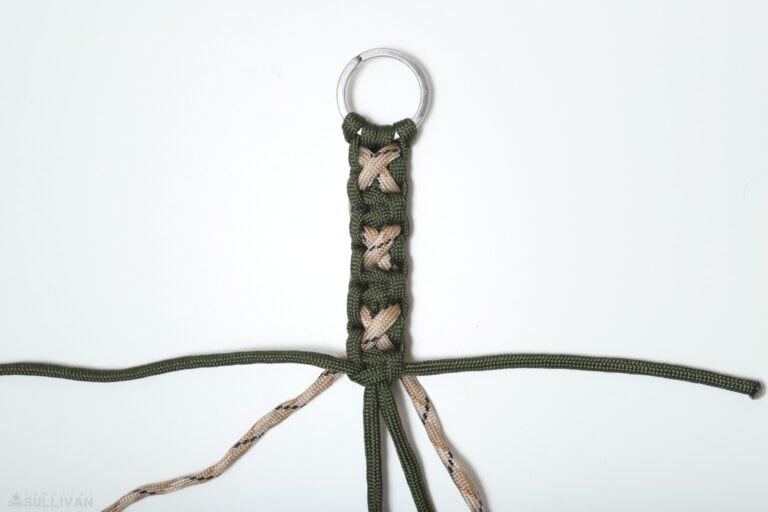
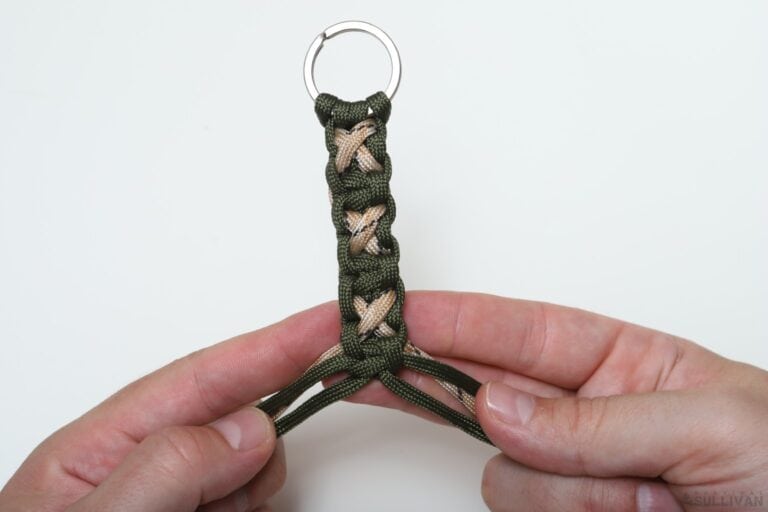
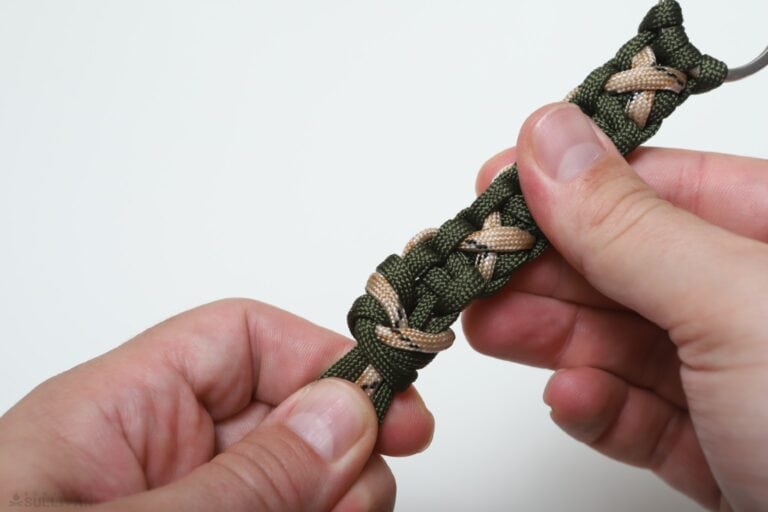
Step 29: continue on until you complete as many crosses as desired or until you have about 3 and 1/2 in of every cord left.
Step 30: pull each of the leftover “tails” to one side, grouped together based on the side they exit on as shown.
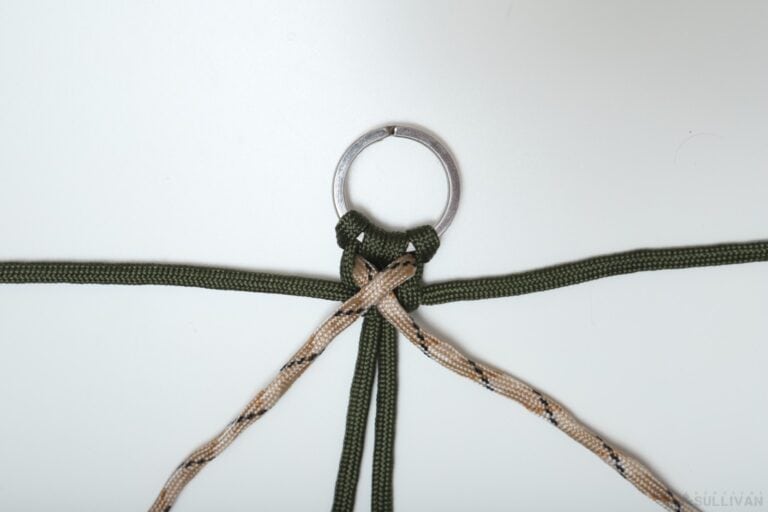
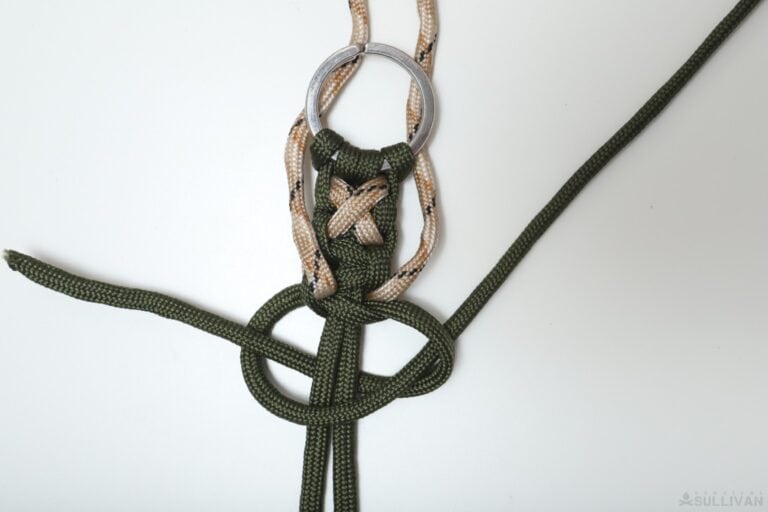
Step 31: taking all of the tails on the left side, make an underhand loop as shown.
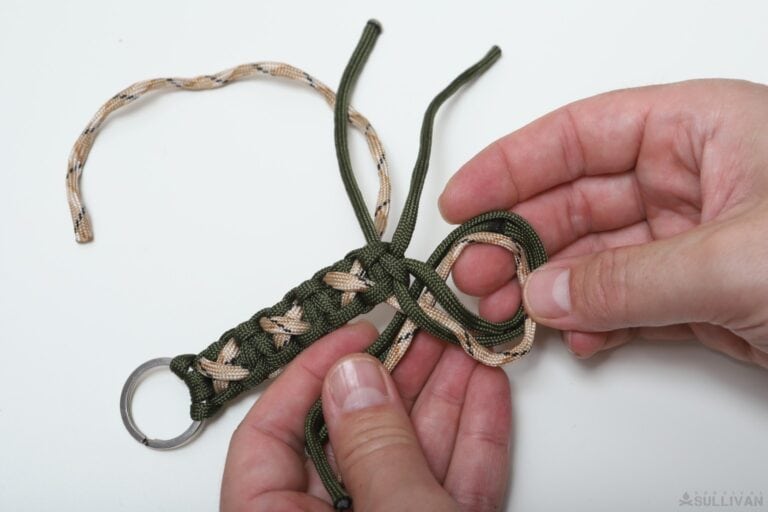
Step 32: grab the opposite tails and pull them through this loop from above.
Step 33: continuing on, bring those same ends up, around and through that loop one more time.
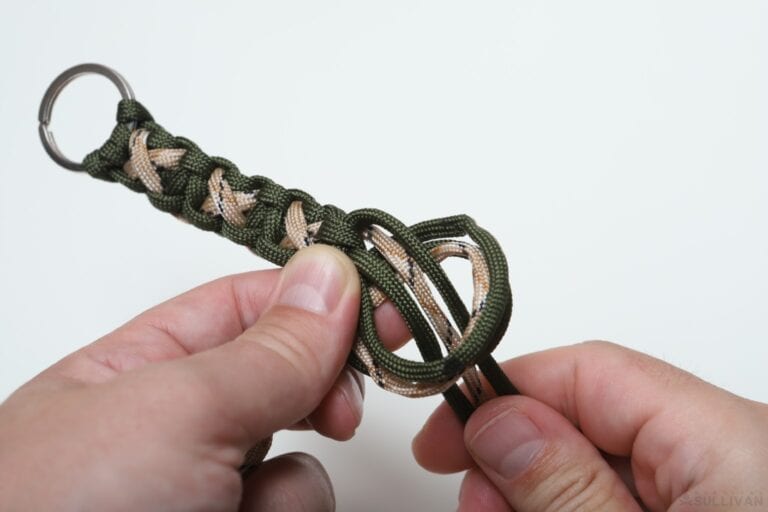
Step 34: start dressing the knot by pulling a slack out alternating on all the working ends until the knot starts to climb up towards the keychain. Take your time, and work through it.
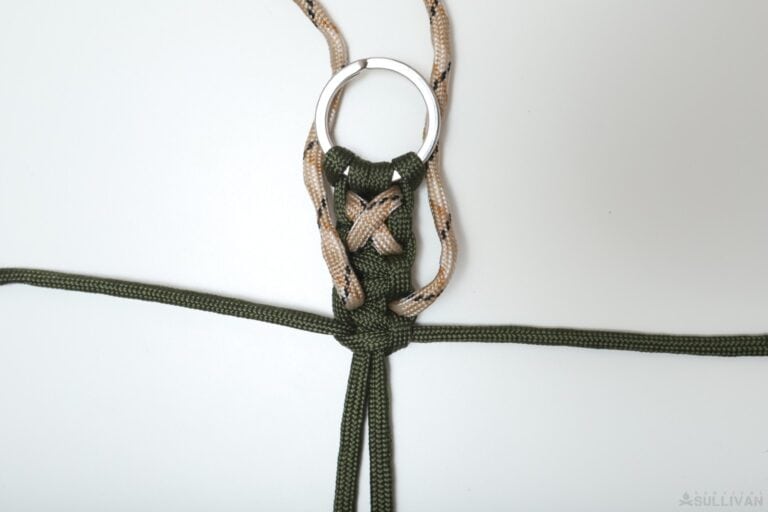
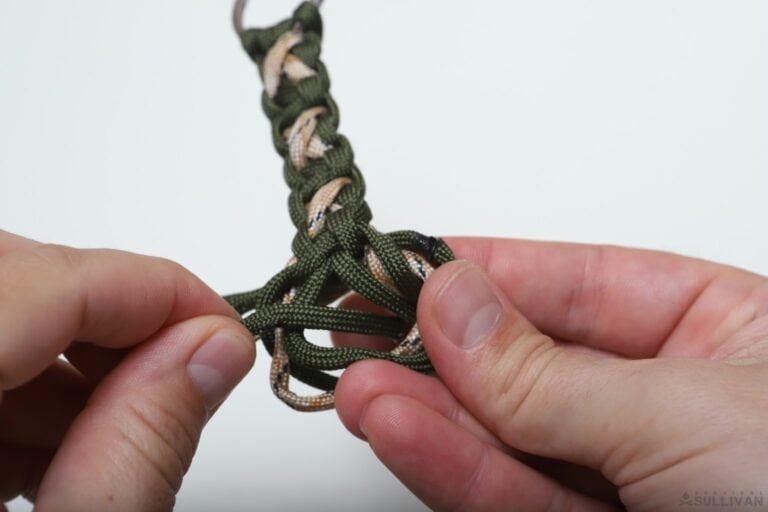
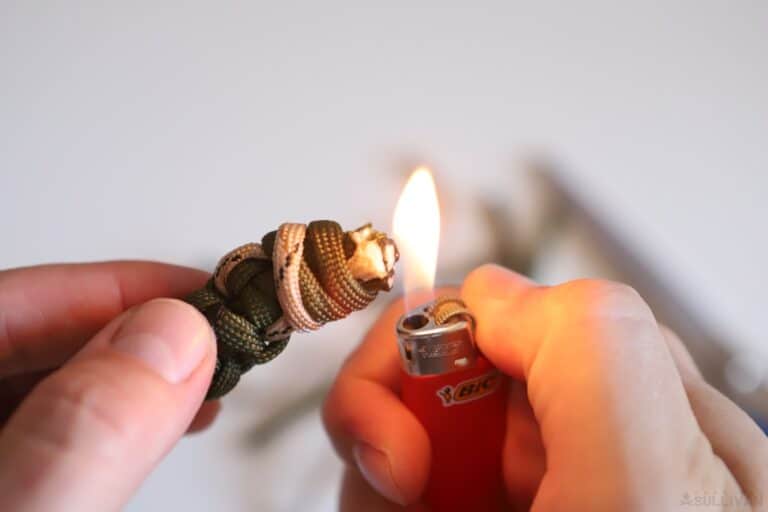
Step 35: once you have the knot fully secured, grab your scissors or knife and cut off all of the remaining tails leaving about an eighth of an inch of cord sticking out of the knot.

Step 36: use your lighter and melt the remnants. Then grab your tool or use the side of your knife or scissors to press the melted ends to seal them and lock down the keychain.
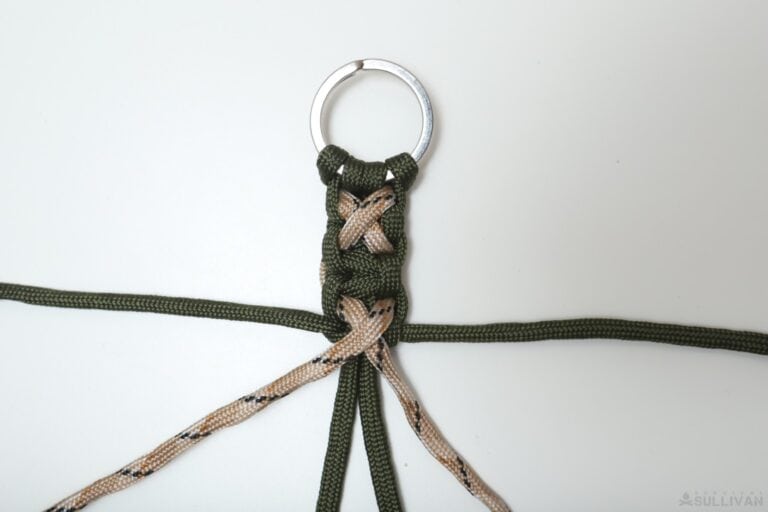
Finished! Your crisscross Solomon keychain is ready to use.
I know it seems intricate and like there’s a lot going on with this keychain- and there is!- but as you can see from the pictures and this walkthrough it’s really quite straightforward.
This is another keychain design that offers a lot of grip unless you carry several separate but useful pieces of paracord with you at all times.
If you liked this guide, you should also check our other guide on making a DIY Growling Dog Knot Paracord Keychain.

Tom Marlowe practically grew up with a gun in his hand, and has held all kinds of jobs in the gun industry: range safety, sales, instruction and consulting, Tom has the experience to help civilian shooters figure out what will work best for them.