Preserving your own food by home canning it will help increase your survival stockpiles far more economically than buying commercially manufactured long-term storage food.
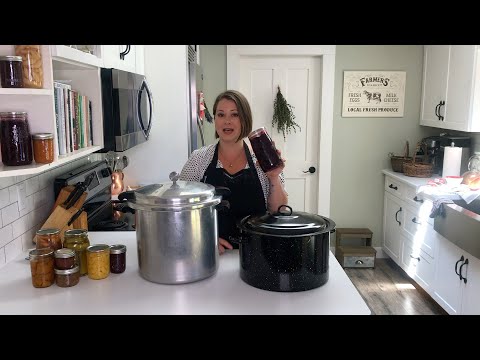
There are two distinctive ways to home can food – water bath canning and pressure canning.
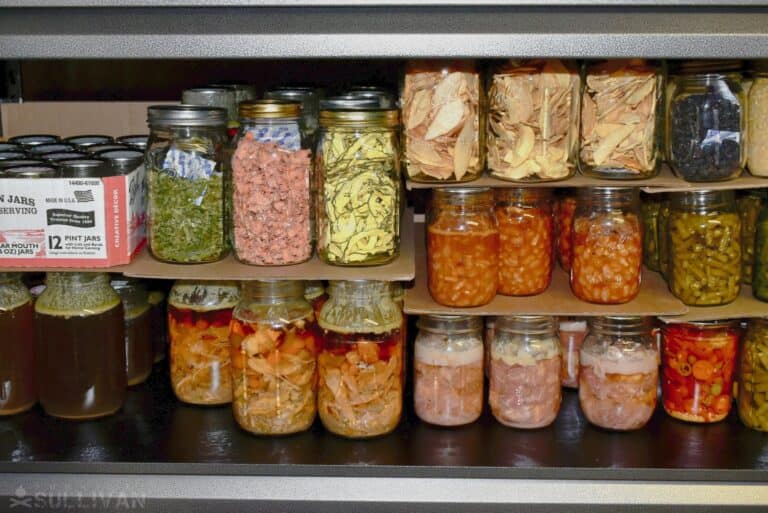
Each method uses the same type of glass Mason jars, rings, and lids, but the process is entirely different, and both sets of rules must be followed to the letter to avoid broken jars, and to ensure you have food that is safe remains safe to eat.
The heating process involved with both types of home canning methods destroys bacteria and other contaminants in the food, and thwarts the natural spoilage process by removing air from inside of the glass jars.
When the hot filled jars cool, a vacuum seal is formed. It is this seal that is essential to achieve in order to prevent rotting and contamination.
Water Bath Versus Pressure Canning
Before you can begin to master home canning and learn all the rules to follow to ensure success, you must understand the two different canning methods more clearly.
Water Bath Canning
This type of home canning is conducted in a large and tall pot with a few inches of water in the bottom.
Water bath canning is done at a lower temperature than pressure canning. This type of canning is designed for foods that have a high acid content (pH lower than 4.6).
It is the combination of heat and time in the water bath that kills the enzymes, mold, and yeast in the food that can cause it to spoil and be unsafe for human consumption.
Water bath canning is recommended for the following food types:
- Fruit Juices
- Tomatoes
- Jams
- Fruits
- Jellies
- Salsa
- Vinegars
- Pie Fillings
- Pickles
- Chutneys
- Relishes
- Condiments
- Sauces
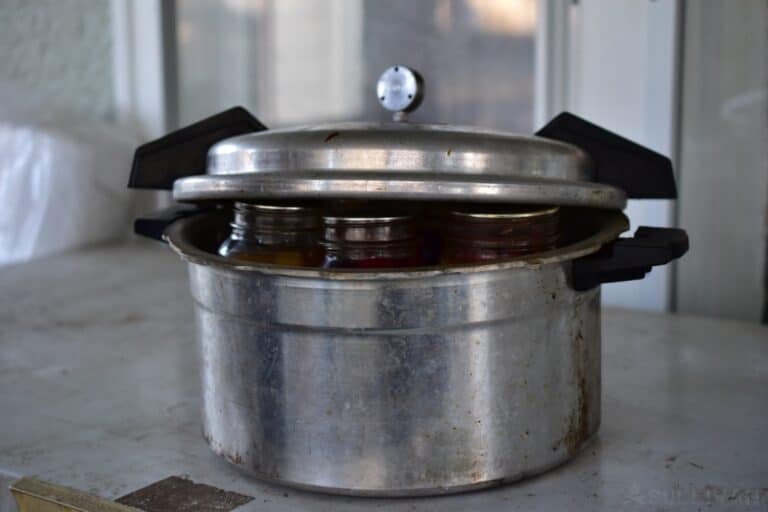
Pressure Canning
Foods that are pressure canned are subjected to 240 degree F temperatures (115 Celsius). These high temperatures are necessary to safely preserve foods with a low acidic level.
As with water bath canning, the proper temperature and processing time is essential to safe preservation, and the destruction of bacteria.
Foods that should always be pressure canned include:
- Poultry
- Meat
- Seafood
- Chili
- Some vegetables
Canning Rules to Always Follow
Rule #1: Always wash and thoroughly sanitize canning jars
Do this even if they look clean or were washed before being stored away after the last use. To sanitize jars, place them sideways on the wire racks in the oven at 180 degrees F (82 Celsius) for about 20 minutes before you start the canning process.
The heating of the glass prevents it from cracking when either cold or really hot items are placed inside.
Rule #2: Never use a glass canning jar with even the tiniest of cracks or chips.
Such an imperfection around the mouth or rim of the jar will prevent an airtight seal from forming. If the crack or chip is present on the body of the jar, air will be allowed to slip inside, and cause bacteria to grow.
Rule #3: Never re-use a canning lid.
A new lid must be used every single time.
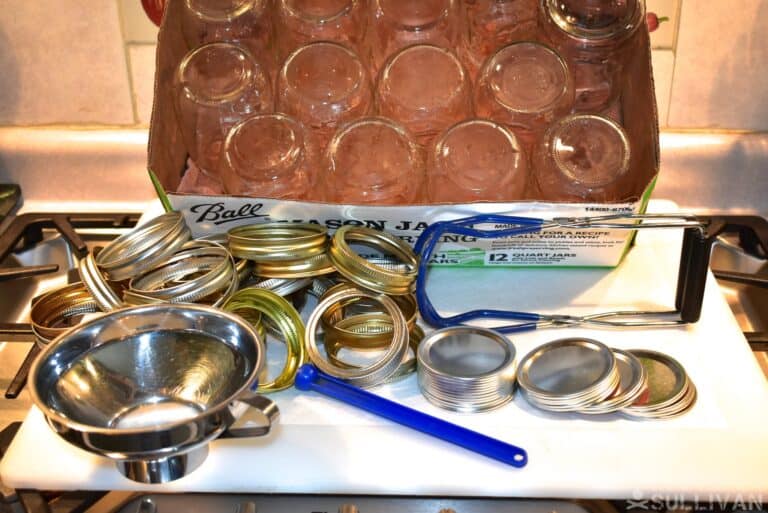
Rule #4: You can re-use rings as long as they aren’t rusted or warped…
… and are still able to make a tight seal around the jar.
Rule #5: Fill a small saucepan with water when you’re starting the canning process…
… and place your lids into the pan. Keep the water at just a simmer to activate the seal on the lid.
Rule #6: Review each new, out of the package lid.
Do this before placing it in the pan to get it ready for use. Look for any signs of unevenness or dings in the rubber part of the seal. The extra time you take inspecting the canning lids can prevent loss of food due to spoiling later.
Rule #7: Never touch the lids or especially the seal directly when removing them from the water.
When your hands or fingers touch the lids miniscule debris can be transferred onto them, and prevent proper sealing.
Always use a magnetic lid lifter that temporarily attaches to the top of the lid to relocate them from the pan of simmering water to the top of a canning jar.
Rule #8: Use a canning funnel or other type of large mouth funnel to transfer the food being preserved into the canning jars.
Using this type of funneling method will help prevent food from dripping or spilling onto the mouth of the canning jar and preventing an airtight seal from forming when the lid and ring are added.
Rule #9: Keep the water bath canning temperature at a steady and rolling boil throughout the process.
If the boil is allowed to hover below and above a rolling boil the temperature will fluctuate and can cause the food in the glass jars not to reach the necessary temperature to destroy bacteria or provoke scorching of the food.
Rule #10: When water bath canning, you must have one to two inches of water above jar level.
This is to ensure all of the food inside is being heated to the proper temperature.
Rule #11: never allow the hot glass jars to touch.
When placing jars inside of either a water bath or pressure canner, and when relocating them to a level surface after processing, never allow the hot glass jars to touch. Doing so will more often than not cause one or both of the touching jars to crack.
Rule #12: Always use a clean dish cloth or paper towels to wipe the mouth of the canning jar after filling it, and before adding the lid and ring.
This will again help prevent any debris from food or other means from preventing an airtight seal from forming. You will need to replace a dish cloth after several uses if it becomes too damp, or is used to wipe away too many food drips from the mouth and rims of the jar.
Rule #13: After turning off either the water bath canner or pressure canner, wait approximately five minutes before removing the canning jars.
This allows them to cool just slightly, and will give them time to acclimate to the temperature change to help prevent cracking.
Rule #14: Always remove air bubbles from the top of the headspace that the canning recipe recommends you leave.
Do this before placing the lid and ring on the glass canning jar. Any air bubbles left on top of the head space could pave the way for spoilage to occur.
Rule #15: Never place hot canning jars directly onto a countertop, table, or similar surface.
Always place a dry towel onto the level surface before relocating the canning jars from either a water bath or pressure canner once their processing is complete.
Rule #16: Do not overtighten the rings when putting them on the canning jar.
Doing so can cause them to warp and prevent an airtight seal from being created with the lid and canning jar.
Rule #17: Only use actual canning jars specifically made for home canning in either a water bath or pressure canner.
Many folks have tried to use empty glass containers that once housed mayonnaise, etc. because canning lids and rings can fit them tightly.
The glass grocery store jars are comprised of are not built to withstand the intense heat of the canning process – especially if they are used to pressure can food.
Rule #18: Allow the canning jars to settle in place for 12 to 24 hours before removing the rings.
Rule #19: Listen to the tell-tale “ping” noise to let you know the lids have sealed properly, and pushed out the indentation in the middle of the rings.
Count the ping sounds so you know that each jar has sealed properly.
Rule #20. If you don’t hear enough pings after an hour or so, assume that one or more jars have not sealed properly.
At the end of 12 to 24 hours, visually inspect each jar for the vent indentation more closely.
If you cannot tell by looking which jar did not seal properly, press down slightly on the middle of the ring with the tips of your fingers. If the jar sealed tightly, there should be no flexibility at all in the lid.
Once you locate any jar that did not seal tightly, simply refrigerate it and use the contents in the next seven days.
Rule #21. Always place a label on the canning jar indicating not only the contents but the date the food inside was preserved.
You may be surprised how similarly different canned foods can appear or how quickly you might forget when one batch of pickles was canned.
Rule #22: Store all home canned food in a cool, dark place until ready to use…
… like a basement, root cellar, or inside a cabinet. The ideal temperature for storing home canned food ranges from 55 to 70 degrees F (12 to 21 C).
Rule #23: Always Follow the Recipe
While playing around with recipes to suit your personal tastes is fine when baking a cake or a casserole, it can be highly problematic when canning – from a preservation perspective.
The exact amount of salt, lemon juice, sugar, or pectin in canning recipes has been factored not just for taste, but for the ability to hit the proper pH pathogen killing level make the food long-term shelf stable.
Creating the right acidic level in each food type being home canned either in a water bath or pressure canner is crucial to its longevity.
Rule #24: Never be tempted to can in a jar that is larger than 1 quart.
Neither water bath nor pressure home canning methods and tools are designed to safely process and preserve food in glass jars that are larger than 1 quart in size.
Larger containers can prevent the food from being evenly heated, which can allow dangerous foodborne pathogens to remain inside.
If you ask someone how long home water bath or pressure canned food will last, you are liable to be met with a flurry of different prospective “use by” dates.
The general rule of thumb is that properly home canned food remains safe to eat for 18 months to two years. In the personal experience of many veteran home canners, specific foods have been known to remain safe to eat for five years and beyond.
Regardless of how long you keep home canned food, always visually inspect each can for signs of rust on the ring or lid, a bubbled look and feel to the lid, and smell the food inside for any foul odor.
If you have any doubt about the safety of home canned food, whether it has been on the shelf or two months or two years, throw it out just to be on the same side.
For specific guidelines about home canning longevity, USDA’s Complete Guide To Home Canning.

Tara Dodrill is a homesteading and survival journalist and author. She lives on a small ranch with her family in Appalachia. She has been both a host and frequent guest on preparedness radio shows. In addition to the publication of her first book, ‘Power Grid Down: How to Prepare, Survive, and Thrive after the Lights go Out’, Dodrill also travels to offer prepping tips and hands-on training and survival camps and expos.
Some of these rules are in conflict with what I’ve read last year or before.
Ball has issued a notice that lids only remain safe for 12 months after used in canning….meaning you should eat the food within 12 months??
Also, I read a notice to NOT simmer the lids before using at all.
Now, is this to sell more lids?? Is this because inferior rubber on the lids is used??
Who knows, but I’m okay because I have shoe boxes of lids bought years ago at an Amish store.
Hope this helps those new to canning and lose jars due to these ideas instead of their expertise.
By the way; I’ve been canning for over 45 years and it is just common sense if you think about it.
I’ve never added vinegar to any tomatoes, green beans, or tomato juice when water bath canning and have been quite successful.
I’ve been told that you can’t water bath can green bean, have you been successful at it?
What if you put your finger on the lid and it goes down