A lesser known method of tying the constrictor, this is generally faster than using an end. It is useful when the end of the line cannot be accessed or the knot needs to be in the middle of the line and to run half the line would cumbersome.
However, it has to be placed over the end of the bundle, so is not recommended if your knot must be in the middle, where it probably easier to use the end to tie.
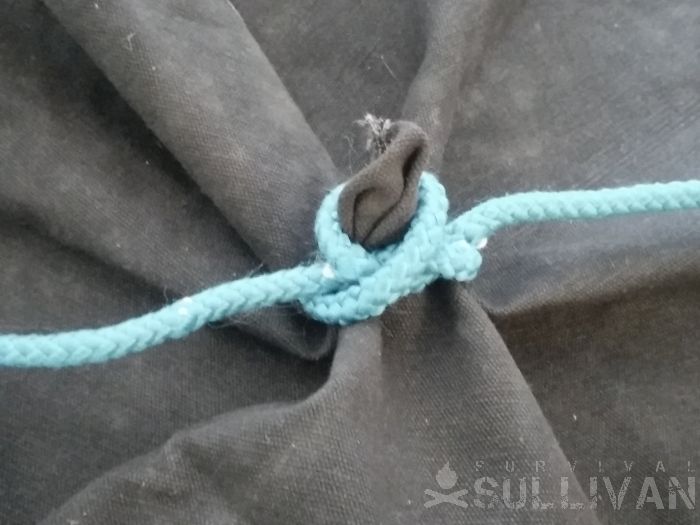
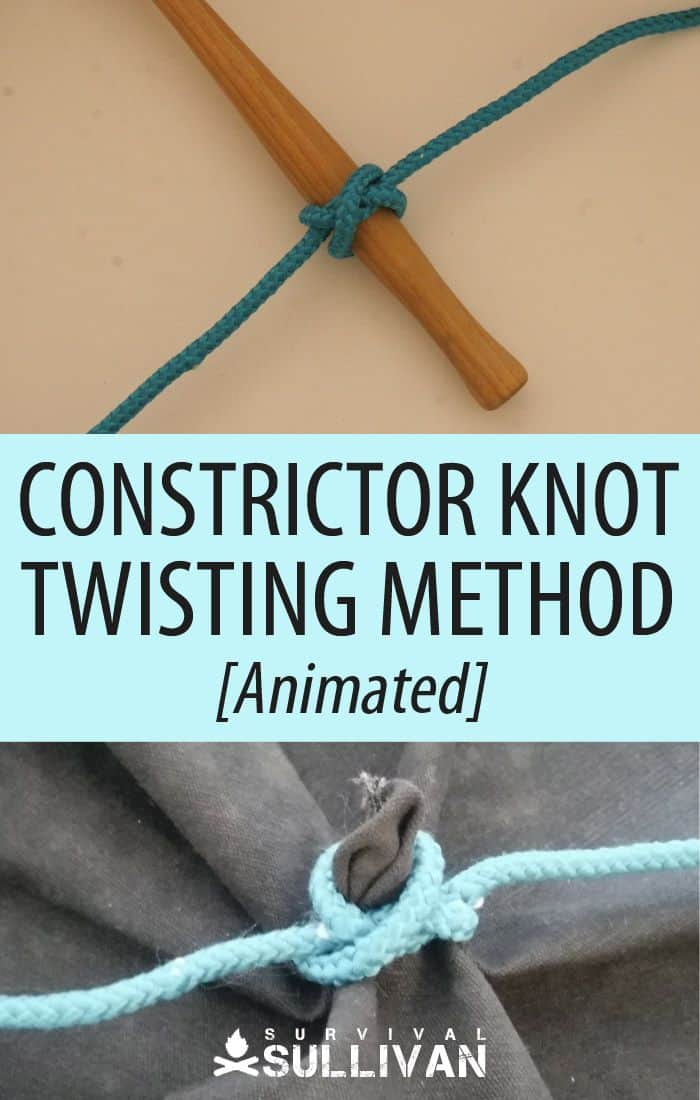
For example, I have found this method most useful for patching tents and other large pieces of fabric: having found a tear or hole, gather up the fabric around it to form a ‘throat’ with the hole at the top, and tie a quick constrictor around it.
This way you won’t lose where the (often very small) hole is when going off to find needle and thread or moving the material around. See the picture at the end of these instructions for a demonstration.
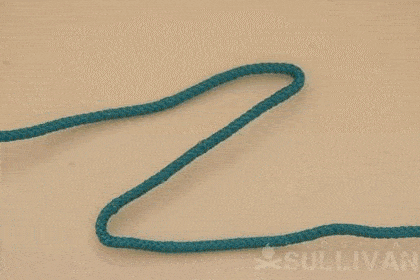
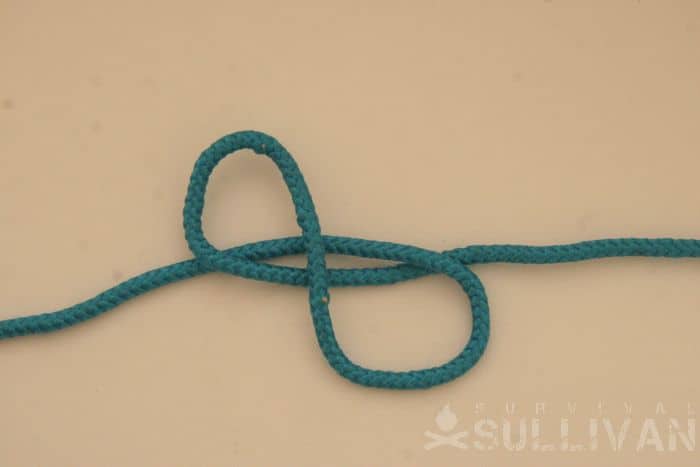
Step 1. Fold the line in a ‘Z’ shape. Notice how this forms two opposing bights:
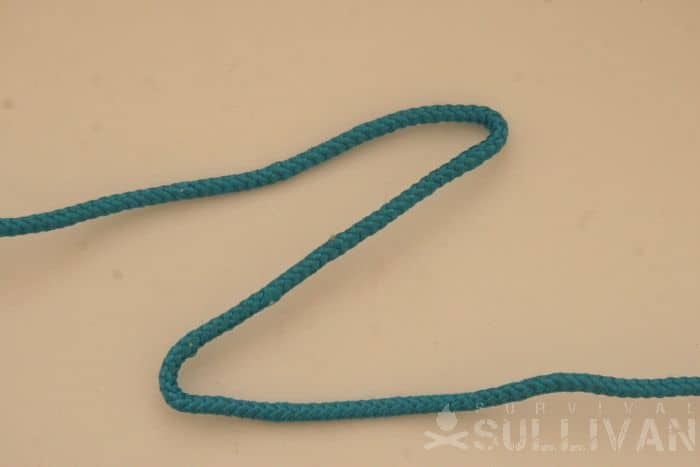
Step 2. Pass one night over the standing part of the other. Make sure not to twist it:
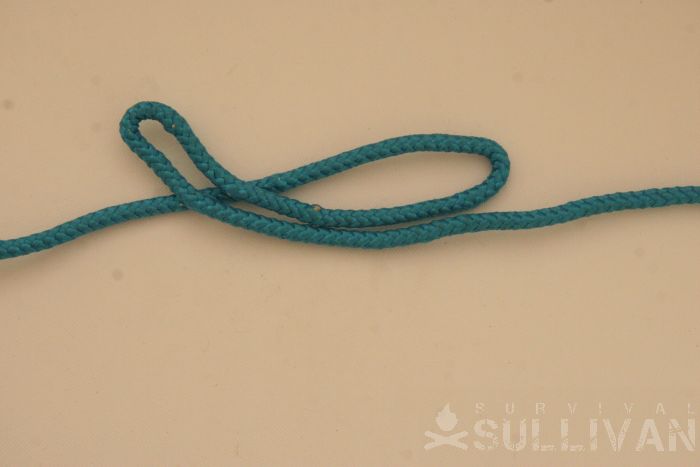
Step 3. Pass the other over the standing part of the first one, again making sure not to twist it:
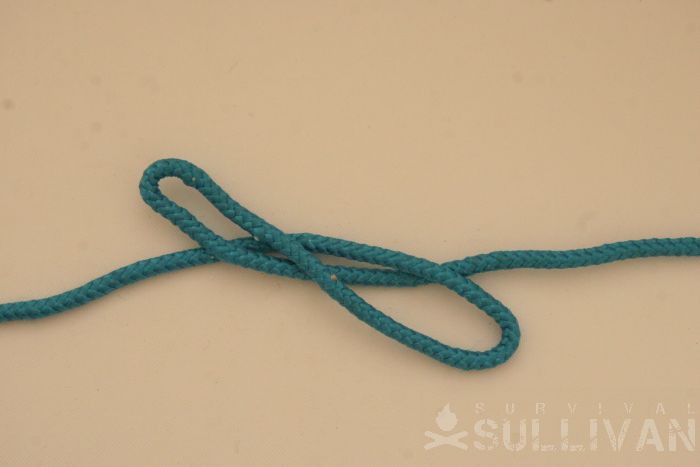
Step 4. Expand the two loops you have now made:
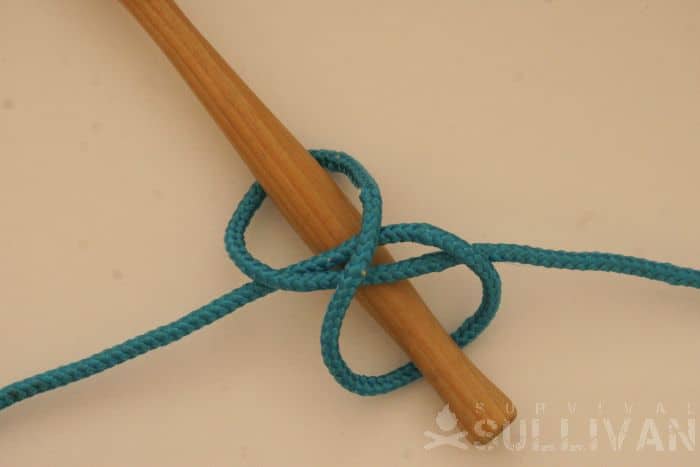
Step 5. Read the pole / bundle etc. down through one loop (over the outside of it). Under the three lines in the middle of the knot, then up through the other lop (again, over the outside line):
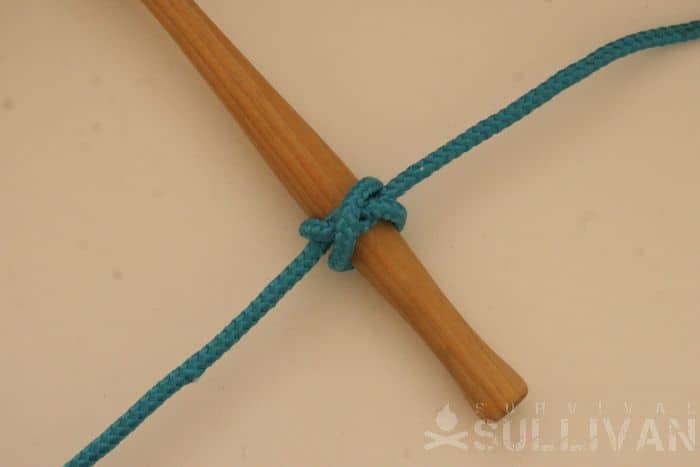
Step 6. Pull on the two ends to tighten the knot:
Using a constrictor knot to isolate a tear in some heavy canvas:
For more knot tips, you can read our complete knots guide.
Nick O’Law has been exposed to survival from a very young age. In his teenage years, he learned A LOT about bushcrafting, such as making snares and traps, and even how to make DIY knives.
If you haven’t ye read and tried his knot-making articles on Survival Sullivan, you should definitely check them out.