To know the knot is to constantly find uses for it…
Brion Toss, Master Rigger
This is one of the most effective binding knots. It is constructed as a ‘half knot’ underneath a turn (called a ‘riding’ turn, because it ‘rides’ over the rest of the knot). As a friction binding knot it can be tied with only end of the line, and will hold very tight (sometimes too tight – it can be difficult to untie).
It can be used to quickly bind pretty much anything, at least temporarily, and excels when tied in small line around a larger object, because the thin line ‘bites’ into the object.
The caveat to the knot’s strength is that one must be cautious when using it on softer materials like fabric bags as the line can damage them, especially if very thin. Keeping the different turns of the knot snug up to each other can alleviate this problem slightly by spreading the load a little.
You probably find this knot useful for tying up bundles of firewood or fabric (like tents or sleeping bags), but it can also be good for lashing together similarly-shaped equipment, like pens or pencils or knives in a pack.
End Tying Method
This is the ‘standard’ way to tie a constrictor, and you could get by with just this if you always have the end of the line to hand.
However, it is best used around the middle of a bundle, where it is inconvenient to get to the ends (of the bundle) and so difficult to use the twisting method (which is generally faster).
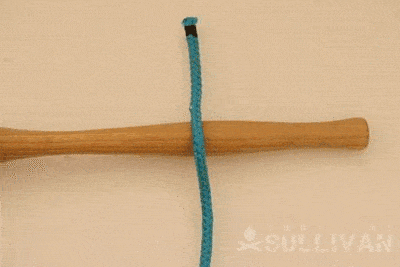
The Steps
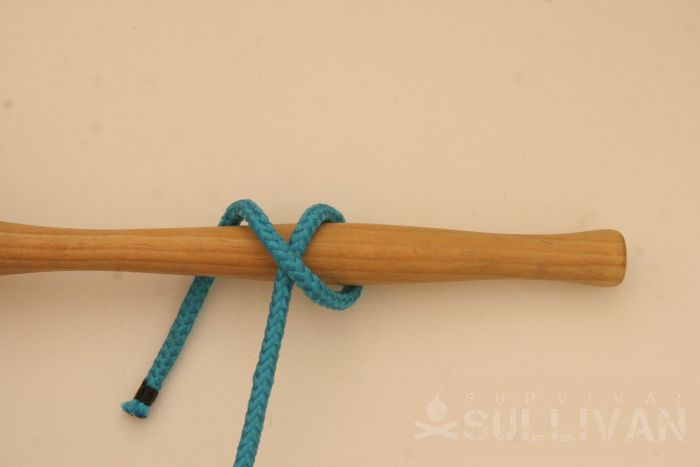
Step 1. Lay the line over the pole working end away from you:
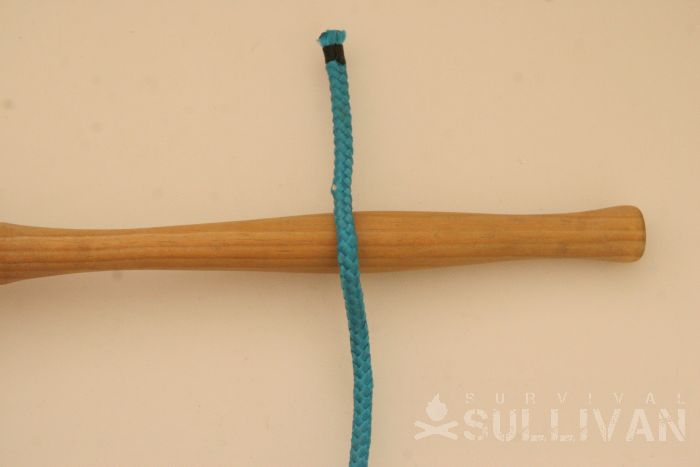
Step 2. Pass the working end back under the pole, coming out on one side (in this case the right) of the standing part:
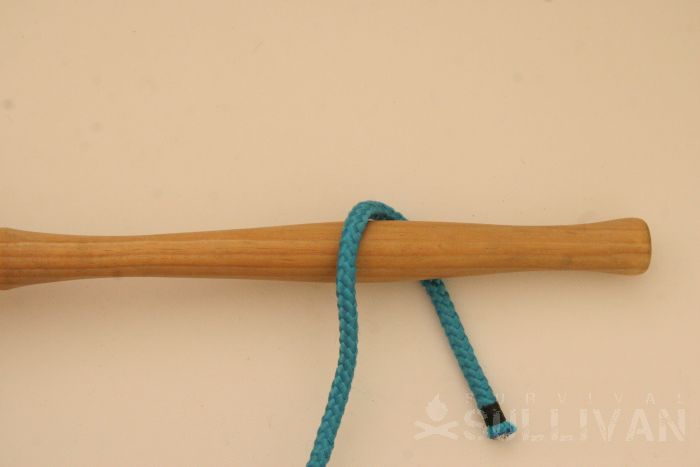
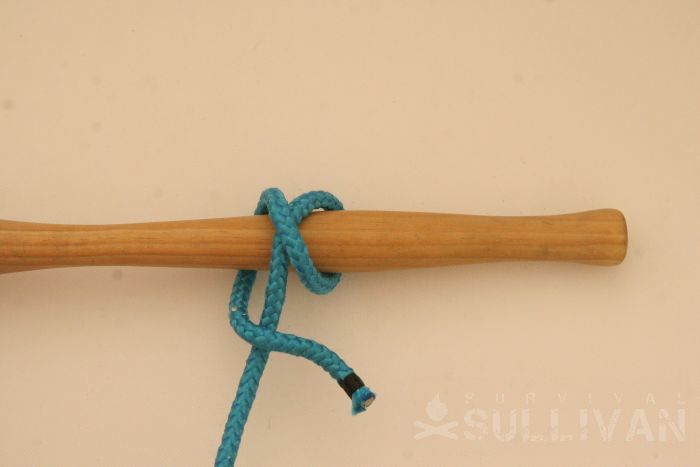
Step 3. Cross the working end back up over the standing part and over the pole. Its should now be on the other side of the standing part (here the left side):
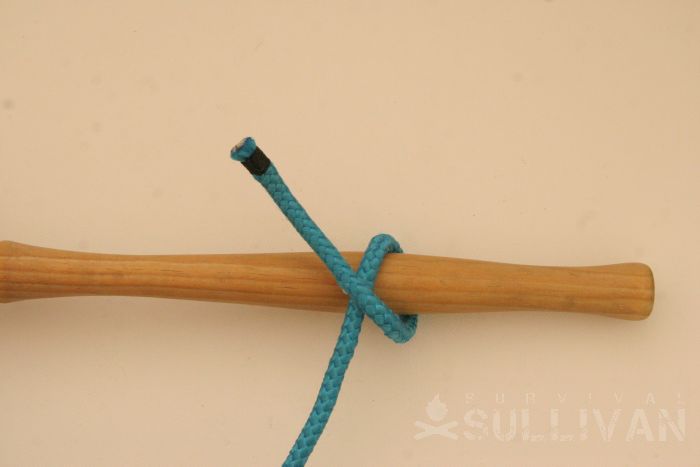
Step 4. Bring the working end under the pole without crossing anything:
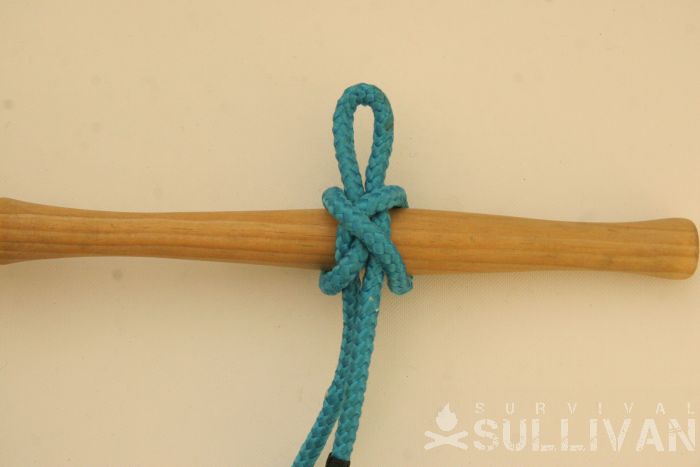
Step 5. Cross the working end over the standing part:
Step 6. Thread the standing part under both parts of the turn on the side it is pointing towards (in this case the right side):
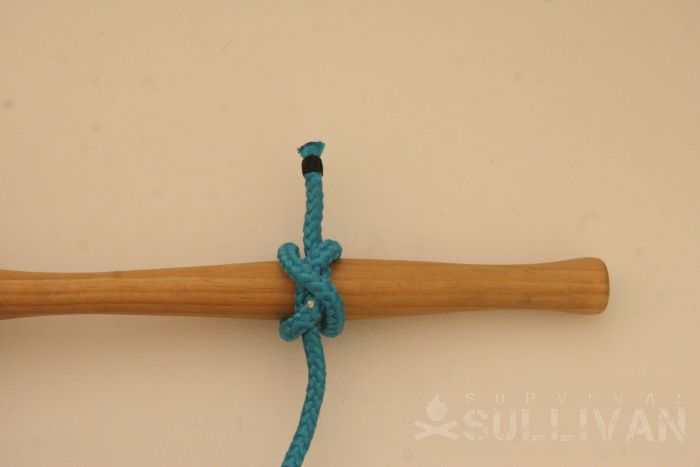
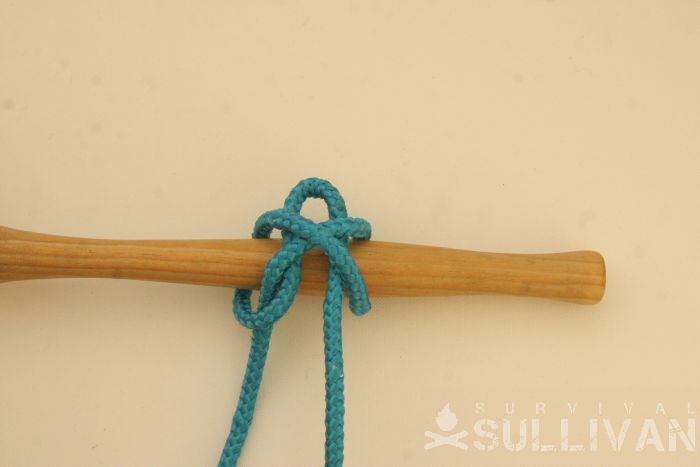
The end result:
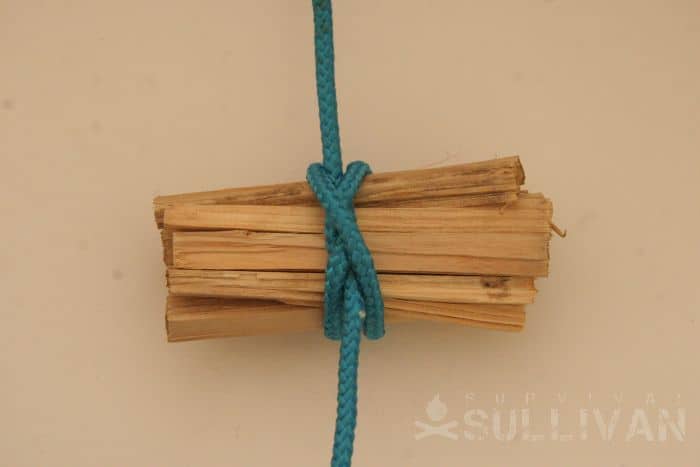
Constrictor knot used to bundle some kindling.
The end tying method tends to be especially suited to bundles of many separate items, where it would be impractical to hold the whole bundle and slip a ‘twisted’ method tied constrictor over the end. Instead, it is much easier to lay the items one by one onto a line laid on a surface, then bring the line up and around and tie the knot.
The same principle means that for very thick bundles ‘knotted end’ binding knots tend to be easier to use.
Slipped Constrictor Variation
The standard constrictor knot can also be slipped for quick release. This will not affect the security of the knot itself, but will it more difficult to tighten because you can’t pull on the two ends as easily if one is doubled back on itself.
The Slipped Constrictor is exactly the same as a standard constrictor knot, except that the final tuck is with a bight, not with the working end:
Pull on the bight and the standing end to tighten it. The knot should look like below. Pull on the working end to open the knot:
Related Knots
- The Strangle Knot is an inferior binding knot, made with the underlying half knot the other way round. This makes it much more prone to slip.
- The Transom Knot however is a variation of the strangle knot, made around two crossed poles, as a temporary square lashing. For this (and pretty much this only) the strangle knot can be very useful.
- The Reef or Square Knot is a binding knot made by tying the end together. It is only good if made quite tight, but is often better for larger bundles where passing the line around the whole thing multiple times would be impractical.
In Conclusion
Overall, this knot is versatile and well worth learning. The variations and different ways of tying may prove useful, but the end-tying method will always work, so if you take away nothing else, learn that!

Nick O’Law has been exposed to survival from a very young age. In his teenage years, he learned A LOT about bushcrafting, such as making snares and traps, and even how to make DIY knives.
If you haven’t ye read and tried his knot-making articles on Survival Sullivan, you should definitely check them out.