This is the method of tying a bowline taught to cavers and search and rescue personnel, for tying a bowline around oneself with only one hand (leaving the other free to help a casualty or stay in place) when thrown a rescue line.
Done in this way, it relies on the weight of the body pushing into the loop for tension. If both hands are free, the same method is still very good if you are tying a bowline in the dark, or in conditions where you need total control of the line the whole time (this method is often used in rough conditions at sea).
As well as being useful for rescue, this is also a very systematic method, where the line is under control all the time (and can’t flap about and go in the wrong place), so it’s easier to learn to do it really fast, which is likely to come in handy one day!
The photographs assume that there is a load or tension in the bight of the loop, somewhere around where the line crosses the base of the thumb.
In these pictures the final knot loop is the size of the loop which fits just around the hand, so no extra load is needed.
In reality, this might be a body (so the final loop ends up around one’s waist or hips) or another hand (the method is very fast if done with one hand as a ‘tensioner’ like this, and the other actually tying).
It may be useful at the end to pull on the standing end to tighten up the loop in the knot.
Like all bowlines, this can be tied as in the pictures, or flipped horizontally (which might be useful if tying with the left hand).
The Steps
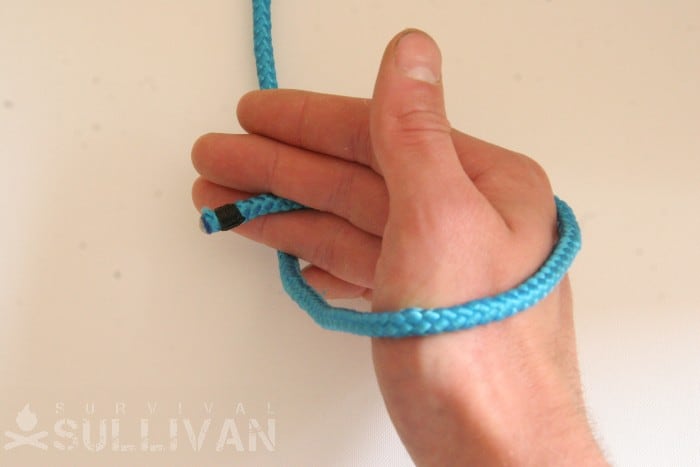
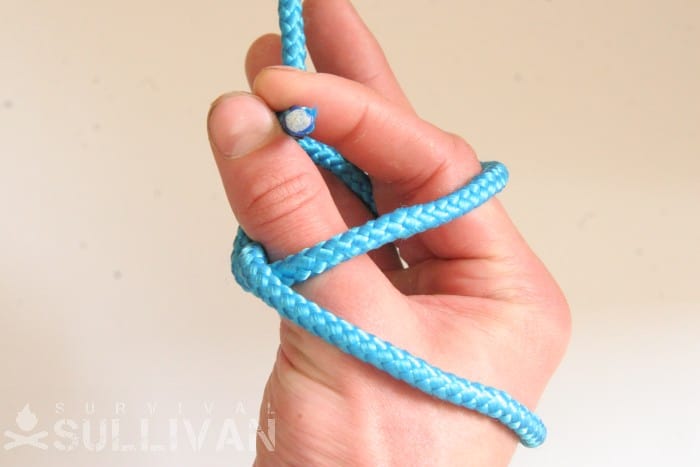
Step 1. Make a loop around your hand. These pictures assume your right hand, but if you want to do some mental gymnastics you can mirror all of them and achieve exactly the same with your left.
If you want to be really good it’s probably a good idea to practice both, you never know which hand you might not have use of in an emergency. This loop will become the loop of the finished bowline.
Note the placement of the line between the ring and middle fingers, and how it then goes around everything:
Step 2. Begin to tip your hand away from you. As this happens, the back of your fingers should be approaching the standing part (at the back of this picture):
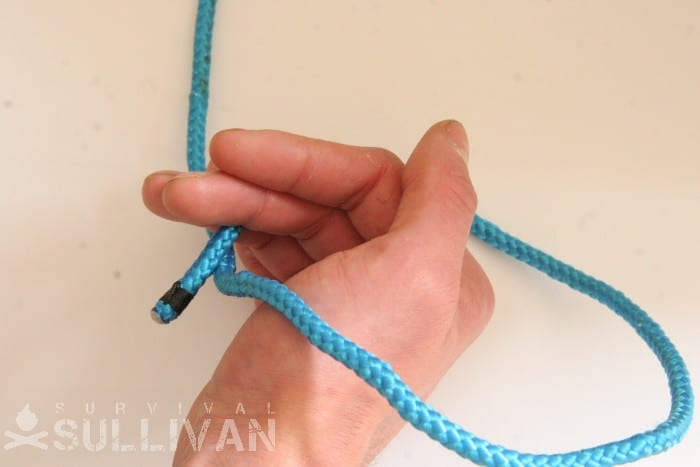
At the same time, curl your fingers under the standing part (which is underneath them in this picture), so that they catch it and pull it up as the hand rotates.
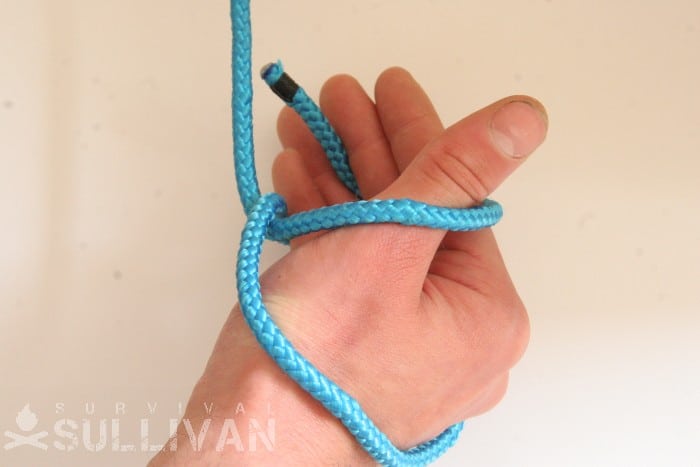
Step 3. Keep tipping your hand, and twist your hand and you should make a loop around your fingers.
This is easier to understand once you’ve done it a few times, so if the instructions aren’t clear, try making your line look like the pictures above (with both hands) and then work backwards to understand the movement to arrive at the point:
Step 4. Use your middle and ring fingers to pass the working end behind the standing part:
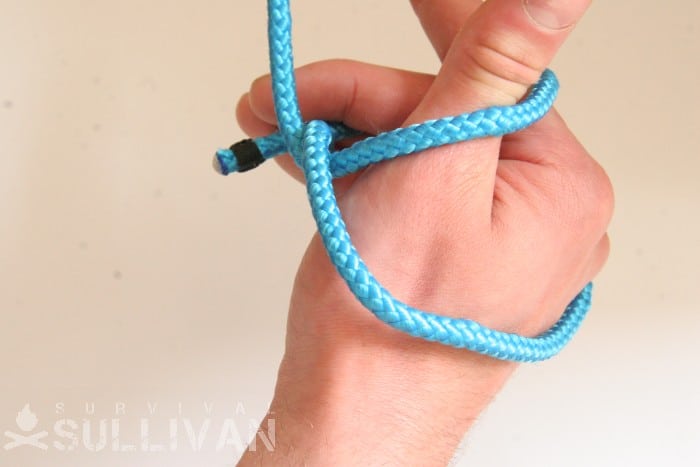
Step 5. Now grab the working end with your thumb and index finger, which should be in exactly the right place to reach it:
Step 6. By pulling down you should be able to free your hand from the loop, and pull on the working end with your thumb and index finger:

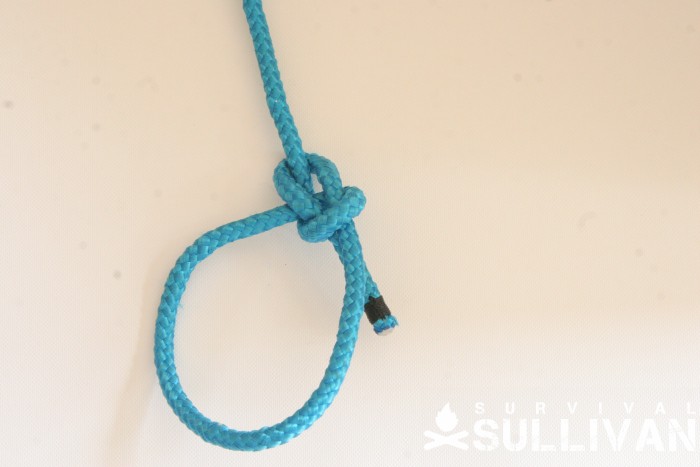
Step 7 (Final Step). Keep pulling and the knot should tighten up to look like this:
Related Knots
- This is not really a different knot in it’s own right, but a standard bowline tied in a particular way. There are other specific ways to tie the bowline:
- A similar technique to this can be used to the a one handed or fast bowline with the anchor behind you, and the bowline loop ending up in front.
- A different technique again is called fro if the bowline is to be tied in the end of a line.
- The Lightning Bowline is great for tying a bowline very quickly around a large post or object, especially if it is to be drawn up very tight to it.
- The Figure of Eight on a Bight (or ‘rethreaded’) is another strong end-loop knot, generally used for more permanent applications
- There are many different variations of the bowline, with different ‘locks’ to add security, and ‘tie-offs’ to tidy the loose end up.
Conclusion
The bowline is such a versatile knot, and used in so many different ways, that it is well worth learning to tie it right, and fast in lots of configurations.
Nick O’Law has been exposed to survival from a very young age. In his teenage years, he learned A LOT about bushcrafting, such as making snares and traps, and even how to make DIY knives.
If you haven’t ye read and tried his knot-making articles on Survival Sullivan, you should definitely check them out.