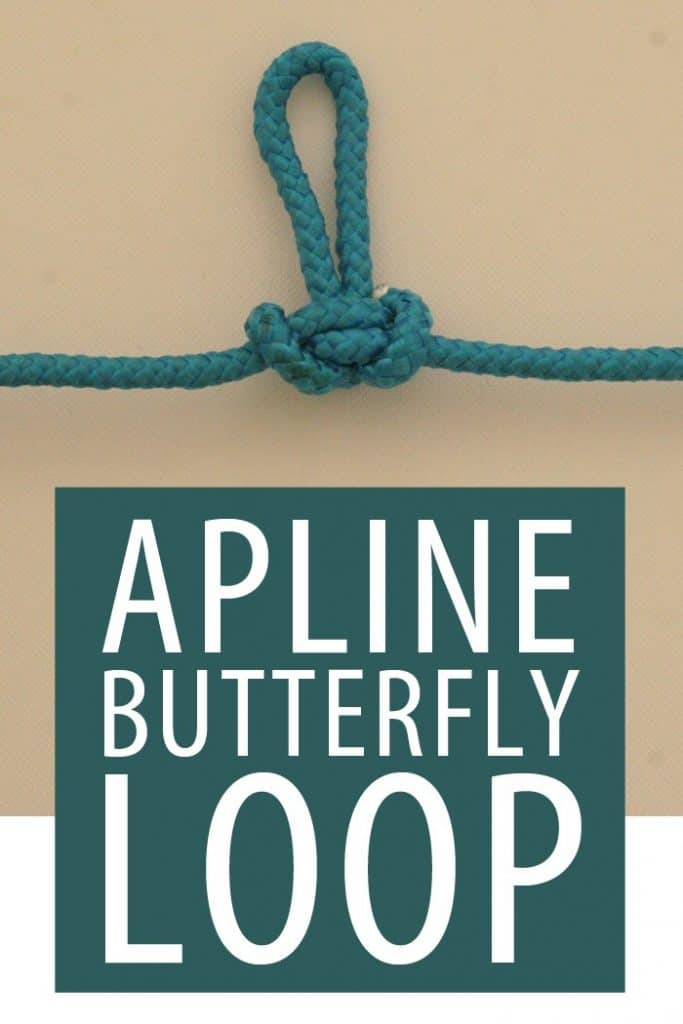
The alpine butterfly is mostly used by climbers. It can be tied without using the ends and produces a loop which stands perpendicular to the rest of the rope.
The Alpine Butterfly should be used when the direction of the load on the loop is close to perpendicular to the rope (or is not likely to be in one single direction along the rope) and the two ends coming out of the knot are at roughly 180° to each other.
The Alpine Butterfly Loop handles ‘multi-directional’ loading well, in that one can load the loop or either end without the knot causing a loss of strength in the rope.
The loop itself also handle a change load direction well. Some loops only perform well one loaded in one direction (like the Directional Figure of Eight), but because of the Alpine loop’s construction it can be pulled all the way to both extremities (along the line in either direction) without losing much strength or security.
If something is placed, tied or clipped (like a carabiner) through the loop, it is even less likely to come undone, because the object acts like a barrier, keeping the line of the loop from slipping down through the knot.
The name originates ‘Alpine’ originates from the knot’s heavy use by alpine mountaineers and climbers.
Some people think this makes it seem a bit exclusive, when in reality it’s a great knot for lots of people, so they just call it the Butterfly Loop.
The knot makes a strong anchor point if you need to tie or clip something securely to the line without it moving. You could do this by tying an end loop or hitch through the loop made by this knot.
Alpine Butterfly Loop Steps
Step 1. Make a bight in the middle of the line:
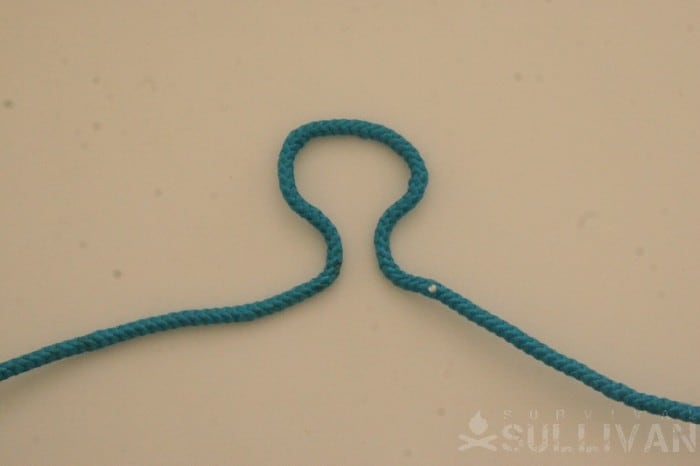
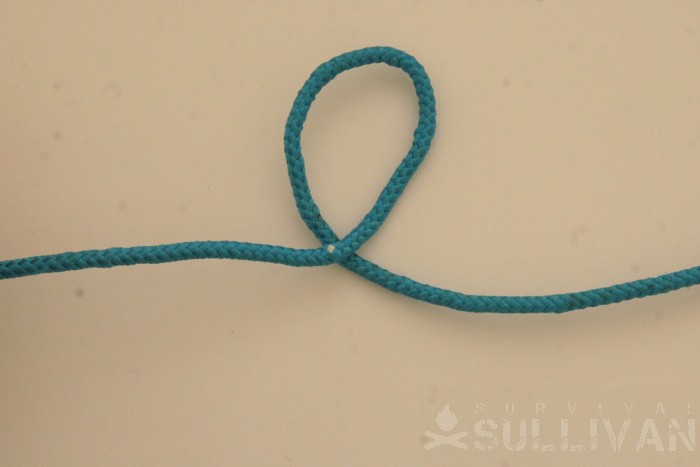
Step 2. Twist the bight once to form a loop:
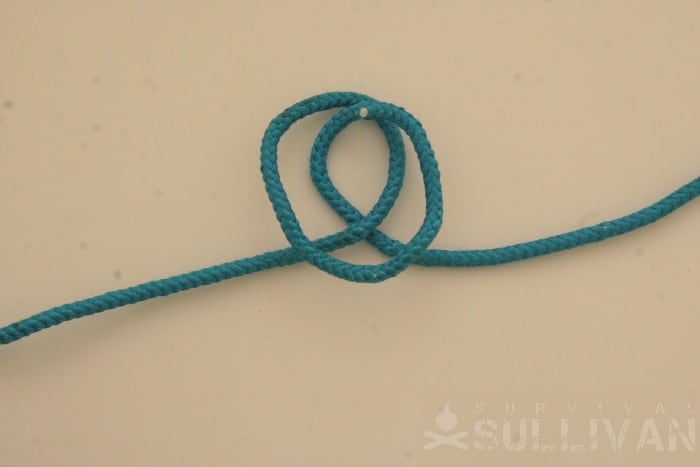
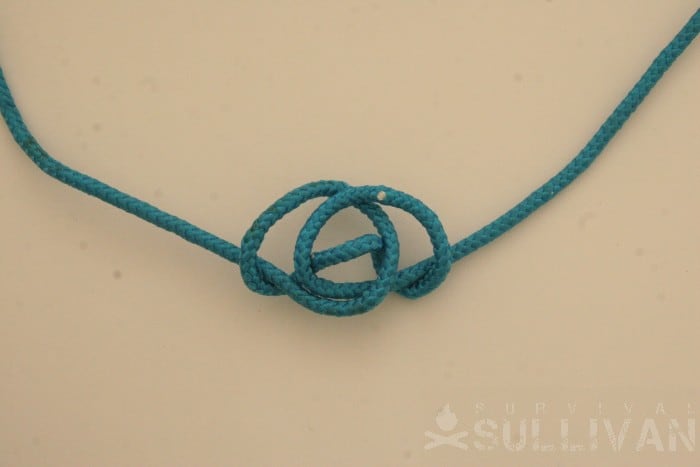
Step 3. Twist this loop again in the same direction to form a second loop. You should now have two loops, one above the other. This arrangement is called a pair of ‘elbows’ (after the two interlocking curves in the line):

Step 4. ‘Fold the upper loop down over the lower one. Notice that what was the lower loop can be seen completely within the upper (or what was the upper, but has now been folded down):
Step 5. Insert what in this frame is the lower part of the uppermost loop (the part of the loop near the bottom of the picture) underneath everything, to the middle of the knot. It should be visible in the middle of the lower loop. This part is essentially a bight:
Step 6. Pull this bight all the way up through the middle of knot, tightening the knot a little:
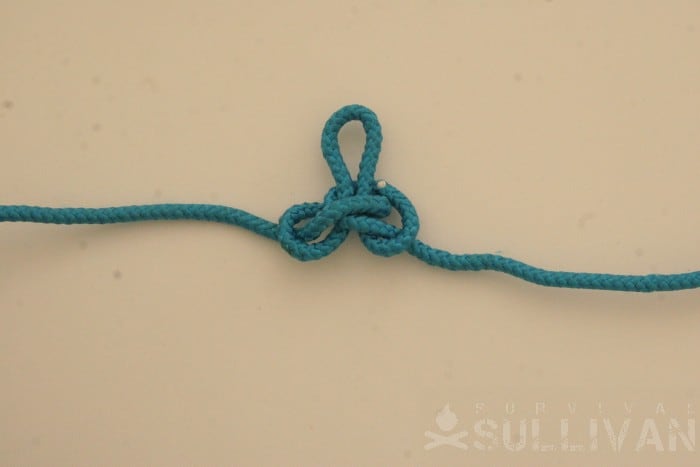
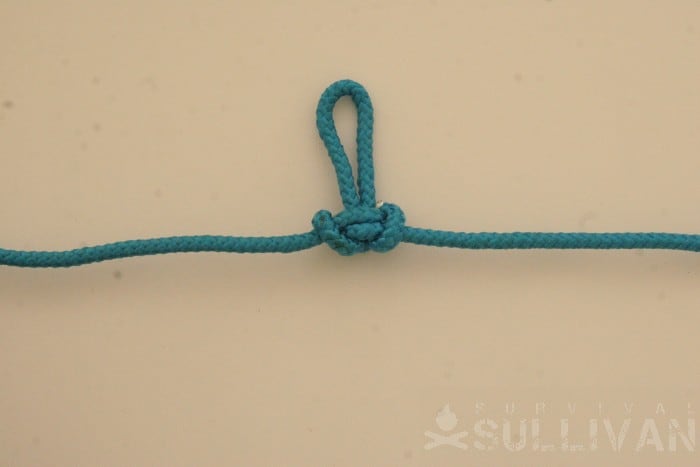
Step 7. Pull on the two standing ends to completely tighten the knot:
Related Knots
The Alpine Butterfly Bend is an end-to-end joining knot, exactly the same structurally) as if the loop of the Alpine Butterfly loop were cut through the middle.
The Alpine Butterfly Loop is structured as two interlocking Overhand Knots. In fact, there is a whole family of knots (all of the others are bends) made by interlocking overhand knots.
The Zeppelin Bend is the best, and the Ashley Bend, Hunter’s Bend Flat Overhand Bend (also called the EDK or European Death Knot, though it is perfectly safe if tied properly) are a few others.
The Figure of Eight on a Bight (or ‘re-threaded’) and the Directional Figure of Eight Loop are the other two best known middle-of-the-line loop knots.
Conclusion
Despite its name, the Alpine Butterfly is a versatile knot for everyone.
It’s true that climbers and mountaineers use it for securing to lines and building anchors, but cave and wreck divers also use it to attach branch lines to their guidelines, and riggers use it for… whatever riggers use knots for! Definitely worth learning knots, whoever you are.
Nick O’Law has been exposed to survival from a very young age. In his teenage years, he learned A LOT about bushcrafting, such as making snares and traps, and even how to make DIY knives.
If you haven’t ye read and tried his knot-making articles on Survival Sullivan, you should definitely check them out.