If you have been living a lifestyle of self-reliance for any length of time, there is little doubt you’re already familiar with the notion of keeping vital gear and supplies close at hand in order to be better prepared. Pretty much every prepared person understands the value of a go-bag or BOB.
The utility of keeping items accessible “just in case” is obvious. But what some folks might not give much thought to is the idea of stashing those supplies in an out of the way or remote location.
Supplies placed in this way will be available should you need them while en route to your destination or while performing any other task that takes you away from home and your primary stash of supplies.
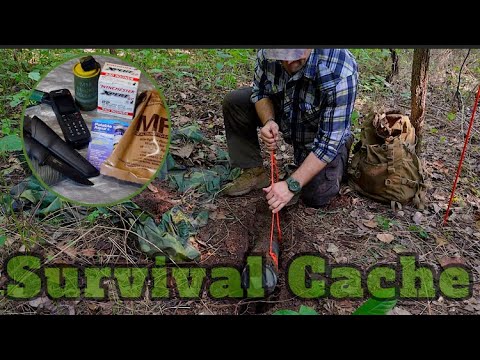
This is the concept of the survival cache, and the practice of placing your gear in this way is known as caching.
Establishing a network of such caches can allow you to be better prepared for whatever disasters or emergencies might occur while reducing your overall load and protecting against the loss of any carried supplies or gear.
This article will tell you everything you need to know about establishing your own survival cache network, from choosing supplies and containers to siting and protecting your investment.
What is a Survival Cache?
The term cache has a certain amount of intrigue to it, a mystique. It conjures up notions of spies, cat-and-mouse chases, and high-stakes political intrigue.
Indeed, people involved in such operations often require caches for exactly what you might be thinking! But even though they are similar, a survival cache need not be used for any nefarious purposes.
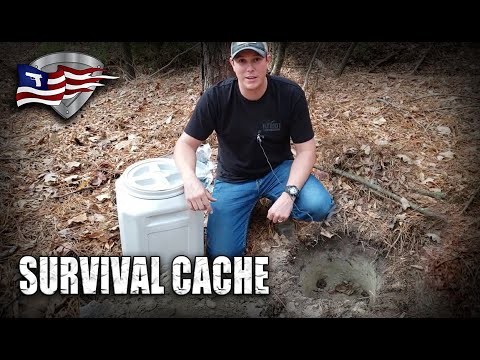
A survival cache is nothing more than a quantity of equipment, provisions or any related survival gear that you place in a hidden location, usually away from your home or base, in anticipation of needing it to resupply during a crisis.
This might be done as a hedge against loss, destruction or theft of your primary supplies, or as a preemptive way to reduce your load or encumbrance when you need to move quickly.
Any such items or gear that you choose for inclusion and your survival cache are up to you, and like all survival supplies highly dependent on the user’s own requirements, preferences and objectives.
Your survival cache might hold weapons and ammunition, provisions like water, water filters, or food, shelter gear like tents, tarps and fire starting equipment or anything else that you might require.
As a rule, any survival cache is going to be sited and then placed in a way that it will not be discovered by any other passersby or explorers, or if it is discovered it will be overlooked as inconsequential or just another part of the environment.
Survival caches are stereotypically thought of as always being buried, but this is not always the case.
Now you might be thinking that you don’t have any need of hiding these remote stashes of survival supplies in this way, and maybe you don’t, but as for your author here I can attest to the real world practicality of such caches.

My Own Real-World Experience with Survival Caches
A long time ago, while still working in Florida in the defense sector, myself and other employees were tasked with moving large quantities of guns, ammunition, optics and armor, both for vehicular and personnel applications, to and from various ranges for demonstration, verification and testing purposes.
The quantity was such that we usually moved in a convoy of at least two vans and often a box truck as well.
Now, there was nothing clandestine, illegal or shadowy about what we were doing, but the company understood properly the risks involved with moving such quantities of valuable equipment.
There is always a chance that someone, somewhere, might make a pass at you in order to obtain a big score of loot. Accordingly, we always traveled armed and in a relaxed but legitimate defensive posture.
Happily, the bosses in the company understood that the regularity of our movements to and through remote areas further increased the risk factor, to a degree, and decided to make available several pre-placed emergency caches along the route.
These were a contingency measure, genuinely a just-in-case option if we were to be overtaken in the middle of nowhere or just run afoul of mechanical problems.
Kept at personally owned properties or even stashed cleverly at roadside landmarks, these were a last-ditch insurance policy containing parts, medical supplies, and anything else we might need should be unable to solve the problem with what we carried.
We only ever needed a cache one time, and it was the result of a truly horrendous mechanical malfunction that had us, quite literally, continually feeding oil to one of the vehicles in order to limp it back to civilization.
Let me tell you, one of our caches saved time, saved a lot of money and saved the day at least as far as our task was concerned. I have been a believer ever since!
You might not need anything quite so extravagant for such a large operation, but the concepts are exactly the same and definitely applicable to prepared individuals and families.
The “Network” Method
Generally speaking, the typical survival cache is thought of as one large nest egg containing everything that a person might need and kept at an out of the way location, usually a BOL, Rendezvous point or other place where there is a high probability of reaching in times of trouble.
An alternate method consists of one or two smaller caches at strategically placed intervals along typically traveled routes.
Both of these methods are entirely viable, but there is another way, one that I have taken to calling the network method though I did not coin the term.
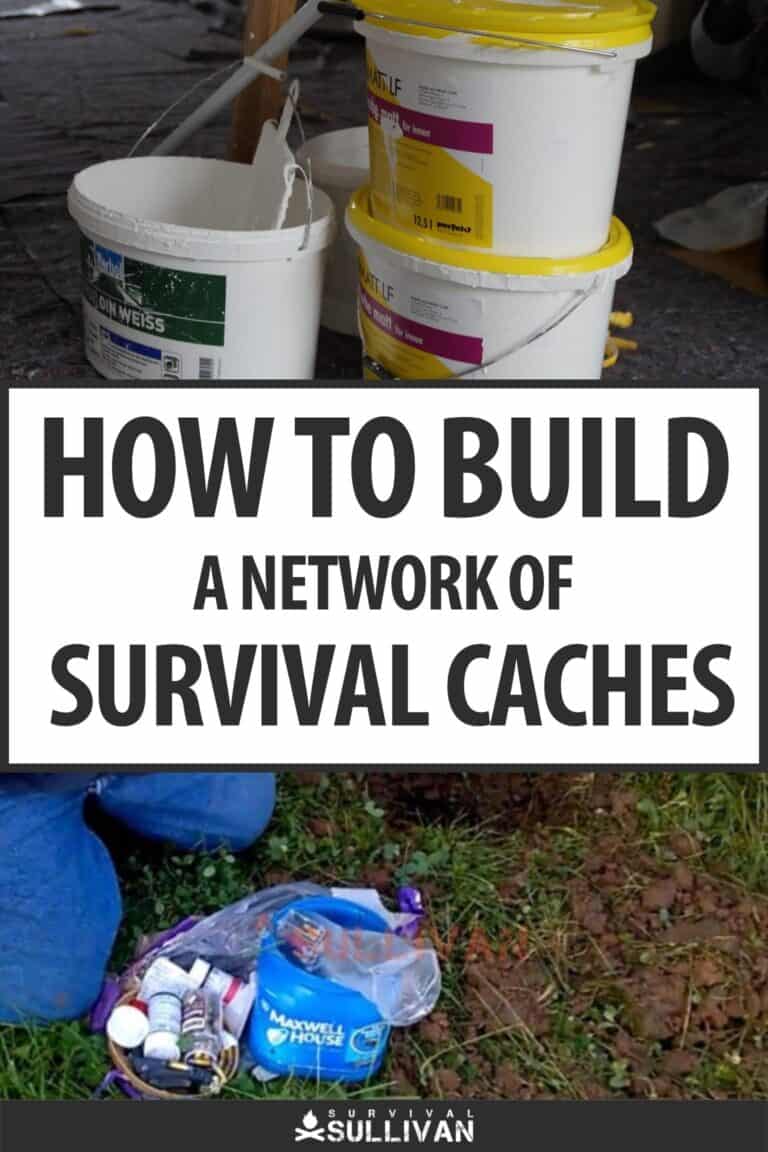
A survival cache network consists of multiple, smaller caches evenly spaced along every designated bug-out route that you might take, or at every possible bug out location you might head for in a disaster or crisis.
This method ensures that you are always able to access at least some supplies when underway, even if you are unable to reach one or more of your cache locations or they are lost, looted, destroyed or somehow rendered inaccessible.
This methodology relies on redundancy as a way to attain certainty in your planning.
In operation, this network method provides you with more opportunities to get what you need even if you are starting from zero, meaning no supplies on hand.
Think of it like a long road trip where you have that “Last Gas for 200 Miles” sort of stretch versus a typical cruise down the busy interstate with gas and food available every 10 to 20 miles.
If you don’t put all of your eggs in one basket, you’ll have more baskets to watch- but you won’t worry about losing all of your eggs in one fell swoop!
The flexibility that this affords preppers when it comes to material preparation is well worth the extra logistical effort you’ll have to put in.
Who Can Benefit Most from this Method?
Like all techniques and procedures, the value to the individual depends entirely on your circumstances, your objective, your overall plan and your personal context.
The survival cache network is not the only and best way to prepare for a disaster or other emergency, only “a way.” But it is a way that could be the perfect option for some readers.
Give this method serious consideration if:
- You regularly commute along the same route(s) for any reason, be it work, family obligations or otherwise.
- Due to circumstances you are forced to rely upon multiple bug-out locations and will have to choose at the instance which one you will head to.
- If you are in poor physical condition or infirm and don’t want to carry or load a large quantity of survival supplies in response to events.
- You like the idea of having a hedge against the loss of your primary load of survival supplies, carried in a pack or in your vehicle.
The survival cache method might not be for you if:
- You cannot put in the time or energy to periodically inspect or maintain multiple remote supply points.
- You plan on bugging in no matter what.
- Your predicted situation will not afford you the time or flexibility to stop and access remote caches.
Probably the primary shortcoming of the survival cache network is that it requires a fairly intricate sequence of steps to be performed several or even many times in order to establish the network.
It is not out of the question that you might prepare three, five or even 10 smaller survival caches depending on how many routes you regularly travel or plan on taking during a bug-out situation.
I would not let this dissuade you out of hand, though. Just like everything else we do in the effort of remaining prepared for bad times, the maintenance and upkeep of these caches will pretty soon become just another item on your survival checklist.
A little proper planning goes a long way toward easing how much follow-up effort is required.
Prepping Your Cache Loads
All right, time to get down to the fun part, at least for most of us: It is time to assemble our cache loads, choosing the container as appropriate for the location where it will be placed and also choosing the contents according to our needs.
I have purposefully included this section ahead of a discussion on placing and protecting the integrity of your caches since your hardware options will make more sense in context when you consider what locations might work best for you.
Containers
Considering a survival cache as a concept, your container must be up to the task of both protecting the items that you’re storing and keeping them all together in a reasonably organized way.
You cannot expect to store a cache in a gym bag beneath an old trailer and have your supplies last any length of time. Conversely, a heavy-duty and weatherproof container is probably overkill if you are stashing your supplies in a closet at your brother-in-law’s house.
The level of protection that your container must provide is dictated by how much exposure to the environment it will experience under any conditions and also how sensitive the items you are storing are.
For instance, if you are storing a general purpose cache of well-preserved food, ammunition, clothing and other supplies inside a climate-controlled building you could probably get away with just about any sort of sealing container that will help keep moisture at bay.
But if you were, for instance, going to be burying a cache or hiding it in a natural or man-made feature that is constantly exposed to wind, sun, rain and other hazards your container must be absolutely bombproof: Airtight, watertight, crush resistant, UV resistant, the works. A suboptimal choice might mean loss of your cache and everything in it.
All of the following are containers that I have used personally or professionally with good success:
Plastic storage tub: These are probably already your best friend if you are a prepper. Generic, plastic or rubberized tubs are used for stashing all kinds of goods in and around your home.
They provide reasonable protection from larger pests and dust, but are not air- or watertight, and not particularly durable.
They remain suitable for placing a survival cache in a climate-controlled building, however, and their innocuous appearance makes them perfect for placing among other household goods in an attic or garage.
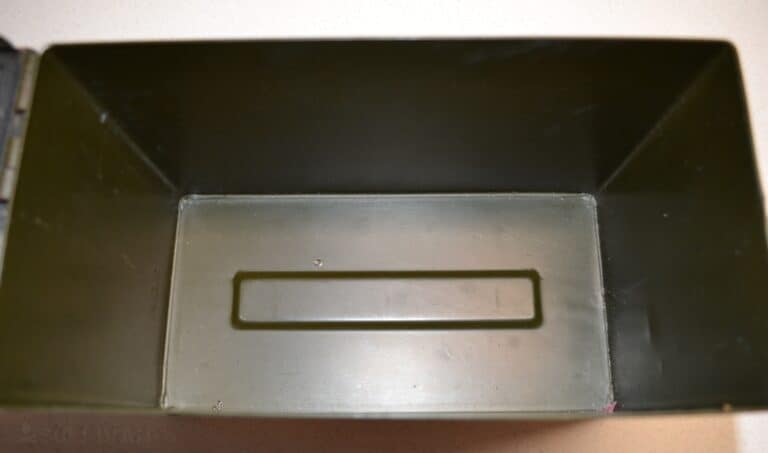
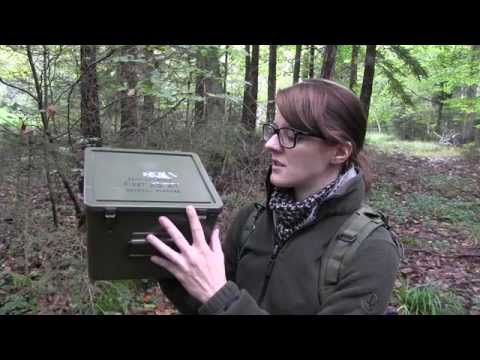
Ammo Can: You know them, you love them. Commercially produced or surplus military ammunition cans have much to commend them when used as the container for a survival cache.
Absolutely durable and highly weather resistant when above ground and above water, so long as the seals or gaskets are intact these will afford your goods significant protection, particularly if they are durable goods.
I like using ammo cans as general purpose above ground containers when placed in a hidden location. If discovered or noticed, they always invite investigation, however.
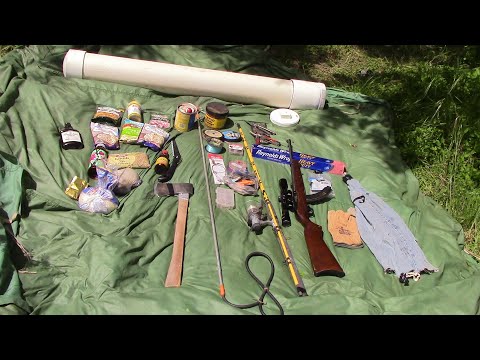
PVC Tube: One popular homemade method for creating a cache container is through the use of large diameter, common PVC tubes and end caps.
Extremely durable, completely resistant to weather rotting and affordable, with a little bit of prep work and careful attention paid to the sealing process these tubes make one of the very best options for buried cache, or potentially even an underwater one if the contents are sealed in their own bag. More on that later!
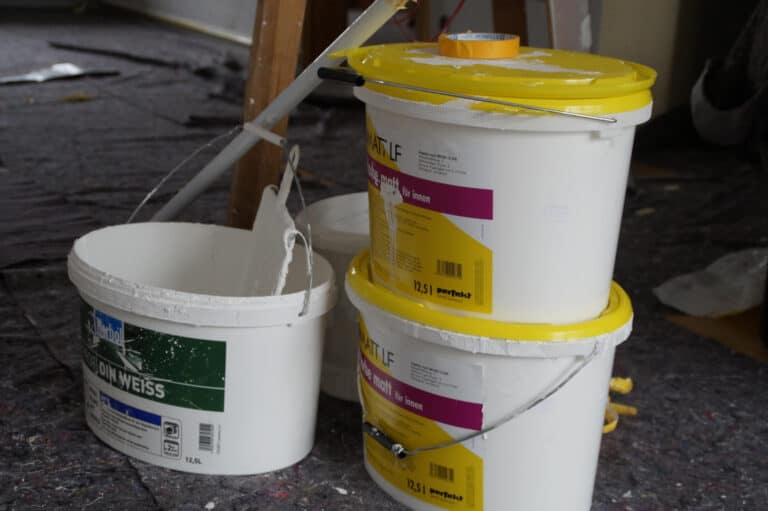
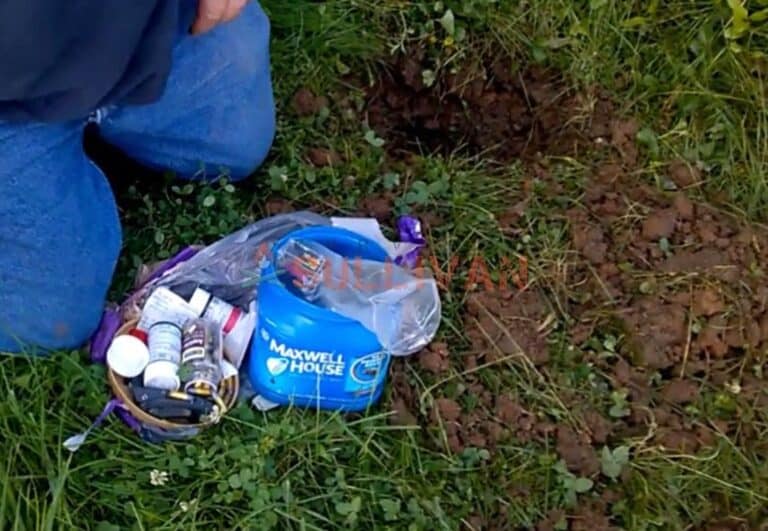
Paint Bucket: You might chuckle, but the bog-standard hardware store 5-gallon paint bucket is in many ways the ideal container for a survival cache.
They are durable, have a tightly sealing heavy duty lid with a gasket and when closed are resistant to dirt, water, pests and more.
These are also commonly seen anywhere, and can be adapted to hidden outdoor storage or camouflaged to be stashed in or around buildings, sheds and other places of human habitation where they will not stick out.
I do not recommend you submerge them, though bucket caches can be buried shallowly if they will not be trod upon; the lids are vulnerable to caving in under load.
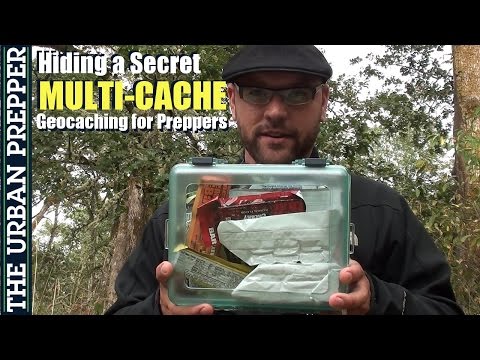
Commercial Cache Container: There are commercially available, purpose designed cache containers, both in metal, resin and plastic.
Many claim to be made with the very best in achievable weather resistance performance in mind and as suitable for being buried, submerged or otherwise subjected to considerable abuse.
Many such containers are used in the activity of geocaching, and may prove to be superior to other improvised options. You must test them to be sure, however!
Depending on the specifics of your cache, you might need a smaller container or a larger one. The area where you plan on hiding your cache will also partially determine what sort of container is best.
Contents
This is where the rubber meets the road for many preppers. What supplies will you put in your caches, and how will you distribute them?
Generally speaking, any survival supplies which you will include in your bug-out bag or go-bag are worth including in various survival caches. There is more to consider, however, then merely duplicating whatever load you have already.
First and foremost, determine whether you will make each cache more or less identical and load to serve as a point of replenishment in case of expenditure or loss, or if you will group items of like kind into dedicated caches that you can access when needed. This requires careful thought on your part.
You should also consider whether it is worth including any items or supplies that don’t quite warrant carrying in your personal survival luggage.
This could be something like fluids for vehicles, spare parts, just-in-case items and double- or triple-redundant copies of things you already have in your possession.
In short, the use of survival caches allows you significantly more liberty to equip yourself with the things you might need without unduly overloading your vehicle or encumbering yourself.
Consider the following items for inclusion into any given cache in your network.
Food: As always, rotation is going to be important. Choose the best preserved foods for this task. MRE’s are a great option, and even better protected inside their plastic bags.
Water: Sealed, bottled water will last a surprisingly long time inside a cache point if the cache container seals stay intact.
Tools: Anything from bushcraft tools to weapons and ammo can be waiting for you inside a cache. Take care that any metal items are protected with grease, oil, or vapor blocking wraps.
Clothing: Seal spare or special use clothes in heavy bags to help keep them fresh and clean.
Medical Gear: Most medical gear does fine in cache storage, but make sure you keep an eye out for mold outbreaks on soft goods. Also medications must be rotated like food.
Flashlights: Any survival stash worth the name should have a flashlight in it. Always useful, highly likely to be lost or broken. A spare is worthwhile. Don’t keep batteries in it to prevent corrosion of the terminals.
Batteries: Batteries do fine when stored in a cache, but recall that all batteries self-discharge. Alkalines are the main offenders, so make your life easy by using lithium types instead.
Navigation Aids: Maps, compasses, atlases and all the usual navigation aids are welcome additions when you might be starting off from scratch with no gear on hand.
Signaling Equipment: Snap lights, flares, signal mirrors and more will all hold up fine in cache storage. Chemical flares will need to be rotated more often than usual when exposed to temperature extremes.
Fire-Starting: Another standard survival item. Matches, lighters, ferro rod, a supply of tinder and you’ll be all set. These items are, as a rule, only vulnerable to moisture. If you can protect them from that you’ll be good to go.
Sustainment Items: Consider inclusions like water filters and additional shelter materials for a good bug-out cache. A small bivy or tarp, emergency blankets, sterilization tabs and similar will set you up for a successful stay in the wild.
Cash: You will probably have some need for cash money when you are forced to access your survival supplies. How much, if any, you store is up to you based on the situation you are anticipating.
Cash is vulnerable to rot, so make sure your container is up to the job of protecting it.
Weatherproofing
For many preppers who are considering utilizing a network of caches, this is the biggest point of uncertainty. These items are not going to be in your immediate control, not quickly (or even easily) accessible and many will be exposed to the elements on a full-time basis.
Particularly when including valuable or sensitive items, guns, ammunition, electronics, food, etc., nobody wants to throw money away due to a mistake or improper preparation.
You don’t need me to tell you that caches kept anywhere except inside a climate-controlled building will need a certain amount of weatherproofing.
So how do you do it? Generally, these measures are dependent upon the nature of the container, the method in which it is stored and any further steps you take to protect the items inside the container.
Let us consider where and how the cache will be stored: If you are locating it above ground with some protection from the elements, you generally won’t need a container that is as heavy duty as one that will be openly exposed to weather around the clock, buried or submerged in a body of water.
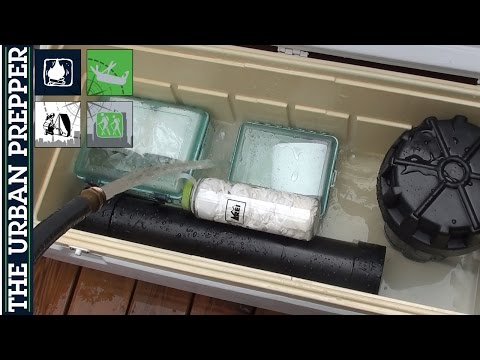
Similarly, you are probably entirely warranted in further protecting items inside the container through other means. This could be something as simple and reliable as a gallon-sized Ziploc freezer bag or something more specialized like a weatherproof, vacuum-sealable mylar bag.
Depending on the items in question, perhaps toss-ins like O2 absorbers or desiccant might be a good idea, though not always necessary.
This is one of those things you cannot afford to get wrong, and any critical items you plan on caching should be tested for longevity before you rely on them.
This can be done conveniently close to home if you are willing to put in the effort by loading a “test” container and leaving it exposed to the weather, buried or whatever is appropriate.
Siting and Emplacing Your Cache
Assembling your cache container and stuffing it with gear and supplies is only half the battle. The other half is figuring out where you’re going to put it, so it will stay accessible and stay protected. Sometimes this is easier said than done!
Broadly, you always want to place your cache in a place that you’ll be able to reach, even in an emergency, and in such a way that it will be hidden from discovery or casual detection.
This is where you can really let your creativity run wild. If you enjoyed scavenger hunts or hide and seek as a child (or maybe even today) this should be a pretty easy process!
There are a few general categories for determining cache locations, detailed below:
Natural: Hidden in the natural environment, the “wilderness.” This could be tucked inside the trunk of an old, dead or fallen tree, buried beneath a shrub, stashed on a river bank or something else.
Hiding your cache in a natural location means you are generally relying upon the environment to blend your site and conceal the cache.
Structure: Your cache will be hidden inside, beneath or around a man-made structure. It might be a paint bucket concealed among the other detritus of a cluttered shed. A rented storage unit for the purpose is a popular option for suburban preppers.
You might stash a small container under a mobile home. You could even conceal a stash in an abandoned or condemned building. Structures are commonly accessed or investigated by people for all kinds of reasons, so choose the spot and concealment carefully.
Consider a building might be sold, remodeled, demolished or illegally occupied when you need to get to your cache!
Buried: In the classic model of buried treasure, you might decide to bury your survival cache for later retrieval.
Done properly, this is a great way to conceal absolutely whatever supplies you place and keep them safe. Done carelessly you’ll likely be losing supplies to environmental damage or discovery by passersby.
Submerged: If you are able to produce or procure a truly watertight container you might consider sinking your survival cache in a shallow body of water.
It could be buried and anchored on the banks of a river, stream or pond or actually submerged farther out in the body of water, necessitating a rope and float, boat or dive to retrieve. This is a high-risk, high-reward option.
Done well, no one will discover your cache unless they spend a lot of time and effort looking for it. Done poorly, you’re probably going to lose your gear entirely.
Think through the location of your caches carefully. Not only must you be able to access them and retrieve them in a reasonable amount of time during a crisis, but you also need a certain amount of privacy to initially place them.
How often are these places traveled by other people? Are there any restrictions or legal issues involved with you accessing the location? How much time, activity and noise is involved in placing or retrieving the cache?
Understand that if you are discovered by any person not in your circle of trust while placing or retrieving, you must consider that location and likely the surrounding area “burned” for your purposes.
Curiosity invariably results in people investigating what you are doing and then in stolen supplies!
How Do You Protect Your Caches?
One of the most common questions I field on this topic is that of how you protect your cache after it is in place.
The answer, sadly, is that you really cannot at least for those that are remotely located. Simply, you must hide it and hide it well if you want it to go undiscovered and unplundered.
Give some serious thought to not only who might regularly be traveling through an area where you stash your supplies, but also what they are doing there. As examples, I would advocate against burying a cache in an area where metal detecting is a popular pastime.
Similarly, any place that is currently undergoing urban renewal is not a good choice for hiding supplies in an abandoned or condemned building.
You might think you have the perfect hiding place near a bit of infrastructure along a highway or roadway. But if workers or maintenance personnel might be expected to access that place for any reason, your cache will be discovered and if it is not stolen, thrown away. Either way, the outcome is the same for you.
The other way you can protect your caches is to regularly check on them and rotate the supplies. You need not think that any item, whatever it is, you place inside your container will persist forever no matter how tightly you seal it or preserve it.
Ammo, food, batteries, medication- all of it will eventually go bad and it can go bad a lot quicker than usual when subjected to temperature extremes or any amount of moisture.
This, as mentioned above, can make things very challenging if you have your stash located in a place where you are likely to be spotted accessing it.
Choose your site carefully, but nonetheless regular inspection and rotation of the contents must be done. That is the only way you can ensure you’ll be able to depend on them when you need them.
My Personal Cache Setups Today
To give you an idea of what is possible using the above guidelines, consider my cache network that I have set up in my hometown area.
For instance, I have one of my survival caches hidden in an old and decrepit cabin on the edge of a friend’s large, rural property.
The building is in such a bad state of repair that the interior is regularly soaked with rain, positively infested with insect life, investigated by small mammals and occasionally the site of mischief on the part of rowdy teenagers.
The cache items- including a firearm, ammo, food, clothing, cash and medical supplies- are kept inside a taped freezer bag inside an ammo can, one with a good seal.
So far, every time I have checked on the contents over time (appx. every 4 mos.), they have proven to be in good shape and unspoiled, despite the exterior of the can getting worse and worse over time. I rotate the consumable items once a year and will eventually swap the can for one in better shape.
I have another survival cache consisting of a homemade PVC tube that is welded closed using PVC cement, and buried on one of my properties.
This is one of those caches that contain “contingency” items in the form of certain documents, flash drives, cash and a few other odds and ends I want to keep compartmented against loss.
The items are inside a heavy-duty vacuum sealed mylar bag, and inside the tube is an O2 absorber and a “moisture meter” strip.
Being buried is a severe test of the integrity of any container, and I am happy to report that after being buried for 2 years the contents were entirely intact, legible and functional.
I had decided to dig it up and investigate it for assurance even though prior experience told me they were probably fine. There is no telling how much rain affected the area of the cache, but it did not result in any damage. After carefully reassembling the cache container, I reburied it.
Lastly, I have a general purpose cache containing a smaller, self-contained loadout found in my bug-out bag that is located at the halfway point along my primary bug out route heading to my BOL.
These items are in a commercially purchased clamshell style metal cache container, hidden next to a large man-made landmark that is not going anywhere anytime soon.
Although the location has overhead cover, it is still exposed to temperature swings, significant moisture and everything else attendant with being outside.
My last check of the contents for a biannual rotation proved that everything was ship-shape, though the interior was ever so slightly damp.
Three different types of containers for three different purposes but all servicing the same objective. I tell you this not so that you will set up your cache network like mine, but so that you will start thinking about how best you can make the concept work for you.
Always Have a Foolproof Plan for Locating Your Caches!
Last but certainly not least on your checklist for creating, placing and preserving the individual caches in your survival network. It is imperative you have a reliable plan for locating a cache after you hide it. I promise you this: You’ll never feel worse than you do when you hide one and cannot track it down again.
This is most often a problem for those who hide their stashes in natural environments, particularly burying or submerging. Whatever you have to do to guarantee you’ll be able to locate it again, you must do.
This could be a classical sort of “treasure map” using bearing and distance from a series of permanent, immovable landmarks, or a more modern solution like a precise set of GPS coordinates.
Depending on what is in the cache you might be able to zero in on its location using a metal detector, but as I mentioned above, if you can do it others can too.
Also consider what you would do to locate your cache if some catastrophic event radically changed the landscape. Tornadoes, wildfires, hurricanes and floods might eliminate or conceal major landmarks you have been depending on while leaving the cache and its contents intact.
You cannot truly prepare for every contingency that might remove your reference points for locating your cache, but it wouldn’t do for you to assume you’ll always be able to follow the same trail through the woods and to locate the site easily if you take my meaning.
Keep it Cached, Just in Case
Every prepper understands the necessity of being prepared for disasters and other emergency situations.
For that reason, one of the best possible contingency procedures you can implement to ensure you will always have access to vital gear and needed supplies is the establishment of a survival cache network.
By placing multiple containers in strategic locations along your frequently traveled routes or points of interest you’ll always be able to procure the things you need no matter the circumstances.

Tom Marlowe practically grew up with a gun in his hand, and has held all kinds of jobs in the gun industry: range safety, sales, instruction and consulting, Tom has the experience to help civilian shooters figure out what will work best for them.
Great information, Tom.
Appreciate you sharing in depth about creating and hiding a cache.
I do believe some of the ways you’ve shared can be used in a bug in location at well.
I’m creating a pond and plan to use pvc pipe and sealer to submerge at least one with necessary supplies right here as well.