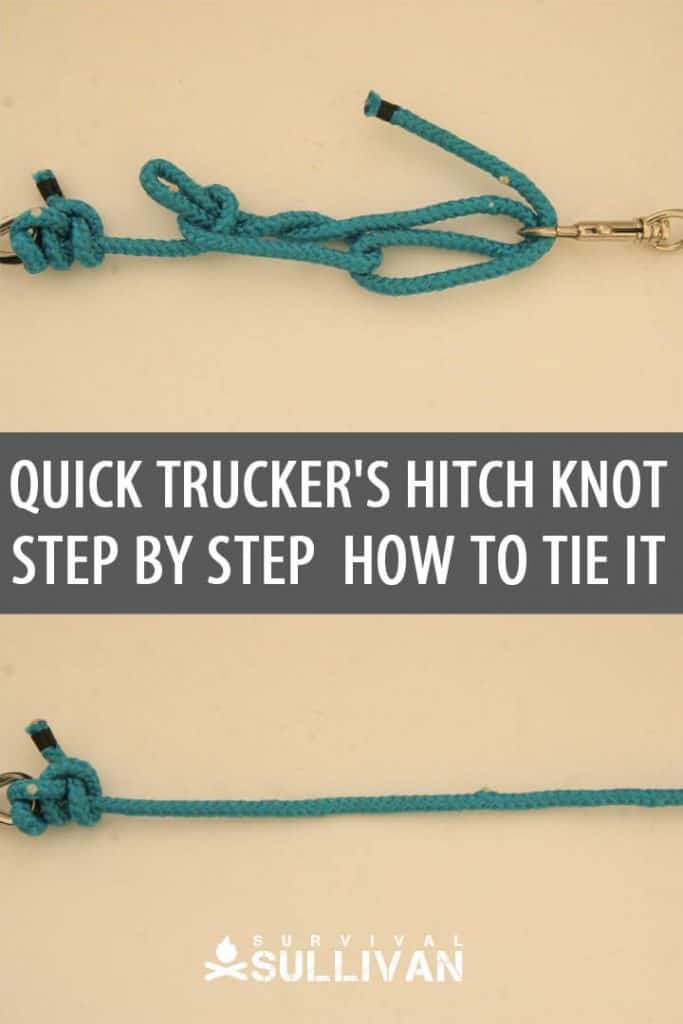
This is a quicker-to-tie version of the standard trucker’s hitch, which affords a mechanical advantage for pulling a load (like a pulley or a winch might). It’s really useful for things like tent guylines or cinching down lashings (like for bundles of kit on the back of a truck) really tight.
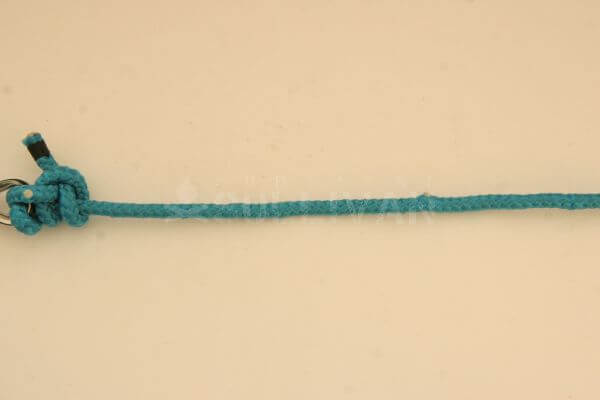
Step 1. First attach the standing end of the line to the anchor. The line in the picture is attached with a round turn and two half hitches, though any strong attachment (a good hitch or loop) will do:
Make a loop in the line, close to the anchor point, Notice that the working part (further from the anchor) is over the standing part (closer to the anchor) in the loop:
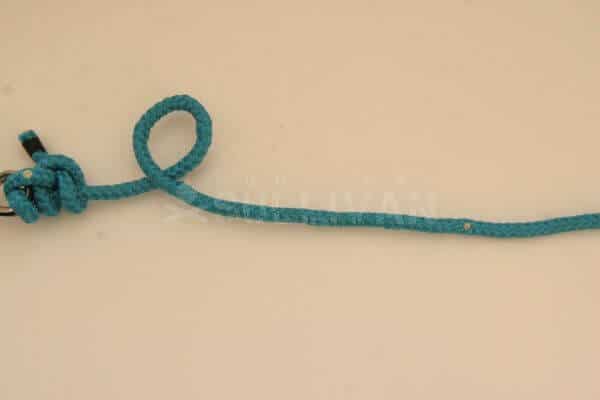
Make a bight in the line, in the working part, further from the anchor than the loop:

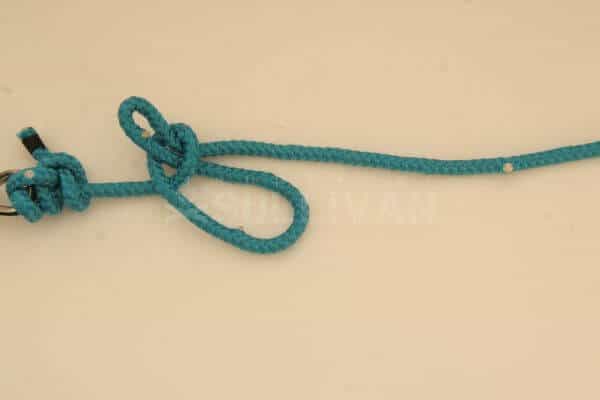
Pass the bight up through the loop. Make sure that the bight goes up through the loop, as in the picture. If it is threaded the other way, the whole knot will just collapse:

Tighten the loop up somewhat around the bight.notice how only the tip of the bight has been fed through the loop, leaving a large loop ‘underneath’ (in the center of the image):
Lay the working part under this large loop:
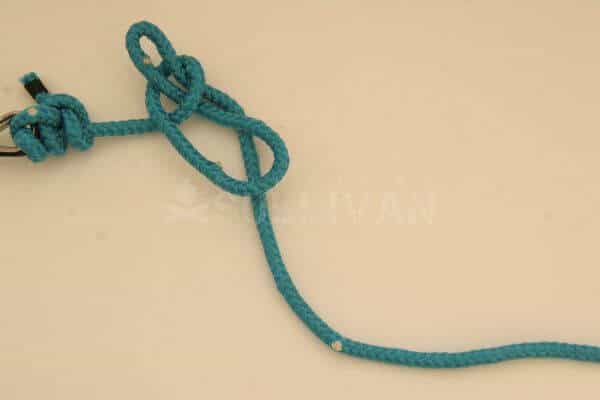
Pull a bight of the working part up through the large loop:

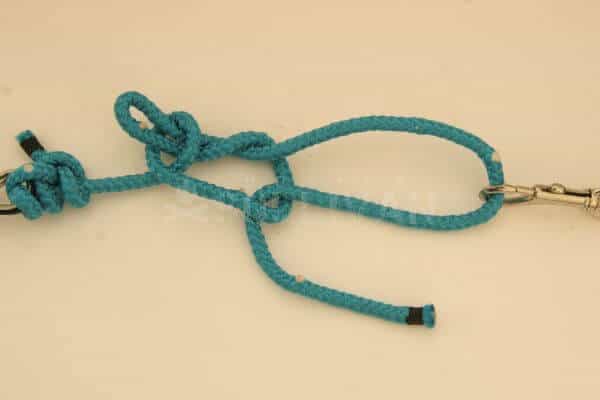
Angle the working end away from the anchor, creating a bight around the line in the lower side of the loop:

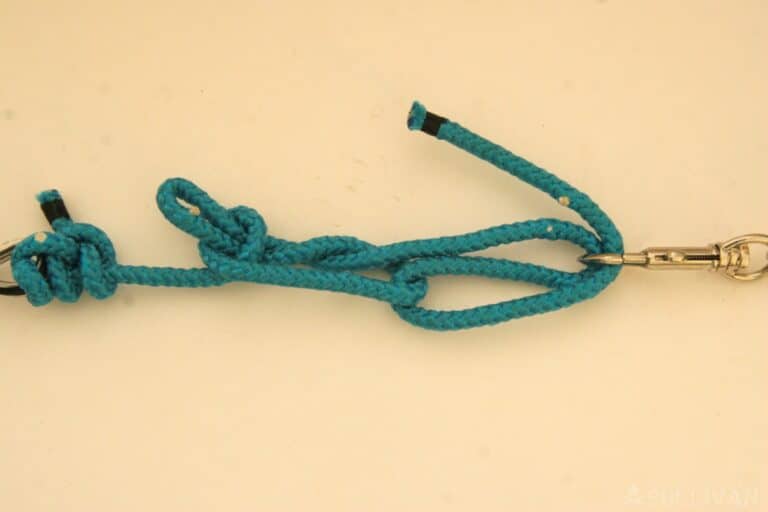
Connect the bight which you just passed through the loop to the load:
Pulling on the working end (towards the load) will tension the whole system and pull the load:
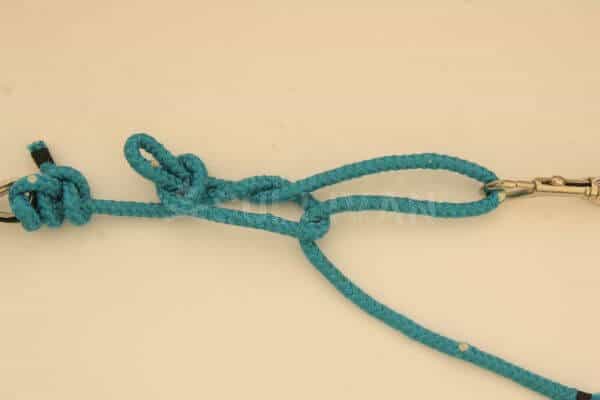
You can also pass the working through the load again. Now pulling away from the load and towards the anchor will tension the system and pull the load:
Additional Information
The standard Trucker’s Hitch requires an end to tie. This version does not, which makes it slightly quicker to make up. It also means many of these can be tied and untied at will along the length of a single line, for use along the length of a long load (e.g. a bundle of logs on the bed of a truck).
Unlike the standard Trucker’s Hitch, the whole structure will fall apart when not under tension, so is not recommended if security is crucial.
It can be a disadvantage that this version does use an end, because it requires an ‘open’ load (like a hook), so a closed ring or hole can’t be loaded onto it directly.
One solution to this problem would be to hitch a secondary line to the load, then make up the quick Trucker’s Hitch and tie a loop in the secondary line around the load-bearing part of it, but that point you might as well have just tied a standard Trucker’s Hitch (or used some rigging hardware!).
This approach would only really be useful if it was really necessary to use Quick Trucker’s Hitch, for example if one didn’t have access to the ends.
Related Knots
- This is a variant of the standard Trucker’s Hitch, which has to be tied with an end, and uses a full loop knot (as well as sometimes slide and grip knots), but can be more secure.
- The Versatackle is a more complex version of the same principle, which uses more turns for more mechanical advantage, and to self-lock.
- The Poldo Tackle is another mechanical advantage rope system, using both ends, for drawing to loads together.
Check out more survival knots in our dedicated article.
Conclusion
The Quick Trucker’s Hitch is a really useful knot for a broad range of circumstances, certainly one to learn, though where security and stability are crucial (or the system is likely to be more permanent) it is also worth learning the ‘standard’ version.
Nick O’Law has been exposed to survival from a very young age. In his teenage years, he learned A LOT about bushcrafting, such as making snares and traps, and even how to make DIY knives.
If you haven’t ye read and tried his knot-making articles on Survival Sullivan, you should definitely check them out.