Before modern steel, ferrocerium rods, paracord and the other accoutrements of modern bushcraft and survival our hunter gatherer ancestors would have created all the tools they needed from the bounty of the natural world around them.
As well as being an interesting outdoor skill in it’s own right being able to make primitive tools might be vital when SHTF.
Something else to remember is that our hunter gatherer ancestors would not have had our modern tools to make primitive tools with and you might not have either in an emergency.
My Primitive Toolkit
So if you are planning on practicing your primitive technology skills then you will need to have the most basic of tool kits to begin with, even before you make more elaborate tools.
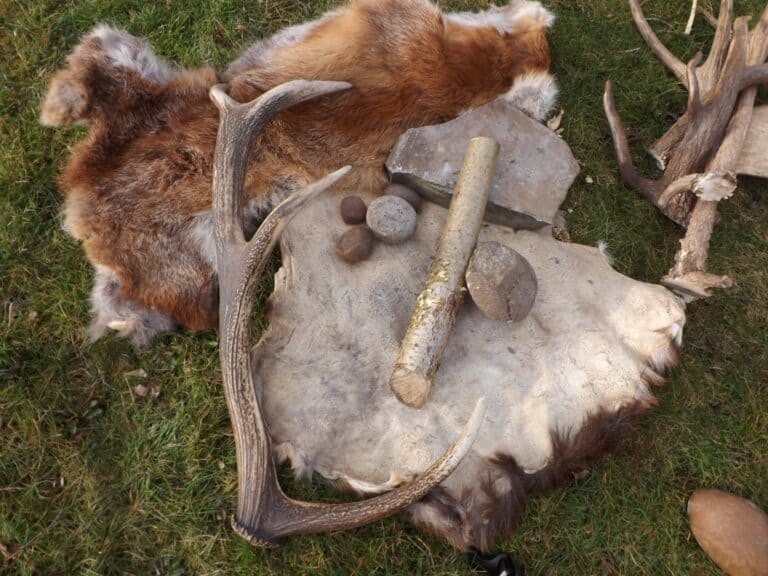
This might be nothing more than a couple of pebbles, stones, shells and sticks. These can then be used to make the more refined tools that you will see here:
1. The smaller pebbles can be used for percussive flint knapping and breaking flakes off flint and other silica rich stones which can be knapped into tools and weapons. They can also be used to abrade wood, soft stone and bone and basically small files.
2. The larger stones, like the leather, are used for abrading, scraping and sanding, given the relative ineffectiveness of primitive cutting tools abrading and scraping with rocks and this improvised sand paper was often the quickest way to shape and form things.
3. A stout wooden club can be used for a range of jobs, much like a batton would be used in modern bushcrafting. It can be used for pounding wedges to split wood and for crushing and breaking bones when making bone implements.
4. Oldowan chopping tool.
These are some of the oldest and simplest stone tools known to man. They can be made with no other tools as they are just pebbles which have had some surfaces broken off leaving a sharper edge. You can then grip the smooth portion of the tool and use sharper edges for rough chopping or crushing.
5. Antler. In its raw form an antler can be used as a digging, scraping and pounding tool, and as you develop your primitive tool kit it can gradually be taken apart and refined into better tools (see more primitive uses here).
As deer cast their antlers annually, there is no need to hunt a deer to get them at the right time of year, if you are somewhere with plenty of deer they will be easy to find laying on the ground.
They do disappear quickly though, as once they are cast rodents and the deer themselves will eat them and they disappear surprisingly quickly.
Most deer species cast their antlers in the Spring and then spend Summer re-growing them in time for the breeding season in Autumn, but that does depend on the deer species.
Roe deer for example lose their antlers in Winter, around November – December time and will then regrow them over the first few months of the year and they are free of velvet, the soft, covering of tissue that surrounds the antlers as they grow, by April or May.
Some of the best places to find cast antlers are where deer regularly jump over an obstacle such as a fence, wall or stream as the sudden shock of them landing on the ground shakes the antler loose.
As well as your tools you will need material to work with, some of the most important materials for primitive tool making include:
- Knappable Stone; Flint, chert, obsidian, jasper and other stones are perfect for ‘knapping’
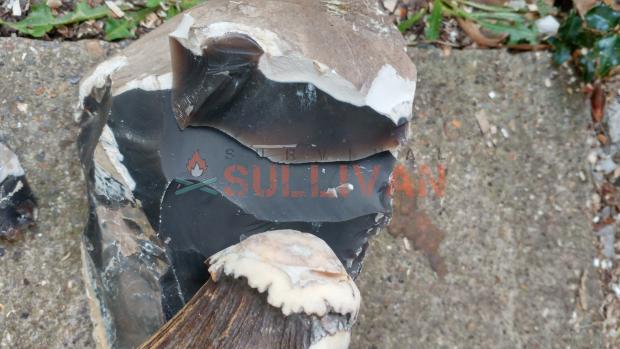
Photo above: darkly coloured flint and an antler hammer
- Bone; ribs and long leg bones can be fractured into long pieces and used to make a whole multitude of tools and implements for primitive survival, scapula’s can be sued to make saws and foot bones can be used to make excellent fish hooks.
- Antler; as well as whole antlers being tools as they are when you find them they can be broken down and used just as bones are for crafting your primitive tools.
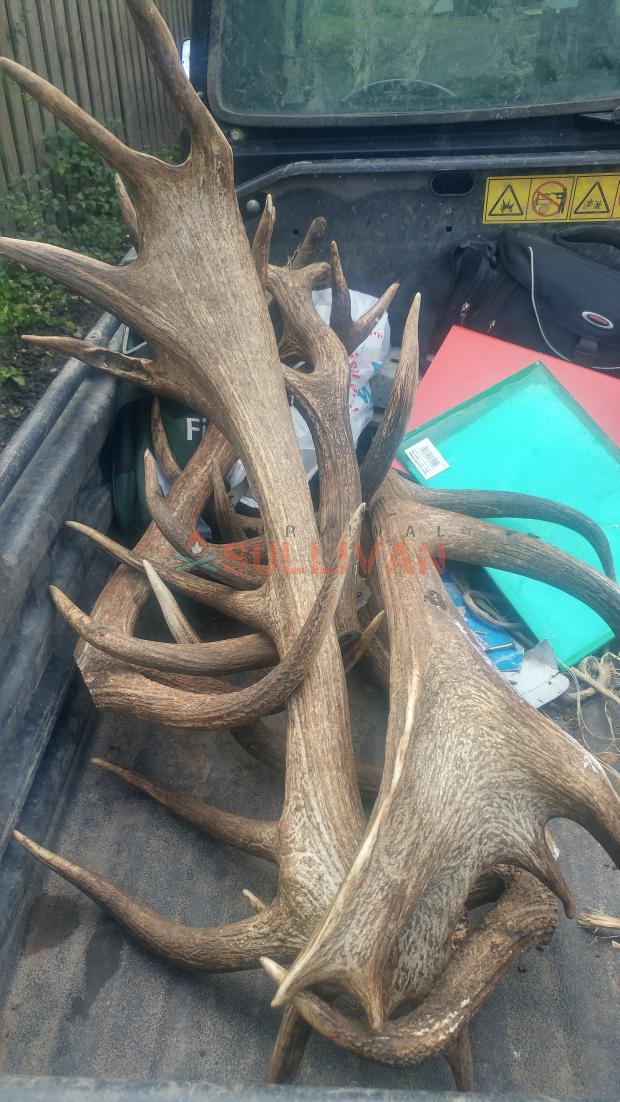
Photo above: collecting antlers from the deer farm
- Wood; it goes without saying that wood is one of the most plentiful materials for making your primitive tools, and will be useful in the construction of a variety of implements.
- Shells; shells can be improvised into small saws, containers and used for a variety of tasks.
Once you have these basic tools and materials you can begin to create the rest of those listed here. Remember though, making and using primitive tools is a much slower process than using modern tools.
Our modern steel knives and saws allow us work much more quickly and their toughness compared to say a bone saw or flint blade means we can work harder with them.
You will need to develop patience if you work with primitive tools and remember that while you can achieve good results with stone tools those results may take a lot of perseverance.
The list of primitive tools that follows will appear in a rough order, the first tools are very simple and could be made with nothing but your basic tool kit, the later ones may require some of the more refined tools from early in this list in their construction.
For each tool there will be a brief description of its intended use, but full how-to details on how to make these tools will follow in a later post. Items you will not see here is primitive hunting, fishing and trapping equipment, these will be addressed in another post.
Hunting is a specialist skill, and requires specific tools and implements which really only do one job most of the tools here can be used for multiple tasks and will be useful for construction, craft, harvesting of resources and processing game rather than specific tasks for certain styles of hunting and fishing.
‘Microlith’ Cutting Blades
These can be struck from large pieces of knappable stone with the pebbles from your tool kit and used as they are, you should be aiming to produce tiny flakes. The edges of these flakes are razor sharp but as they are so sharp and thin they are not very strong but as they are so easy to produce they are almost disposable.
They can be used for processing fibres for cord making, skinning and dressing game and you don’t even need to find large pieces of flint or chert to make them with. They can be made with the tiniest flint pebbles and tiny microliths no bigger than a finger nail are regularly found at archaeological sites.
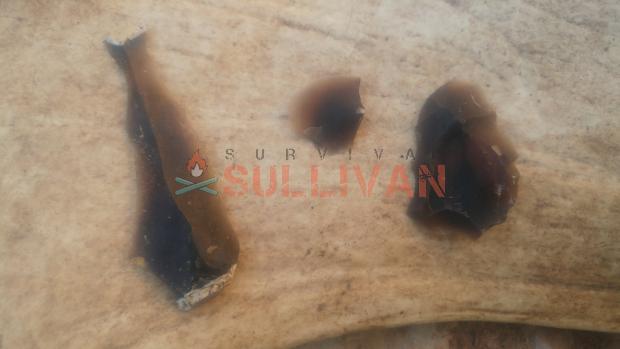
Photo above: a range of flinnnt microliths
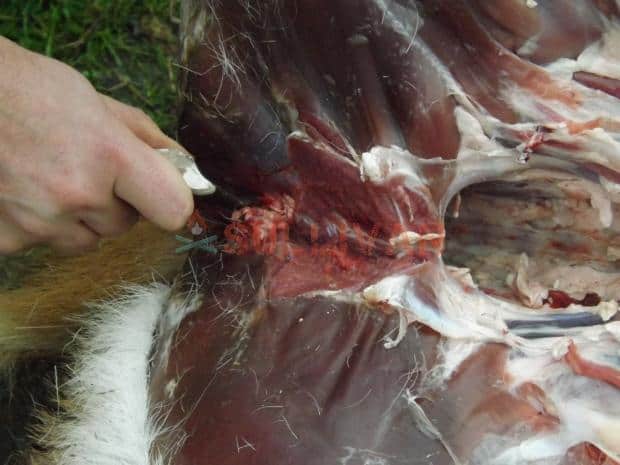
Photo above: a flint flake being used by primitive technology students to butcher a red deer
Flint Burin
A burin is basically a scoring or drilling tool, they can be made from chunks of flint or other silica rich stone but the key is that they are hard. Making them from antler or bone is no good as although these materials are strong they are too soft.
You will need to use your burin to process bone and antler so it does need to be made of stone. They can be made with nothing but the small pebbles from your initial tool kit and you should be aiming to produce a bluntly pointed piece with a strong tip, you’re not looking for the thin flaked edges that will be razor sharp but be very weak you want something that you can use to score and abrade bones and antlers, this will be one of the tools you use most regularly especially as you make bone tools and implements.
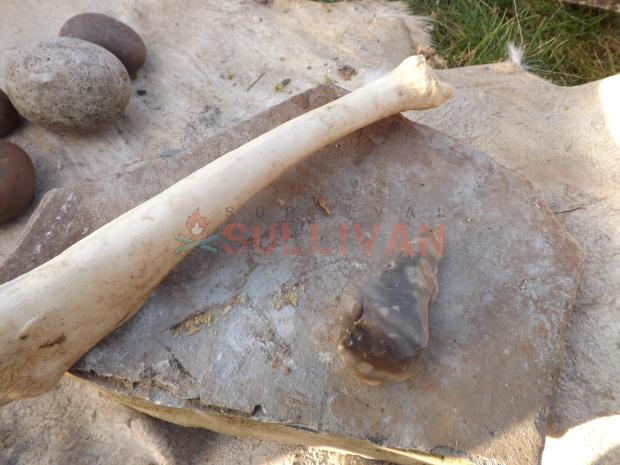
Photo above: flint burin and deer leg bone
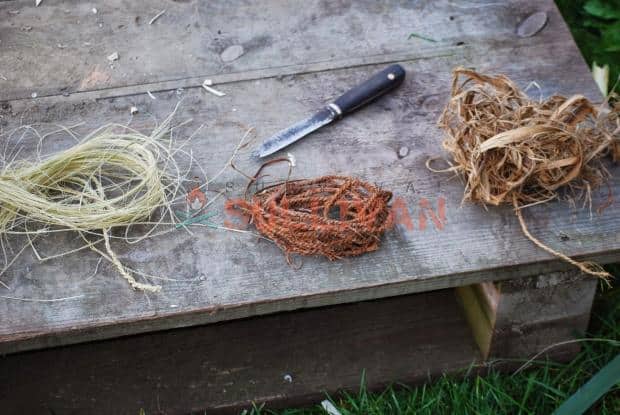
Cordage
We probably wouldn’t count cord as a ‘tool’ in a modern day tool kit but it is a vital part of a primitive toolkit. It can secure stone axe heads in place and bind arrowheads and hook knife blades into place.
Primitive cordage can be made in a variety of shapes, sizes and ‘grades’, the very strongest and finest bindings would be made from animal sinews which are incredibly strong and fine and would be ideal for very strong light-weight bindings such as arrow heads and fletchings.
Rawhide cordage made from animal hide is also incredibly strong and is slightly elastic and is an excellent choice for making strings for a bow drill.
Plant fibers can also be used to make incredibly strong cord which is suitable for everything from fishing line to heavy duty rope for securing shelters and rafts. Some of the best plant fibers for natural cordage include stinging nettles, willow bark, lime bark, cat tail leaves and many others.
Glue
Glue, like cordage, is another consumable item which may well not really be a tool but it is vital for securing arrow heads to shafts, backing a bow with sinew or horn and for making many of the other tools which are listed here.
Primitive glue comes in many forms, it might be made from boiled animal hides, fish skin or from pine resin strengthened with crushed charcoal.
Sea Shell Saw
This can be made with your flint burin or just with the edge of your Oldawan chopper to create teeth in the edge of a large shell such as a scallop shell. This can then be used to gather plant fibres, including small woody species such as small willow wands for basketry. It can also be used to score and shape smaller bone tools such as bone needles and even soft stone such as shale.
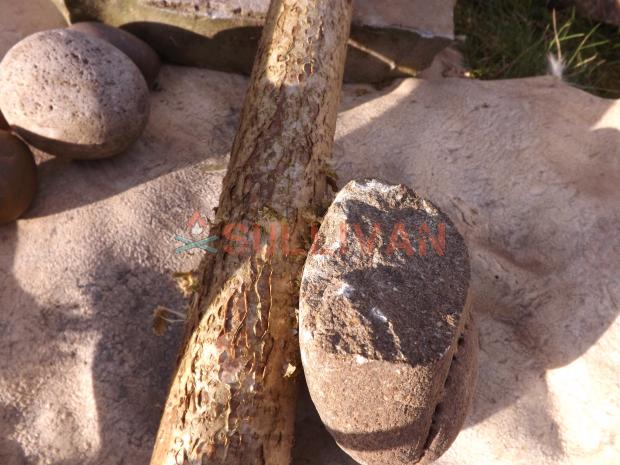
Antler Soft-hammer
These can be made out of the beam and coronet section of an antler. That’s the bottom section of the antler where it connects to the deer’s skull. The coronet of the antler is solid bone, whereas most of the rest of antler, while not hollow has a much less dense center which is full of a honeycomb structure and is not very strong.
That’s why you need the coronet section of the antler for the dense bone. This hammer is one of your primary flint knapping tools for detaching large flakes either to reduce a large piece of stone to produce a tool such as a hand axe or to produce flakes which can be further shaped in to other tools.
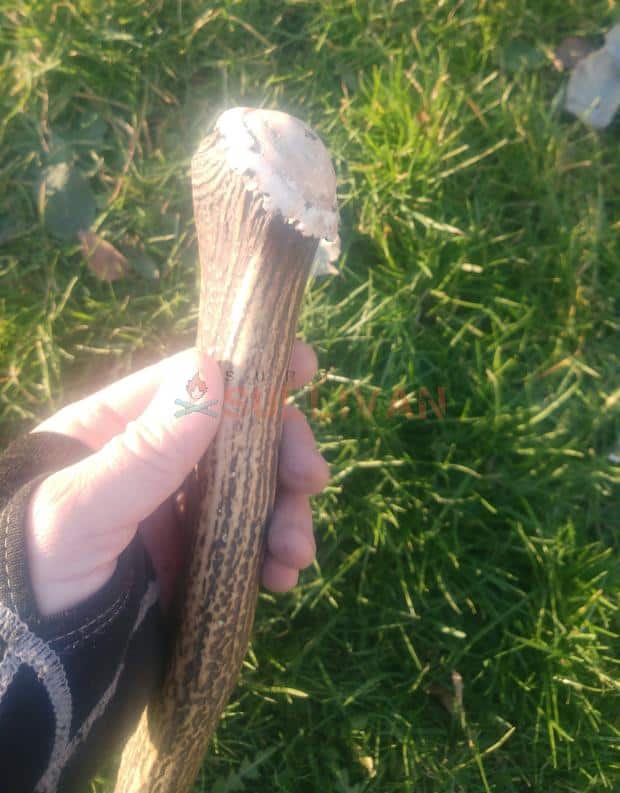
Photo above: Antler soft hammer made from the beam and corronet of a red deer antler
Stone Hammers
Unlike the soft hammer which was used specifically for flint napping other hammer tools would probably be most often used for pounding and crushing are some of the simplest tools that exist but because they are so simple there is often no need to make a specific tool for the job.
If you really need to pound something into the ground or break open bones, shells or pulverise roots or anything else you can use a stick or a rock. In fact that is what the archaeological record suggests is that tasks which required a hammer would have been performed with rocks or sticks, at the most advanced a crushing/chopping tools like the oldowan chopper. There would not necessarily have been any need to make a specific hammer tool.
Hammers and clubs would have been used as weapons though and stone war clubs were used by many Native American tribes such as this Sioux war club;

Photo above: Missouri History Museum Image in the Public Domain
Flint Scraper
Using a flake produced with your soft hammer you can make a scraper. These tools are used for scraping fat, meat and tissue off of animal skins as you prepare them to be cured and tanned. They feature a knapped edge on only one side rather than an edge with two bevels which meet. This makes a very rough edge for scraping rather than cutting. They range in size from larger palm sized scrapers to tiny ones no larger than a thumb nail.
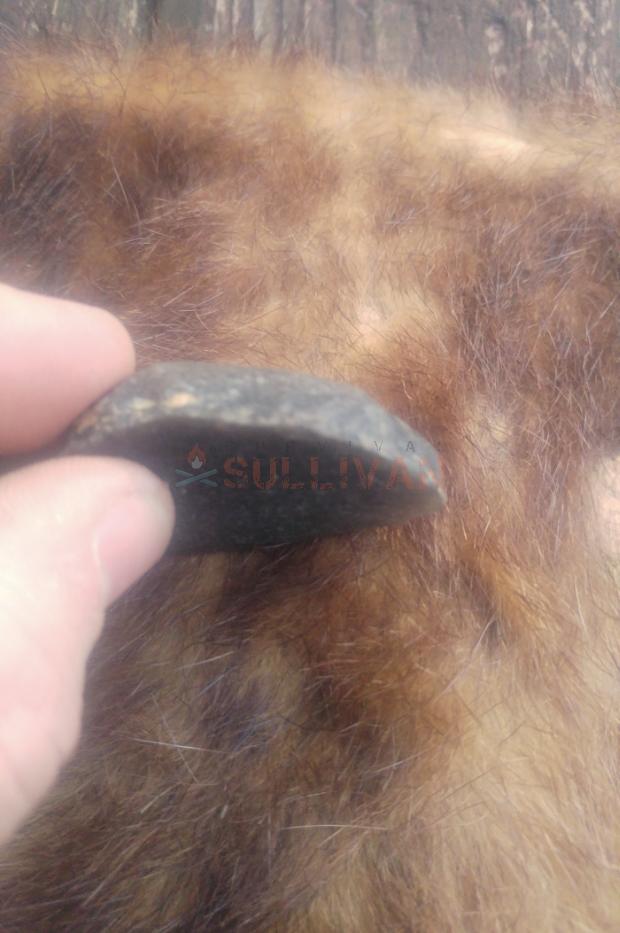
Photo above: a chert scraper for processing animal skins
Antler Pressure Flaker
To break antler down into useful sized pieces without modern tools is quite difficult it can be abraded against a sharp piece of rock such as the edge of your oldowan chopper or even weakened with heat from your fire. A glowing ember placed against the point at which you want the antler to break and blown on will heat up the antler and weaken it, a strong blow against a rock or with your wooden baton can then break off the piece you need.
A pressure flaker is made from a single tine of an antler and when applied to the edge of a piece of flint it will chip off a small piece, if you make these small chips alternately from opposite sides of the piece of flint it will create a slightly stronger edge with a more obtuse angle, this is known as a retouched edge.

Photo above: antler tines from a red deer antler, perfect for pressure flaking
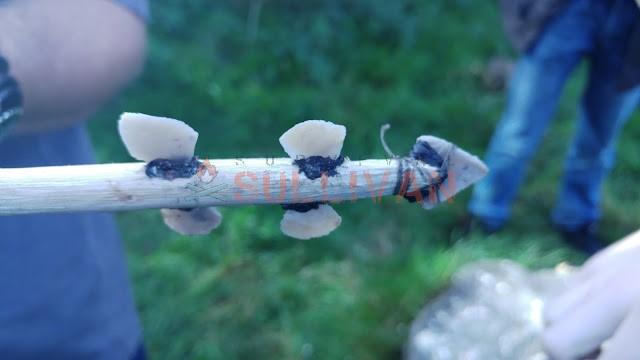
Hoko Knife
Hoko knives are the simplest hafted stone tools to make, they are basically a split stick with an antler flake secured in the split with cordage and or glue. They provide a better griping surface than an unhafted flake but also have less useful cutting edge.
The flint flakes set into the handle of a hoko knife may need to be a bit more robust than the average microlith, so the edges of the flint are ‘retouched’ by pressure flaking with a small piece of antler. These retouched edges sacrifice a little of their razor sharpness for an edge that isn’t so fragile.
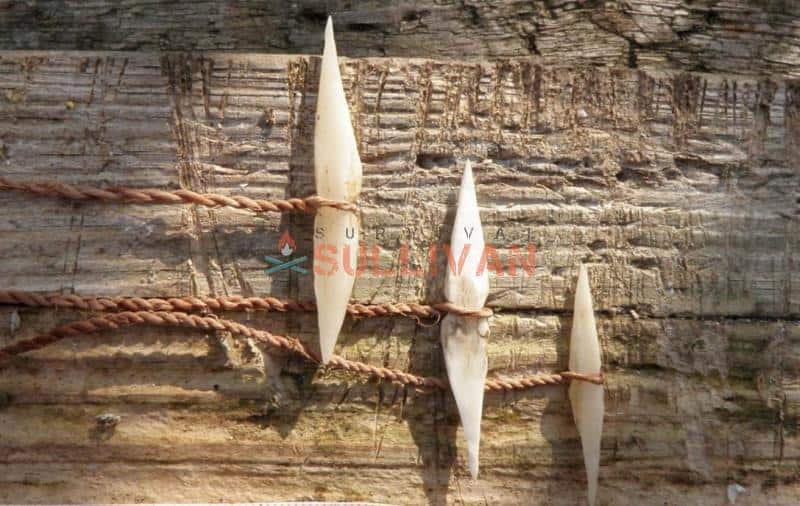
Bone Awl
An awl is an incredibly simple but very useful tool, it can be used to punch holes in bark, skin and other materials to allow you to sew is or to make pilot holes. It can also be used as a tool for scoring and cutting and for basketry. They are very easy to make using a deer leg bone but smaller finer awls can be made using bones from smaller animals but will be somewhat more fragile.
Using a burin you can score the bone so that when you break it it will break along the line you have scored. You will then need to abrade the now broken bone against a stone to sharpen it to a point.
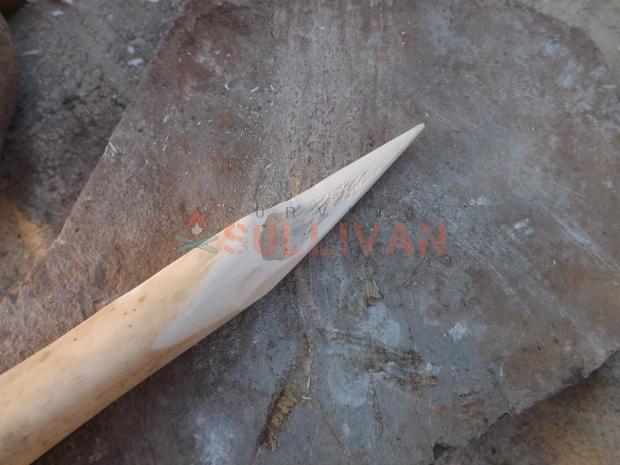
Photo: a finished bone awl
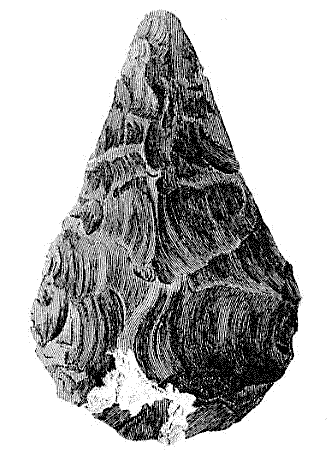 Hand Axe
A stone hand axe is a natural progression from the simple chopping tool you started off with in your tool kit, those simple choppers can be made just by smashing a rock to create a sharp edge.
A true stone axe is a much more refined version of this tool, created by knapping, hand axes are used in the hand in a pinch grip for chopping and slicing.
Celts and hafted axes
A further progression from the hand axe is a hafted stone axe, many of these were not only knapped but smoothed to a polished finish by abrasion against other stones and a process called pecking whereby a smaller stone is used to chip away gradually, similar to the way metal is bead blasted nowadays but much slower.
These long narrow axe heads would be fitted into a hole in a wooden handle rather than the modern idea of fitting the handle through an eye in the axe. These could then be used for chopping more like we would use a modern axe.
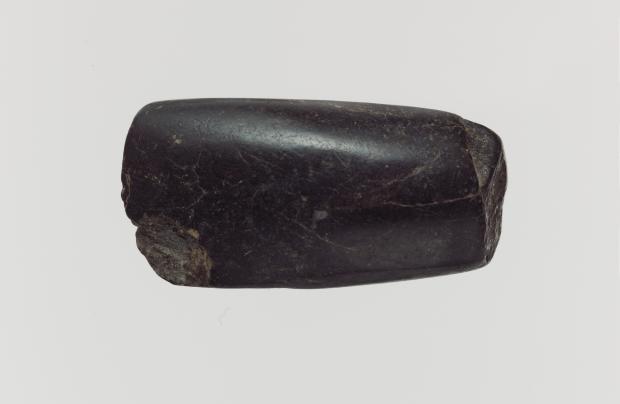
Photo: a small stone axe
Bow Drill
Whether for starting fires or for drilling holes a bow drill is a simple tool to make and use but you should be aware that one of the things that makes using a bow drill relatively easy nowadays is the modern nylon cord we can use, it’s very strong, relatively abrasion resistant and slightly elastic.

Primitive cordage can be very strong but is rarely as abrasion resistant unless you use rawhide made from animal skins. Nevertheless lighting fires and drilling holes with a bow drill is perfectly possible with primitive materials and tools. It will just take you longer to make the drill, hearth and bow with stone tools instead of steel and you will have to be gentle with the cord you use.
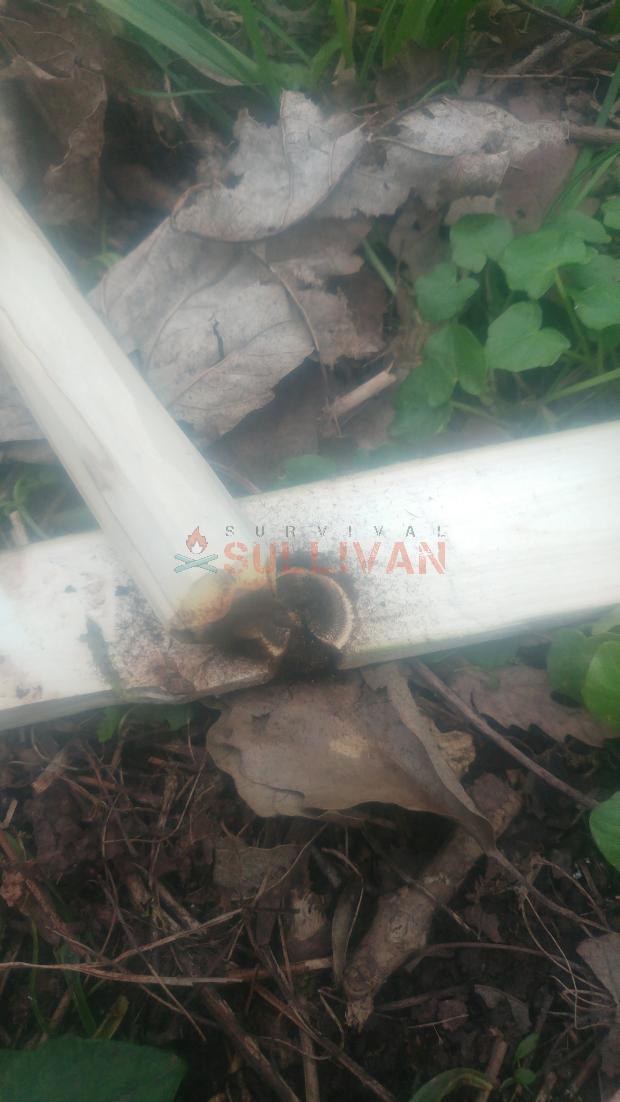
Photo above: making coal with a primitive friction fire set
Bellows
Once you have got a fire going with your bow drill kit, you might want to use that fire for something. As we are dealing with primitive tools and Stone Age technology here you won’t be forging steel and iron or smelting copper but you could use a bellows to work your fire up to a condition that is suitable for firing pottery which will be very useful to you.
Animal skins are the easiest thing to use for making bellows, if you skin them carefully with your piece of flint and ‘case’ them that is skin them without cutting all the way up the belly you will be left with basically a skin bag, you can tie up the holes where the feet were and the hole where the head and neck was becomes the outlet for your bellows.
As you crush the bag, like squeezing the air out of a modern dry bag, it will squeeze their air out of the neck and you can direct it towards your fire place. When you lift up the skin again and open the tail end it will fill up with air again.
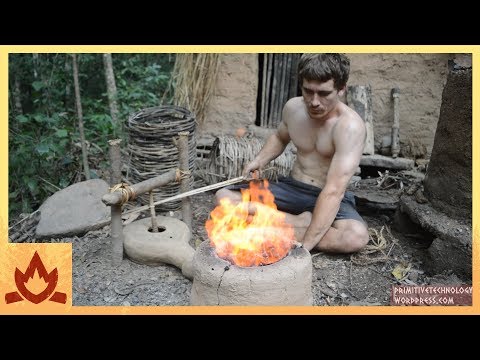
Larger skins are more useful for this something the size of a goat or a small deer. Another novel approach to making bellows is depicted in this youtube video:
Grinders, Pestles and Mortars
These tools would have been important in a Stone Age society, even though this was before what we would now understand as agriculture so these tools would not have been used to grind corn and wheat they would have been used to process other foods such as acorns, edible grass seeds and roots.
They may have been made of wood burned and scraped out with an ember and a stick or piece of flint or most likely they would have just been two stones, a large flat one and a smaller one for grinding. Over time the large flat stone would have developed a depression in it as it was used again and again.
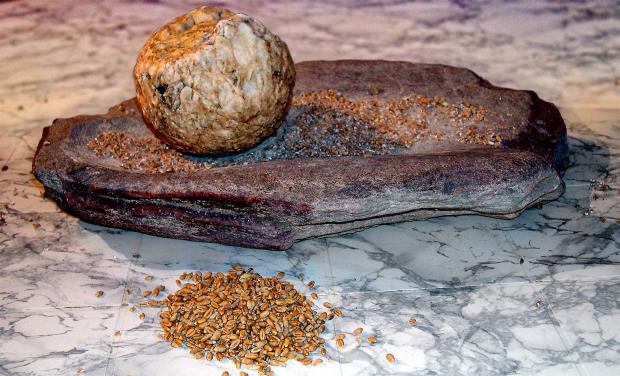
Photo: A neolithic grind stone
Spoons and Eating Utensils
If you’ve just used your grind stone to process some food you are going to need something to eat with. Spoons can be hollowed out of wood using an ember from your fire and a flint flake but it would be easier to use a shell or they can even be made out of folded bark like image 2 in the picture below;
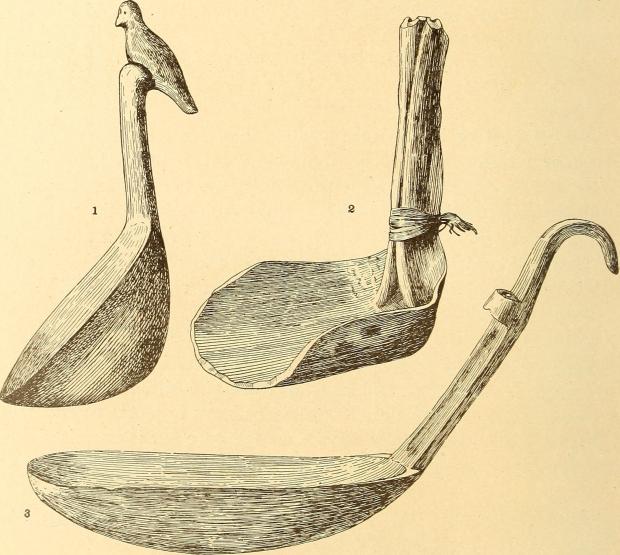
Photo above: primitive spoons
With this basic range of tools, and utensils you can get a good meal and will also have a complete stone age tool kit and the tools you need to fashion all your weapons for hunting, fishing equipment and other primitive technology.

Geoff is a lecturer at Hartpury College. He has been teaching at colleges for eight years and in that time has worked at some of the most prestigious land based colleges in Britain. He trained as a professional hunter and game keeper and as well as his teaching job he still manages deer professionally as a deer stalker, carrying out culls, guiding clients and advising on deer management strategy.
He has operated his own bushcraft and survival skills training companies since 2010 and has also managed outdoor and environmental education centers in Norfolk and Scotland over the course of his career. A keen traveler, Geoff has honed his survival skills in New Zealand and Scandinavia, he speaks fluent Swedish and has proven his bushcraft ability on many expeditions.
Several of these expeditions were on long distance trails in the UK to raise money for Whizz Kidz a charity that supports disabled children, Geoff has hiked over 2000 miles in aid of this charity.
I would add one more item. A bag or basket. You need something to put stuff in as you collect it, or you’re limited to just what you can carry with your hands. I’d make that before a eating utensil.