No matter where you are and what you are doing, whether it is camping by the lake for an enjoyable weekend or deep in the backcountry on an extended hunt, fire is a critical resource.
You’ll need it fire to provide warmth, light and also a means to cook your food and boil water.
This is a fundamental skill, and one that many an outdoorsman will learn and practice right away.
With the benefit of modern technology like lighters, it’s easy to lose sight of the fundamentals, and one of the most important fundamentals for building a fire is the proper use of kindling.
Kindling is the smaller fuel that you’ll use to get a fire going in the first place, and they sort of foundation to add larger and longer lasting fuel to.
It sounds simple, and I suppose it is, but the devil is in the details, and if you don’t know what you’re doing with kindling, starting a fire is going to be a very frustrating experience.
But no worries: I’m here to help with a front-to-back guide that will tell you everything you need to know about selecting, prepping, and using kindling.
You Can Find or Make Kindling
To clear something up straight away, it is possible to both find and make your own kindling for your fire wherever you happen to be.
Kindling is simply a smaller size of the typical fuel you’ll use for your campfire. 99% of the time, this is going to be smaller pieces of wood.
You can gather it in the form of small-diameter twigs and sticks that will catch fire more easily and burn up more quickly.
Or, you can fashion your own kindling by taking your larger pieces of firewood that you’ve already processed, and splitting them down into even smaller sizes to serve in the same way.
Whichever way you get it, you will want two batches of kindling: a batch of smaller stuff that is about the diameter of your little finger, and a batch of larger pieces that are a little larger than the diameter of your thumb.
You’ll use both at the appropriate time to properly get your fire going.
Whatever the case, it’s entirely possible to use both no matter what you happen to be doing.
You might have some choice, dry sticks, and twigs that will work perfectly, and you can supplement that supply by further chopping some of your larger processed wood.
That being said, the usual rules of selecting good fuel apply: your kindling should be very dry and easy to ignite.
Now, with that in mind let’s see what you need to process and use kindling correctly.
What You’ll Need
You don’t need much in order to implement, make and use kindling. But you’ll need a few things, so read the following list…
1. Wood
as mentioned above, kindling is really just a smaller size “format” of whatever fuel you happen to be using for your campfire. The vast majority of the time, this is going to be wood.
Note that the type of wood you use will determine how it behaves; softwoods and especially highly resinous woods like pine burn hot and quick, while hardwoods like maple or oak burn somewhat slower.
Either or both will work, just keep that in mind as you gather smaller pieces for kindling or as you prepare to chop your larger firewood.
2. Cutting Tool
If you’re going to process your own kindling, you’ll need some sort of cutting or chopping tool for the job.
You can use a sturdy bushcraft knife for smaller and softer stuff, or something like a hatchet, camping axe, or machete to chop larger or harder wood.
Whatever you use, make sure you practice good safety procedures at all times.
If you’re gathering smaller sticks to serve as kindling, you can just snap them in half with your hands to break them down to the appropriate size.
3. Tinder
If kindling is the foundational fuel that you’ll use to ignite larger fuel for your fire, tinder is the precursor to the fire itself.
A small, fluffy, frizzy bundle that’s extremely easy to ignite and what you will use to get your smallest kindling going in order to subsequently ignite the larger kindling before your primary fuel.
Tinder can be a natural or man-made substance or accelerant for the purpose.
And that’s really all you need aside from an ignition source in the form of matches, a flint and steel, a torch or something else.
Now, let’s learn how to use kindling to start a great fire…
Using Kindling to Start a Fire, Step by Step
The following steps will show you how to use kindling to properly build a sustainable fire.
Step 1: Gather suitable wood.
You’ll need wood if you’re going to make a fire in the first place. Look for good, dry wood in the area.
Gather what small-diameter twigs and sticks are suitable for your smallest kindling.
You can take larger stock and process it down into the larger kindling you’ll need later on.
Step 2: Snap smallest sticks to length.
Once you’ve gathered a suitable amount of small twigs to serve as kindling, take the time to process them into the appropriate length.
Depending on the overall size of your fire, this smaller kindling should be anywhere from 8 inches to 1 foot long.
Step 3: Process firewood and larger pieces into kindling.
Using your cutting tool and a suitable work surface, start chopping larger pieces of wood down into thinner pieces of kindling that are about 1 inch wide or a little bit less.
Step 4: Sort kindling.
You should now have two piles of kindling, your smaller ones and your larger ones.
Step 5: Build fire lay.
Clear a spot for your fire. Make sure you move anything away from it that might accidentally catch fire.
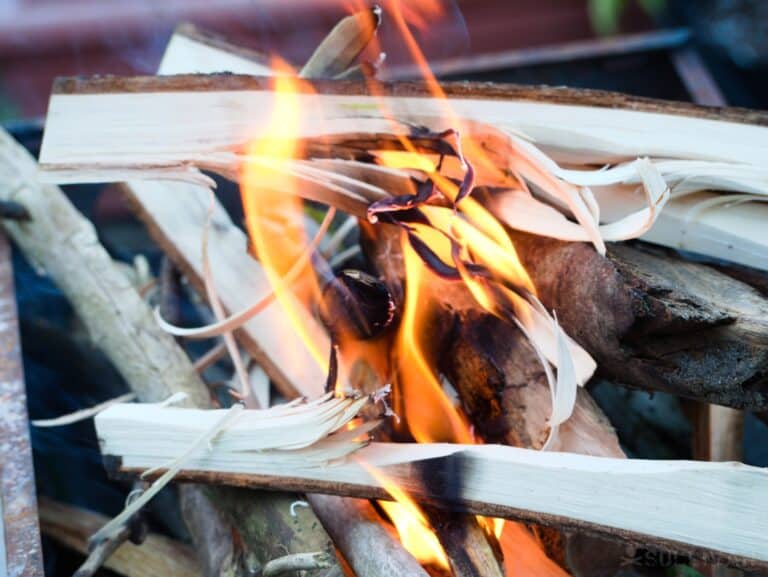
Then lay down a few larger and driest pieces of your kindling to serve as a bed for your tinder. We do this to keep the tinder off of the ground and away from moisture.
Step 6: Prepare and place tinder.
On the bed you made of the larger pieces of kindling, place your tinder.
Whatever kind of tinder you choose or have, make sure it is as dry and frizzy as possible so it is ready to accept a flame or sparks.
Don’t forget to shield it from the wind, and get the rest of your smaller kindling ready.
Step 7: Ignite tinder.
Using whatever method you have at hand or are comfortable with, ignite your tinder bundle.
Be prepared to blow on it gently in order to get it to catch. Once it is ignited, move quickly and cautiously through the next steps…
Step 8: Add smaller kindling to burning tinder bundle.
Carefully and judiciously add smaller pieces of kindling to your burning tinder bundle, doing so one at a time and making sure they catch fire so you don’t overwhelm and extinguish your tinder.
Step 9: Add larger kindling to fire.
Once you have several pieces of your smaller kindling burning steadily, carefully start adding larger pieces to start building and sustaining the fire.
It’s good to have a plan; you can use a traditional teepee-style fire, a square cabin-style fire or any other design you prefer.
Step 10: Keep adding larger kindling.
As the fire grows more intense and taller, add larger kindling and ensure proper airflow. Your campfire should be well on its way now.
Step 11: Add larger fuel once kindling is burning properly.
At this point, you should have a small fire consisting mostly of your larger kindling.
Now’s the time to add your full-sized firewood repeating the process as before; add a piece, make sure it ignites and is getting enough airflow, and avoid smothering your smaller fire.
Step 12: Increase distance as necessary.
Make sure your kindling and firewood is well back from the fire.
It will grow more intense, taller and somewhat wider as you add your primary fuel so move back if you need to.
Step 13: Keep adding larger fuel.
Once you have one or two pieces of larger fuel going, you can add larger fuel at a somewhat quicker pace until your fire has reached the appropriate size.
Step 14: Finished!
Congratulations, you have successfully built a campfire the right way using different sizes of kindling. This no doubt saved you considerable time and frustration.
And that’s it. Although it might seem redundant, using kindling properly is actually a highly effective and efficient way to build a better and more controllable campfire of any kind, no matter what you’re using it for.
Helpful Tips
If your fire starts to die down, revert to using kindling.
A common mistake that you might make if you let your fire die down too much is to just throw another full-size piece of firewood on the pile.
It might work, but it’s just as likely to snuff out the struggling fire.
Instead, go back to using your kindling; add smaller pieces if you need to to provide quick heat and fuel to the fire, then progress up to the larger pieces as before.
In a few minutes, you’ll be ready to add larger firewood again. This is a good reason why you should have a large supply of kindling on hand!
Dry out your own kindling ahead of time.
If you process your own firewood for your wood-burning stove or fire pit, don’t forget to make a supply of kindling also in the same way…
Seasoned kindling works a whole lot better than green kindling, and the same way that seasoned firewood works better than green firewood.
Try alternative types of kindling.
It is possible to use different natural materials for kindling instead of wood.
Woven bundles of long, dried grasses can work, as can larger pieces of birch bark, pine cones, cardboard and any kind of paper.
You can roll up thin paper into tubes before crumpling it and then tying it in a simple knot to keep it from fluttering away when you light it.
Just follow the rules outlined above so you have smaller and larger pieces to use.

Tom Marlowe practically grew up with a gun in his hand, and has held all kinds of jobs in the gun industry: range safety, sales, instruction and consulting, Tom has the experience to help civilian shooters figure out what will work best for them.