Named for a nomadic ethnic group living in the Russian steppes, this knot is similar to the bowline, but is ‘quick release’, meaning a bight (instead of the working end) is put through the final step, and the working end can be pulled to immediately open the knot.
This knot could also be referred to as a ‘slipped Eskimo Bowline’. ‘Slipped’ because a bight (rather than the end) is passed through the final tuck, so the working end can be pulled to open it.

The bowline is a loop knot, made with the same structure as a sheet bend, with the working end making a bight, around the standing end in a half hitch (which is in a half hitch). The ‘Eskimo’ Bowline has the bight made around the loop itself.
This knot is relatively unknown in the Untied States and in most of Europe, being historically a Russian not, but it shouldn’t be! It is secure, quick to tie, and easy to undo, and has become my go-to loop knot.
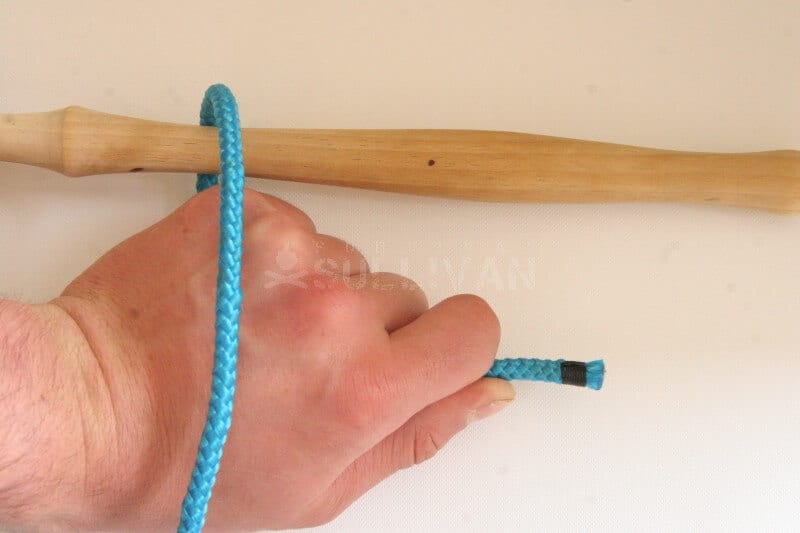
Step 1. Make a turn around the object. Hold the working end under the standing end as shown:
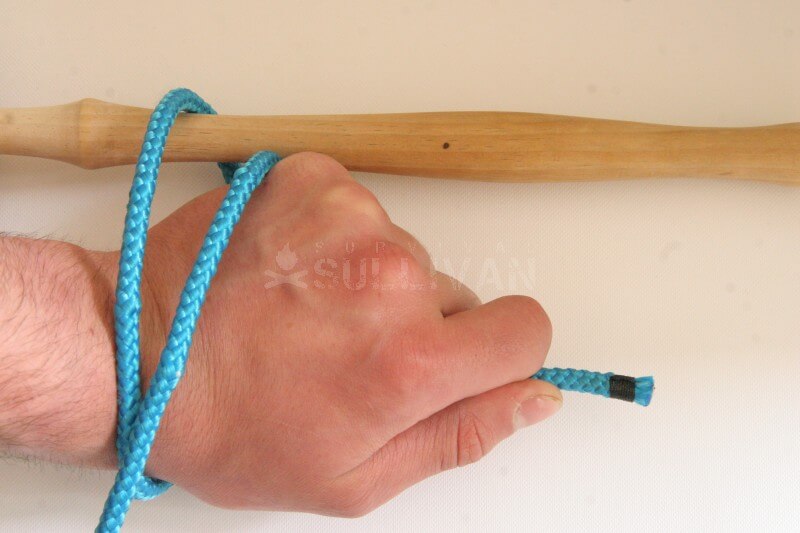
Step 2. Make round turn around your hand with the standing end, going under then over, and progressing toward the working end (left-to-right in this picture, but tying the knot with opposite hands it would be right-to-left):
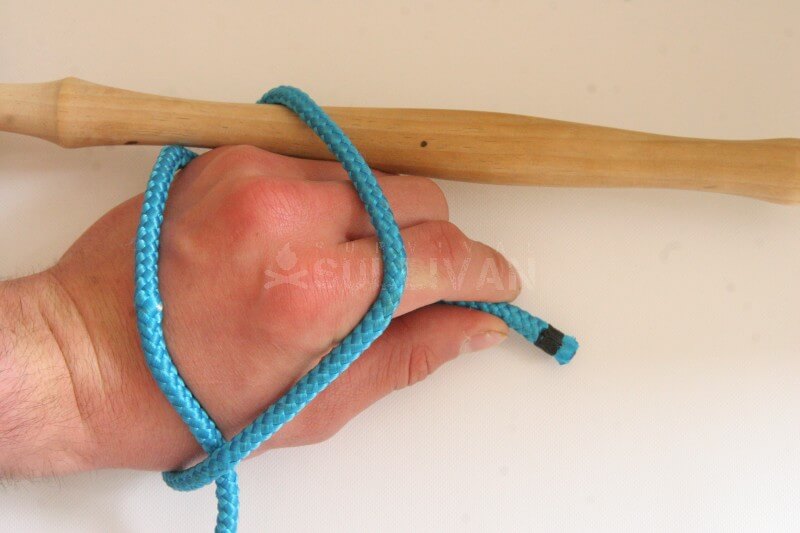
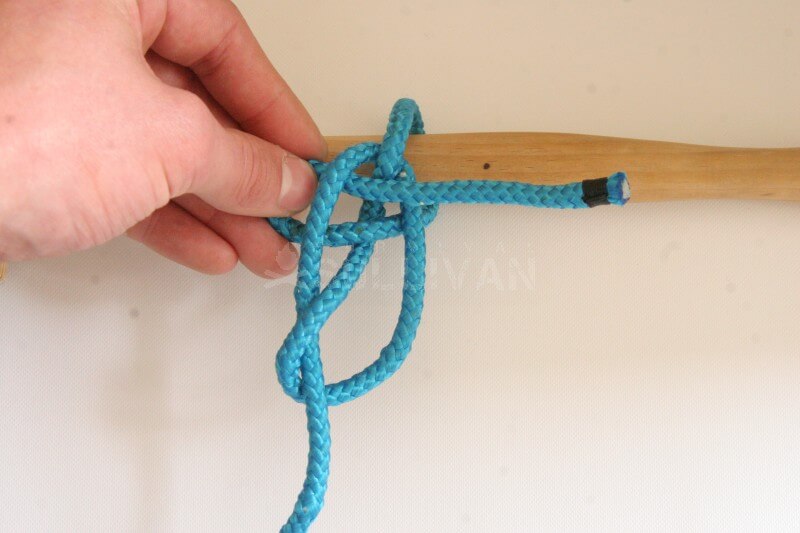
Step 3. Pass the side of the turn which is nearest to the working end underneath the other part of the turn. This is often easiest done by raising the knuckles of the hand holding the working end (by angling the wrist up)and pulling the whole hand in the right direction to move one part of the turnunder the other (in this case the hand moved right-to-left):
Step 4. Slip what is now the nearest part of-the-turn-to-the-working-end off the end of your hand, and over the working end. It should now sit under the working end, and there should be only one strand of line going over the top of your hand:

Step 5. Pull your hand back, and with it pull a bight in the working end through the strand of line which was lying on top of your hand. Do not let the working end come through, only the bight. The is what makes the knot ‘quick release’:
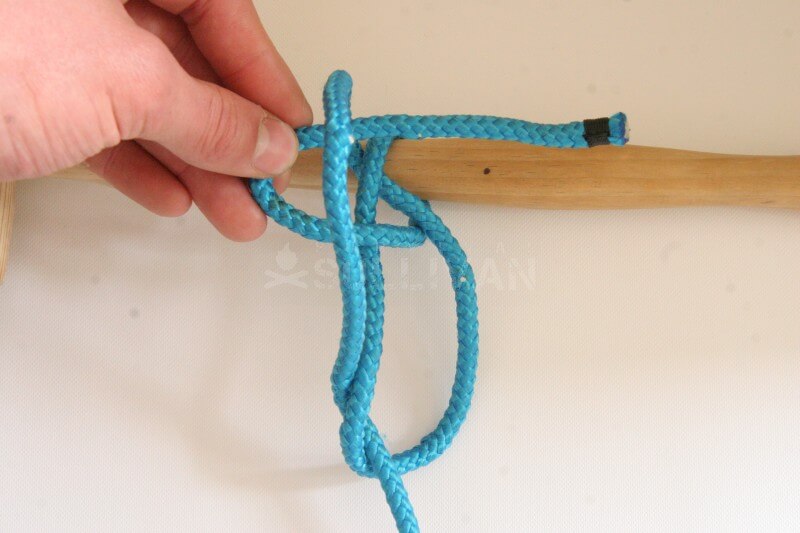
Step 6. The knot should then look like this. Pull on the standing part (at the bottom of this picture) to tighten it up:
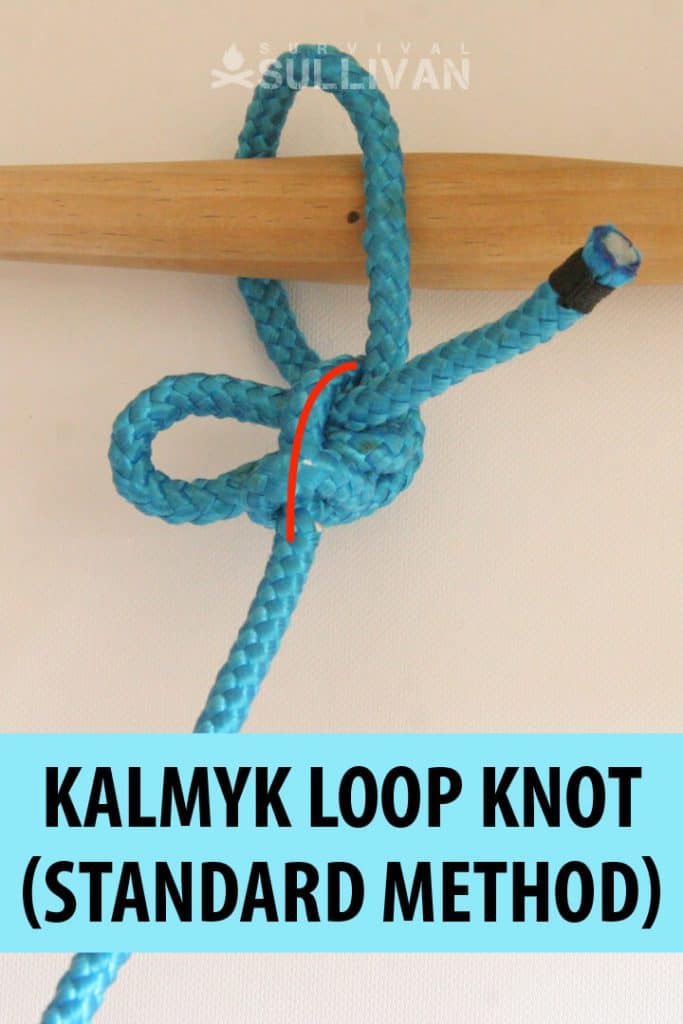
The knot should look like this. Exactly like this:
The picture is taken at a tilted angle to better display the arrangement of lines on the right hand side (in this case – whereas if the knot was made ‘mirrored’ they would be on the left hand side).
Especially when using this method, it is all too easy to make the knot right, but tighten it with the lines in the wrong places, and it becomes a simple slip knot which is not nearly as secure.
The picture above is the knot tightened correctly. Note how the whole structure of the knot – all the lines except the bight from the working end – are to the right of the central line marked in red.
This picture shows the knot tightened wrong:
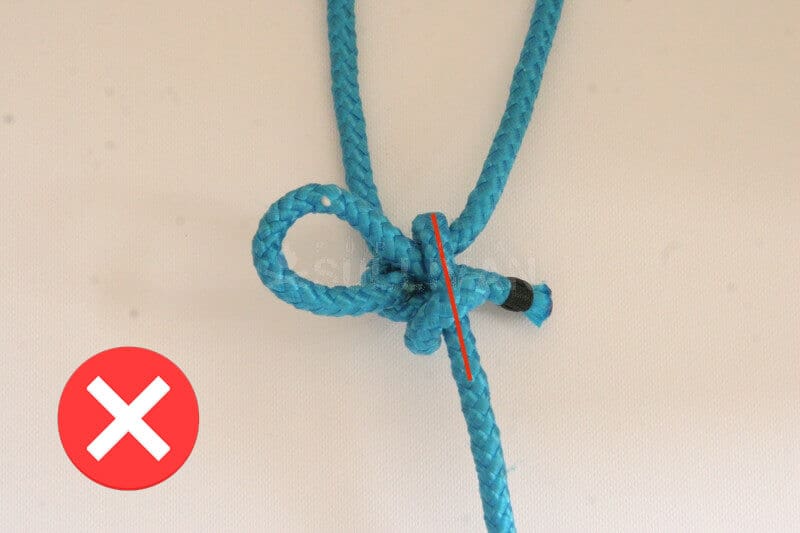
Some of the structure of the knot is visible on the same side of the central line as the bight, which means that if any load is put on that side of the loop, the whole thing becomes a simple slip knot and falls apart.
Related Knots
- The Eskimo Bowline and Bowline are (normally non-slipped) variations of the same principles of the Sheet Bend (an interlocking bight and half-hitch) which this knot relies on.
- The Kalmyk Loop can also be tied in two other ways. The method given above assumes that it is being tied around an object in front of the tyer, with the rest of the line trailing back to somewhere behind them. It can also be ‘free in hand’ (not around an object), either with the line trailing from the knot to behind the tyer, or away further forward.
For an extensive collection of knots, check out our comprehensive knot guide.
Conclusion
This knot really deserves to be better known. It is simple, quick and easy to tie, and because the method keeps the line under control the whole time can be good for tying in the dark (because if you can do it well, you can be sure all the time of where the line is).
Nick O’Law has been exposed to survival from a very young age. In his teenage years, he learned A LOT about bushcrafting, such as making snares and traps, and even how to make DIY knives.
If you haven’t ye read and tried his knot-making articles on Survival Sullivan, you should definitely check them out.