Sometimes we take our tools for granted. As preppers, we pride ourselves on always being prepared with the right stuff, but sometimes life or circumstances conspire against us.
What could be more aggravating than sitting on a small mountain of canned food and lacking a can opener? That exact scenario has been the punch line of jokes in movies, comics, and more, but believe it or not it really does happen every now and then.
Maybe your power is out and your electric can opener is out of action. Maybe you simply lost your precious multi-tool or Swiss army knife. Even your trusty P38 is missing in action!
It doesn’t have to mean going without dinner as long as you’ve got a knife. Keep reading and I’ll tell you how to open any can using a knife alone.
Be Careful and Pay Attention!
You knew this was coming. Get your mind right, and do it right now: it is not only possible, but safe, to open a can with a knife but only if you have your brain fully engaged the entire time.
You’re going to be using a substantial amount of force to open a can with any kind of knife, and the blade might take unexpected paths if you mess up.
Make sure you have your supporting hand properly positioned at all times and always work to minimize injury if your hand, the can, or your blade slips. You’ve been warned. Now let’s get to the techniques.
Method #1: Cutting Straight Through (Classic)
Sometimes the direct approach is the most effective. A sturdy knife with a good point and a sharp blade can easily cut straight through the lid of typical food cans.
Step 1: place the can down on a sturdy, flat surface and hold it in your non-dominant hand.
Step 2: hold your knife in your dominant hand using a typical grip.
Step 3: place the point at the edge of the lid near the rim where you would connect a can opener normally:
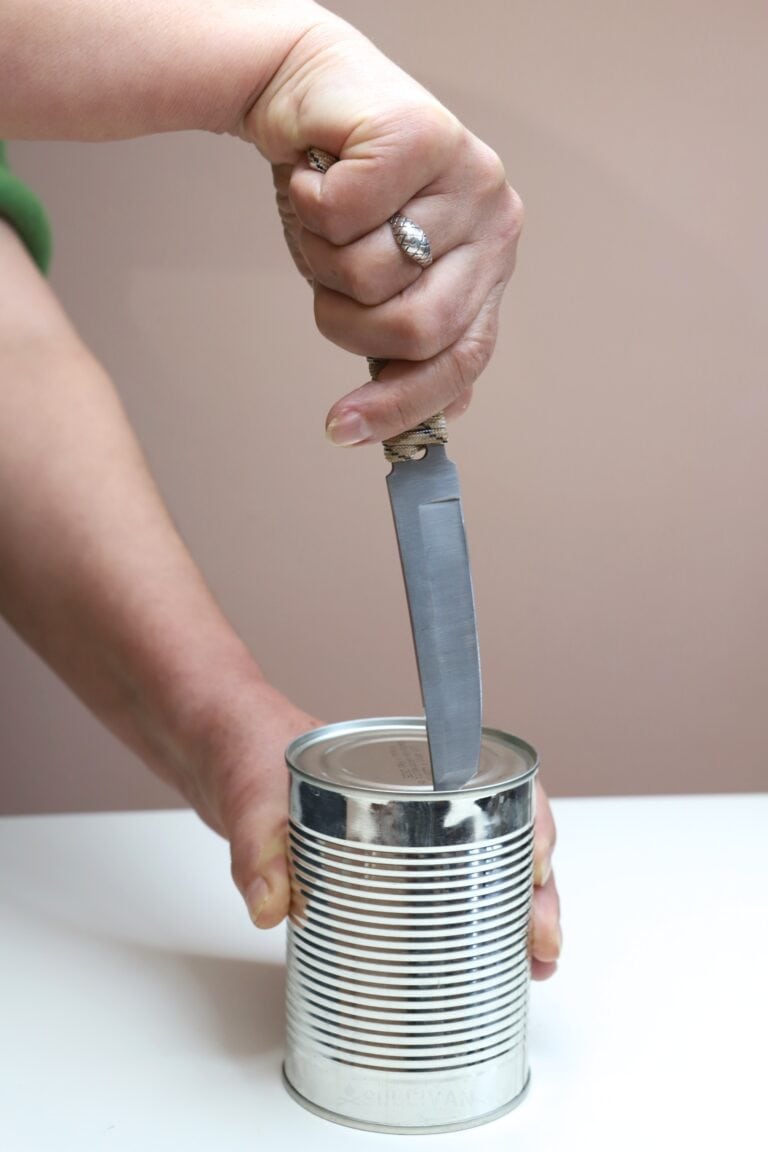
Step 4: press down hard with the knife to pierce the lid. Insert the knife about an inch into the can or a little more.
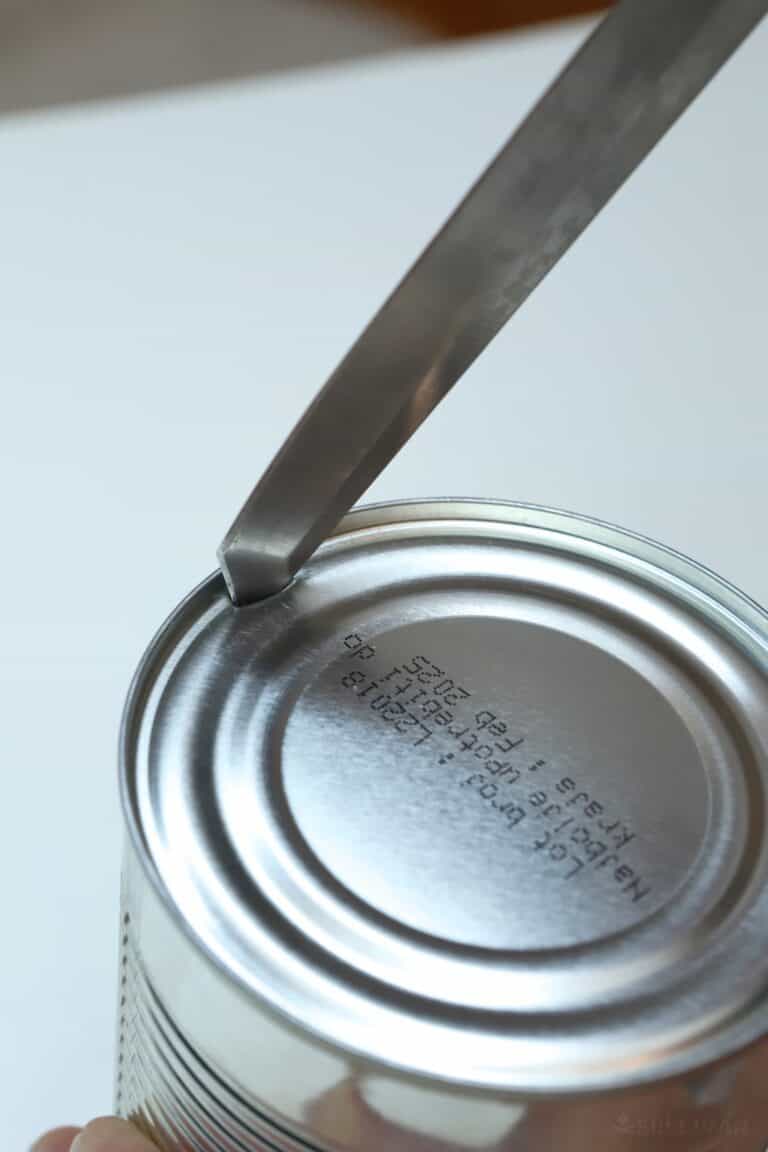
Step 5: now simply cut through the lid about ¾ of the way using a sawing, up anddown motion.
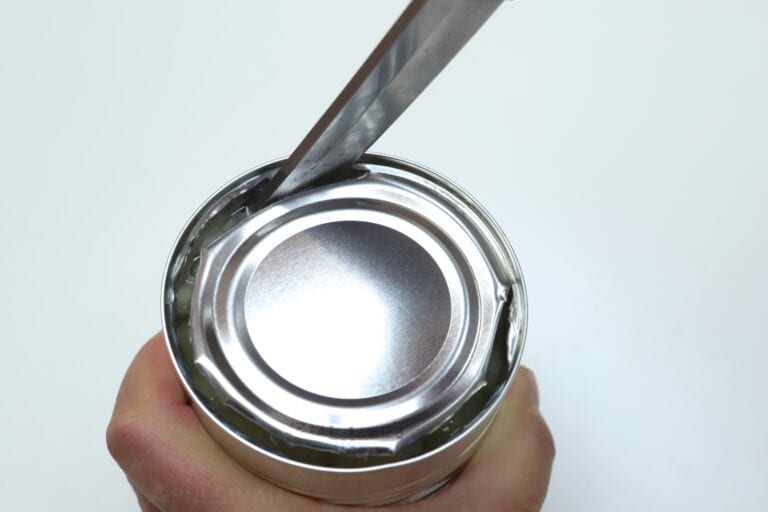
Step 6: use the side of the blade or another tool to pry open the lid.
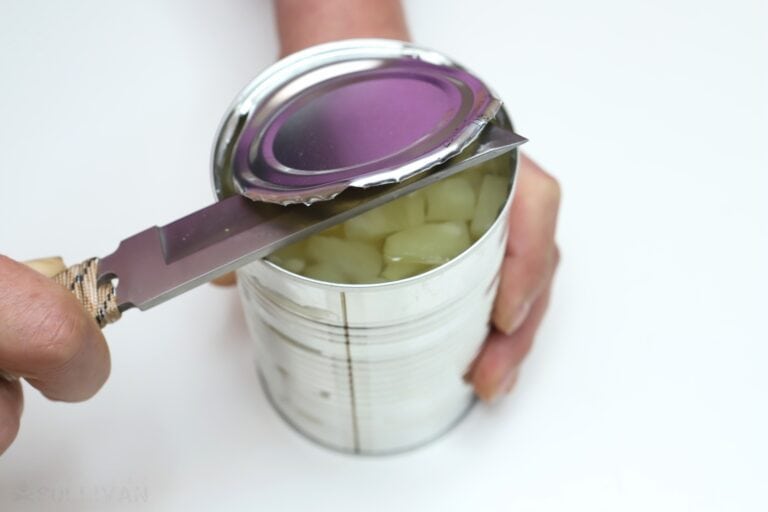
Step 7: empty the contents of the can and heat, eat and enjoy.
If you don’t want to mess around with any of the more intricate techniques listed below, if you’re just in a big hurry, or if you have a knife that is exceptionally durable or one that you just don’t care about this method works fine.
It also provides a pretty good degree of control, minimizing the likelihood of accidents but, as you might have expected, it is hell on your edge.
Method #2: Using the Tip
One of the easiest and most adaptable ways to open a can with a knife is by using the tip alone.
It isn’t particularly fast, and it can be messy when the time comes to pry open the lid, but if you don’t have a stout knife or you’re worried about slipping and cutting your supporting hand this is definitely the method to use.
Step 1: position the can on a smooth, sturdy work surface so it won’t buckle under pressure.
Step 2: hold your knife in your dominant hand with the tip facing down and the blade facing away from you.
Step 3: position the tip at the outer rim on the top of the can where a can opener would normally bite down on it. Angle the point of the knife inward slightly.
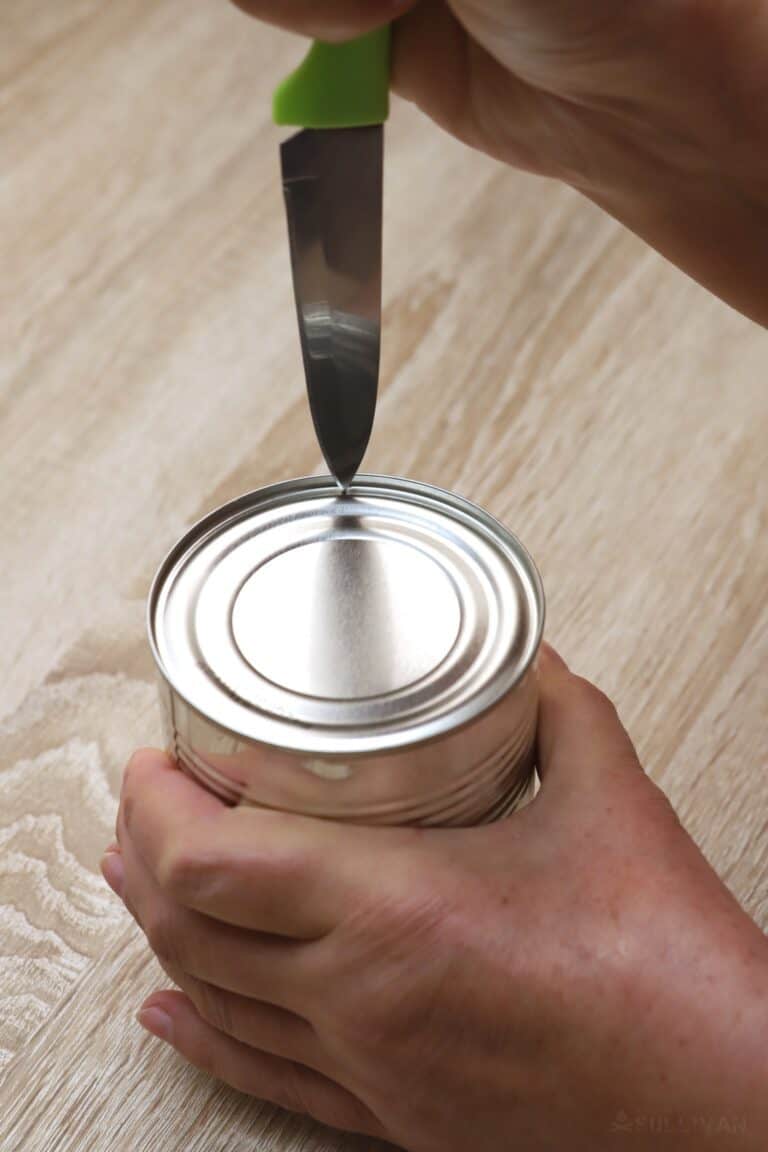
Step 4: gripping the knife tightly in your dominant hand, use the base of your palm on the opposite hand to tap the pommel of your knife and puncture a small hole in the lid.
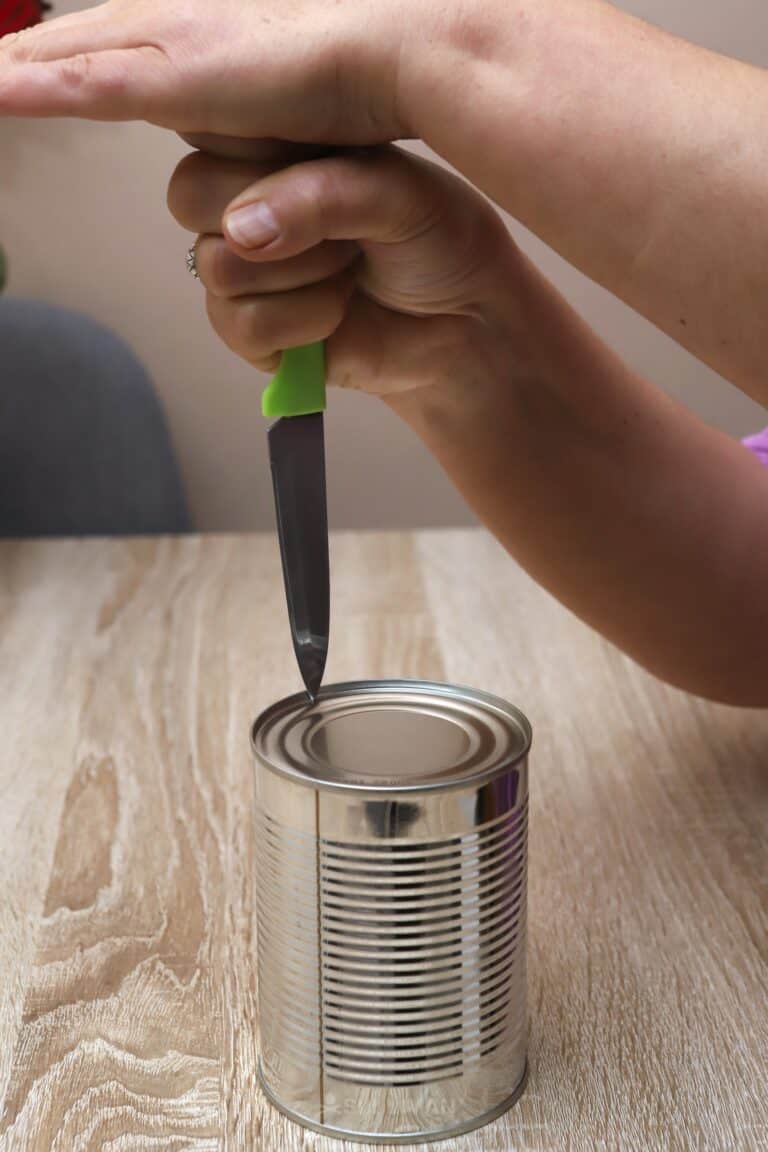
Step 5: withdraw the knife, slightly rotate the can, and repeat steps 1 through 4 to make another hole right next to the first one leaving only a small section of metal between them.
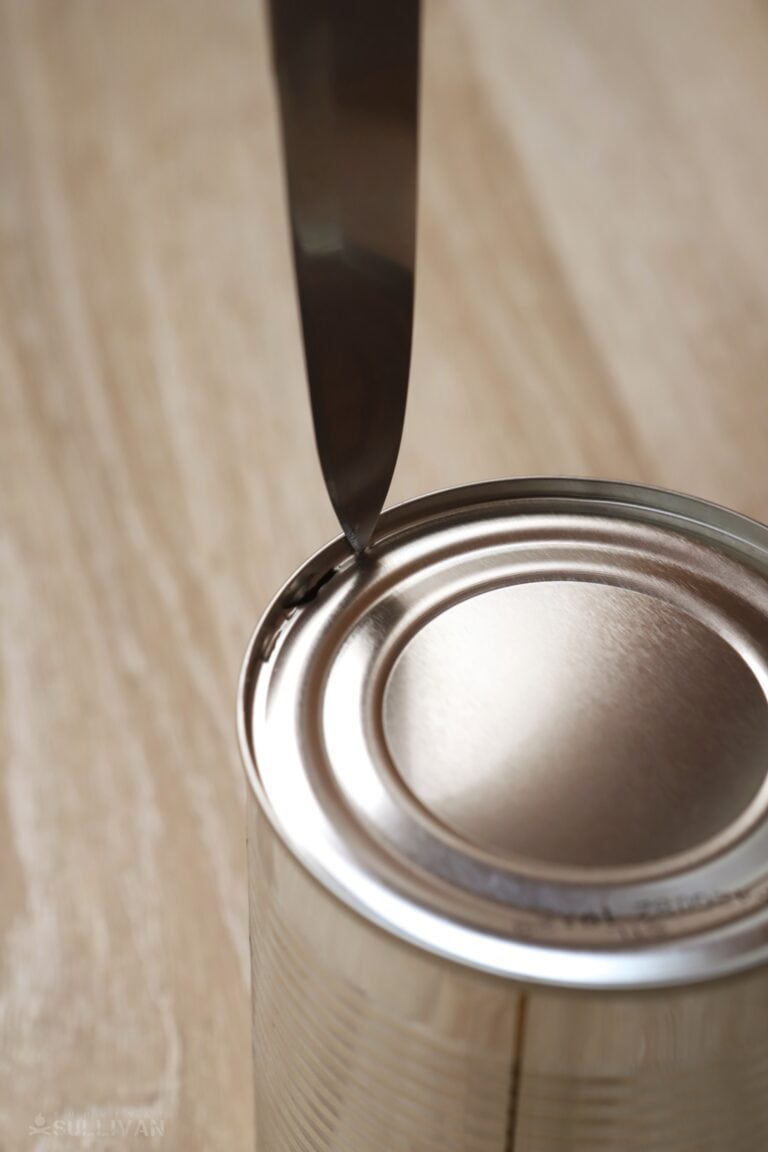
… and then yet another one right next to the second:
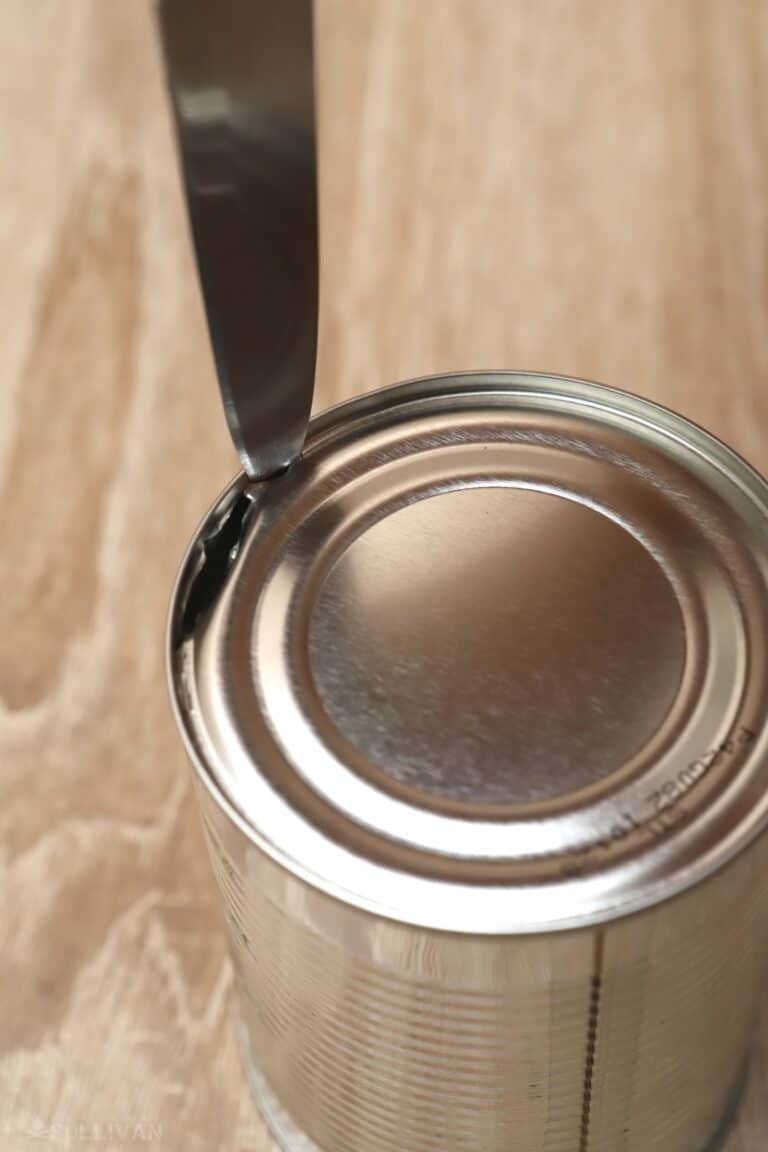
Step 6: repeat this process until you have gone at least ¾ of the way around the lid.
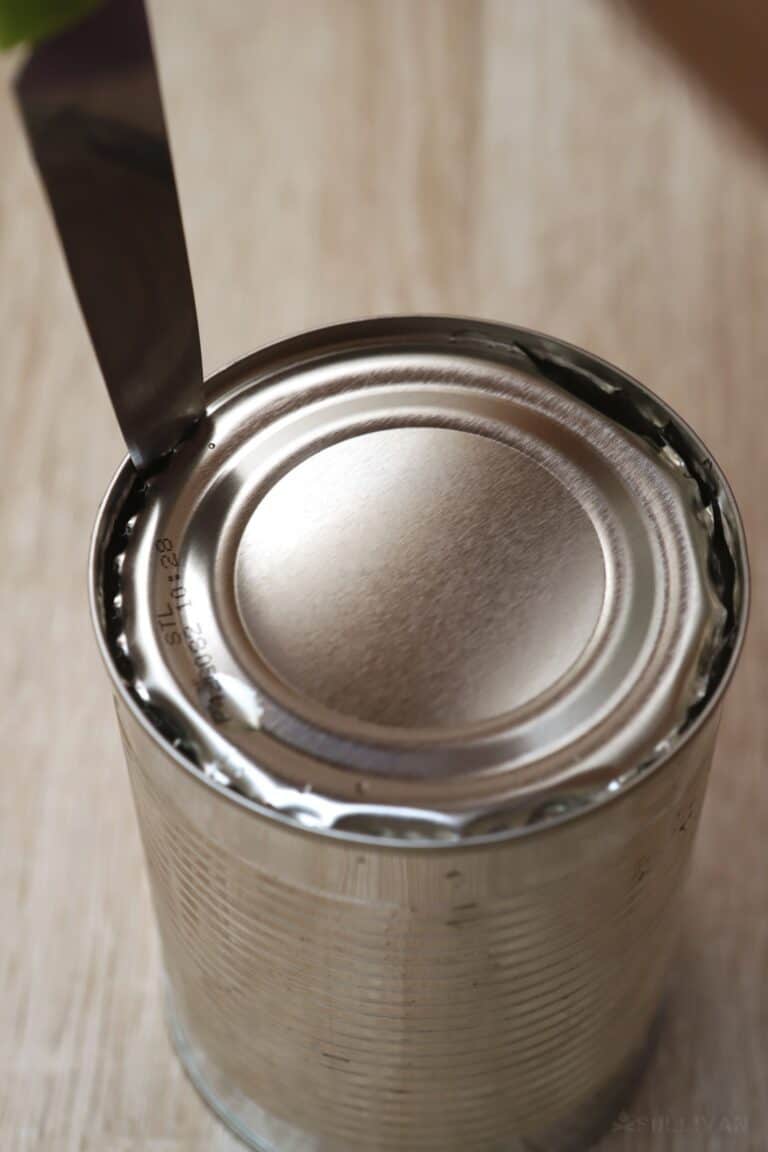
Step 7: once you have the lid mostly or entirely perforated, carefully pry open the lid using some other tool or the tip of your knife.
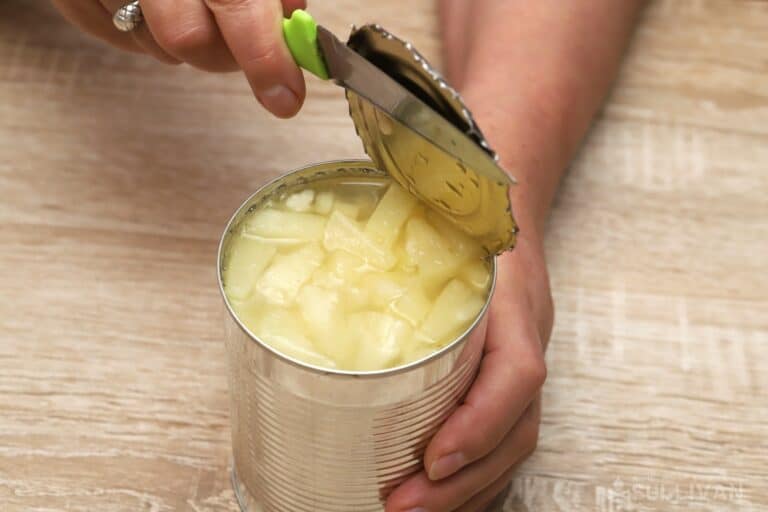
Step 8: empty the contents of the can into a container or dig in.
Like I said, this method is methodical and slow, but certain. If your knife handling skills aren’t very strong or you are just nervous about being cut, this is a good one to use.
However, you must be careful that you don’t topple the can or knock it off your work service since you won’t be stabilizing it as you strike with the tip.
Also, be very careful if your knife has a pointed or glass-breaker pommel because it’s easy to injure your non-dominant hand.
Method #3: Using the Belly
If your knife has a pronounced belly behind the tip, something like a Bowie, classic Buck knife, or Kabar, or if it has a “faceted” tip like an American tanto, this technique works well and similarly to using a manual can opener.
It is very hard on the edge where it makes contact with the can, but it’s a better option if your knife has a fragile tip. If done properly, it’s unlikely to result in self-inflicted injury due to slippage.
Step 1: place the can on a sturdy work surface that won’t collapse or slip. Put your other hand on top of your first like so:
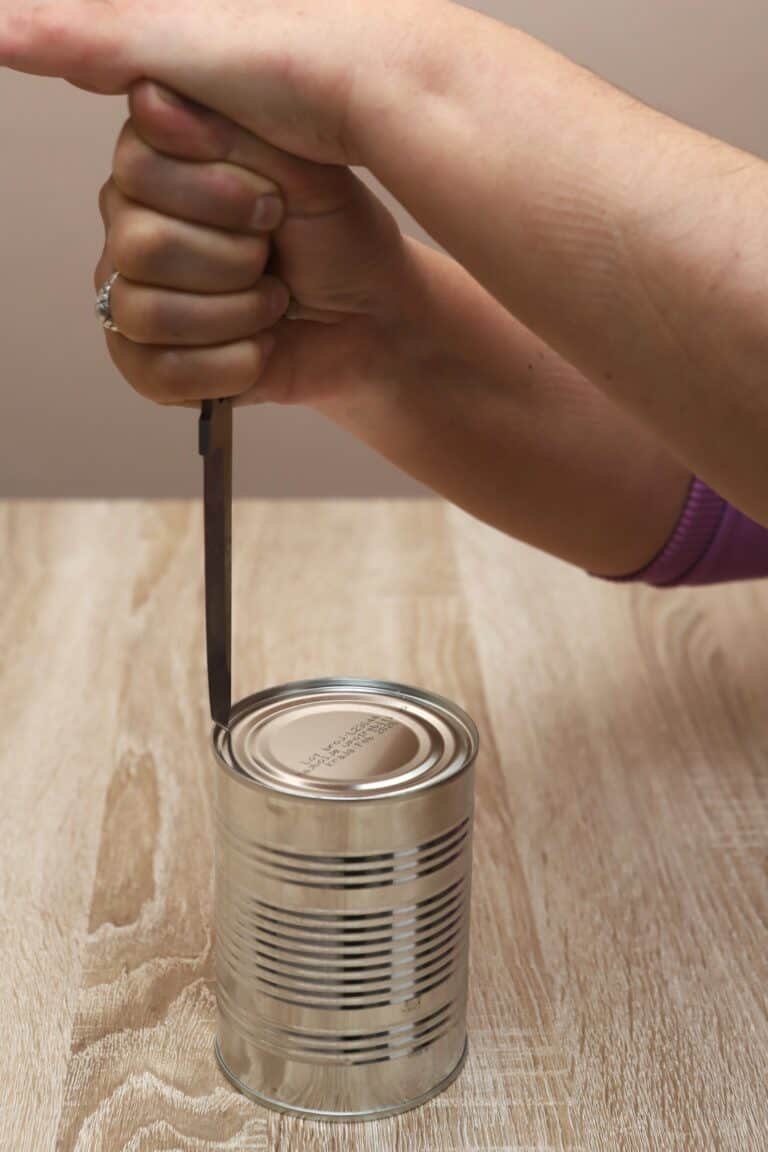
Step 2: make a hole at the edge of the lid using the tip of your knife. Simply tap the fist you made with one hand with the palm of the other:
Step 3: carefully force the knife deeper into the hole to widen it until it is wide enough to permit the belly of the knife.
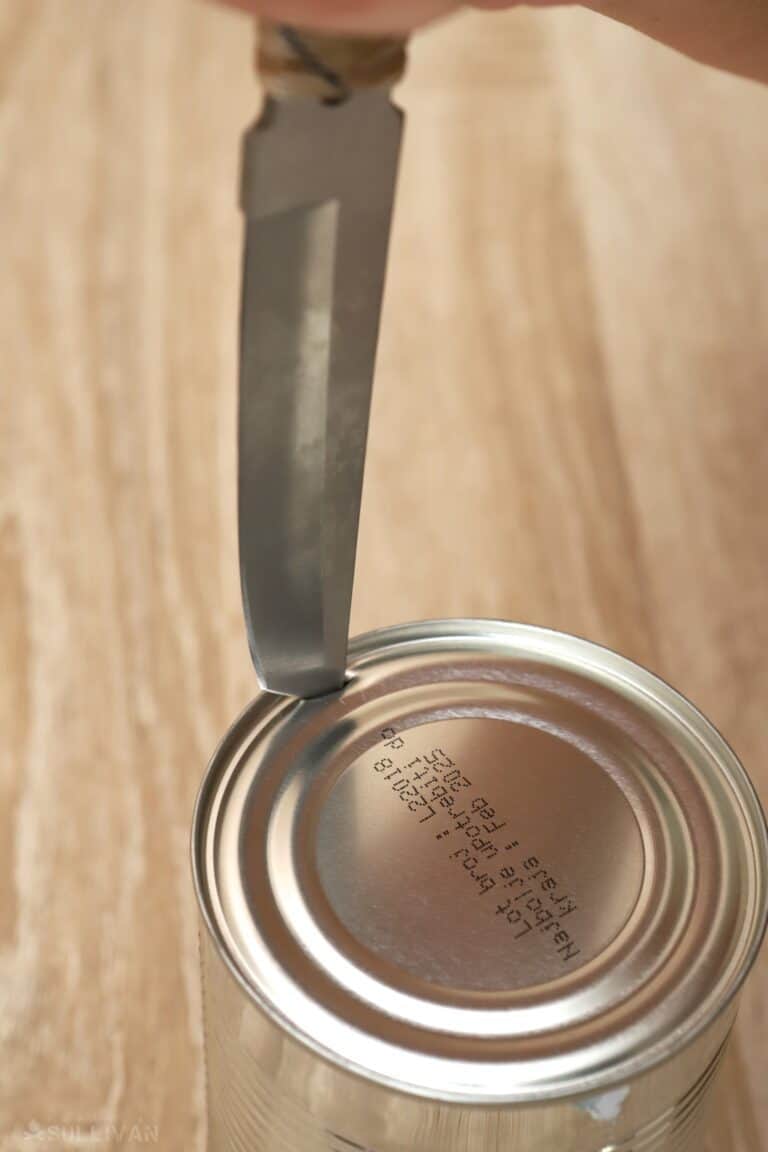
Step 4: switch your grip so you are holding the knife with the belly of the blade away from you. Hold the can firmly in your opposite hand. Carefully insert the tip into the hole you made so that about half the belly is inside the can.
Step 5: holding the can firmly and anchoring it on your work surface if you need to, pull the handle of the knife back both upwards and towards your body allowing the spine to lever against the rim of the can. This will make a cut upward through the rim using the belly of the blade.
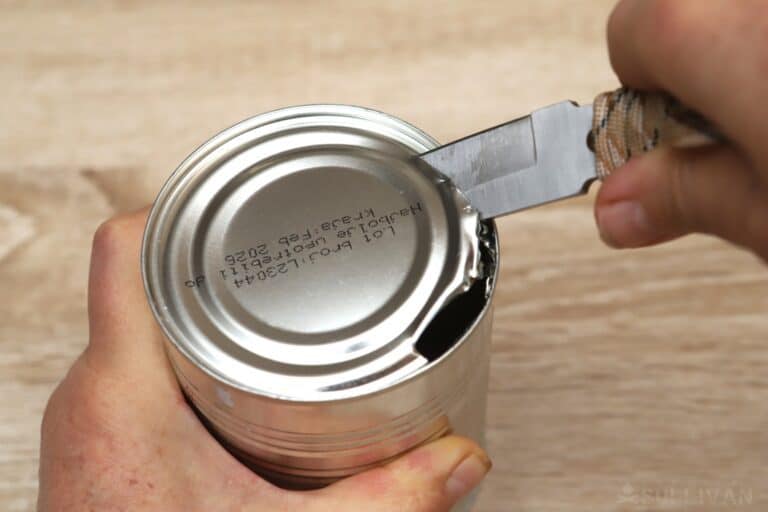
Step 6: with each cut, advance the knife until it touches the rim and repeat the preceding steps.
Step 7: keep going until you have cut through at least ¾ of the lid.
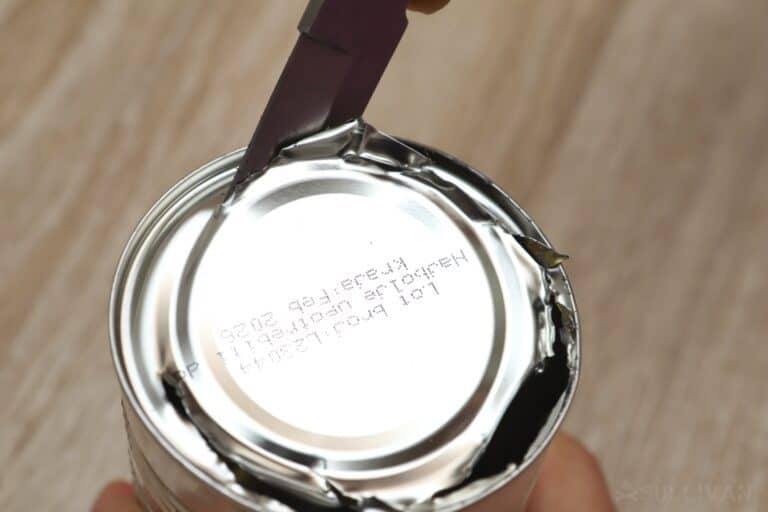
Step 8: being careful to avoid the ragged edges of the lid that are now pointing upward, use your fingers, the side of the blade, or another tool to lever the lid up and out of the way.
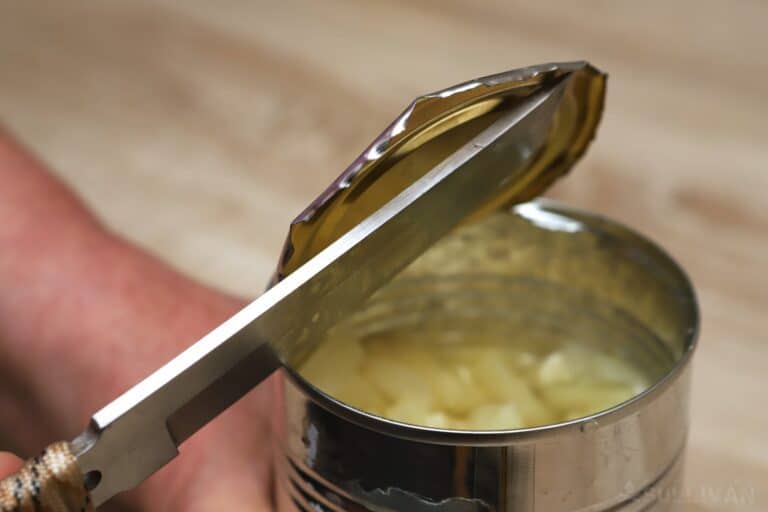
Step 9: empty the contents of the can into a container or eat as-is.
This technique works very well on all kinds of cans and with all kinds of knives, be they folding or fixed blade in nature.
It is also a good technique to use with a little practice if you don’t have a good work surface because you can safely keep the can in your non-dominant hand as you open it with minimal risk of slashing or stabbing yourself.
Note that if you are using a fixed blade with a long handle or a long blade, you might need to hold the knife with a reverse grip for maximum control and leverage.
Method #4: Using the Heel of the Blade
If your knife has a broad blade with a pronounced heel (that’s the corner of the blade where it stops closest to the handle) this is another technique that simulates the mechanism of a can opener pretty closely.
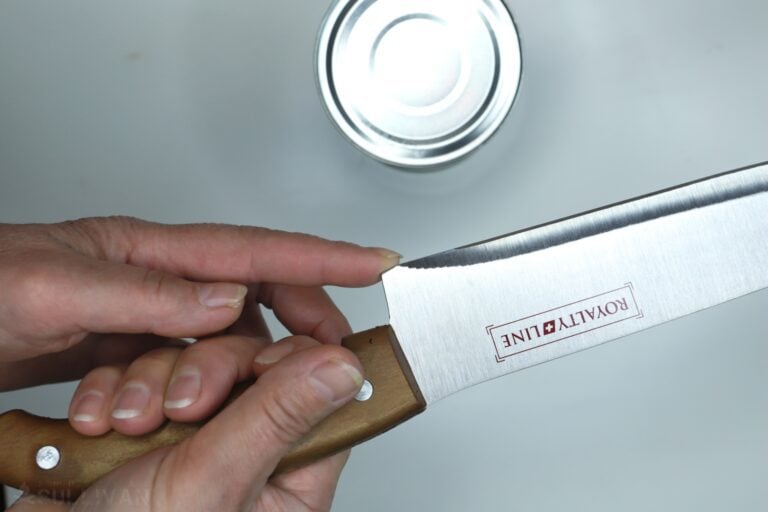
It has the added advantage of saving both the tip and the majority of the edge from damage. If you have a cleaver, kitchen knife, or similar implement this is the go-to method.
Step 1: hold the can in your non-dominant hand on a sturdy work surface. Try to maintain your grip so your fingers don’t go past the midpoint of the circumference of the can. Wear a glove or chainmail mitt if you’ve got one handy.
Step 2: holding your knife in your dominant hand with the tip up and the edge facing away from you, place the heel just inside the rim of the can on the lid, where a can opener would normally bite down.
Step 3: holding the can still and firmly with your non-dominant hand, press down hard with the heel of the knife to make a small hole.
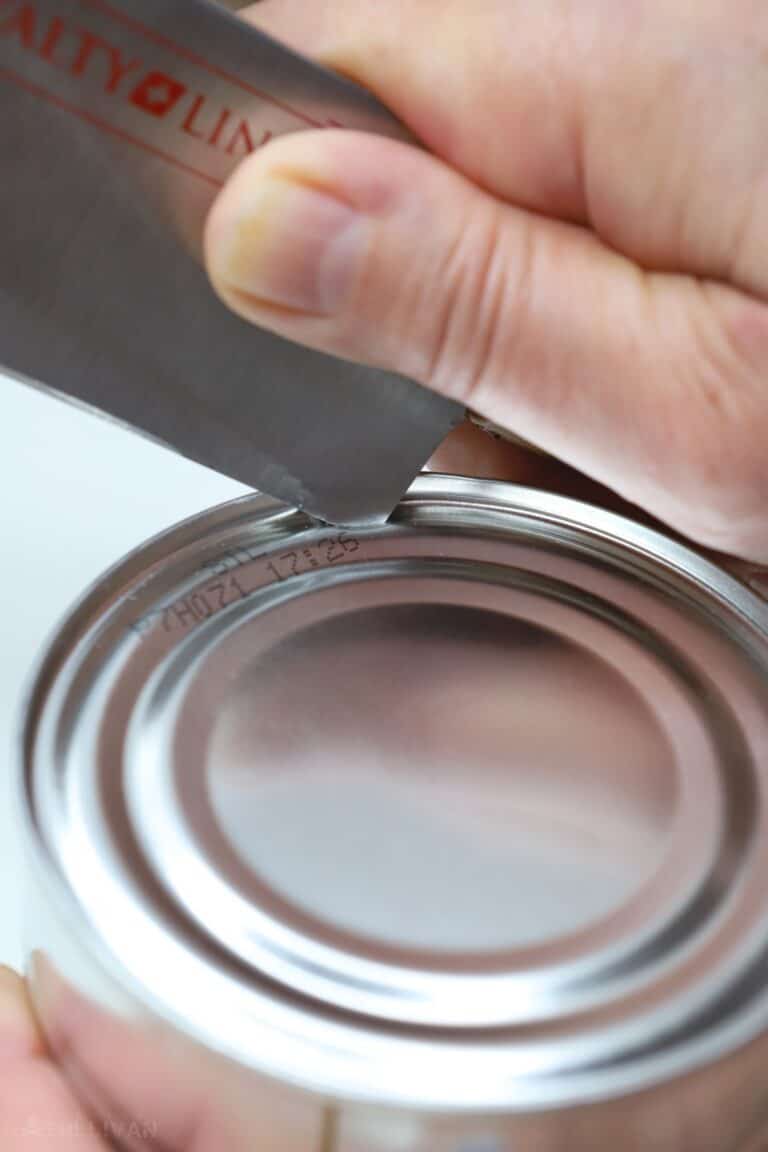
Step 4: rock the knife forward carefully to deepen and widen the hole. Do this a few times to start the cut.
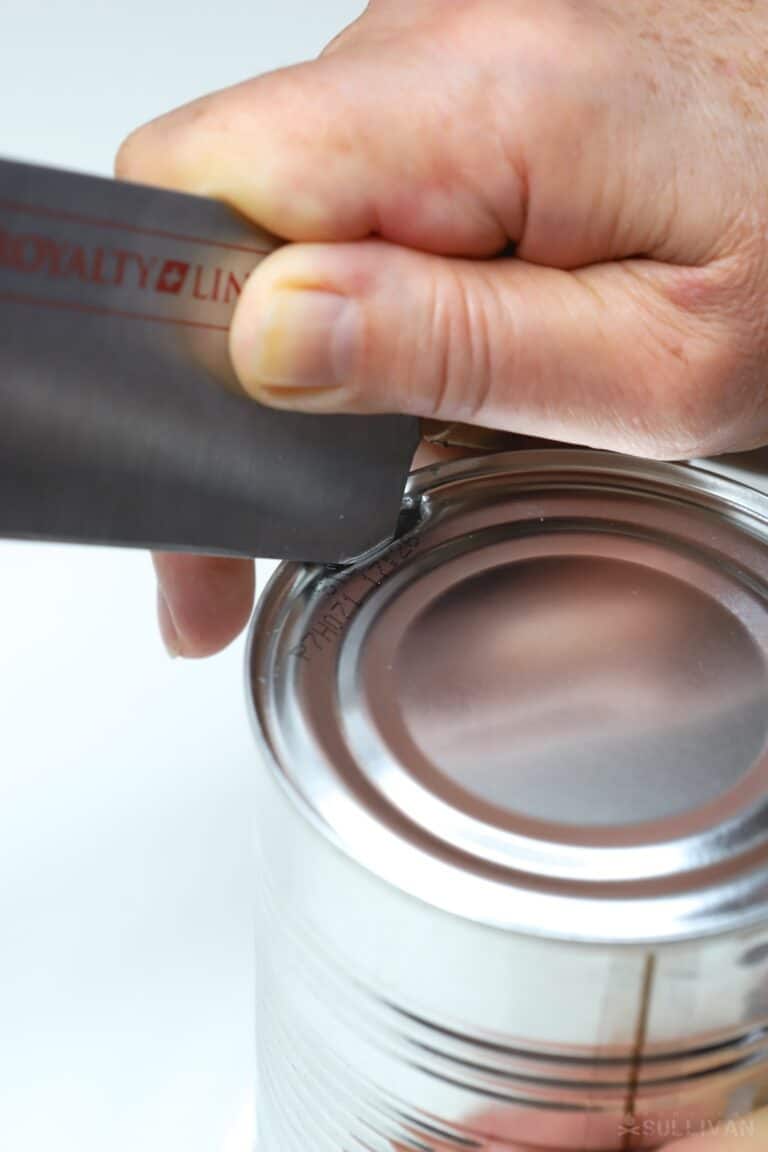
Step 5: after you make a few cuts with the knife, rotate the can in place to advance the lid to the edge of the knife.
Step 6: repeat the above steps until you have cut at least ¾ of the way through the can lid.
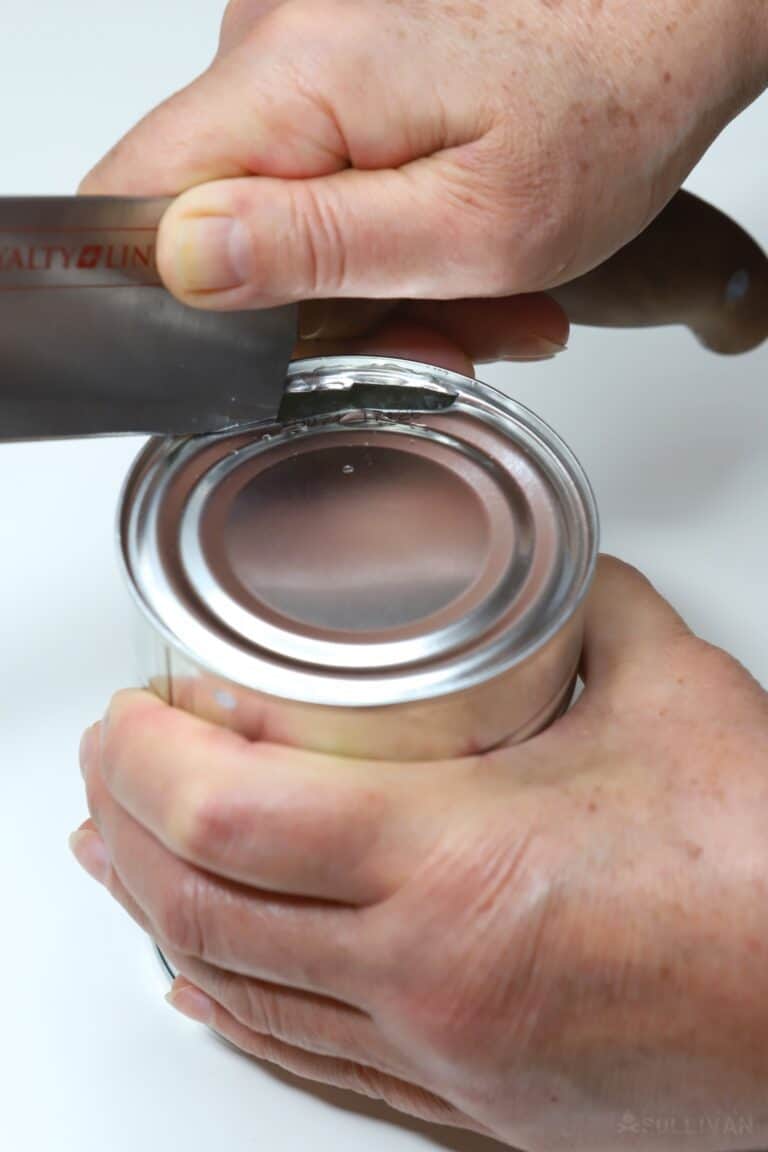
Step 7: slip the knife under the lid and use the side of the blade to lever the lid up, or use another tool. You can carefully do this with your fingers also.
Step 8: empty the contents of the can into a container, or just get to eating.
I really like this technique if I have a larger knife that is constructed in such a way to permit it. It saves the tip and the edge for more serious, useful work.
However, you’ve got to be cautious because if you have a full grip on the can with your non-dominant hand and the knife slips off and skitters down the side you can severely cut your fingers.
If you don’t have a glove or a chainmail mitt, or you just want to use the knife with more control, you can use the heel of the blade with the technique prescribed in method number one up top, striking the unsharpened spine of the knife with your non-dominant hand to puncture the lid.
Make that series of perforations all the way around the perimeter and then you can pop it off as before.
Tom Marlowe practically grew up with a gun in his hand, and has held all kinds of jobs in the gun industry: range safety, sales, instruction and consulting, Tom has the experience to help civilian shooters figure out what will work best for them.

I always have a P-38 and a P-51 available wherever I go.
If only knife makers replaced the totally redundant bottle-opener with a can-opener, this would be a less frequent issue. There is no reason to include a bottle-opener on a knife, other than to claim another function. When it is quite easy to combine the two in one blade, that must be the only reason that even decent manufacturers continue to provide the redundant blade.