There are two types of charcoal you should learn how to make before the SHTF – cooking charcoal and activated charcoal. Sure, you can buy commercially manufactured versions of both kinds of charcoal, but doing so will cost a lot more money than making either for yourself.
Unless you have an unlimited budget and copious amounts of storage space, your stockpile of charcoal (and everything else inventoried and organized in your basement or garage) will eventually run out during a long-term doomsday disaster.
Learning how to make both cooking charcoal and activated charcoal will enhance your survival skillset, and allow you to replenish the depleted stockpile over time.
Charcoal is essentially wood that has been burnt up, leaving only its carbon compounds behind. You must reduce or eliminate the oxygen from the fire used to heat the wood to carbonize it.
It has a virtually unlimited shelf life, though the way you store it will affect its potency.
Reducing the air flow caused the consumption of volatile compounds but prevents the fire from consuming the wood completely – leaving what we commonly call charcoal, behind.
Cooking Charcoal vs. Activated Charcoal
Cooking charcoal technically referred to as “char” and is primarily a pure carbon. It is a rather lightweight ash residue hydrocarbon and black carbon that is produced when both water and other potentially volatile matter (methane, tar, and hydrogen) is removed from either vegetable or animal substances.
Heating wood in an environment that has restricted air flow creates charcoal coals.
Activated charcoal is a fine black powder that has been heated to extremely high temperatures to enhance its power of absorption.
The hot temperatures alter the internal structure of the material used to make the charcoal (usually wood, peat, bone char, coal, sawdust, or even coconut shells and olive pits) and reduces its overall surface area and pore size.
Activated charcoal is far more porous than cooking charcoal, and is often used to absorb toxins from the body and to filter water, during survival situations.
Because of it absorbent properties, activated charcoal has been used to treat even acute poisoning. It binds together with the toxin to stop it from being absorbed into the intestines and stomach o the victim – unless the poisoning stems from an acid, like alkali or petroleum.
Never use activated charcoal to treat such an acid poisoning, it could be very harmful or even deadly, to the victim.
Best Wood to Use
Dense hardwood is the best type of wood for making charcoal, soft wood will burn up too rapidly for cooking or boiling water. Choosing the wrong type of wood will result in either the creation of poor quality charcoal or a failed project.
Never use pressure treated lumber when making activated charcoal. Such lumber is filled with chemical compounds that make it wholly unsafe for human ingestion, water filtration, and even cooking. The amount of wood you will need will depend solely on how much charcoal you will be making.
How to Make Regular Charcoal
Note: This will be turned into activated charcoal in a separate set of steps, just below.
Step 1. Chop the gathered wood into small blocks or chips. Chop the wood pieces are uniformly as you can so they will process evenly. The larger the wood bits, the longer it will take to heat them to the point they will be reduced to charcoal.
Step 2. Put the wood pieces in a cast iron pot, metal barrel, or metal trash can with a firm fitting lid. The wood bits need to be heated in a space that has restricted oxygen flow to create activated charcoal, making the fit of the lid essential to the success of the project.
Step 3. Drilling a couple of holes into the bottom of the cast iron cauldron (definitely not an easy task) metal trash can, or metal barrel to cause the wood blocks on the bottom to catch fire will quicken the heating process without allowing too much air into the container.
The wood bits that are ignited during the process will turn into wood ash (also extremely useful around the homesteading survival retreat) and not turn into charcoal.
Step 4. Hang the pot over an outdoor fire, with the lid only fitting loosely on the to pat this time. Keep the lid loose until all of the light gray or white smokes that appears first, turns to a tan to dark tan hue.
The white smoke is created by the release of water vapor. Once the tan smoke appears, put the lid firmly onto the pot and stoke up your fire.
Step 5. The smoke stemming from the cast iron pot will likely decrease after several hours of cooking the wood. When this happens, put the cast iron pot directly onto the hot coals of the outdoor fire.
Step 6. Cover the entire cast iron pot with ashes from the fire and dirt. The more covered you can make the pot, the better.
Step 7. Permit the pot to stay encased inside the wood ash and dirt for a minimum of 4 hours, but preferably overnight. Allowing the material inside the can to cool completely reduces the chances of spontaneous combustion occurring when the lid is removed.
Step 8. Dig the cast iron pot out of the dirt and remove the lid.
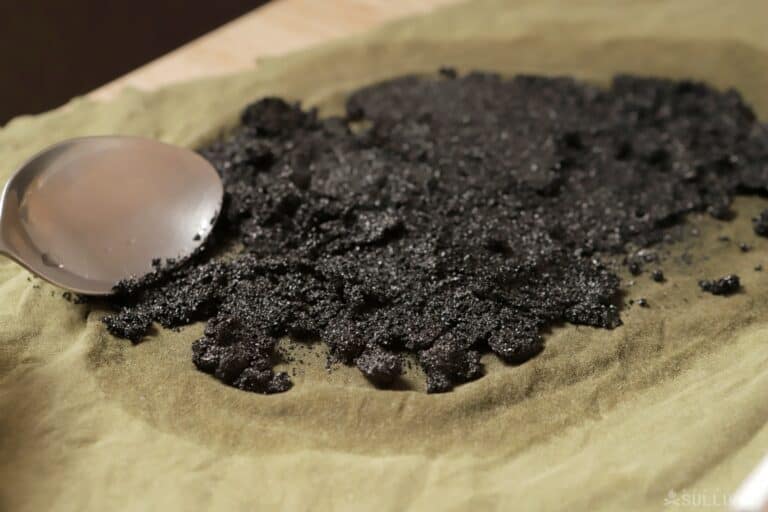
Step 9. Carefully dig into the material left inside of the cast iron pot to get to the bottom and remove the activated charcoal.
If the charcoal was processed properly, it will be lightweight, extremely dark, and crumble easily when squeezed in your hand. If the charcoal is covered with a lot of wood ash, air flow was not restricted enough during the heating process.
Making Activated Charcoal from Regular Charcoal
Step 1. Follow the charcoal making method above.
Step 2. When removing the charcoal from the cast iron pot, can, or barrel, wash the pot to remove any wood ash or other residue.
Step 3. Allow the charcoal to dry completely before moving onto step 4.
Step 4. Grind the charcoal into a fine powder, either by hand or by putting it into a food processor or blender. If the charcoal chunks are too large, it could produce an activated charcoal that is weak or inefficient.
Step 5. The charcoal must be mixed with lemon juice, calcium chloride, or bleach to become activated.
You can grow a lemon tree (dwarf trees can be grown indoors during the winter months and outdoors during the summer, in nearly all regions) to create a stockpile of activated charcoal making supplies, or make calcium chloride yourself – outdoors only and by following proper safety procedures.
Step 6. Mix your chosen material with water and stir – at a 25% material and 75% water ratio.
Step 7. Pour the mixture over the charcoal until it is covered – like you would do with a roast that is placed in a cook pot.
Step 8. Allow the charcoal to marinate in the mixture for 24 hours.
Step 9. Drain away the mixture from the charcoal.
Step 10. Rinse the charcoal in clean water to remove any chemical residue.
Step 11. Gently wipe away as much water as possible. It should be wet, but not saturated with the water.
Step 12. Put the charcoal back into the cast iron pot, barrel, or metal trash can.
Step 13. Cook the charcoal for about three hours – the fire must be hot enough to remove all of the water from the charcoal.
Step 14. Remove the now activated charcoal from the pot and allow it to cool.
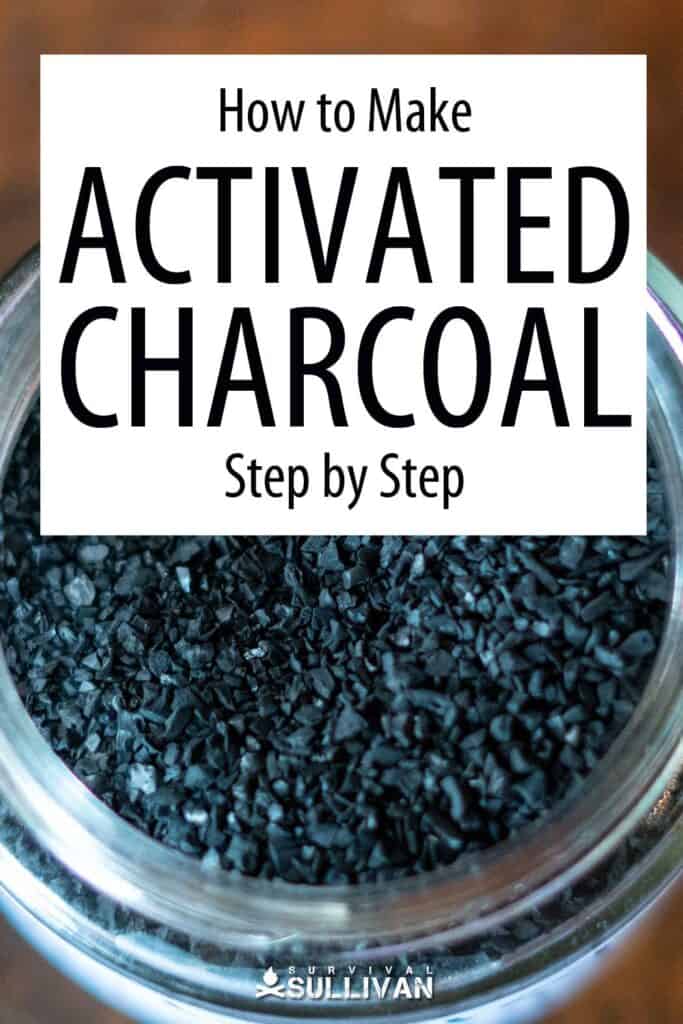
You can store in an airtight container such as a glass jar until ready to use. Activated charcoal doesn’t expire.
Walter Filtration
Activated charcoal can stored in an airtight container in your bugout bag for use in a small emergency water filter.
Ideally, store the activated charcoal in a DRY plastic water bottle to conserve space so you have both the needed debris and chemical removing material and a bottle to use to make the filter, handy at all times.
Boiling water isn’t necessarily enough to make it clean enough to drink. The boiling process will kill off nearly all of the possible bacteria in the water, but at the same time, can cause pesticides, heavy metals, and other potentially deadly matter in the water, to actually increase.
Precautions
The general dosages recommended for an adult with activated charcoal is 25 – 100 grams. It is often recommended that children consume 10 – 25 grams of activated charcoal. Learn more about the right dosages here.
PLENTY of water should be consumed along with the activated charcoal during an emergency poisoning treatment.
We are not doctors, this is not medical advice, only you and your doctor can determine how to treat health conditions. These dosages are merely emergency survival generally recommended best practices.
Activated charcoal has also been used to treat alcohol, cyanide, iron, and lithium poisoning, among other things.

Have and activated charcoal or charcoal success or failure stories? Share them with the Survival Sullivan community in the comments section below.

Tara Dodrill is a homesteading and survival journalist and author. She lives on a small ranch with her family in Appalachia. She has been both a host and frequent guest on preparedness radio shows. In addition to the publication of her first book, ‘Power Grid Down: How to Prepare, Survive, and Thrive after the Lights go Out’, Dodrill also travels to offer prepping tips and hands-on training and survival camps and expos.
I have a comment and then three questions. First, you say “unless the poisoning stems from an acid, like alkali or petroleum.” Alkali is a Base, not an acid [and petroleum is usually neutral, neither acid nor base.] Can you clarify – what poisoning DOES it work for?
My second question is in the making of activated charcoal. You say “Step 5. The charcoal must be mixed with lemon juice, calcium chloride, or bleach to become activated.” Again, because lemon juice is a weak acid, Calcium chloride is a salt of a strong acid and a strong base – so it is neutral, and bleach is a base, I must ask which method works? Or, do you use a different method depending upon what you are going to use the activated charcoal for? [ie. acid-activated to counter bases/alkali, neutral which would be helpful against both acids and bases to a degree, or base-activated to counter acids]
These are great questions!
Did you ever receive a reply?