If you own property, or if you just lease it, you have the right to determine who gets access to your property and who doesn’t.
Keeping unwanted visitors or passersby off of your property is important, and to do that, you’ll usually need to post your property with no-trespassing signage.
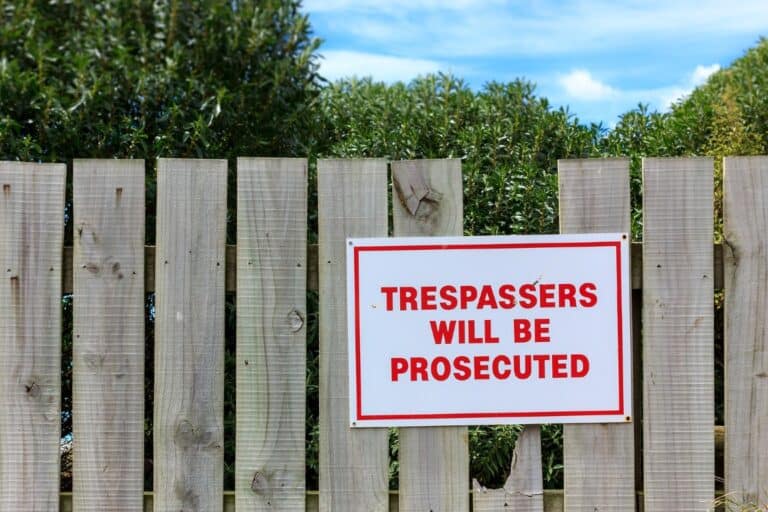
It sounds simple, and it is, but it’s a surprisingly nuanced topic that’s easy to get wrong. You might not know there are state regulations for posting signage in most states!
To help make your sign-hanging foray straightforward and easy, I’m bringing you eight tried and true tips to help you get the job done.
Tip #1 – Always Research Signage Requirements!
The best tip I can give you is also the least fun: you have to research your home state’s signage requirements before you get started!
Most states have regulations concerning the posting of no trespassing signage, specifically regulations that you’ll need to abide by if you want the law to back you up when it comes time to actually deal with trespassers.
Some states have relatively few rags, others have a lot, but generally, they will entail:
- the overall size of the sign,
- the font,
- specific verbiage or a message that must be on the sign,
- how high you can place the sign on a post or tree,
- and also how low,
- and how far apart the signs must be.
It sounds like simple stuff, and it is, but you must follow it to the letter if you want to protect your property. Once you’ve figured all this out, you’re ready to proceed…
Tip #2 – Figure Out How Many Signs You Need
The next thing you need to figure out is how many signs you should post around the perimeter of your property. The general rule of thumb is that the larger your property, and the larger the perimeter, the more signs you’ll need.
Typically, you’ll need at least one sign for every 100 feet and one sign for every entrance, gate, path, or water frontage on the parcel. The idea is to create a continuous web or network of signs so that no trespasser can reasonably, or plausibly, say that they did not see them.
Also, keep in mind that your signs must be placed at a certain height off the ground, not too low or too high, so factor this in as you go around figuring out the number of signs you’ll need.
You might need more signs if you have fewer suitable points to place them.
Also, consider taking along a paint pen or some other reliable marking device to mark the spots along the perimeter where you will place your signs.
This will save you from doing the measuring work over again a second time prior to placing. Once you figure out the final number, grab a few extra as insurance against mistakes or loss.
Tip #3 – Use Paint Markings if You Can
If your state allows it, consider using paint markings instead of signage.
Typically, states will allow you to use purple paint to mark trees, fence posts, or other features on your property to count as notice against trespass in the same way that signs do.
Although most states do not permit this as legal notice against trespassing, if yours does, this can save you a lot of time, money and effort when it comes to posting your property.
It is a lot easier to use a rattle can of spray paint or a bucket of paint and a brush to make some large vertical stripes than it is to go through all the trouble of securely hanging a sign.
But just keep in mind that the states that do allow you to do this will also mandate requirements that are much the same as they are for signs; specifically the width, length and overall height of the mark.
But as long as you can handle that, you’ll have a much easier time!
Tip #4 – Buy Quality Signs
If you are using signs, try to buy the best ones that you can reasonably afford.
Keep in mind that all of your signs are going to be exposed to the elements continuously: heat, cold, wind, rain, and in most places, relentless UV exposure.
Your signs will break down, fade away and be rendered illegible in fairly short order if they are cheaply made or printed.
Cardboard is unacceptable for obvious reasons. The best signs you can get are made from metal or high-durability acetate plastics.
Before you purchase your signs, test one corner of the painted graphics with a thumbnail. If you can’t scratch it at all, they will probably last. If the paint that flakes off or noticeably dents under your fingernail, I wouldn’t expect them to last too long before they’ve got to be replaced.
No matter how cheaply you can get those signs for, it could be false economy if you’ve got to replace them yearly. Especially for a large property made up of difficult terrain, your time and effort also have an associated cost, so buy accordingly!
Tip #5 – Choose Good Hardware and Fasteners
The next thing you’ll need are appropriate fasteners for mounting your signs.
If your signs are going on to fence posts, fencing or other specialized mounts there are probably equally specialized hangers or fasteners just for your application.
Otherwise, you’ll be nailing up your signs using nails or screws. Both are viable, but I typically prefer using screws because they do not loosen nearly as badly over time, especially when driven into a tree.
I don’t like using staples, wire ties or any other “questionable” fastener; permanent or semi-permanent is best.
Remember that if your signs fall down, a trespasser might be able to legally claim that they did not see the signage, depending of course on where they entered your property.
In any case, if it goes to court, this is definitely something that the defense attorney will seize on and exploit.
Whatever sort of fasteners or hardware you choose for mounting your signs, make sure they go deep enough and are thick enough to provide a good bite into the mounting surface without unduly damaging the sign itself.
Also, try to make sure that your chosen fasteners are weatherproof themselves. They will lose their grip rapidly if they start to rust away.
Tip #6 – Mount Signs Securely
No matter what sort of mounting surface or hardware you are using, your signs must be securely mounted. I mean to say they must be difficult for some nefarious individual to remove- take it for me, they will try!
Never mind the fact that it is a distinct crime itself in most states to tamper with or remove a posted no-trespassing sign from private or public property, some people will try to cover their tracks or pave the way for future trespassing by taking down or “reducing” your signage.
Now, honestly, there’s nothing you can do really to prevent a motivated person from destroying or taking down your sign. If they come with tools and vandalism in their heart they will get the sign down, depend on that.
But having to use tools and force, and having to make noise, is a lot different than being able to quietly come up quickly and easily simply take a sign down from a peg or tack nail.
You don’t want to make it easy on trespassers; that’s the whole point!
Tip #7 – Check Your Installation
Once you have installed your sign, and before moving on to the next installation point, take a moment to check your work.
Make sure that your sign is completely secure wherever you have mounted it, and then it can withstand significant force in all directions. If it can’t, it’s likely that your sign can get blown away by a stiff gale.
A moment of inspection will ensure your signs can last for a long time with no maintenance.
Tip# 8 – Walk the Property Line
Once you finished installing all of your signs, now is the time to walk around your property one more time and, if it has a road frontage, to drive by it.
This is an honest assessment: how do your signs look? Are they visible and vibrant? Can they be seen coming or going from either direction?
Are there any stretches of your perimeter that seem to be barren of signage, even if you have fulfilled the state requirement? If anything seems unsatisfactory or hard to see, this is something you should fix.
Keep in mind that the placement and actual visibility of your signage might come up in court when you have to finally deal with a trespasser!
What you don’t want to happen is for there to be any loopholes or plausible explanations that could see a trespasser’s charge downgraded or even the case thrown out entirely.
Once you’ve taken the time to do the job right, take the time to assess your work and make any improvements necessary.

Tom Marlowe practically grew up with a gun in his hand, and has held all kinds of jobs in the gun industry: range safety, sales, instruction and consulting, Tom has the experience to help civilian shooters figure out what will work best for them.