Freezer Bag Cooking is a method of cooking dehydrated foods using only heated water and a freezer bag.
It’s a technique that has caught on well with hikers and campers but has also been adopted by preppers as a means of convenient cooking with minimal cleanup. However, some people despise the idea of it and claim it can be harmful to your health.
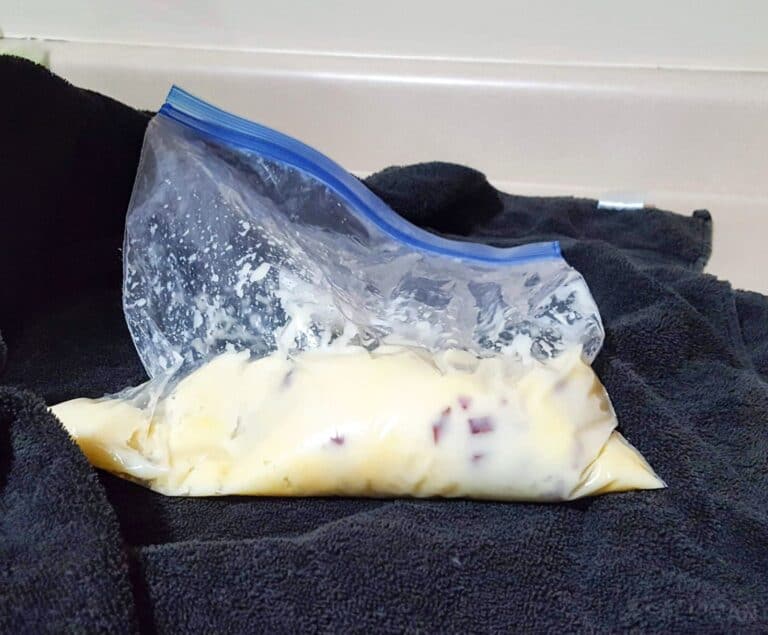
The method itself is pretty straightforward. You mix your dry ingredients in a freezer bag, add in heated water, insulate the bag in some way, and wait for the food to “cook” or rehydrate.
For rehydrating food, you do not need boiling water, but heated. Generally, most people will bring the water to a slow boil, and then allow it to cool off for a minute or two before adding to the bag. However, some people get very creative and can make full three-course meals using nothing but freezer bag cooking.
In this article, we will be discussing the details of freezer bag cooking, as well as the potential health effects some people claim. We will also look at two of my favorite recipes to make on the trail. Of course, we will talk about how freezer bag cooking can be useful to preppers, and how to incorporate it into your preps.
Table of Contents
Origins
Freezer bag cooking initially became popular during the 1990’s during the rise of the ultralight backpacking craze. Since hiker and rock climber Ray Jardine hiked the Pacific Coast Trail with a pack that had a base weight of only 12.5 pounds, the quest for lighter and lighter gear has continued.
By allowing you to reduce the needed equipment and supplies freezer bag cooking can help a backpacker cut weight in a category that is often a large portion of overall pack weight.
Another aspect that helped freezer bag cooking become more and more widely used was the fact that you could make healthier and better-tasting meals, compared to the often less-than-desirable pre-packaged food.
It is because of methods like freezer bag cooking catching on, that we have seen so much research and development by dried food companies in the last twenty years.
While you certainly have a large variety of “gourmet” meals to choose from today for your backpacking needs, in the mid to late nineties the options slim.
Pros
With freezer bag cooking, you forgo the standard mess kit, only needing a spoon, and a pot to heat water. You also lose the excess weight of the standard mylar packaging most dehydrated meals come packed in.
You also do not have to do any dishes and have minimal cleanup at all. This allows you to save on extra water needing to be carried if you are away from a water source.
The remaining trash from the meal is only the bag itself, which packs small and weighs next to nothing. Another area freezer bag cooking saves weight is with fuel. Just having to heat water, you will not use as much fuel as traditional cooking.
Another advantage to freezer bag cooking is that you get to customize your meals. If you’re a heavy eater, you can add in more food. A light eater can do less food, or omit heavier parts of the meal.
You are in control of the ingredients and portion size, which is an advantage over using store-bought food. From a health perspective, it also allows you to control the quality of ingredients and change recipes to conform to specific diets of beliefs.
Cons
While freezer bag cooking sounds like a fantastic thing, there are some who a staunchly against it. Most of the concerns are about chemicals leaching from the plastic during the “cooking” process while the plastic is softened from the heat.
However, according to the Material Data Sheet for Polypropylene (PP), the melting temperature is Melting Point | 150-170 °C, with the Decomposition temperature being >300°C, far beyond the boiling point at 100°C (212°F).
Another concern a lot of people are uncomfortable with freezer bag cooking is the spilling of boiling water while adding it to the bag or mixing the food in the bag. Steam created inside the bag can fill the bag as you are mixing or kneading the food, and can cause the seal to pop open.
Koozie / Pouch
When freezer bag cooking you need the heat to do the cooking, so insulating the bag will help keep in the heat and make sure your food gets good and rehydrated before eating. It’s popular to use a specialized koozie (a pouch) to put the bags in while they cook.
Some people purchase or make their own, specialized koozies to drop their bags in to keep things nice and cozy. You can find them made from a ton of different materials, and everyone has their personal opinion on which one works best.
The most common ones I have seen are made from the material used in windshield heat reflectors for your vehicle. I have used this style, as well as ones made from thick cotton towels, and both seemed to work about the same.
Other people, myself included, prefer to use something on hand to insulate the bag rather than a koozie. Generally, I will use either a jacket, sleeping bag, or beanie hat, and all work just fine.
The Food
When it comes to the food that you can make while freezer bag cooking, the possibilities are only limited to your imagination.
Some people prefer a simple dump it all in kind of recipe, while others will cook different parts of the freezer bag meal in separate bags and serve it family style. As long as you can find, or make, the ingredients dehydrated, you can cook with it.
Another option is to cook your own meals at home, and then dehydrate them. Then you break it up and portion it out into freezer bags. You now have virtually the same thing you get with store-bought dried meals (such as soup, beef stew, and spaghetti with meat sauce).
This allows you to control what goes into the meal, and tweak the spices and style to make it your own. It is also significantly cheaper to make your own. The last time that we processed a batch of chili we ended up with 11 bags, and less than $20 in the chili. 11 bags bought commercially would have been $75 to $100.
I have two personal favorite freezer bag recipes that are my go-to when planning on freezer bag cooking. These recipes are hearty, warm, and great after a long day on the trail, fishing, or hunting.
The recipes are very versatile and are more suggestions than an actual recipe. You can change almost any of the components, or add or subtract ingredients based on what you have on hand.
Freezer Bag Cooking Recipes
Pepperoni Ramen Recipe
The first recipe is Pizza Ramen. This recipe creates a very filling and delicious pasta dish that is not only delicious but warm and filling. You can add just about any topping you like into the mix.
I have added sausage, peppers, onion, mushrooms, shredded cheese, bacon bits, black olives, Canadian bacon, and just once, pineapple. I would not recommend the pineapple.
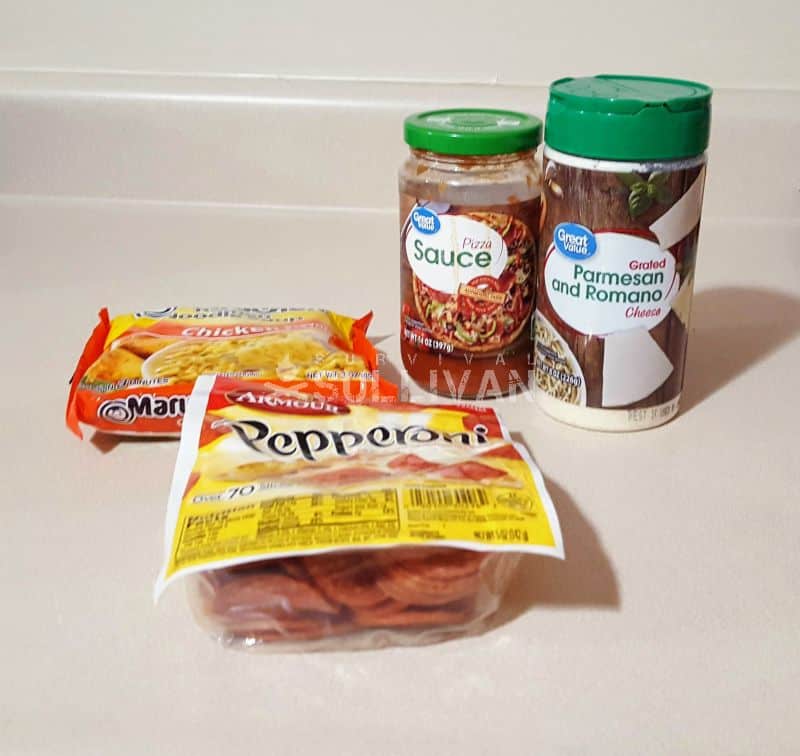
- 1 pack chicken flavored ramen
- 1oz of pepperoni, sliced in half
- 3/4 cup heated water
- 1 tablespoon of grated parmesan cheese
- 4 tablespoons of pizza sauce
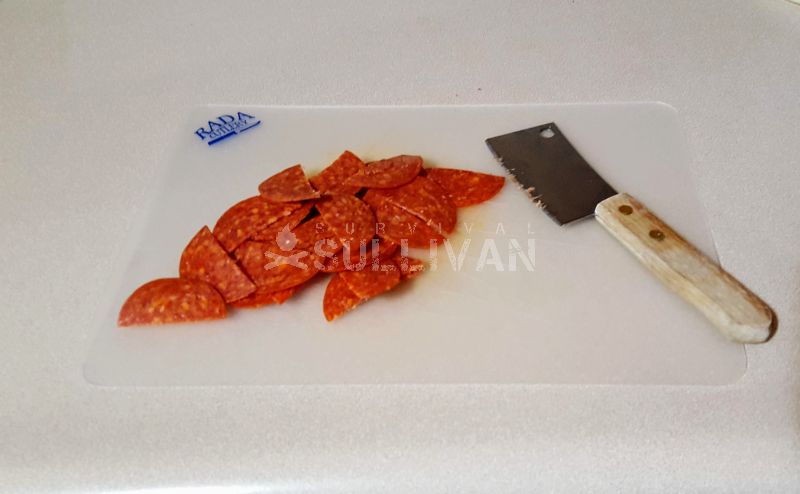
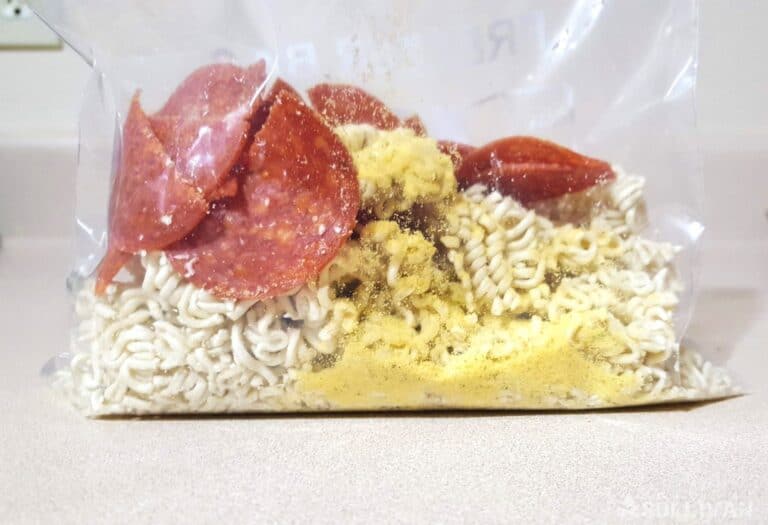
Break up the ramen noodle block and add into the freezer bag. Add in the chopped pepperoni, the ramen flavor pack, and the hot water. Here you can add any dried ingredients that you may want. If you add a lot of dried ingredients, you may need to increase the water to 1 cup.
Mix well and insulate. Leave for at least 10 minutes.
After 10 minutes remove and mix again to make sure all the noodles are broken apart and rehydrated. Next, mix in the parmesan cheese and pizza sauce. Here you can add any fresh ingredients you like.
Let it set for 2 to 3 minutes to combine well and heat the sauce, and it is ready to eat:
Notes on ingredients:
If you are planning on cooking on the trail, you will want to find shelf stable and sealed ingredients where possible. Ramen is nuke proof, so that is good to go.
Pepperoni is pretty shelf stable, but I usually buy the vacuum sealed packs, used half of the package and snack on the rest. The best place I have found for the pizza sauce is pizza style Lunchables.
You get a small sealed pack of sauce that is perfect. For the parmesan cheese, I will try to get the little packets from takeout pizza places. They are sealed in mylar and shelf stable.
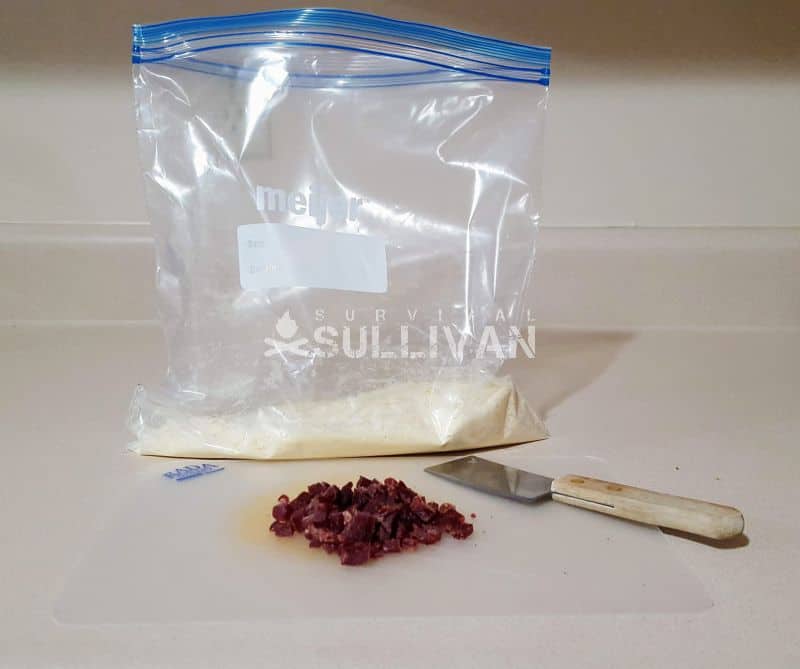
Jerky Mashed Potatoes Recipe
The second recipe is Jerky Mashed Potatoes. This is another extremely versatile and very adaptable recipe. You can add is most dried ingredients to make it extra hearty. Often I have added shredded cheese, bacon bits, chunks of sausage or pepperoni, mushrooms, or whatever else is in the food bag.
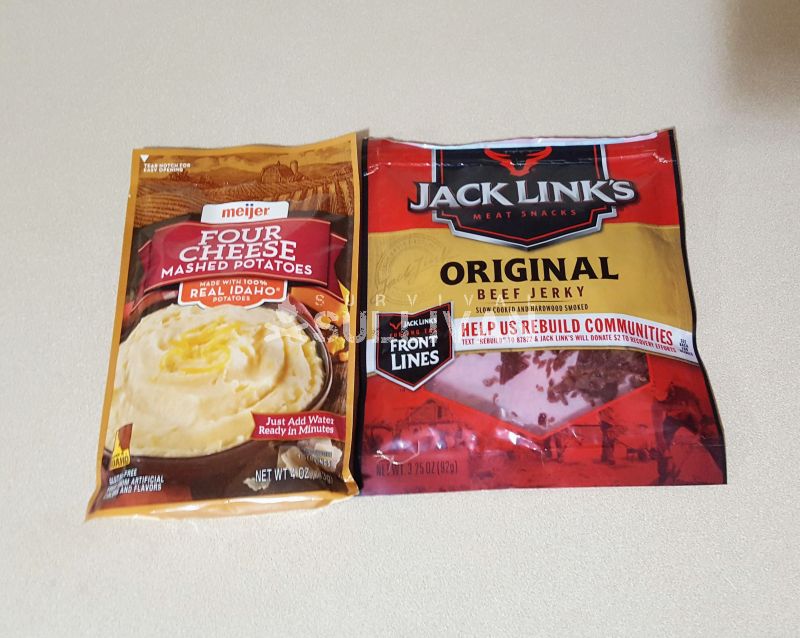
- 1oz of beef jerky, chopped or shredded
- 1 pack of instant mashed potatoes (the kind you only need to add water to)
- 2 cups of heated water
Add mashed potatoes and chopped jerky into the freezer bag. Add 2 cups of heated water and mix well. Insulate the bag and wait 10 minutes. Stir and serve.
Moroccan Spiced Tuna Couscous
Tuna + couscous + spices = Yum! This one is a slightly spicy meal that’s very, very easy to make.
Ingredients:
- 1/3 Cup couscous
- 2 Tablespoons chopped sundried tomatoes
- 1 Teaspoon spice mix
- 2 Tablespoons tomato paste
- Salt
- 1 can tuna
In a medium-sized freezer bag, mix couscous, spice, and sundried tomatoes and pack the rest in separate bags.
Add 1/3 cup boiling water to the bag with the couscous mixture. Stir well, adding tomato paste and salt. Seal the bag and let it sit for five minutes or so to cook.
Curried Pumpkin Soup
Who doesn’t like soup? This one uses curried pumpkin powder; taking the sweetness of pumpkin and giving it a slightly spicey flavor.
Ingredients:
- 1/4 Cup curried pumpkin powder
- 3 tablespoons coconut milk powder
- Salt
- Pepper
- 1 teaspoon pumpkin seeds
To make this one, start by mixing the pumpkin and milk powders in a medium-sized freezer bag. Add 1 cup of boiling water to the mixture stir well and seal the bag. Leave it in a cozy for around five minutes and serve it topped with the pumpkin seeds.
Breakfast Rice Pudding
A rice pudding for breakfast? Sure, why not?
Ingredients:
- ½ Cup of Instant Rice
- ¼ Cup Raisins
- ½ Teaspoon Sugar
- ¼ Teaspoon Cinnamon
- ¾ Cup of water
Mix the dry ingredients in a freezer bag. Add a ¾ cup of boiling water to a freezer bag and stir well. Let the bag sit for about 10 minutes – you can use a cozy to let the rice cook better.
Basic Trail Oatmeal
The ultimate easy-to-make breakfast, this one can be changed up as often as you want by using different ingredients (i.e. dried fruits instead of raisins).
Ingredients:
- 1/3 Cup of Oats
- 1 teaspoon of chia seeds
- 2 teaspoons powdered milk
- 1 – 3 teaspoons of sugar/other sweeteners
- ¼ teaspoon of cinnamon
- ½ cup water
Add the dry ingredients to a freezer bag. Add ½ cup of almost-boiled water to the bag and stir well before sealing the bag. Let the bag sit for around eight minutes.
Alfredo Veggie Rice
Creamy, filling, and healthy, what’s not to like? This one’s packed with flavor and is perfect after a long day on the trail.
Ingredients:
- 1 cup instant rice
- 2 tablespoons alfredo sauce
- 2 tablespoons parmesan cheese
- 2 tablespoons dried milk (milk powder)
- ¼ Cup freeze dried vegetables
- 1 cup water
Add the ingredients to a freezer bag. Add 1 cup of boiled water to the bag and stir well. From there, leave the bag for about 15 – 20 minutes. Serve and enjoy!
Note: you can add a touch of olive oil for extra flavor if you want.
Mexican Beans and Rice
If you like Mexican food, then this is for you! It’s quick, easy and filling to boot!
Ingredients:
- 1 cup instant rice
- 2 tablespoons instant refried beans
- 1 tablespoon taco seasoning (adjust to taste)
- 1 oz cheddar cheese
- 1 oz Fritos
- 1 ¼ cups water
Put the rice, beans and taco seasoning into a freezer bag and mix them well. Add 1 ¼ cups of water to the bag and stir everything nice and thoroughly. Seal the bag and let it sit for about 15 minutes. Dice your cheese. Stir the rice and fold in the cheese and Fritos. Voila! Enjoy!
Chocolate Brownie in a Baggie
Ah, the ever-reliable chocolate brownie! This is the comfort food of champions; if you’ve had a bad day, just have a brownie…or two…or three…
Ingredients:
- 1 packet crushed graham crackers
- ¼ cup chopped walnuts
- ¾ – 1 cup chocolate chips
- 3 tablespoons dried milk
- 2 tablespoons sugar
- ¼ cup water
Add ¼ cup of almost-boiling water to a freezer bag with the dried milk and chocolate. Dip the bag into simmering water to melt the chocolate and then add the other ingredients.
Simple Omelet
Who doesn’t like a good omelet for breakfast? This recipe is easy to mix and make so you can enjoy an omelet whenever you like with minimal mess.
Ingredients:
- 3 eggs
- 1/3 cup of chopped onions
- 1/3 cup of chopped mushrooms
- 1/3 cup of chopped green pepper
- 1/3 cup of chopped cheddar cheese
Place the veggies and cheese into a quart-sized freezer bag. Crack the eggs into the bag and seal the bag (letting the air out before sealing completely). Knead the bag to mix the ingredients. Boil the bag in water until the eggs are cooked and voila; you have an omelet!
Breakfast Rice with Fruit
If you need a softer breakfast, why not try a bit of rice with fruit? It looks nice and tastes great!
Ingredients:
- 1 ¼ Cup water
- ½ teaspoon cinnamon
- 1 cup instant rice
- 2 tablespoons butter
- 2 tablespoons powdered milk
- 2 tablespoons brown sugar
- ¼ cup diced dried fruit(s)
With the exceptions of the butter and the water, put the ingredients into a freezer bag. When breakfast time comes around, boil the water and add it and the butter to the bag. Let the bag sit for around 15 minutes.
Brown sugar and cinnamon oats
A high-energy breakfast full of fiber and carbs to prepare you for a long day either at the office or on the trail.
Ingredients:
- 1 Cup oats
- ¼ cup dry milk
- 2 Tablespoons dried fruits/raisins/berries
- 2 tablespoons brown sugar
- 1 teaspoon ground cinnamon
- 2 cups water
Add the dry ingredients to a freezer bag. Boil the water and add it to the bag, then leave the bag to sit for around 5 minutes or so.
Strawberry Cream of Wheat
If you’re looking to brighten up a day and tickle your tastebuds, why not add some fruit to your cream of wheat? This recipe uses strawberries, but you can experiment with other fruits and see what you like.
Ingredients:
- 1 packet plain Cream of Wheat
- 2 tablespoons freeze-dried strawberries
- 1 tablespoon powdered milk
- 1 tablespoon almonds (optional)
- 1 teaspoon sugar
- ½ teaspoon ground cinnamon
- Water as needed
Preparation is simple, combine all the dry ingredients in a freezer bag. Add boiling water to the bag and leave it to sit for around 5 minutes.
Note: you can add water until you get the consistency you want.
Basic Rice and Beans
If you’re hungry and you need a simple meal that’s still packed with carbs and protein, then this meal is what you need.
Ingredients:
- ½ cup of instant rice
- 1/3 cup refried beans
- 1 tablespoon dried onions/shallots
- 2 packets salsa
- 1 cup water
Combine your dry ingredients (beans, onions, rice) in a freezer bag. At dinnertime, add 1 cup of almost-boiling water to the bag and seal it tightly. Let the bag sit for 20 minutes or so before you chow down.
Trail Chili
If you’re a chili fan and you want to have some chili for the trail, then you’ll love this one. It’s flavorful and filling and you’ll be wanting more. It’s easy enough to make and you can get a good recipe here.
Sweet Potato Porridge
If you’re a porridge fan, this is a breakfast that you’ll love. Porridge is a light, easy-to-make breakfast. The sweet potato flavor is great, and you’ll definitely enjoy it. Here’s a recipe for you!
Ramen Pot Pie
Pie, and better yet, a chicken pie…yummy! Ramen might seem like an odd choice for a pie ingredient, but it works really well, giving us a filling meal that’s quick and easy. Here’s the recipe for you!
Spicy Cheese Polenta
A cheesy treat that’s easy to make, this one can be eaten on its own or with other foods. Its use of cheddar cheese gives it a nice rich flavor that you’ll quickly come to love. You’ll find the recipe here.
Chicken Chili Chowder
Another chili recipe, this one uses pepper (either white or black pepper) and red pepper flakes for a touch of extra spiciness with cheddar cheese to give it a creamy flavor. It also uses garlic powder to enhance the flavor. Try it yourself and see what you think.
Gourmet Mac and Cheese
Who doesn’t like a good mac and cheese? It’s the ultimate ‘warm and fuzzy’ meal for when you need a pick-me-up. This recipe starts out with a great cheese sauce that you can use in making your mac and cheese. Here’s the recipe.
Peanut Butter Fudge
It’s fudge with peanut butter in it, there’s not really much to say. It’s easy to make, baking in just 30 mins. It tastes great! Try it yourself and see what you think.
What are some of YOUR freezer bag prepper recipes that you’ve tried? Are they based on ingredients with a long shelf life? Let us know in the comments below.


Born and raised in Kentucky, Steve grew up deep in the mountains on a family farm. After college, Steve spent over 15 years working in public service and has experience in Fire, EMS, and Law Enforcement. He has also worked with training and deploying search & rescue and service dogs for utilization in a variety of services.
Steve is also a Scout Leader with the Boy Scouts of America, and works to teach preparedness to the next generation. Steve has worked with and taught firearms and self-defense in multiple venues, from tactical applications to long range shooting, and also has extensive training in first aid and wilderness first aid.
An active prepper, Steve has devoted hundreds of hours to mastering and teaching skills and techniques for use in survival, homesteading, and general preparedness.
How do you dehydrate chile?
In a dehydrator or in an oven set to low with the door cracked open. Google how to dehydrate food at home- there are tons of resurces
Could you do a follow up article that is recipe based? I’m a roughneckneck (in England) working on land rigs at the moment (North Sea drilling is fully catered, all you need is you and your kit, but land based drilling you hope to have good facilities for cooking and laundry somewhere near shops, and pubs! doesn’t always happen) and being able to take a week or two of meals (there is always a kettle for tea!) would be a game changer when the digs are naff
Much appreciated
Regards
Damien
Additional recipes are in the works. Keep an eye open for next set soon.
New to this,
Are your recipes intended for the quart size bags?
Yes, most all FBC recipes are done in the quart bags. However, it really doesn’t matter on most of them if you use a gallon size bag. The only issues you would run into is making sure powder doesn’t get stuck in a corner or something like that.
A trick I have used when I had to use gallon size bags was to stick one corner of the bag down inside a bowl or a cup of some sort, basically reducing the size you are working in. After you mix everything together you can pull the corner out and proceed as normal.
Hope that helps!