Paracord is truly a prepper’s best friend, and if you’re anything like me, you always want to have some of this supremely useful cordage with you.
The thing is, unless you’re carrying your bug-out bag or some other luggage, Paracord tends to take up room and it just isn’t convenient in day to day life. Who carries a roll of paracord in their pocket?
You can avoid cluttering up your pockets and looking a little strange, though, by turning your paracord into other useful items like keychains.
With the following guide I’ll tell you how to make the elegant and practical butterfly stitch keychain scooby.
It’s so easy that anyone can make one with just a little bit of practice and a few simple materials. Let’s get going…
Getting Started
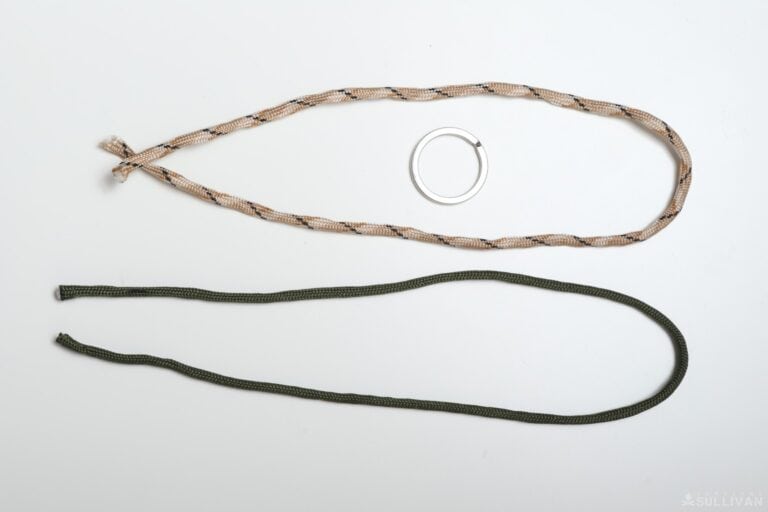
You don’t need much to craft this keychain. You’ll need two lengths of paracord around a foot long each, and preferably of two different colors for maximum aesthetic appeal.
You’ll also need a key ring or shackle, a lighter, scissors or a sharp knife, and a metal paracord tool (if you don’t want to use your scissors or knife for sealing the edges).
And that’s it. We’ll get to the steps in just a minute, but do keep in mind that while it is possible to make this design using two lengths of paracord with the same color, it’s significantly easier using two different colors because it helps you avoid confusion.
Plus, this design especially looks great with two complementary colors woven into it.
With that said, let’s get down to business.
The Steps
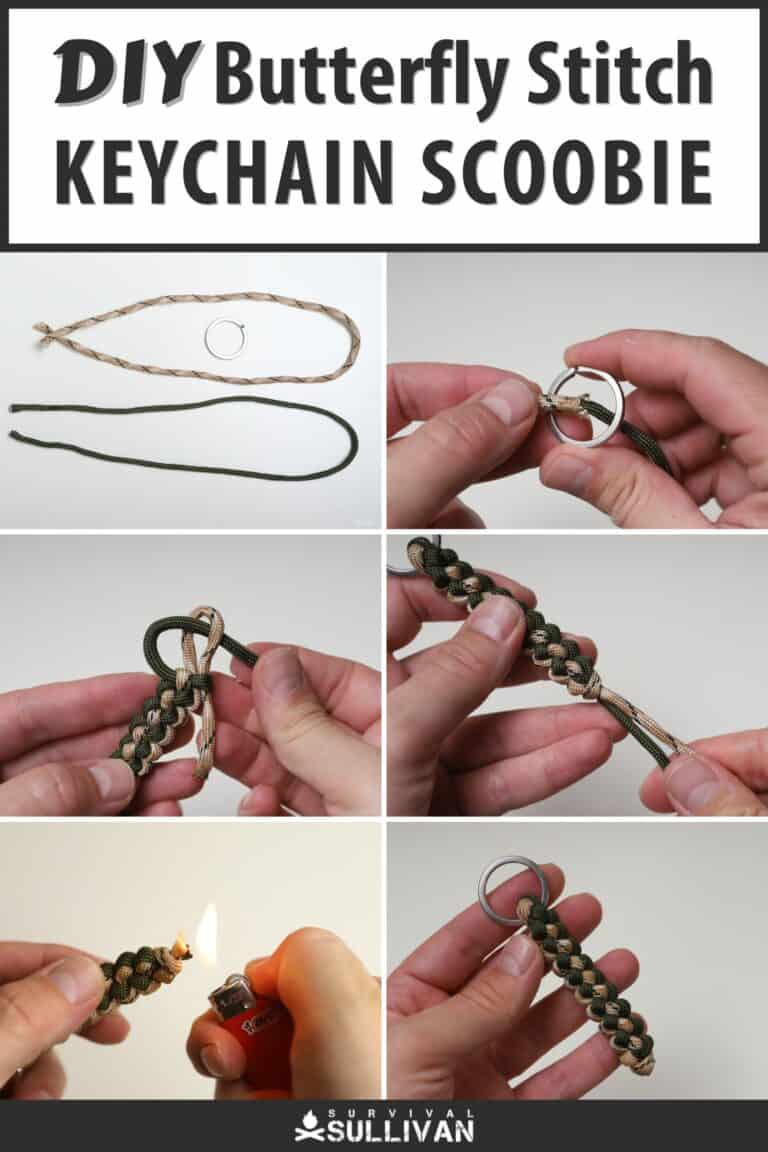
Step 1: start with two equal lengths of Paracord and your key ring or shackle.
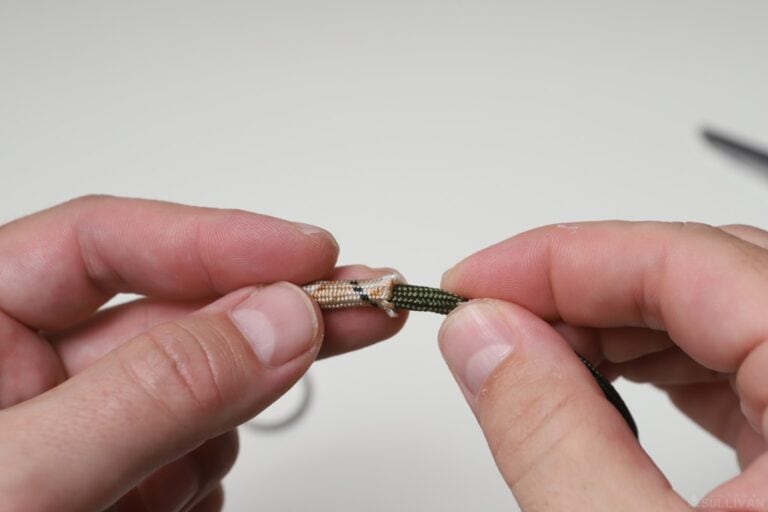
Step 2: choose one length of cord. Pull out about an inch and a half worth of the inner strands. Do this gently so you don’t create a kink or bunch inside the sheath of cord.
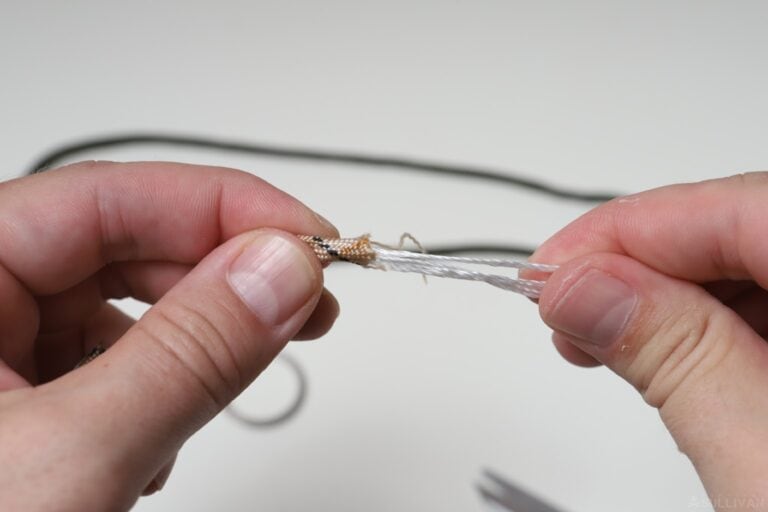
Step 3: use your scissors or knife and carefully cut off the exposed inner strands.

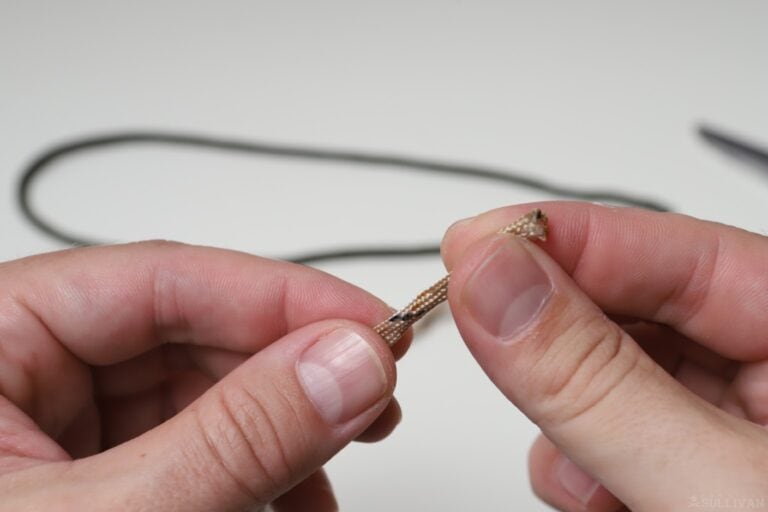
Step 4: carefully, straighten and pull the sheath to retract the rest of the internal strands. At this point you should have an inch and a half of empty space inside the sheath on one end.
Step 5: take one end of the other cord and, holding the hollowed out carefully, gently twist the one inside the other until it bottoms out against the inner strands.
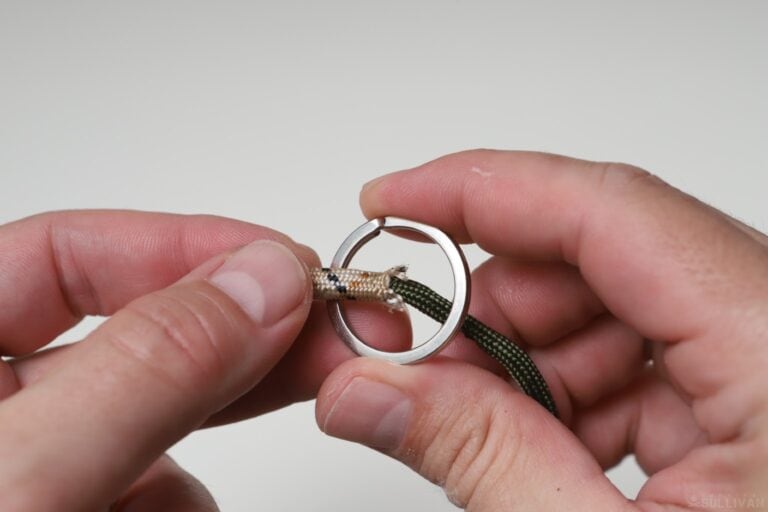
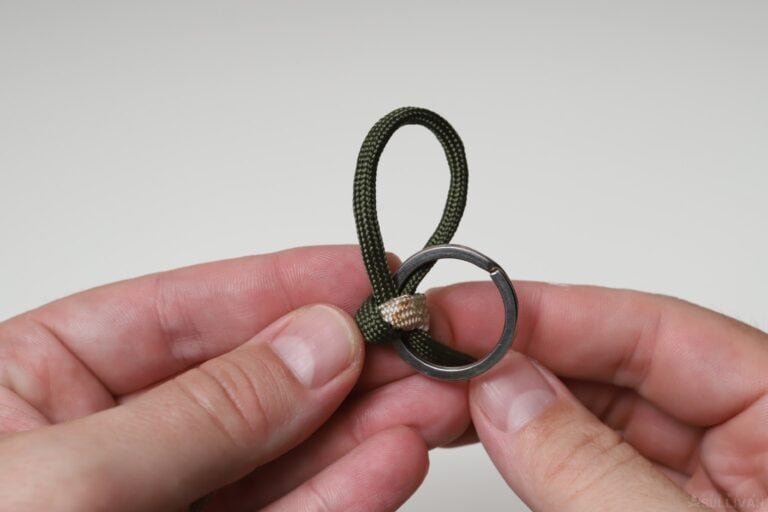
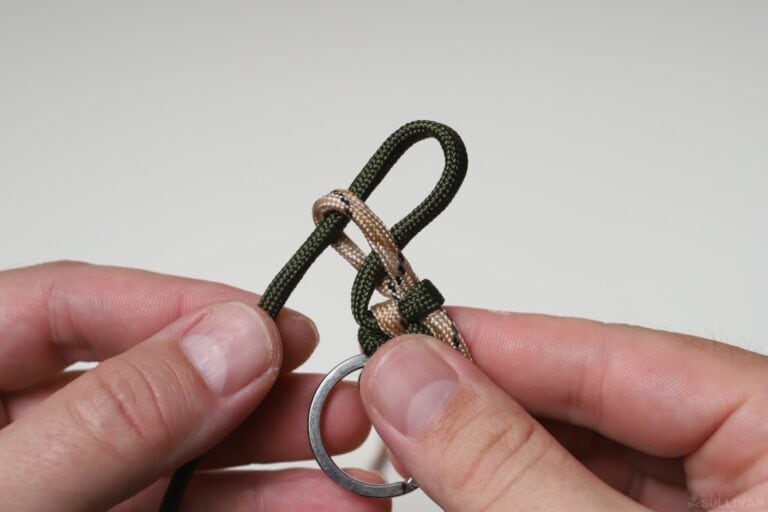
Step 6: taking care not to disturb the arrangement of your cords, run the key ring over the cords until it is in the middle at the connection.
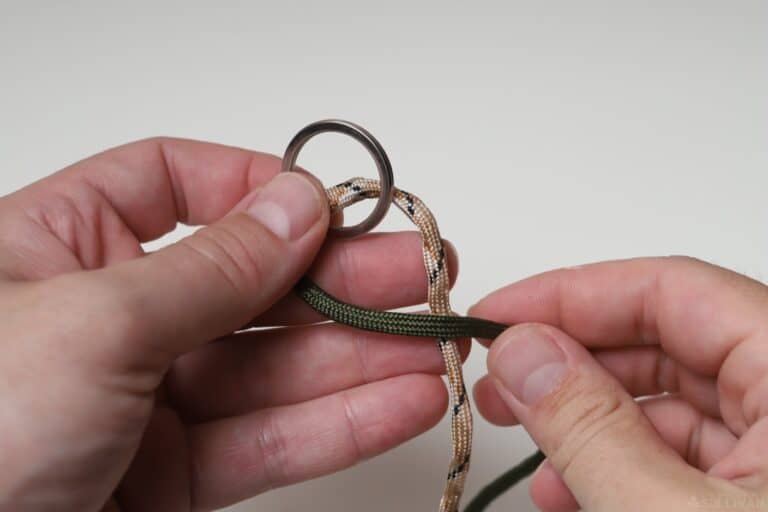
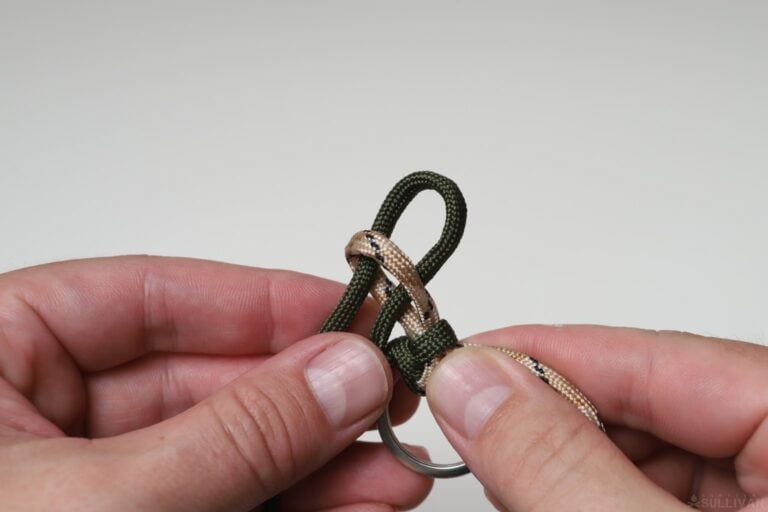
Step 7: you should have both lengths of cord straight and pointing towards you as shown. Now take the cord on the left and lay it across the cord on the right…
Step 8: continuing on, bring the left side cord around and behind, pulling a bight up through the loop you just formed as shown.
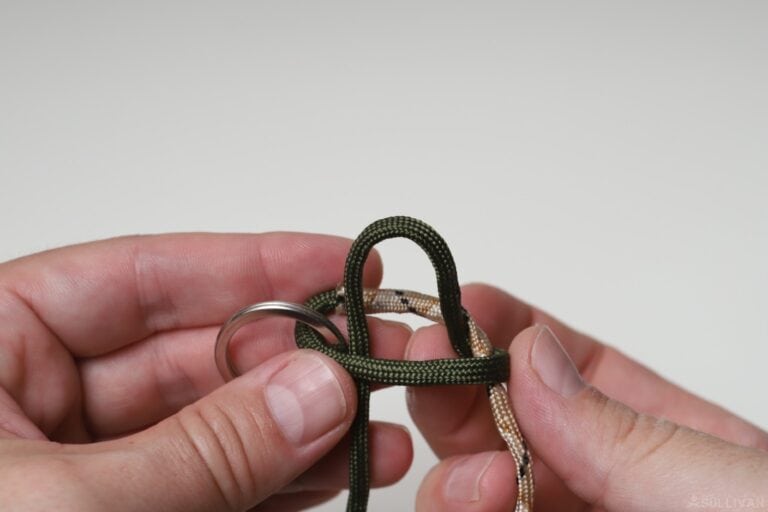
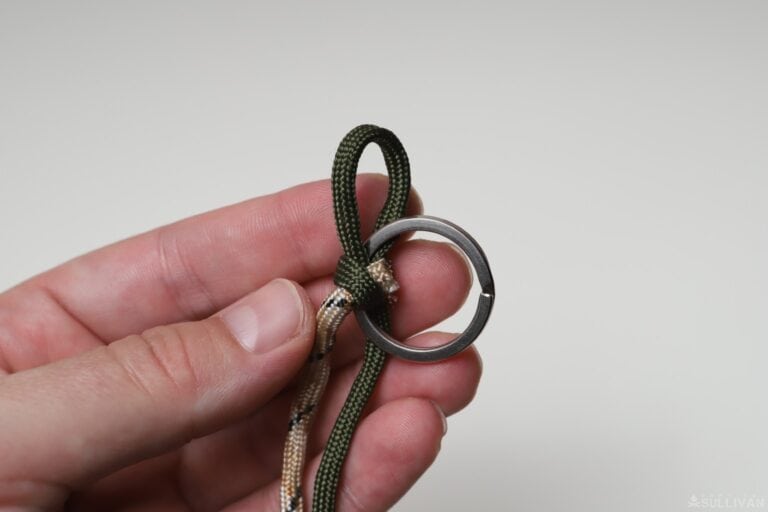
Step 9: being very careful not to pull both lengths of cord apart, pull the slack out to tighten down both cords and secure the loop you just formed. See picture for details.
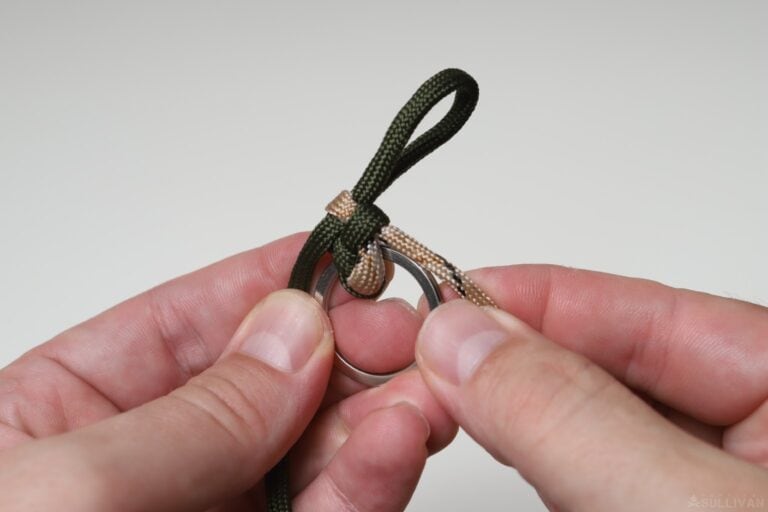
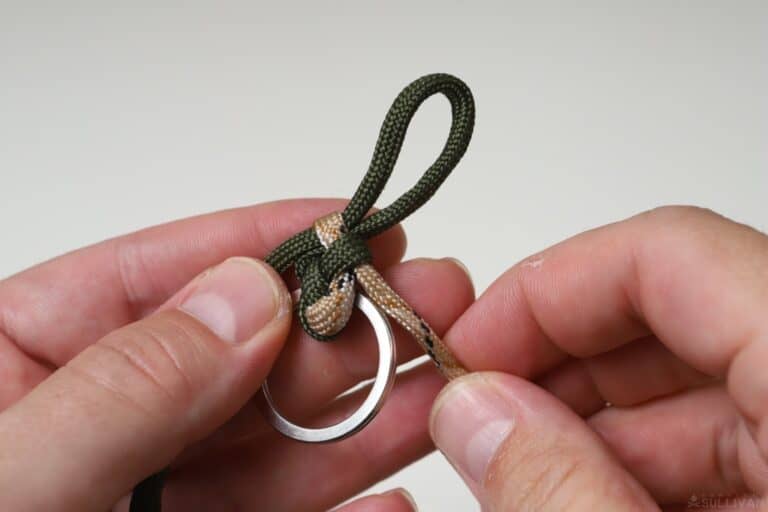
Your keychain should look like this at the moment:
Try to maintain the same orientation in your hand for the entire process to make things easier and prevent mistakes.
Step 10: now taking the opposite cord from the one you started with, so in our case the one on the right, pinch a bight in it and then pull that bight through the loop formed by the opposite cord as shown.
Step 11: again being careful not to pull your cords apart, pull out the slack in the left-hand cord to tighten it down around the new loop.
Step 12: now we repeat the process on the opposite side once more, pinching a bight in the left-hand cord and pulling that through the loop you formed in the previous step.
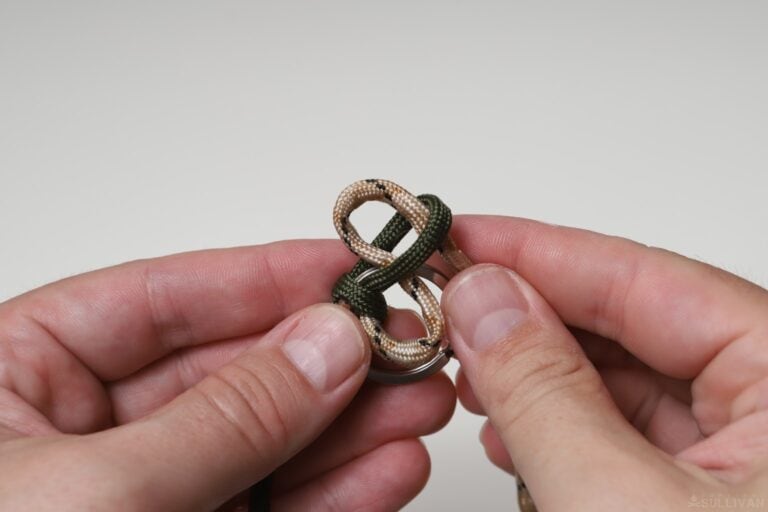
From here on out, you want to try and keep the size of the loops you form consistent to make your keychain tidier.
Step 13: continuing on, pull the slack out of your right side cord to tighten it down on this new loop…
Step 14: and again switching sides, creating a bight with the right side cord and passing it through the loop from the previous step.
Step 15: tightening down once again…
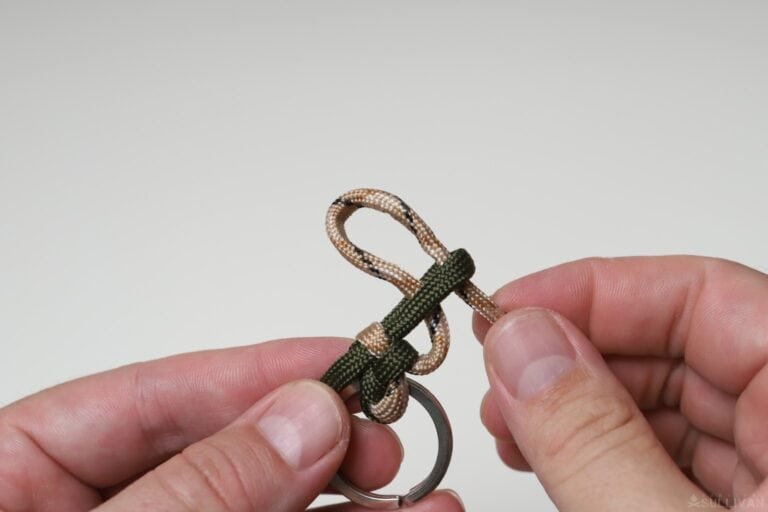
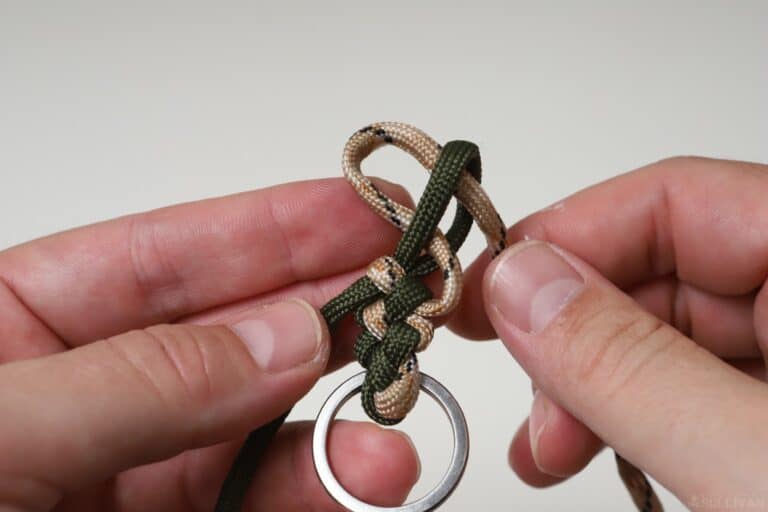
Step 16: and then continuing on, switching sides each time. Form a bight with the left side cord and pass it through the previous loop…
Step 17: and then tighten down by pulling on the right side cord. You’ll definitely notice the structure of the keychain starting to climb away from the key ring now.
Step 18: keep going, it really is this simple but it will take a while. Form a bight with the right side cord and then pass it through.
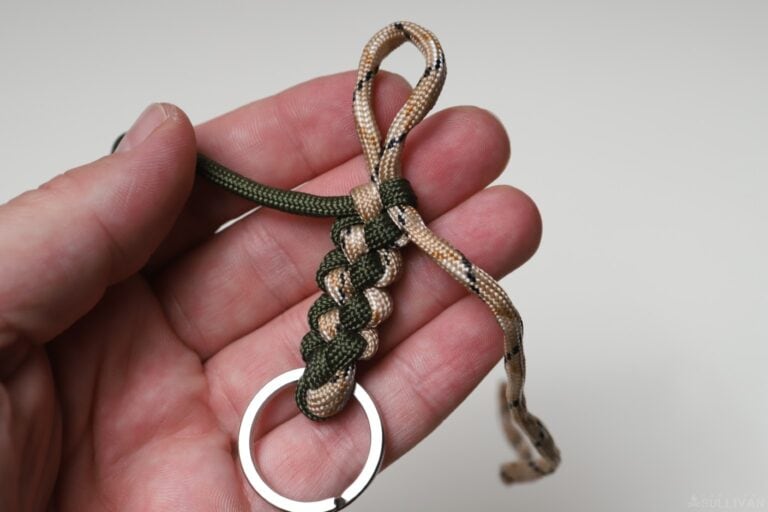
Step 19: tighten down by pulling on the left side cord. Repeat this process until you have two and a half to three inches of cordage left on each side.
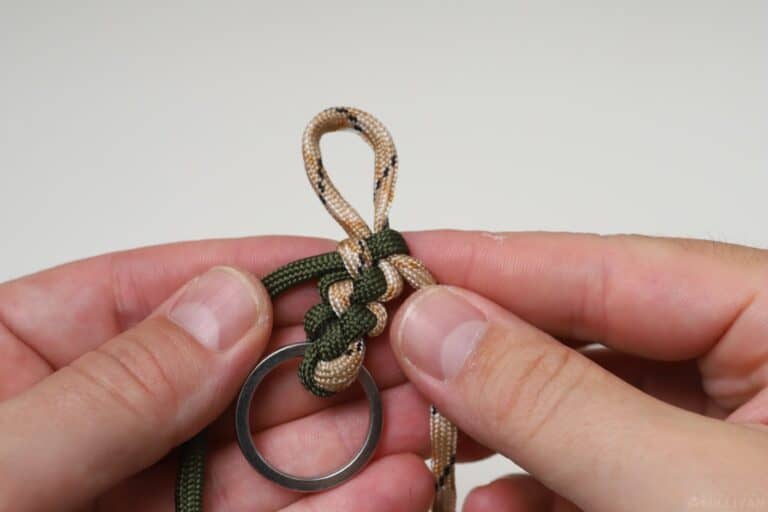
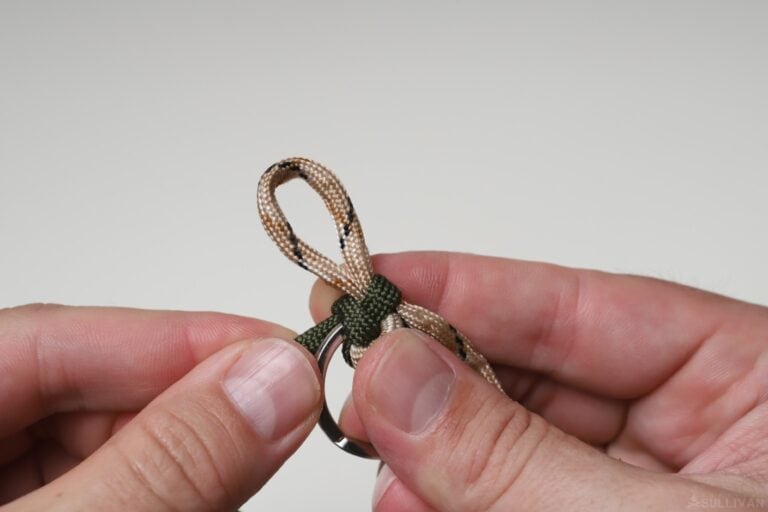
Step 20: now that you have a short length sticking out on either side and a remaining loop it is time to finish the keychain.
If you aren’t happy with how long the keychain is, start over with longer lengths of paracord for each side.
Step 21: pass the working end of the left side through the loop.
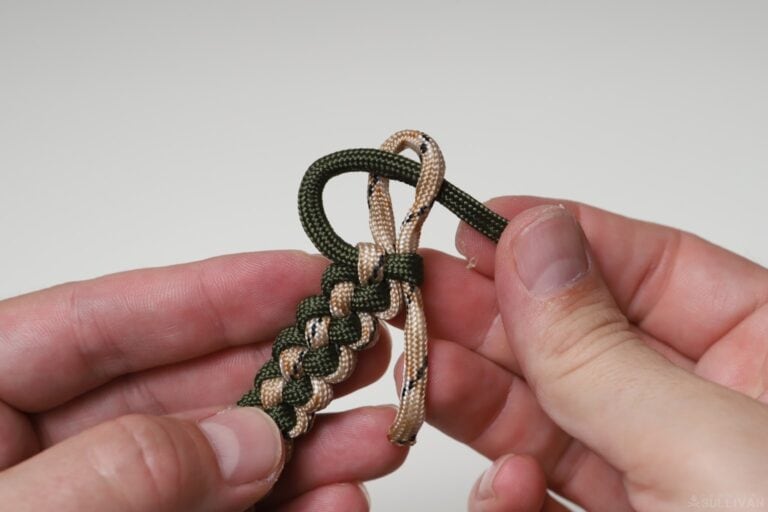
Step 22: then pass the working end of the right side of cord through the loop.
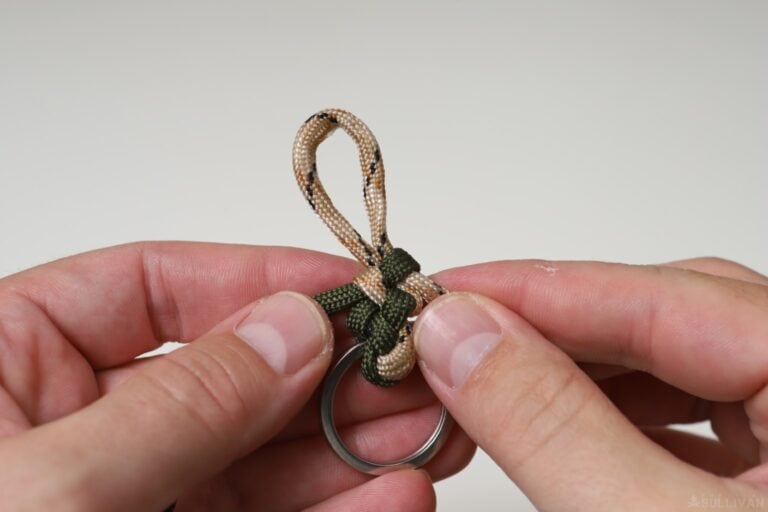
Step 23: holding the middle of the keychain structure, pull on both free ends now to cinch it down and secure the keychain.
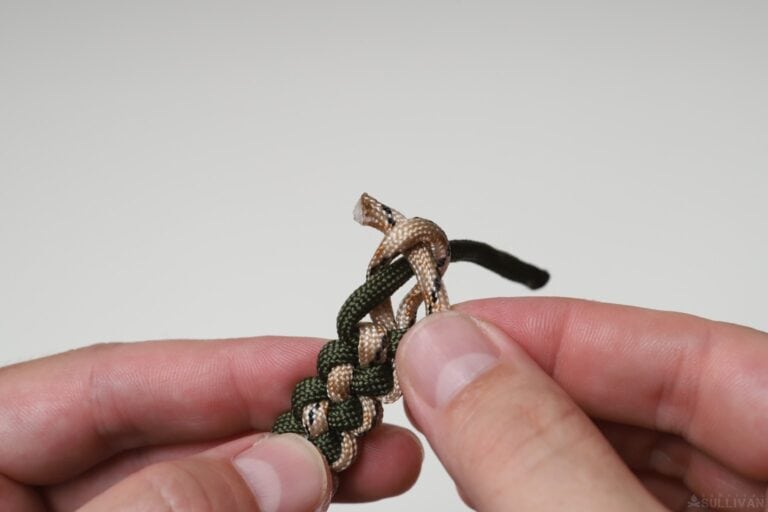
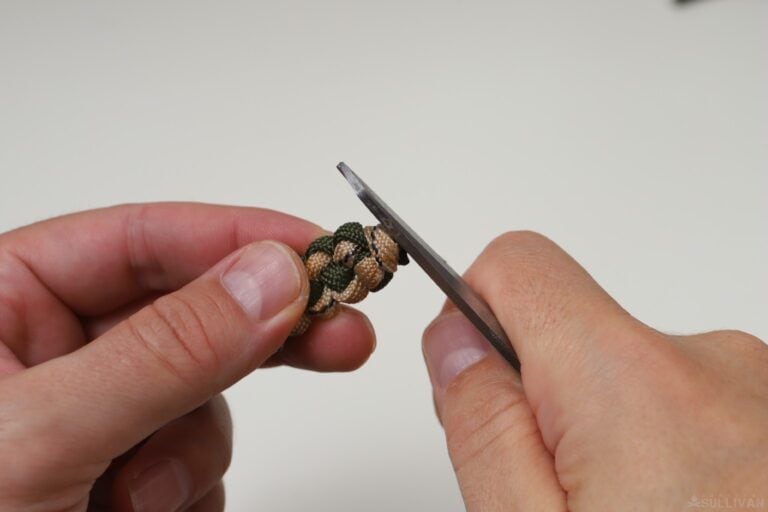
Step 24: using your scissors or knife, cut off the tails leaving about 1/8 of an inch of cord sticking out.

Step 25: use your lighter to melt the remnants of the working ends.
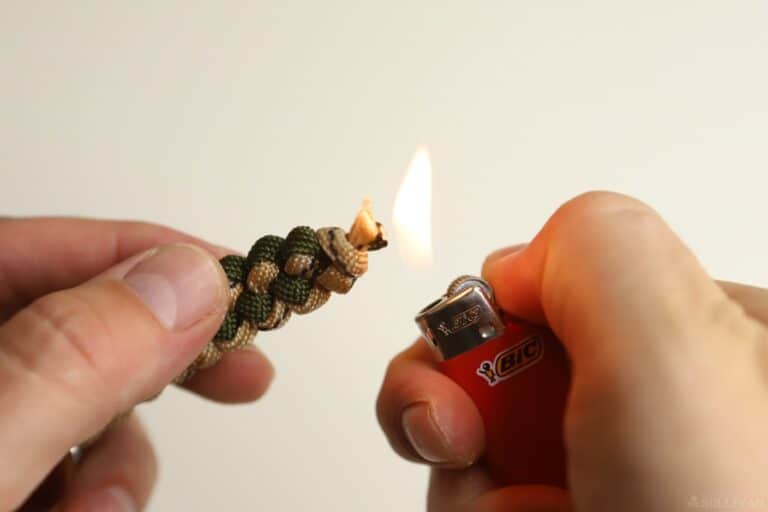
Step 26: press the melted edges using the side of your knife or scissors, or your paracord tool to seal them and lock the keychain.
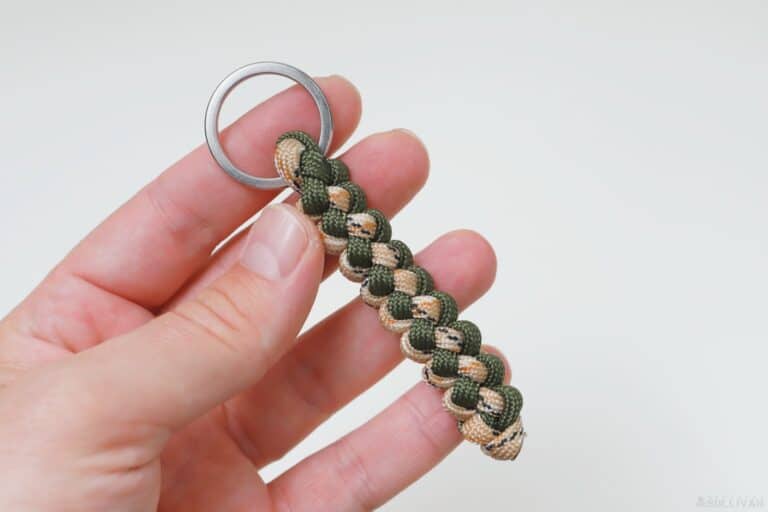
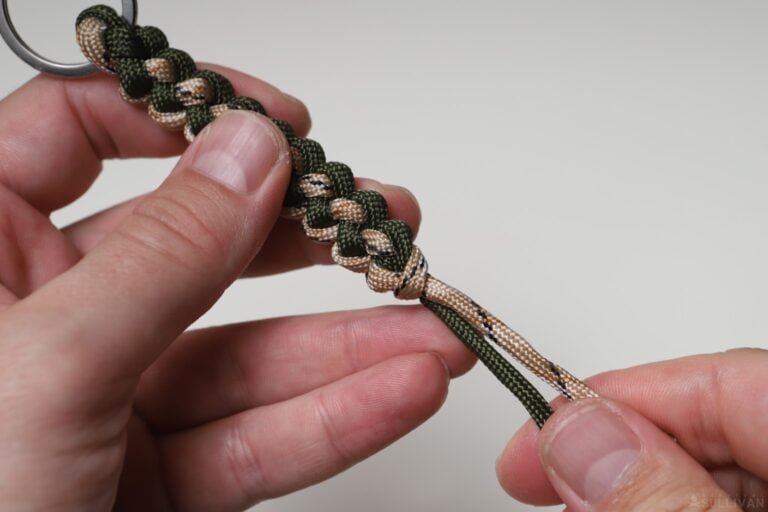
That’s a wrap! Your keychain is finished and ready to go into service.
Also try: DIY Growling Dog Knot Paracord Keychain
I really like the Butterfly Stitch keychain because it’s attractive and eye-catching, and also really easy to grip even with gloves on.
One major downside is that it’s built using two different lengths of paracord which, in my experience, somewhat reduces the practicality if you need to break it down and put that Paracord to work. Nonetheless, it’s a cool and easy project!

Tom Marlowe practically grew up with a gun in his hand, and has held all kinds of jobs in the gun industry: range safety, sales, instruction and consulting, Tom has the experience to help civilian shooters figure out what will work best for them.