There are many kinds of blood-sucking parasites on earth, but there are hardly any that are more pervasive and persistent than fleas.
Flea infestations, once they get established, or something you can never seem to get rid of and if you’re dealing with fleas in your own home they can make it virtually impossible to relax.
Plus, these nasty little critters can spread disease and nobody wants to be pock-marked with itchy, red flea bites.
Professional extermination is usually expensive and a major undertaking, but it’s possible to get a handle on fleas in your home using an effective, safe DIY flea trap.
Keep reading and I’ll show you what you need to know…
What You’ll Need
It’s amazing how little you need to craft an effective DIY flea trap. I can all but guarantee you probably already have everything in your kitchen right now.
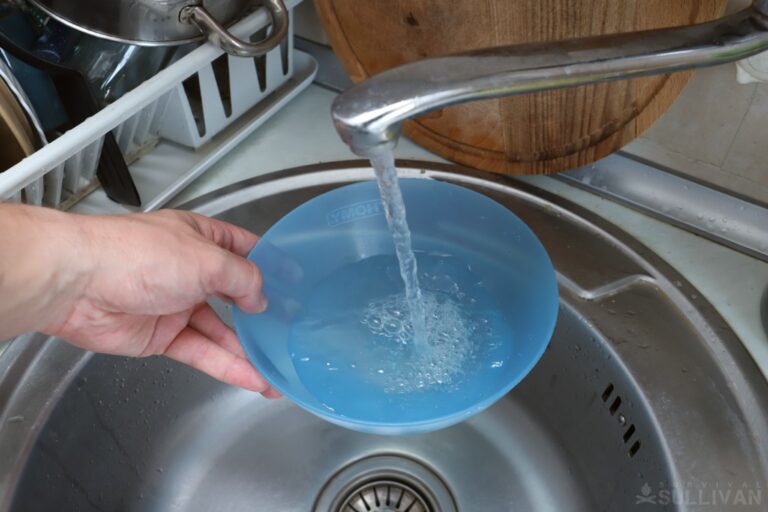
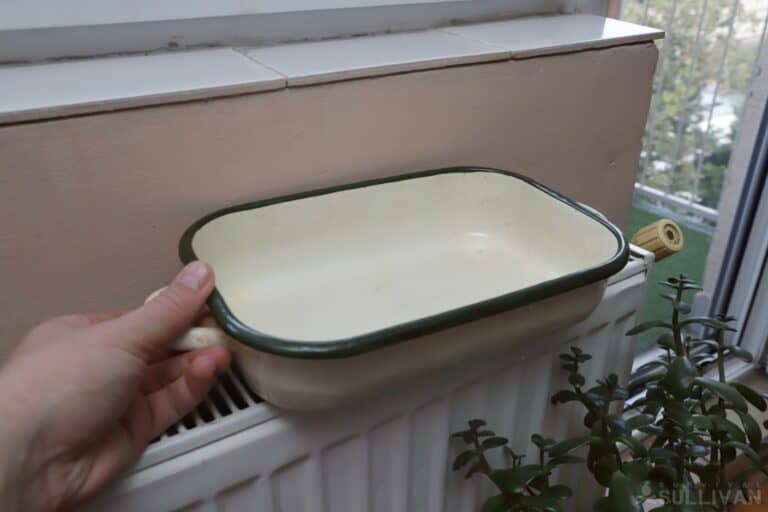
1. Shallow Dish or Container
You need a shallow container for this trap, preferably one that’s quite wide but that has low sides. A large, rimmed baking sheet is perfect. A large pie pan, even a disposable aluminum one, will also work fine.
You can even use the inverted plastic lid on a storage container if you want to.
The trick is that the edges must be low enough so that fleas can easily leap into it, but not so low that it won’t hold water.
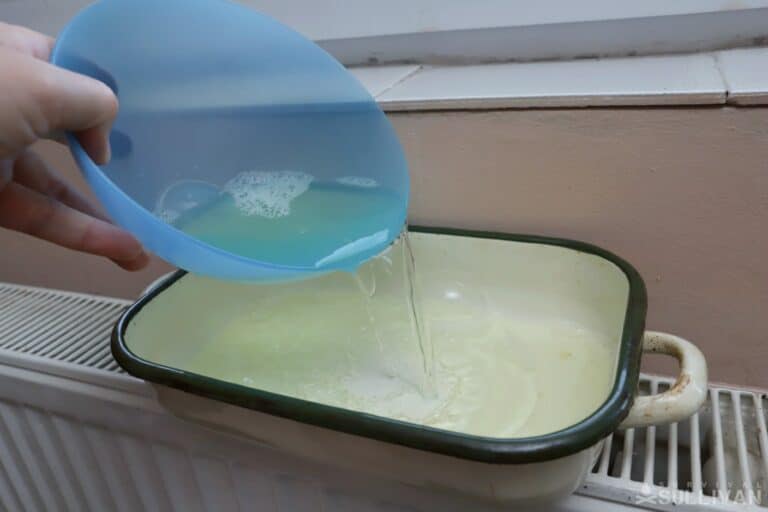
2. Water
enough water to fill up your container. That’s it. You can use common tap water, it doesn’t matter.
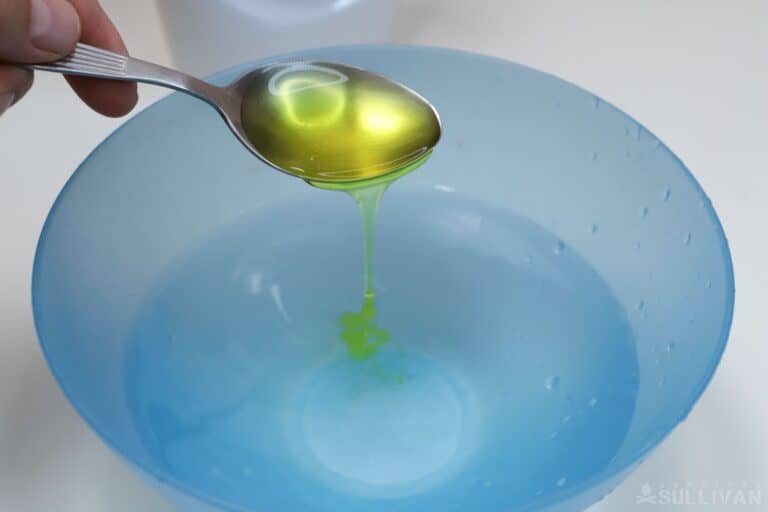
3. Dish Soap
we use dish soap with this trap as a surfactant that will break the surface tension of the water.
This will allow the fleas to actually get stuck in the water when they touch it, and then drown.
Most of the time, fleas are so light and delicate they can actually jump across the surface of standing water without falling in!
The use of dish soap is critical for this trap, so don’t leave it out.
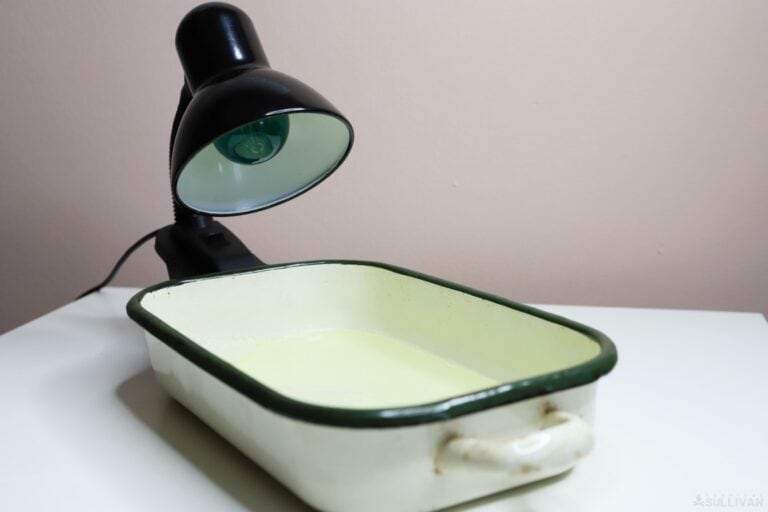
4. Lamp
a good lamp will make this trap highly effective. Use one that preferably has some directionality and can produce a spotlight sort of effect, like desk lamp.
If you don’t have a lamp like that, you can use a common table lamp with good effect.
5. Extension Cord (optional)
if your trap location doesn’t have an outlet nearby, you’ll need an extension cord to get electricity to your lamp.
6. Colored Bulb or Filter (Optional)
if you want to take the effectiveness of your trap to the next level, find a party bulb that has a yellow-green tint, or add a similarly colored filter.
There’s something about this wavelength of light that attracts fleas and will help you wipe them out faster.
And that’s all you need. Time to get to assembly.
Making Your Flea Trap, Step-by-Step
Assembling and placing this trap is the picture of simplicity, but as always the details matter. Read over all of the steps before you begin.
Step 1: Determine location
Figure out where you’re going to place your trap. Any location where you experience high flea activity is a safe bet, but this trap will work anywhere:
- near where your pets sleep
- next to windows and doors
- around your furniture
- near any other fabrics where fleas can hide and lay eggs.
Step 2: Draw water
If you’re working with a container that’s easy to carry, draw room-temperature water directly into it.
If not, collect it in a separate container that’s easy and safe to carry to the location where you’re placing your trap.
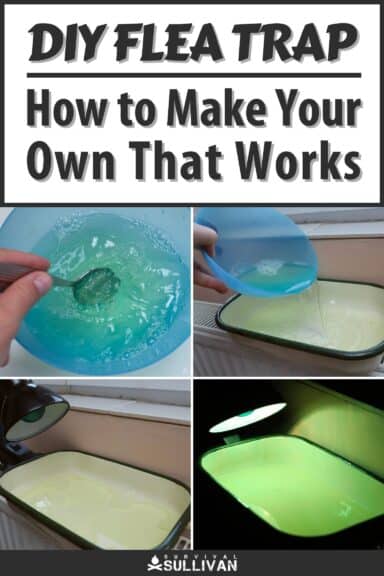
Step 3: Add soap
Put a generous squeeze of dish soap into your water. One to two tablespoons is generally sufficient.
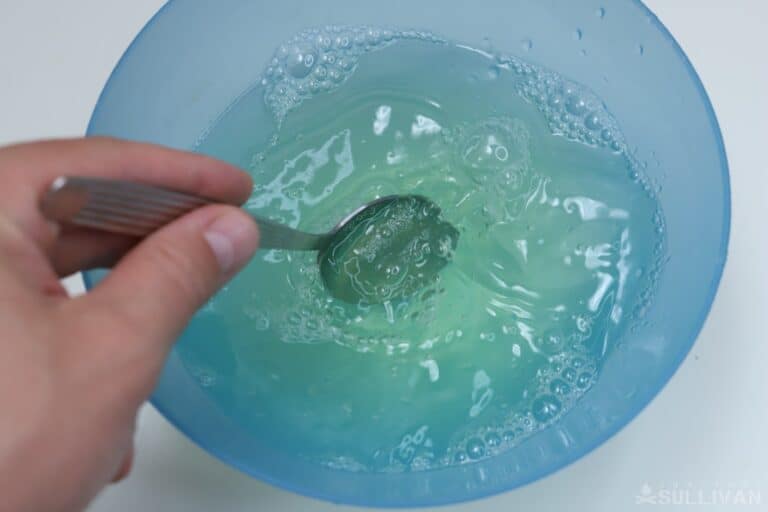
Step 4: Mix soap
Gently agitate the soap in the water using a utensil or your hands. You want it to be totally dissolved, but you don’t need a soapy, sudsy mess.
Step 5: Place container at desired location
Place your tray or dish at the trap location.
If you have any concerns about it being knocked over or disturbed, place plastic or something under it that can help catch splashes and spills.
Step 6: Add water
If you haven’t poured the soapy water into your tray yet, do so now, and to do so gently so you don’t create too much suds.
Step 7: Place lamp
Get your lamp in position, and try to place it in such a way that you can direct the light into your tray, and also so there’s a minimal risk of it getting kicked or knocked over. Do keep pets in mind if you have any!
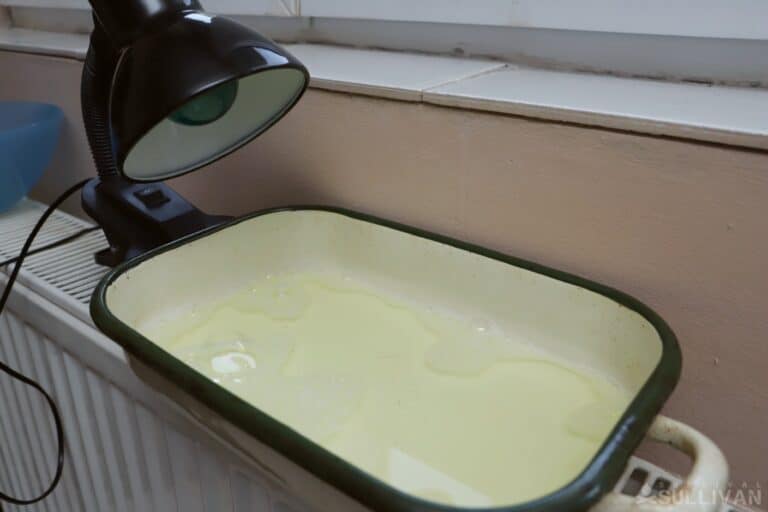
Step 8: Aim light
Turn the lamp on, and aim the light directly into the middle of your dish of water.
This will act as a hotspot that will naturally attract fleas will want to get to it to stay warm, or because they are drawn to the light.
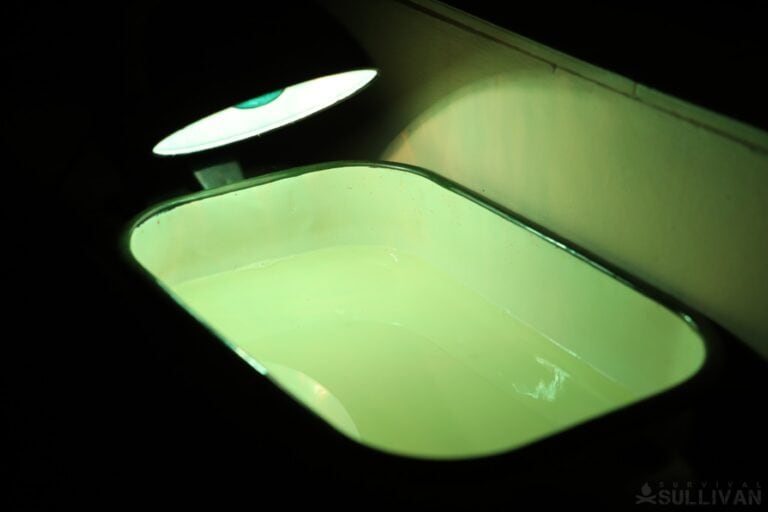
Step 9: Arm trap at dusk
Fleas are active at all hours of the day, but are most active after sunset.
Accordingly, if you aren’t going to keep your lamp turned on at all times, turn it on in the evening and then off at dawn.
Step 10: Observe for collected fleas
Check your trap periodically for little specks floating in the water.
Those are probably your intended victims! As mentioned above, fleas will jump towards the bright, warm spotlight emitted by the lamp and then fall into the water unable to escape. Then they drown.
If you notice lots of specks, you have chosen a good spot.
Step 11: Dispose of and replace water
As your water starts to evaporate, or as it starts to fill up with flea corpses, simply dump it out and replace it adding dish soap as before.
Step 12: Done
You can keep this up as long as it takes to depopulate fleas from your home, or at the very least give yourself, your family and your pets a small relief against their onslaught.
Where Should You Place Your Flea Trap?
I touched on it briefly above, but this deserves a little more explanation. Chances are fleas aren’t all over your home.
Fleas are probably inhabiting areas and materials that will help them survive, both by keeping them warm and safe and by allowing them a safe place to lay their eggs so they can reproduce.
These areas are also especially valuable if they are where their food also is, meaning you, your family, and your pets.
Fleas commonly inhabit dense textiles like curtains, drapes, rugs, carpet, furniture, pillows, throws, pet bedding and even boxes and bins of clothing that they have access to if they are undisturbed.
These areas will host adult fleas and also be where they lay their eggs, or else they will lay them nearby.
If any of these places coincide with bedrooms, living rooms, or other places where people typically stay or sleep in your house, you should be prepared to put multiple traps in all of these locations.
You Must Use a Comprehensive Approach to Eliminating Fleas
Manage your expectations when employing a DIY trap like this.
While highly effective and almost completely safe for people and animals alike, this trap only affects fleas that jump into it.
Fleas that are too far from the light or in another room are unlikely to make their way to it and fall victim to it.
Accordingly, your best bet is to employ multiple setups throughout your home and all trouble areas.
Even then, you’ll need to do that in conjunction with other flea control measures to truly get a handle on an infestation.
The life cycle of a flea is months long, and that can mean that the problem can seemingly re-erupt a long time after you think you’ve solved it!
You’ll need to employ heavy-duty vacuuming, cleaning and inspection of all of the trouble areas I mentioned in the previous section.
Make sure you stay on top of flea control measures for cats and dogs because they’re the most likely to bring these pests into your home in the first place.
Use strategic dosages of pesticide around entry points where fleas might make their way in, specifically windows and doors.
Also, be hypervigilant about vacuuming all nooks and crannies and all carpeting in your home on a regular basis to suck up Fleas and their eggs, and then take care to thoroughly clean and sanitize your vacuum and any associated bags or canisters.
You’ll have to keep this up for months if you want to truly win the war, but using these traps and a holistic approach is possible!

Tom Marlowe practically grew up with a gun in his hand, and has held all kinds of jobs in the gun industry: range safety, sales, instruction and consulting, Tom has the experience to help civilian shooters figure out what will work best for them.