Call them crayfish, crawdads, crawfish, mudbugs or anything else: these tiny, lobster-like freshwater crustaceans can be found throughout North America and across the world, and may prove to be one of the best, not to mention the most delicious, sources of survival protein anytime you are out in the wilderness.
Crayfish are easy to catch using a properly designed trap, and it just so happens that you can make a highly effective version using nothing more than a couple of 2-liter bottles and other basic or scavenged materials.
We won’t waste any more time, keep reading and I’ll tell you everything you need to know. Pretty soon you’ll be ready for a proper crawfish boil!
What You’ll Need
Before you get started, take the time to read over this list of materials and understand how they work together. Also start thinking about improvised or alternate choices you can choose to achieve the same outcome.
But, it’s no exaggeration when I say that you can quite literally make a highly effective crayfish trap from trash alone.
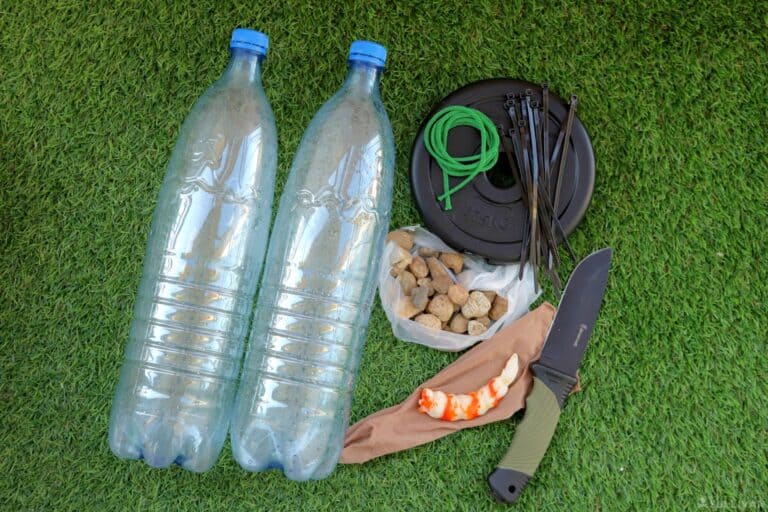
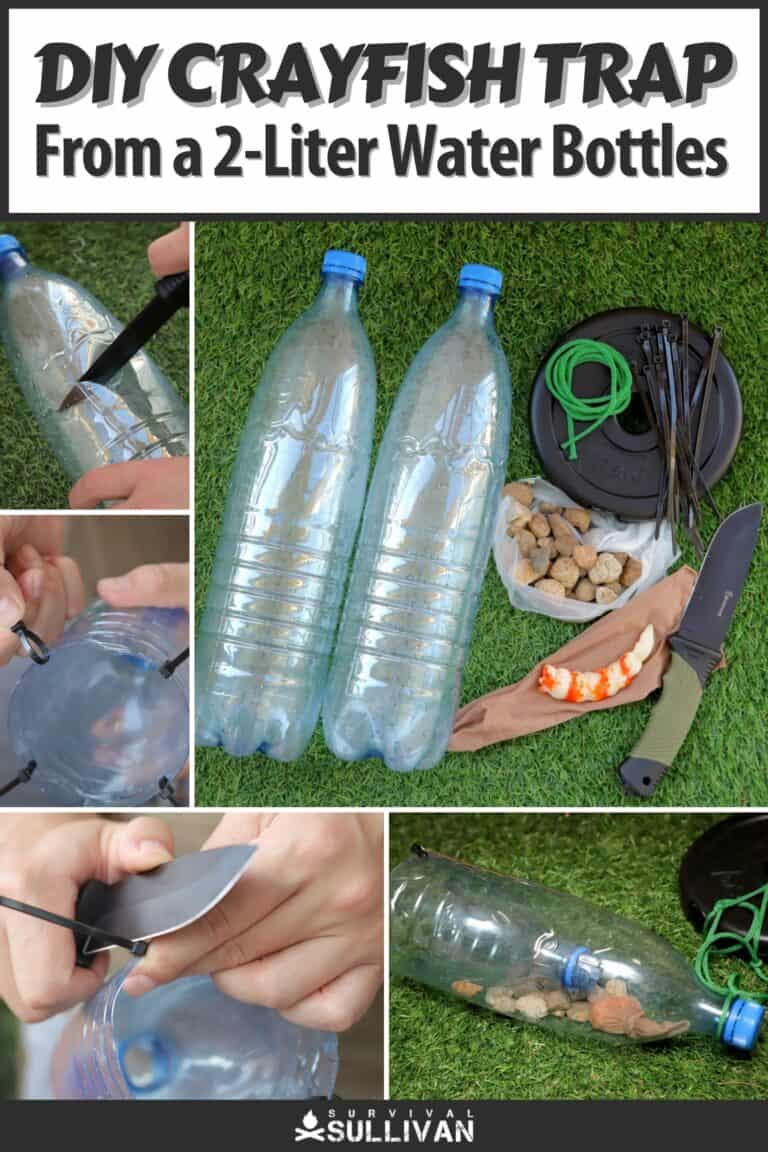
1. Bottles
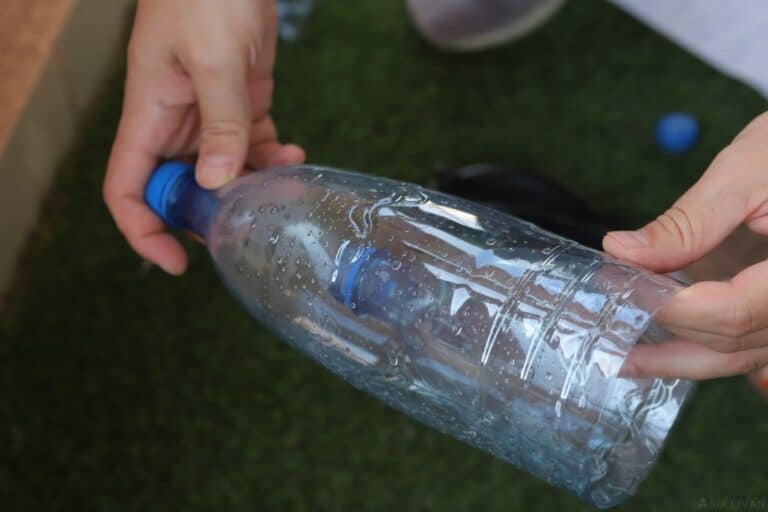
You need a pair of 2-liter size bottles for this, or rough equivalents. Bigger is typically better, but make sure both bottles are identical or nearly so because you will have to nest one inside the other.
2. Zip Ties or Cordage
You’ll need one or the other to attach the two bottles together after you complete assembly.
Anything that is reasonably sturdy and waterproof will work, you just can’t have the bottle halves separating after the trap is set.
3. Sharp Knife or Scissors
You’ll be doing plenty of cutting in this build, both of the plastic bottles themselves and on whatever you are using to attach them together.
As always, be careful when using any sharp cutting tool!
4. Sinkers
You’ll need some kind of weight to help hold your trap on the bottom of the water. You can use fishing weights, or improvise with small river rocks or pebbles.
5. Crayfish Bait
If you want your fish trap to be successful, you’ll need bait. There’s only one type of bait that will reliably attract crayfish, and that’s meat of some kind.
The fresher the better, but you can use fish or shrimp (preferable), chicken, squirrel, or anything else you can come up with.
If you’re lucky enough to have actual crawdad bait balls, you can use those.
6. Nylon Stocking or Old Sock
This is an old crayfish hunter’s trick- put your bait inside a stocking or sock and tie it off inside the trap.
This prevents one or two hungry crayfish from gobbling it up too quick before it attracts even more of their kind.
7. Anchor
You can improvise an anchor for your trap using paracord and a heavy rock, a horseshoe or anything else you have handy if you are worried about your traps floating away or being carried away in a current. They are quite light, after all!
That is really all you will need. Time to get down to business.
Step-by-Step
The following steps will help you easily construct and place your DIY crayfish trap:
Step 1: Gather Materials
Grab everything you’ll need from the list above. Just a reminder, make sure your two plastic bottles are identical or nearly so: it is critical that the top of one bottle can nest snugly inside the bottom of another after you cut the bottom off.
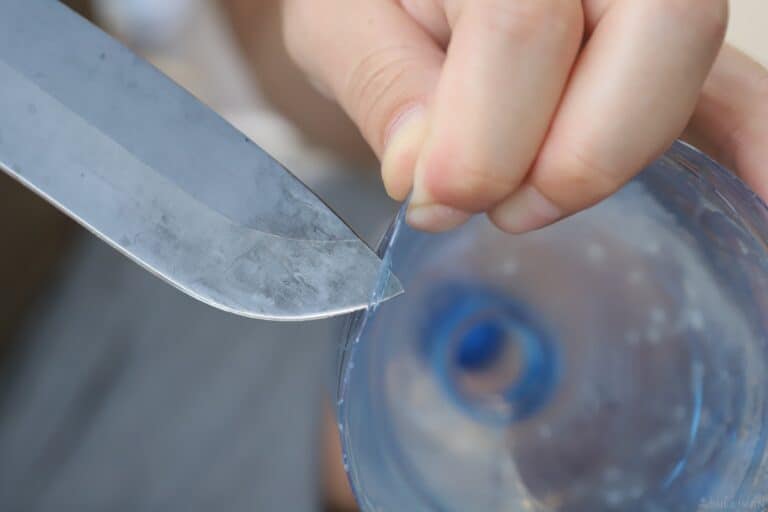
Step 2: Cut One Bottle in Half
Using only one bottle, take your knife or scissors and cut it in half around the middle, a little bit higher than halfway.
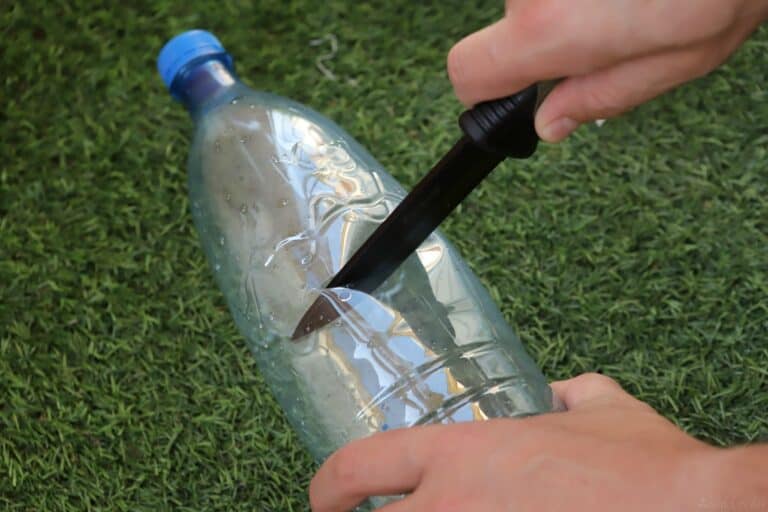
Take your time, and make this cut as neat and tidy as possible. The idea is to have the top, or neck, of the bottle that will basically act like a funnel.
Step 3: Cut Second Bottle in Half
Repeat the previous step, but this time cut the second bottle in half around the waist several inches below the midpoint towards the bottom of the bottle.
You should now be left with one tall and one short “funnel,” each made from the necks of the bottles.
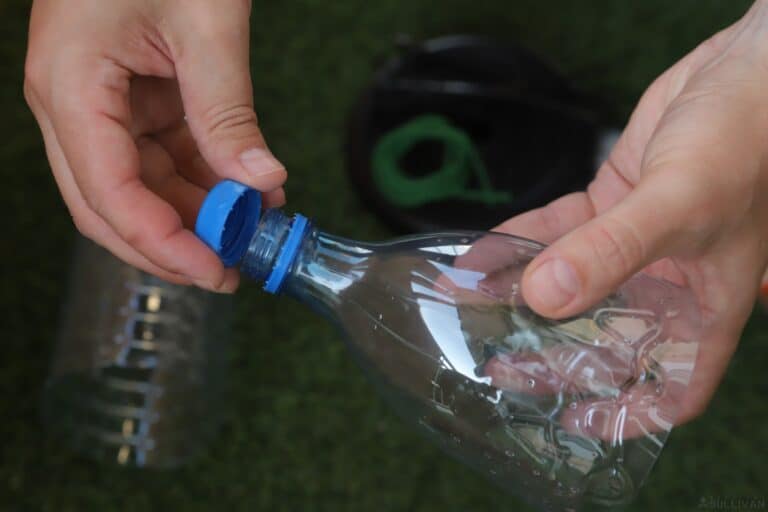
Step 4: Unscrew Cap from Shorter Funnel
The shorter funnel you created will be the interior piece that acts basically like a ramp or chute that will guide the crayfish into the trap.
So you don’t forget I make things way harder on yourself later, go ahead and unscrew the cap but don’t discard it because you might need it.
Step 5: Insert Short Funnel into Bottom of Long Funnel
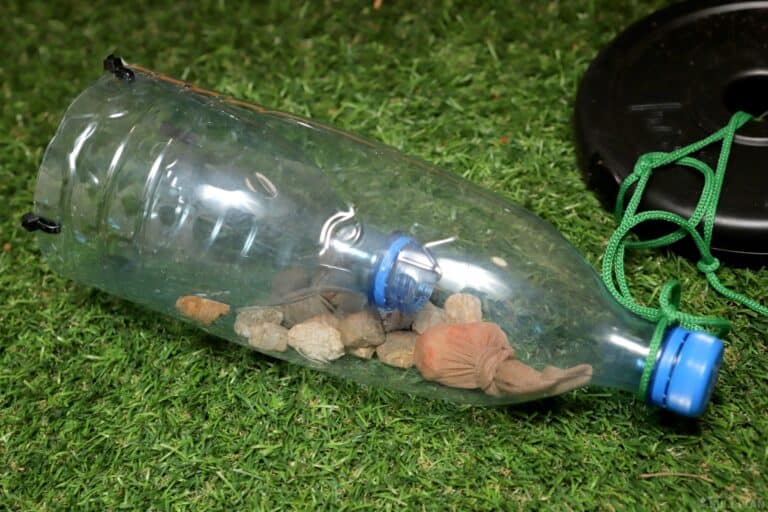
Now nestle the short funnel inside the bottom of the longer funnel keeping the necks pointing in the same direction. They should go together like those Russian nesting dolls.
This is why it is so important to make both of those cuts clean and even so the edges tightly overlap. This will be crucial for the next step.
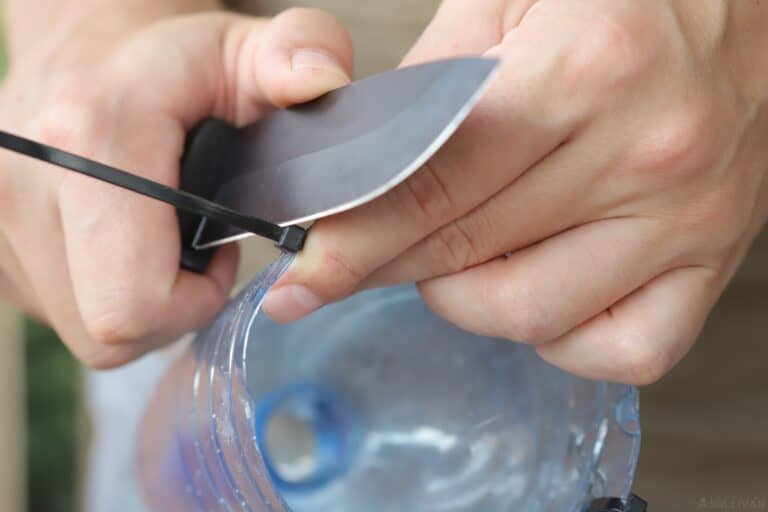
Step 6: Drill or Poke Holes
You cannot trust that your trap won’t come apart like this no matter how snugly it fits together. Accordingly, we need to attach the pieces.
Using any narrow, sharp tool you have handy, cautiously poke at least four and preferably six holes evenly around the circumference of the funnels where the edges overlap.
Do this cautiously so you don’t hurt yourself, and take care to avoid splitting the edge.
Optional: If you want to make a truly sturdy and reliable trap, carefully poke a second series of holes in the rim just above the first set, keeping the holes in line with one another.
Step 7: Attach Funnels Together
Using your waterproof zip ties, cordage or any other improvised material you came up with, loop them through the sets of holes to secure both sections of the trap together.
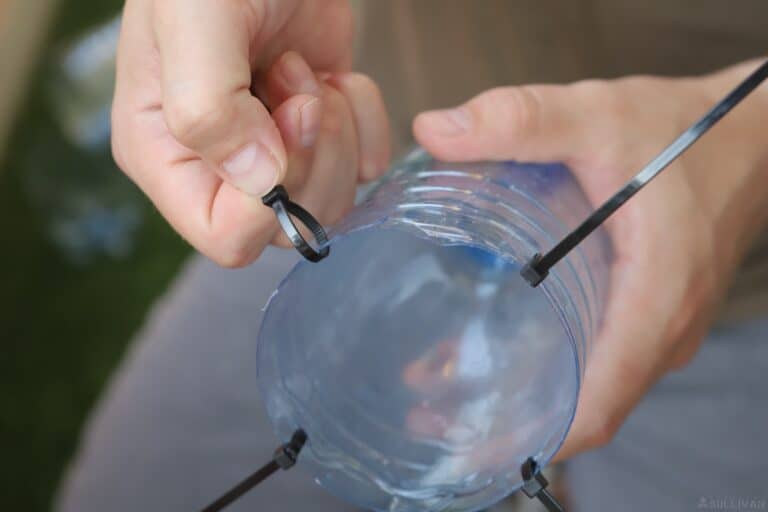
Take your time and do this right to create a strong seal, and leave the locking system of the zip ties or any knots you tie on the outside of the trap.
This will keep them from becoming obstacles or impediments that can create a clog which might prevent crayfish from entering.
Step 8: Clean Up Attachment Points
Take this time to cautiously cut off any free ends of your zip ties or unneeded cordage:
Though it’s unlikely to directly interfere with your quarry on the outside of the trap, this is a snag hazard that can cause your trap to be carried away by a floating piece of debris, or cause debris to attach to it.
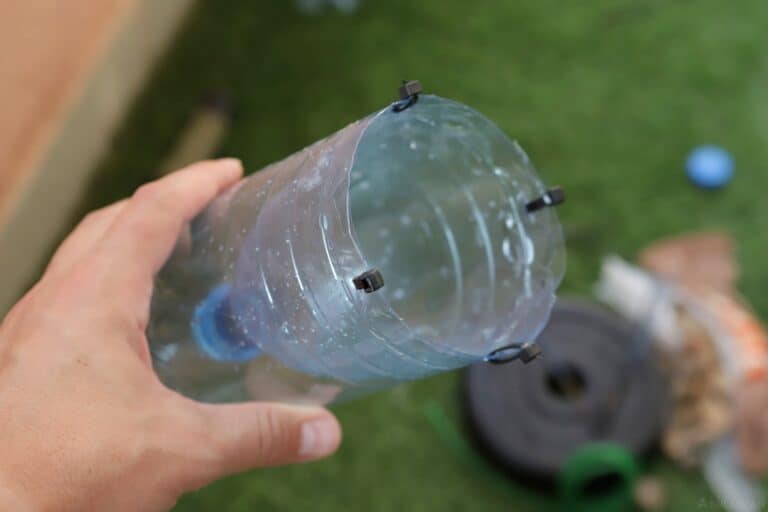
The lower profile and less snag-prone your trap, the better.
Step 9: Weigh Down the Trap
Open the cap that is on the outside of the trap. Gather small fishing weights, pebbles or any other object that will give you a trap some ballast and start filling up the main chamber of the trap between both necks.
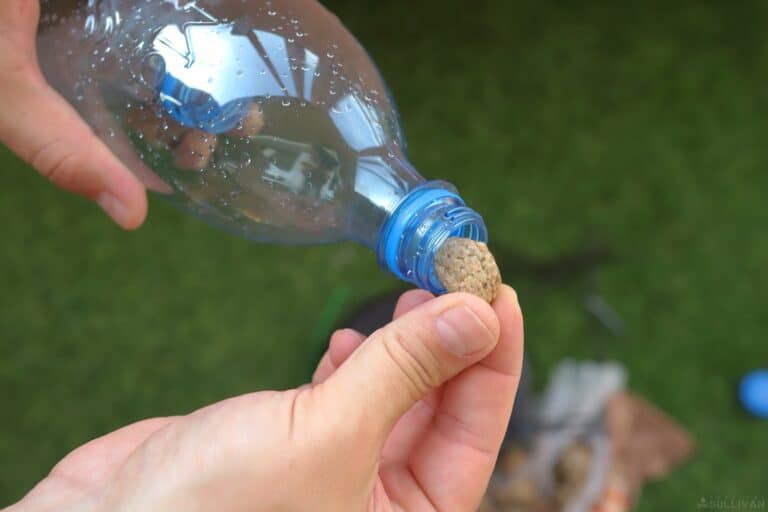
You don’t need too many, but test it to ensure that the trap will stay on the bottom wherever you place it.
Make sure you leave plenty of room for the bait you will place in a moment, and also for the crayfish themselves.
Step 10: Place Bait in Main Chamber
Load small bits of bait, whatever it is, into the sock or nylon stocking if you have it. If you don’t, that’s okay.
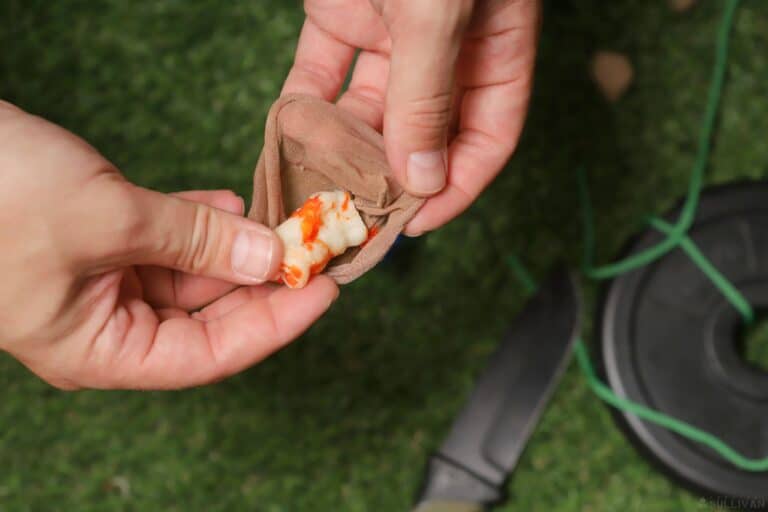
Remember that fresh meat is greatly preferred by crayfish. Now place the bait through the exterior neck of the trap into the main chamber.
Recap the exterior neck tightly with the same cap.
Step 11: Attach Anchor
Whatever sort of anchor system you’ve rigged up, even if it is just a piece of cordage tied around the neck, go on and secure it to the trap now. Be cautious not to compromise the trap’s structural integrity or disrupt the bait.
Your anchor must be capable of keeping the trap in place overnight.
Using the Trap
Step 12: Place the Trap
Slowly submerge your trap and let it fill with water. Then securely position it on the bottom taking care to make sure the ramp does not clog but it will remain level with the bottom.
Don’t forget to secure the other end of your anchor.
Step 13: Verify that Trap Will Stay Level
Test your trap to be sure that the large opening, or ramp, will rest more or less evenly on the bottom of the body of water you place it in.
The idea is that crayfish will be able to walk up the ramp and scoot through the opening into the chamber, but not get back out again. If they can’t walk up the ramp, you aren’t going to catch nearly as many.
Step 14: Wait
Now all you need to do is wait and give your trap time to work. Ideally, you will leave it overnight and return the following morning because crayfish are most active at night.
When you check the trap, remove it gingerly and be careful not to give the crayfish that might be stuck inside any advantage that will help them escape. Pick up the trap with the open, entrance end pointing up when you remove from the water.
Step 15: Collect Crayfish
Depending on the bottles you used you might be able to simply remove the outer cap and then dump out the crayfish caught in the main chamber.
But, if you used two different types of bottles you might have to remove the attachments you put on earlier and separate the main parts of the trap to get them out. Either way, be careful, because those pinchers aren’t just for decoration!
Congratulations! You created a functional and effective DIY crayfish trap from stuff that most people would throw away. This might be just the ticket to keep yourself in high-quality protein when you’re stuck in a survival situation.
Helpful Tips
Use the Best Bait You Can
Crayfish love meat, and they prefer aquatic meat. Fresh fish and shrimp are the absolute best things you can get, if you have those available use them first.
Terrestrial meat from chickens or other animals are also worthy if you can’t get fish, but do your best to avoid using processed meats; crayfish generally don’t like them.
Check Your Trap Regularly
Crayfish need lots of food, and if you leave them in the trap for a long period of time they will go through the meager amount of bait and actually starve before you can recover them.
On a similar note, multiple crayfish stuck in a small space might fight and tear each other apart!
Crayfish are Extremely Sensitive and Delicate Creatures
If you want to keep them alive in a holding tank or other container, it must be extremely clean and uncontaminated.
Too high water acidity and chemicals will kill them quickly, as will stagnant water because they will suffocate.
Use Bigger Bottles if Needed
You can use larger 3-liter water bottles or any other similar containers that have a small neck with a cap if you prefer, or if you are able to catch more crayfish at a time. The basic design remains the same.
Always set multiple traps
Any seasoned trapper will tell you that the way to succeed when trapping is to set multiple traps.
Even under ideal conditions, trap rates tend to be very low, so multiple traps set strategically will greatly improve your chances of a score.

Tom Marlowe practically grew up with a gun in his hand, and has held all kinds of jobs in the gun industry: range safety, sales, instruction and consulting, Tom has the experience to help civilian shooters figure out what will work best for them.