Root cellars are an ancient technology for preserving food, ones that have been getting the job done since well before the electric refrigerator and freezer were even a figment of the imagination.
They will be here with us, too, long after the fridge and freezer both are ancient history!
Root cellars are making a comeback today among homesteaders that want to be more self-sufficient, off-grid capable, or just want to save money while having more useable food storage space.
But putting in a fully-features root cellar can be pretty spendy: from site selection to materials and outfitting, the whole operation can set you back a bunch of money.
However, it is possible to get all the benefits of a root cellar in a smaller size format, or by repurposing other equipment for the purpose.
Below are 21 such root cellar ideas for DIY-savvy homesteaders.
Table of Contents
1. Just a Hole in the Ground
You might think it is nuts, but believe it or not, it is possible to keep your produce from spoiling, especially root veggies, by just placing it in a hole in the ground and covering it with something.
Yes, you’ll have to protect it from pests somehow. Yes, you may need to enclose it to keep larger animals away.
But if carefully wrapped and placed outside in cooler weather they can keep. A simple cloth wrapping might be all it takes during the winter months.
In warmer seasons that are still cool, a layer of wood ash in the hole can help keep insects away and prevent spoilage.
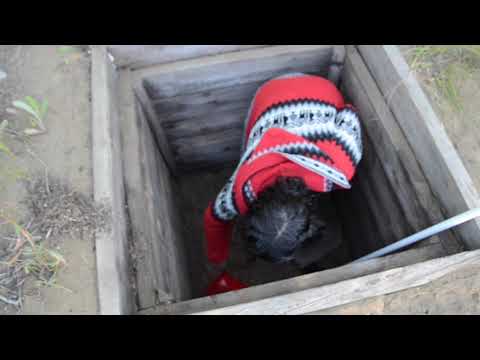
2. Hole with a Hatch
An upgraded version of the idea above, a simple hole in the ground with a hatch and frame over the top is a great way to add weather and the best protection to your impromptu, in-ground root cellar.
You can make the hatch and frame from any scrap wood and hardware you have handy, and if you place the hole in an area that gets shade it will help cut down even further on excessive heating. A great and quick method if you need chilled storage in a jiffy.
3. Zeer Pot
A zeer pot is, in some ways, the very first standalone refrigerator design, and one that does not use any electricity to boot! A zeer pot is made by taking two clay pots, one large and one small.
The larger pot is filled with sand and the smaller one is nested inside it. Then you fill the space between them with water, wetting the sand.
Finally, food is placed in the innermost pot for storage. The combination of insulation and evaporative cooling means your food will stay cool and appropriately humid.
The pot can be covered to increase humidity, and all you need to do periodically to recharge it is add more water.
4. Bury a Bucket
An old-school homesteader trick, burying a heavy-duty bucket with a lid is a great way to provide cool, year-round food storage. Just make sure it seals snugly when closed but not totally airtight.
Buckets are cheap, easy to place, can be placed in multiples, and can also be used in the ground with zeer pot principles to really get the temps down in warmer weather.
They are also mostly impervious to pests as long as you cover them with a good lid, and so are great for storage wherever you could be dealing with insects or other critters.
5. Trash Can
The trash can works as the bigger brother to the bucket method described above.
You’ll get more room and actually be able to take advantage of zoned storage, unlike the bucket, but you’ll need to dig a deeper hole and pay a bit more per unit.
The trash can root cellar is also a great choice if you’re looking for longer-term storage, as they tend to better stabilize and retain humidity levels.
Additionally, you can use multiple cans side by side for different types of foods if you want.
6. Barrel
Going even bigger than the trashcan, a cleaned water storage barrel or never-used chemical storage barrel can offer even more room and is especially suited to climates with cold winters because of their greater strength: less risk of cracking!
Just dig a hole then place the barrel in it, leaving the opening right at ground level. You will also need to come up with a workable lid.
The biggest downside to the barrel method is the cost, as they can cost a bit when new.
Also, never, ever use a previously-filled chemical storage barrel under any circumstances!
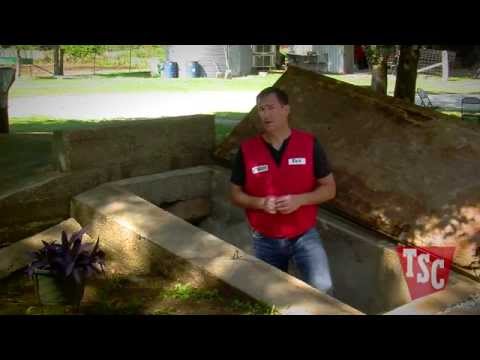
7. Water Tank Cellar
For the real root cellar experience on a budget, you can consider converting an unused below-ground water tank into a storage area.
The key is that the tank needs to be modified in some way so that you can open and access the interior, and also so that the air can circulate.
This will help keep temperatures and humidity more consistent and protect against spoilage.
Make sure the tank is thoroughly cleaned of all mold or other contaminates before you load it with food, too.
Just like the barrel method, this one is great for cold winter climates and provides even more capacity.
8. Bury an Old Freezer or Fridge
Another classic “up-cycling” method that is sometimes frowned on as tacky, but you won’t worry about that once you see how well it works and how easy it is to install.
Just dig a hole deep and wide enough to fit your old fridge or freezer, then place it in the hole with the door facing up. Fill the remaining space around it with sand, soil and/or straw to insulate it.
You’ll have plenty of room, a nicely sealing secure door, and a durable container to keep out bugs and other critters.
9. Build a Pallet Cellar
The internet has shown us that you can make just about anything with a few pallets, and now your food storage can be included.
In theory, this is the same as any other buried container method but on a much smaller scale (unless you plan on building an entire root cellar out of them).
The key here is to make sure you are using good robust pallets that won’t disintegrate in the ground and that you use a good waterproof sealant on all inside surfaces.
Simply break down the pallets, finish them, and then reassemble them into a box that is sized to suit your needs. Drop it in the ground, cover it, and you are done.
10. Use a Crate
If breaking down and rebuilding pallets isn’t your thing, you can use heavy-duty wood crates instead. This is very similar to the pallet method above, except you avoid having to DIY a bunch of wood.
You’ll probably need to clean and finish the crate as above, but then all that is required is popping it in the ground.
Crates with tight-fitting slats are best since they will better keep out insects. You may want to use straw, sand and/or soil around the sides of the crate to help further insulate it, and of course figure out a way to cover it.

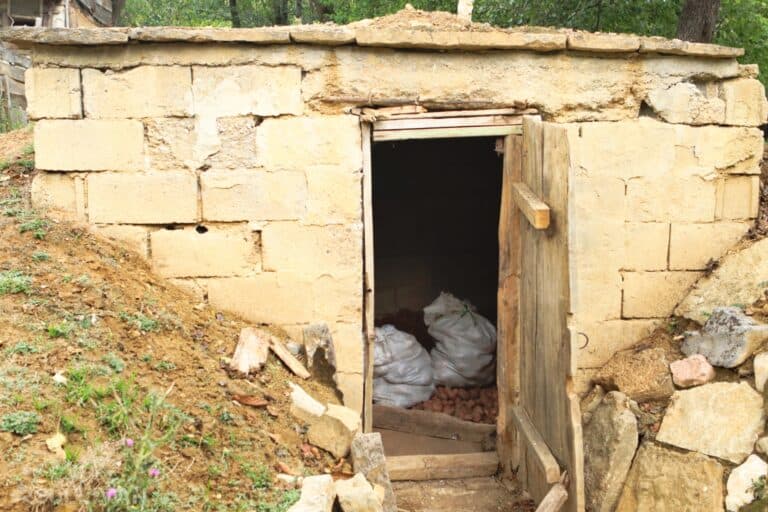
11. Make a Root Cellar from Stones
Another old-fashioned method that requires little more than some heavy lifting and time.
Choose a shady spot in your yard (if you have one) away from trees and dig out a hole that is at least 3 feet deep and wide enough to accommodate the stones you have while leaving plenty of room for your food to follow.
Line the bottom of the hole with stones, then build up round walls on all sides. As you go, make sure the stones are as tightly fitted as possible.
Fashion a lid or door from wood or anything else that will fit snugly and is appropriately sized. Stone will definitely help to keep the interior cool and also manage moisture levels.
12. Use Earth Bags
Earth bags are becoming a fairly popular way to build anything from walls to temporary furniture, and they work great for root cellars too.
The idea is simple: fill large fabric bags with damp soil, rocks, or sand and stack them like bricks until you have the desired shape.
In this case, a simple, four-walled compartment or room forming your cellar. This method is super cheap, adaptable to below-ground or partly below-ground use, and will help to keep your food from spoiling like any other root cellar.
It can be as simple or as intricate as desired based on your budget and ability to add more features.
Don’t forget to have good drainage in place, provide extra insulation around the bags if you can, and build a lid or door that is sturdy and waterproof. Don’t use a bag for the door!
13. Bury a Whole Shipping Container
If you want a whole prefabricated room for your root cellar, look no further than a used shipping container. These are weatherproof, durable, and relatively easy to find if not transport.
Dig a large enough hole for the entire box in a hillside or mound, then lower it in -a crane or a friend with a good winch will come in handy here.
Fill the remaining space around it and over it with soil, but avoid placing so much soil on either side that the container is at risk of being squeezed. They don’t take nearly as much force from the sides as they do from the top.
14. Cover Your Veggies with Hay (Storage Clamp)
Another ancient method of preserving your produce, and root veggies especially, is to simply place them on a bed of fresh, clean hay and then cover them with more hay.
This is what is called a storage clamp, though some folks also refer to it as a clamp pit.
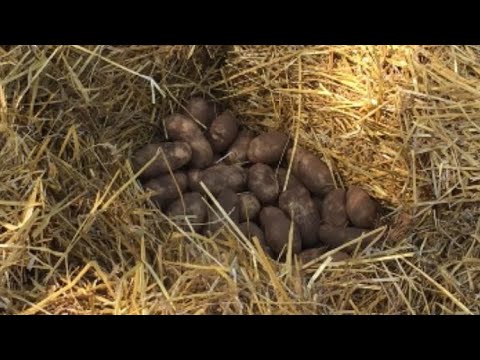
The idea is that the hay helps absorb moisture and keeps the veggies dry, while at the same time keeping them at a more stable temp.
This is an above-ground option, so it will only reliably work in cold seasons or cold climates.
15. Use a Garden Blanket
Here’s a method I had never heard of until recently. A garden blanket is a method of keeping produce fresh while it is still in the garden, specifically low-growing veggies like lettuce, spinach, and root crops.
The idea is to cover the beds with bags full of organic matter to keep them safe from cold damage while still allowing some airflow.
This is a great way to give your produce an extra few weeks before harvesting if you don’t mind going out to the garden, pulling aside the bags, and grabbing what you need.
16. Try a Window Box Cooler
In the coldest regions, or areas with reliably cold winters, you don’t need to worry about chilling your food if you just put it outside! A window box cooler is a great option for those climates.
It’s essentially a box much like a window planter, one that is also hung outside the home and accessed from the window. With your produce placed and lightly covered it will keep as it would in true cold storage.
Consider building an insulted version with a lid for even better protection in somewhat warmer areas.

17. Build a Spring House
A spring house is another classic method, one relying on the cooling power of water. The idea is to build a structure, often in an existing spring or ditch line that has water running through it.
As the water moves slowly past and around the structure, it helps cool the air inside, making it ideal for storing food.
This method works best if you have a ready source of moving water nearby, as well as solid stones or rocks to help build the structure.
Consider adding a small roof to keep out rain and snow if needed. The trick with this method is managing the water so it doesn’t flood your spring house!
18. Keep Your Produce in the Garage or Shed
A keep-it-super-simple method for cold climates. If you have a garage or shed with space, keep your produce in there. Not directly on the ground but off the floor, up on shelves, or hanging in bags.
This will give it the protection of a structure but cooler than the inside of your home. Make sure to check it regularly and remove any bad items before they start to rot.
These areas are common hangouts for all kinds of pests, though, especially in wintertime, so have a plan for dealing with them or you might yet lose your food!
19. Make an In-Deck Outdoor Storage Compartment
A clean and easily reached option for outdoor storage is an in-deck storage compartment.
This is a great way to keep your produce safe from temperature fluctuations and curious creatures, while still keeping it close by if needed.
You can build or buy these compartments, depending on the size you need, and they typically open right out of the “floor” of your deck.
It is easy enough to make one yourself if you are a skilled carpenter and have a suitable cooler to modify.
20. Keep Your Produce in a Cool Closet
Pretty much every home has a room or two that is just a little bit cooler than the rest.
That closet, hall corner, or chilly guest room can be enough to keep your produce at a consistent temperature and well out of reach of pests.
Just make sure you check it regularly for mold, bugs, or other signs that things may not be going as planned.
Also, do whatever is needed to keep light off of your food or you’ll risk spoilage. Thick blackout curtains on windows and judicious control of nearby light contamination is a good idea.
21. Build a Chilled Basement Storage Room
If you have a finished or unfinished basement, and have the space for it, you can build a chilled storage room.
This means adding extra insulation to protect from heat, as well as cooling units such as an air conditioner or ducting to keep temperatures down. Also, consider some form of air circulation to keep mold and mildew at bay.
This is a good option for those living in hot climates, but it does require plenty of work and money to set up, though it can still be cheaper than doing a full-sized root cellar.
If you have the means for it, this can be a great way to ensure your food stays fresher all year round!

Tom Marlowe practically grew up with a gun in his hand, and has held all kinds of jobs in the gun industry: range safety, sales, instruction and consulting, Tom has the experience to help civilian shooters figure out what will work best for them.