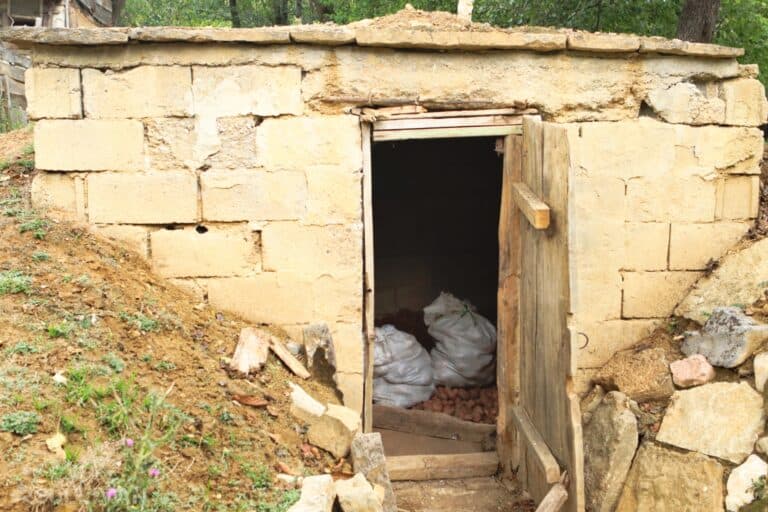
When it comes to having a home with a root cellar, you then have untapped space that can be used in order to store your growing stockpile. In this article, you’re going to learn how to ensure that none of your supplies will get destroyed by dampness or water.
We’ll also go through some tips on how to take extra precautions when storing items in your root cellar to ensure that dampness is not an issue. It is crucial that food, important documents, and other items stay away from the humidity.
The flooding of a root cellar starts when the outside surface slants towards the structure. This means that the water collects on the side of the exterior wall. As the water collects, it seeps into the ground, finding its way through the floor and cracks in the walls.
Step 1: Elevate the surface outside of the home.
You will need to make sure that the ground surrounding the foundation of your home slants away from the foundation. You will need to pack dirt around the entirety of the exterior walls in order to create a slope. The slope should have a 2-inch drop per foot.
This means that for every foot that you step away from your home, the surface should have dropped by 2 inches. If you would like to ensure that the dirt does not erode due to the weather; pouring concrete is a viable option.
Step 2: Well Maintained Downspouts and Gutters
It is important that your downspouts release the water caught at least five feet away from your home. In doing so, this will aid in keeping the water away from the foundation. It is also just as important to ensure that the downspouts and the gutters have no holes to avoid any water seeping through and going into the foundation.
Keep the downspouts and the gutters clear of any debris that may fall from trees surrounding the property. Backed up gutters and downspouts will allow the water to pour down your home and onto the foundation, which isn’t something you want.
Step 3: Landscaping Issues
Everyone likes to a have a beautiful yard; however, some people do not realize that the placement of flowers or plants around the home can cause water damage. Nevertheless, there is a way to have a beautiful landscape without compromising your retreat that remains waterproof.
Plant roots may suck up water, but they can also create a way for the water to go into the dirt. Having plants close to the foundation will allow water to seep into the dirt and make its way into the foundation and, soon after, the root cellar.
To keep this from being an issue plants need to be no less than 12 inches away from the foundation. They should also be planted on a small slope to ensure that the water from any rainfall or water from gardening flows away from the foundation.
Step 4: Waterproofing Walls
Before you start waterproofing the walls, you will need to double check the exterior walls to make sure that there are no cracks or holes. If you find any cracks or holes, they will have to be repaired before moving onto the next stage for waterproofing the retreat walls.
If the crack is running parallel to your foundation, then this may hint at an issue with the foundation. For those situations, it’s recommended that you seek a professional to rectify the issue. On the other hand, if there are only small cracks, then you will need to use the concrete patches to seal the cracks.
Once you have made sure there are no cracks, you will then need to remove all debris and dirt from the walls. You can do this by using Xypex or Drylok to waterproof your walls. Drylok is a more cost-friendly product; however, both products will expand as it dries and bonds to the walls.
You will paint the product onto the walls and allow it to dry completely. Follow the individual product instructions to get the best results. There are many preppers that have chosen to apply two coats of this product to be extra safe and have a better durability.
It is extremely important to clean the walls well before applying either of these products. If there is any dirt or debris on the wall while you are applying the products, it will create a weak spot in which the water will be able to seep in.
Use a push broom to scrub the walls well, and allow plenty of time to dry completely. In order to help ensure the dryness of the wall, place osculating fans and allow up to 24 hours for it to dry completely before you paint on the product of your choice.
Step 5: Install a Sump Pump
In most basements, there is a hole placed in the wall for a pump so that it can release any standing water. The pump will turn on automatically to ensure that the basement does not flood.
Although you are waterproofing it so that this does not happen, there may be a circumstance that the pump is needed. On top of that, the pump can be a backup form of waterproofing the space.
Step 6: Use a French Drain
The French Drain is used for more serious water issues, but it’s better to install this beforehand so that these issues never pop up during crucial times like if TSHTF. This type of drain has a continuous piping system that runs below the floor of the cellar.
The piping will run along the entire space of the cellar. It is pretty similar to the installation of a sump pump, but it will require cutting and taking out a 12 inches long and deep strip of the floor of your cellar. You will then lay in the piping and surround it with some gravel that is coarse.
After you have installed the piping, you will need to pour concrete over the piping to close up the floor. This type of drain will need a sump pump so that it can get rid of any excess water that gets into the system.
Once the concrete has dried, it is a great idea to cover the flooring in Drylok just as you did for the walls. You will want to keep all water out of your BOL, including the floor.
Step 8: Install a Hydroclay System
Hydroclay is a type of waterproofing system that is known to absorb a tremendous amount of water. It is a product based on bentonite. The clay will be pumped out and will fill any water pathways to seal the foundation. This is also the very same product that is used in manholes, tunnels, backyard ponds, and even dumps.
After you purchase Hydroclay, you will need to install cardboard tubes that contain the clay to the outside walls. As the cardboard is exposed to the water, the clay will be released and follow the water pathways. It is a simple way to help safeguard your BOL and ensure that your retreat stays dry.
Storing Your Stockpile
Once you have waterproofed your root cellar, the supplies still may be subjected to humidity. To keep this from happening, there are several techniques that you can implement to ensure that your items remain safe at your bug out location.
Get a Dehumidifier
It is important to keep humidity away at all times from the items stored in your BOL. Although you have already waterproofed root cellar, you need to cut down on the water in the air.
Purchasing the dehumidifier and running it in the root cellar will keep the humidity levels down. This will give your food storage a longer shelf life and keep the humidity from ruining any medical supplies and any other items that can be ruined due to water or humidity.
There are three different types of dehumidifiers that you can purchase and use in your cellar.
- Desiccant Dehumidifiers: These use silica packets to drain the air of any moisture. A Desiccant Dehumidifier is a special kind of dehumidifier that you can purchase to place in the storage area as well. This dehumidifier uses the silica gel to remove the humidity. It is best used in temperatures that have a low to moderate level of humidity. After completing all the repairs necessary for waterproofing your space, using these will be a great addition since you have already ensured the safety of your BOL from the water.
- Mechanical Dehumidifier (Refrigerant Dehumidifier): This type works like the refrigerator in your home or the air-conditioning system. The Mechanical Dehumidifier forces air through a metal coil that cools and condenses moisture. It then drops into a water tank.
- Peltier Dehumidifier: This type is typically recommended for smaller spaces, such as a bedroom or bathroom. It is perfect to be placed in closets where you are storing BOBs and other items you have prepped. If you are looking to keep moisture from EDC items, then the Peltier Dehumidifier is a great option. You can put one of these in each storage space where your prepper items are located. These are great to place in the areas where you store your dehydrated food storage. This will extend their shelf life dramatically.
Ventilate
Once a month, open the door to allow fresh and dry air to flow through the space. If you don’t want to keep the door open for long due to fear of intruders seeing your prepping efforts, then use a fan to circulate the air. This will keep the door open for a less amount of time, but will still air out the space.

Using Silica Packets
Have you ever seen the small paper covered packets that come in when you order products online? It expresses to throw it away and to keep it away from children. These packages keep moisture and humidity away from the products while they are transported. Instead of throwing these away, keep them.
When you store non-edible items like clothing and paper, you can place these packets inside the storage container. It will help keep any extra humidity out of your BOB. You can also purchase these through major retailers and prepper stores.
In Conclusion
Following these steps in waterproofing your root cellar will ensure that your prepping efforts do not get ruined or leave you defenseless should TSHTF.
Make sure you do price comparisons when purchasing products online or in stores. Look at the reviews of each product and compare those to their counterparts, to ensure that you are getting the best products and deals.
Make sure that the instructions are at least similar and if there are materials in the product, like Drylok, ensure that the materials are the same per brand. All these tips and steps will ensure that you have a root cellar that will last.

My name is Teresa Fikes. I am a Homesteader, survivalist, prepper, historian, and writer plus much more all in one package deal. I was raised on a small family farm were I was taught at an early age to survive off the land without the help of modern conveniences. I am a writer by profession and a Homesteader by Blood, Sweat, and Tears.
We just put in an outdoor root cellar, with poured concrete walls, and I find that it is humid and drippie wet inside, also I think it is too warm, and wanted to insulate it inside since the outside excuvation work is done, would you recamend putting on a sealer, I did not think root cellars were suppose to be wet inside. Thank you for your help