The Boom Hitch is essentially an extended, more complex relative of the Clove Hitch. It is something of a chore to learn, but worth it.
It will hold fast and not slip under tension from any direction, even when tied in thick, slippery line. This makes it good for securing a line to a beam or post permanently.
The Boom Hitch takes its name from its use: tying a line to the boom (the main crossing pole which secures the foot of the mainsail of a boat).
The Boom Hitch is often favoured because it is very simple to tie for it’s holding strength and security, requiring only a succession of wraps and one tuck.
Like most hitches, the Boom Hitch can be made ‘slippery’ (quick release) by passing a bight rather than the working end through the final tuck. This is not very common though.
Most hitches which are worth making slipped are those which will come off whatever they are tied around fairly quickly when undone, (hence the name ‘quick release’).
The boom hitch has a lot of turns before the tuck is made so would be slow to unravel (especially in a rough or very grippy). In fairness though, slipping it will make the knot easier to untie.
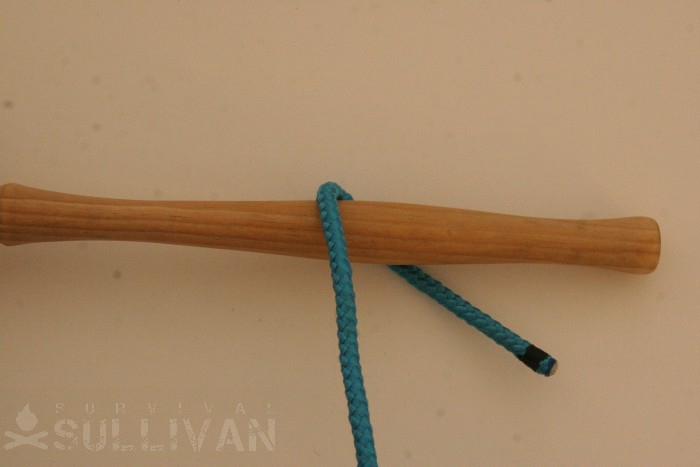
Step 1. Make a turn:
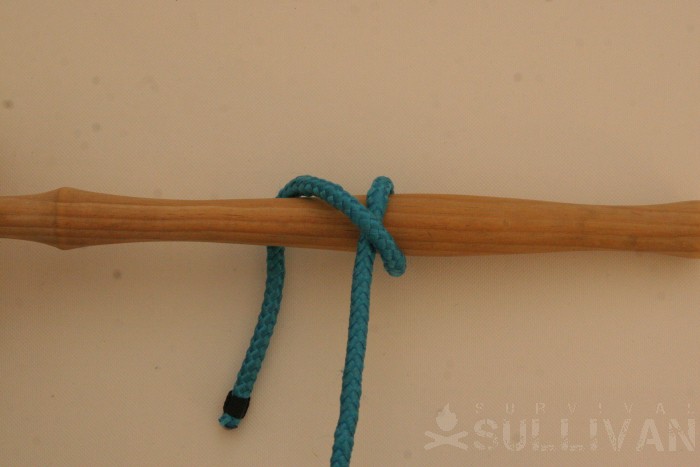
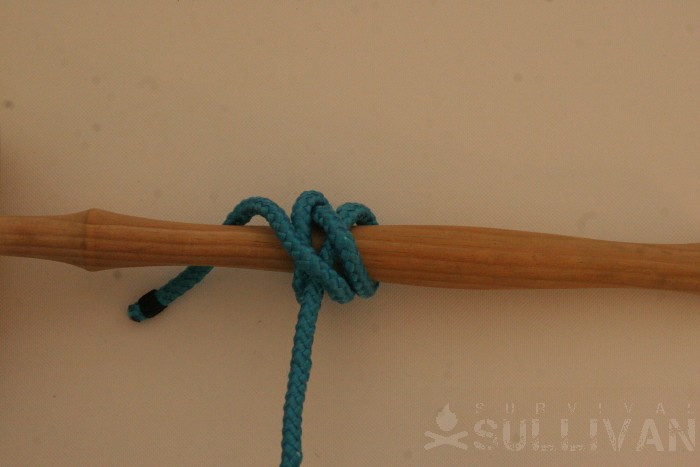
Step 2. Pass the working end over itself, and over the pole:

Step 3. Continue as you would with a clove hitch: pass the working end back under the pole, taking care not to cross anything:
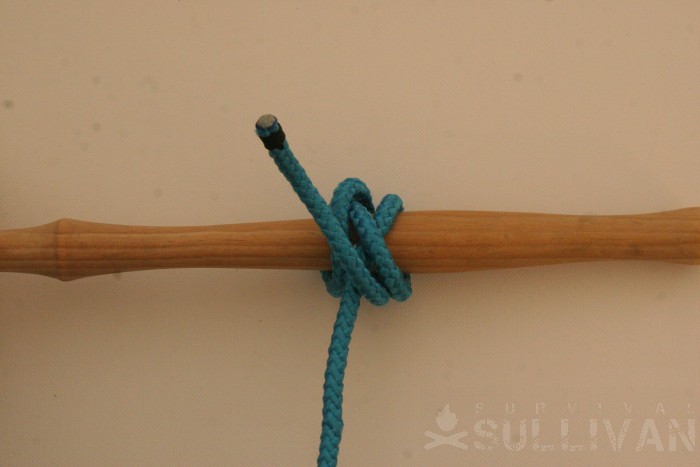
Step 4. Pass the working end up and over (here the Boom Hitch departs from the Clove Hitch) where it just cross the pole.:
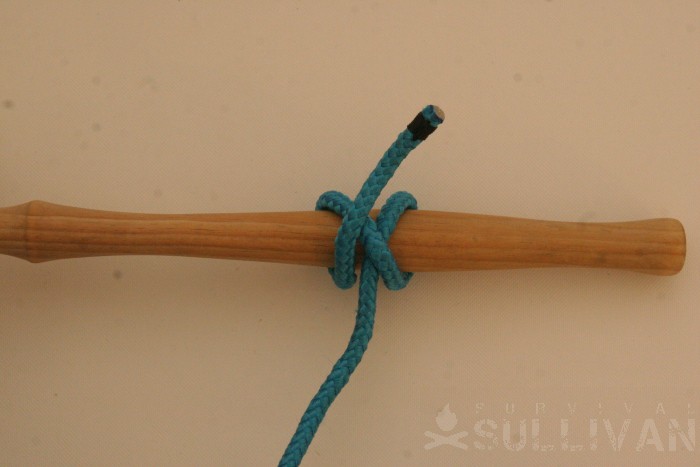
Step 5. Bring the working end under the pole and outwards. Note carefully the placement of where it ends up: between the standing end and the first turn made. It should not be outside that first turn:
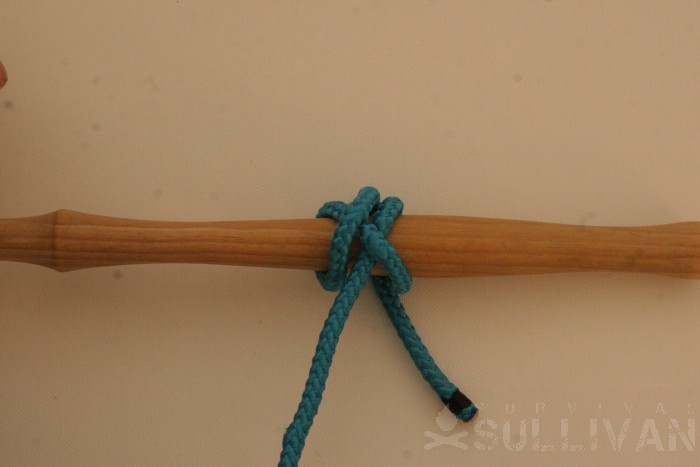
Step 6. Brin the working end over everything, and across the knot:
Step 7. The working end comes down under the pole, staying outside everything:
Step 8. The working end goes over itself, and under the next line, following the strand to it’s right (to it’s right in this photograph:
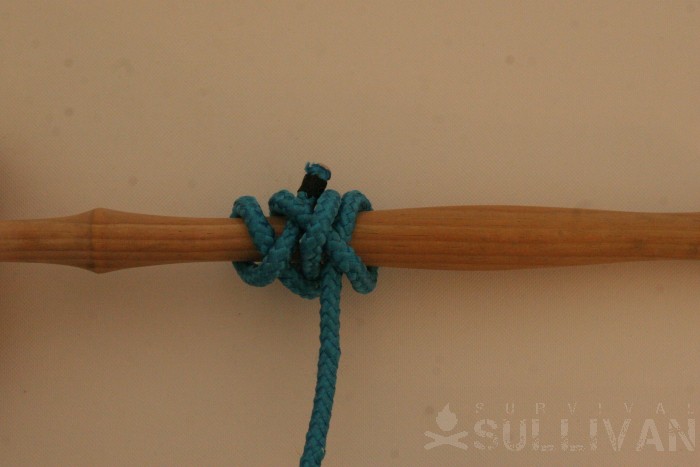
The whole knot can be made the opposite way around if you really want to scramble your brains), what is important is that the strand being followed is nearer to the centreline of the knot than the working end).
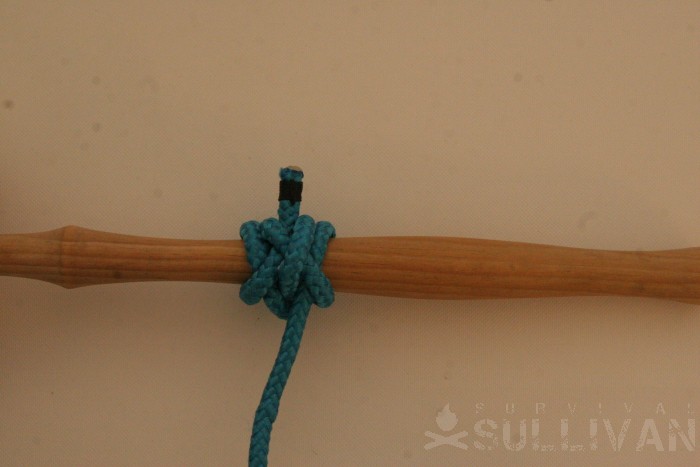
Final Step. Pull on the working end, then the standing end to tighten the knot:
Related Knots
- The Clove Hitch is a better known (and simpler) hitch with a similar design of crossing turns and a final tuck. It is less secure though, so not recommended for critical situations, especially if the knot is likely to be left in place for a long time.
- The Boom Hitch is intended primarily for situations where the load pulls directly away from the pole around which it is tied. For situations where the load is mostly along the length of the pole or post, a ‘slide and grip’ type hitch is far superior (much less likely to slip). The best in terms of strength and security is the (Death) Gripper Hitch, though it is very difficult to tie. On the other hand the Icicle Hitch (which is much easier) will do for almost all situations and is often favored for that reason.
Conclusion
This is one of the best knots for its purpose (securing a line when the load will be perpendicular to the pole), but can be easy to get wrong, and should be tied carefully.
You should also avoid it in situations where a slide and grip hitch (or anything else) would be more appropriate.
Nick O’Law has been exposed to survival from a very young age. In his teenage years, he learned A LOT about bushcrafting, such as making snares and traps, and even how to make DIY knives.
If you haven’t ye read and tried his knot-making articles on Survival Sullivan, you should definitely check them out.