This is the ultimate gripping hitch, especially made for tying one line to another or to pole or post when the pull is the direction of the first line. It would be the perfect gripping hitch but for it’s complexity: it is very difficult to learn and remember how to tie.
This is probably not the best knot for beginners, so if you’re new to the world of knot tying, you can always pick something easier from our knot tying guide.
It is a good idea to learn to tie the gripper hitch, and to practice often, but in most cases, an Icicle Hitch will suffice.
Since the Gripper Hitch is so notoriously difficult to tie, the following pictures are rigorously step-by-step, including as little difference as possible between each photograph for maximum clarity.
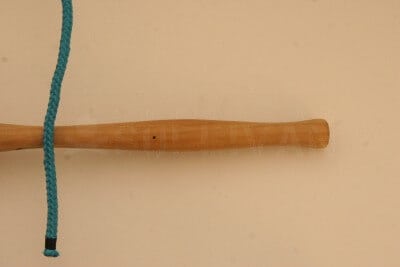
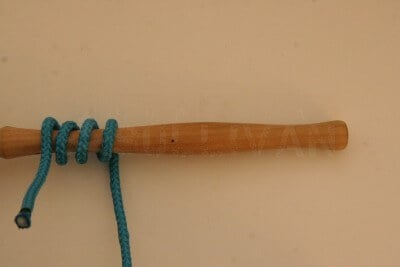
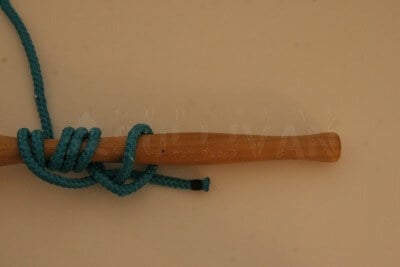
Step 1. Lay the line over the pole (or other line, or whatever object you are gripping), with the standing end (the part which you eventually be pulling the on) near you. The working end is not visible in this photograph:
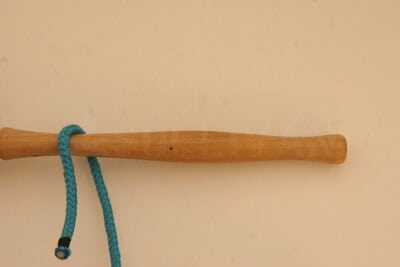
Step 2. Take the working part under the pole / line:
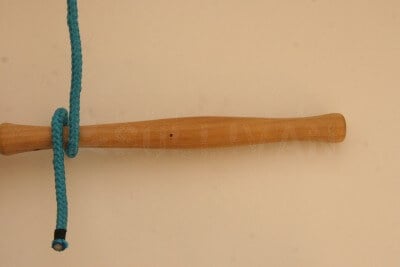
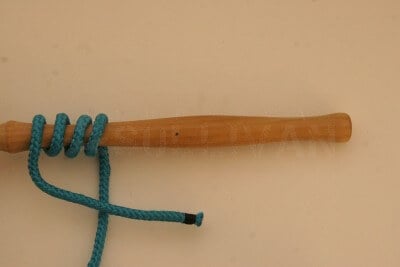
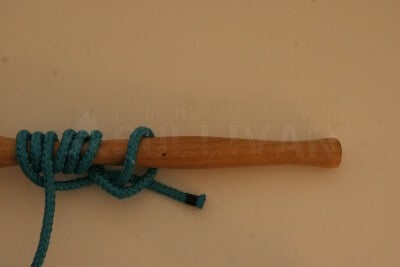
Step 3. Bring the working part up again over the pole / line, creating a turn:
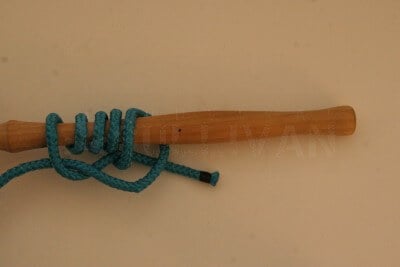
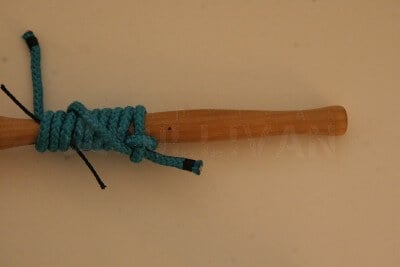
Step 4. Repeat the last two steps, creating a number of turns. At least four turns is good, though more will be stronger and more secure:
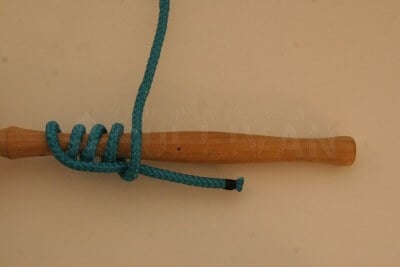
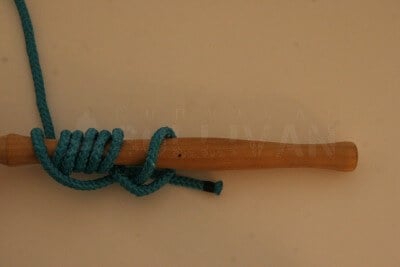
Note that the turns are made by manipulating the working part. I do it this way, and find it most comfortable, though it is of course possible to achieve the same effect by wrapping the standing end in exactly the opposite direction.
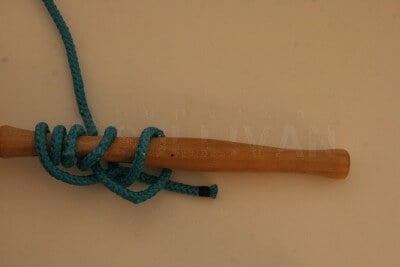
The working part should be coming out from underneath the pole / line, and the standing end from above. Lay the standing end over the working part. See how this forma a loop, between the standing part, the working part and the turns on the pole / line:
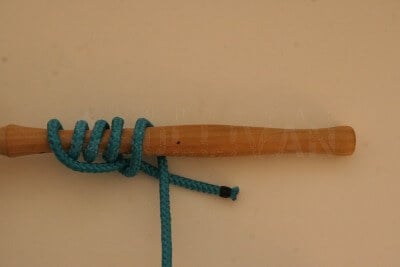
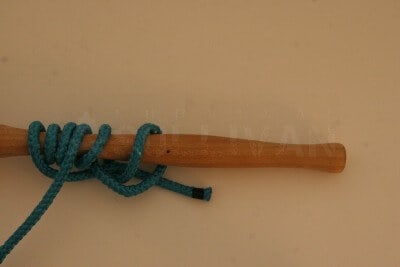
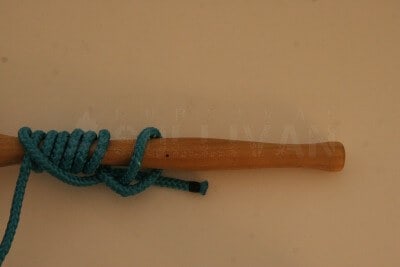
Step 6. Bring the working part up again over the pole / line:
Step 7. Bring the working part under the pole / line again, (forming yet another turn) but note that it lies over the standing end:
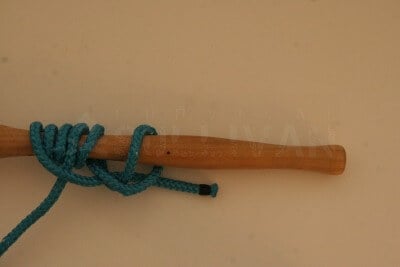
Step 8. Thread the working end down through the loop noted earlier:
Step 9. Bring the working part up under the pole / line following.the nearest turn:
Step 10. Follow the turn around the pole / line with the working end:
Step 11. As you follow the turn, tuck the working end inside the standing part (which the turn goes underneath):
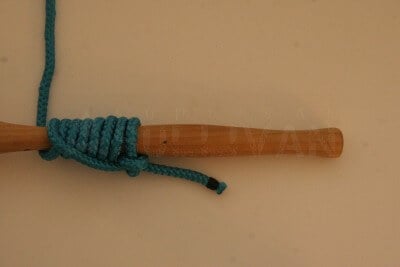
Step 12. Continue following the turns. Bring the working end up under the pole / line again:
Step 13. Repeat the follow and tuck process above:
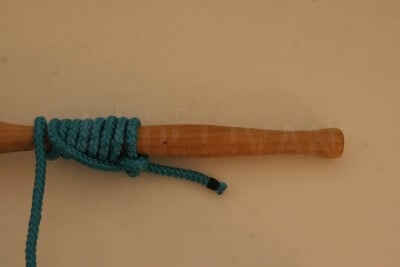
Step 14. Repeat, following the turn:
Step 15. Tuck the working end through the standing end as you follow the last turn:
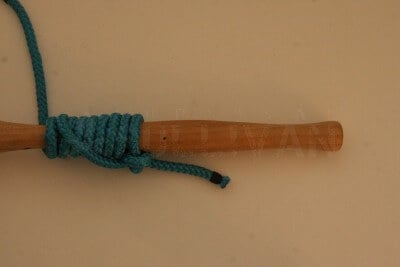
Step 16. Continuing in the same direction, bring the working end up under the pole again:
Step 17. Bring the working end down over the pole, forming another turn, now outside the standing end:
Step 18. Bring the working end up again under the pole:
Step 19. And down again over the pole.
Step 20. Bring the working end up under the pole for the final time:
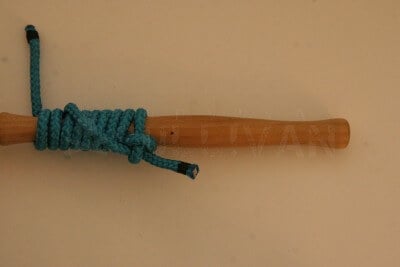
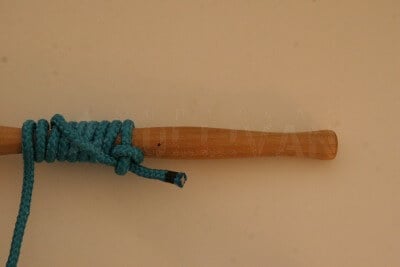
Step 21. The working end is going to be tucked through the last three turns. (one of which was under standing end). The black line indicates where the working end will go:
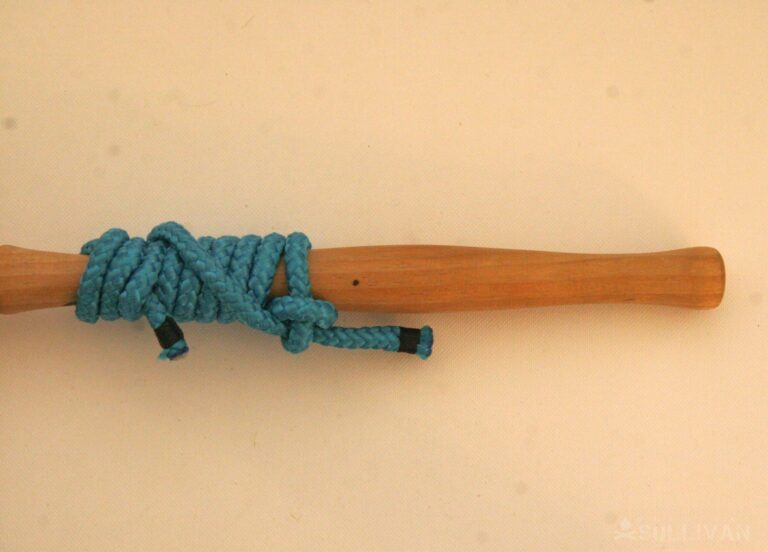
Step 22. Tuck the working end. Pull on the standing end (at the right in this picture) to tighten the knot. It may elongate slightly, but not much. The back turn leftmost in this picture) should not move:
Additional Information
- The ‘Death’ Gripper Hitch was invented by Warren Messer for situations where the Icicle Hitch will slip (and to correct the problem of the loose working end). You can read the full story from page 29 onwards here.
- By pushing against the hitch from one end, you can slide it up and down whatever it is tied around, but it will hold tight when pulled. This makes it very versatile.
- Independent testing by Practical Sailor concluded that the Hitch was the best slide-and grip knot in terms of security, but was difficult to learn and remember how to tie.
Related Knots
- The Icicle Hitch is a slightly less secure variation on a similar theme, though it only has wraps in one direction so is less secure, especially after being agitated.
- The Rolling Hitch is commonly thought of as the best slide and grip knot, but actually performs very poorly in modern lines and materials and is best avoided when such good alternatives are available.
Wrap-Up (Pun Intended)
The ‘Death’ Gripper Knot is a brilliant slide and grip knot and well worth the time to learn. Understanding how it works and what makes it so strong will also make it easier to understand how to tie what and when (it is good for learning ‘string literacy’).
Nick O’Law has been exposed to survival from a very young age. In his teenage years, he learned A LOT about bushcrafting, such as making snares and traps, and even how to make DIY knives.
If you haven’t ye read and tried his knot-making articles on Survival Sullivan, you should definitely check them out.