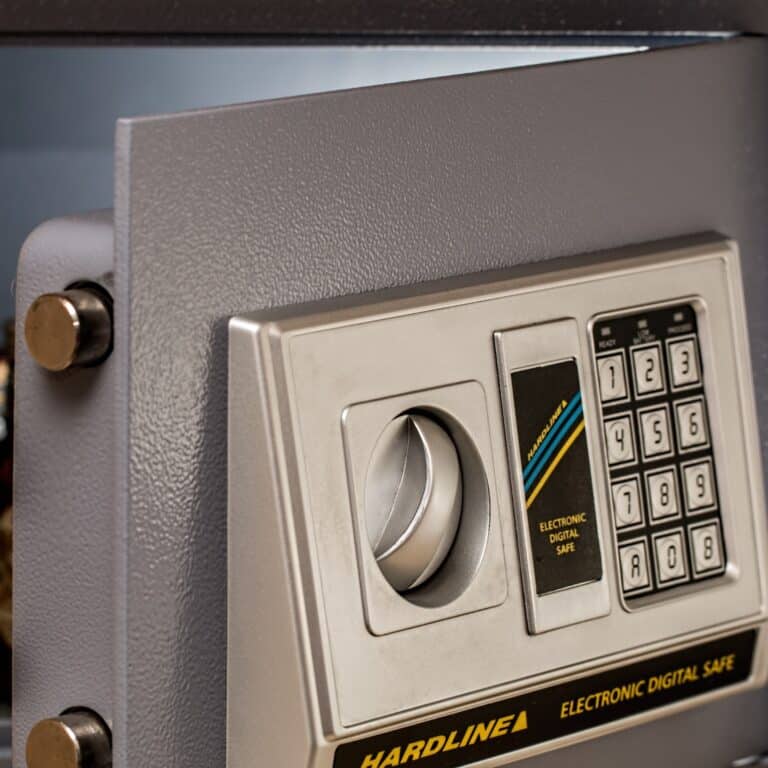
You probably don’t need me to tell you that it’s critical to have a safe to protect your valuables. Whether you’re storing guns, jewelry, electronics or anything else, a safe is generally the final line of defense in an asset protection plan.
But the bad news is, no matter how big and heavy you think you’re safe is, there’s a good chance that serious thieves can just cart it off if they have time and opportunity. No joke!
While there are other ways to secure your safe, the only way to maximize the protection that your safe can provide your valuables is to securely bolt it down.
But when we’re talking about drilling into the frame or concrete slab supporting our home, we’re officially dealing with serious business.
Don’t omit this critical step; keep reading and I’ll tell you everything you need to know about bolting your safe down the right way.
Table of Contents
Do You Really Need to Bolt Down a Safe?
Yes, you really do. Specifically, if you are dealing with anything that can properly be called a large safe, like a typical gun safe that weighs 400 pounds (or even a lot more) it is critical that you bolt it down if you want it to provide you with real security.
I know that if you’ve ever handled one of these safes, you probably think it impossible that thieves could just grab it and take off with it, but I’m here to tell you that is exactly what happens, and more often than you might think.
Teams of thieves, especially ones who have cased your property and know you aren’t going to be around for a long time, will usually bring or steal power tools.
Those power tools in conjunction with pry bars and large furniture dollies can roll your safe right out of your home and into a waiting truck or van to be carted off and broken into at leisure. Not cool!
And while bolting your safe down doesn’t guarantee that this won’t happen, it is a serious impediment for even the most determined thieves.
Remember: anything that you can do to make their job harder, noisier, and take longer is to your advantage when it comes to keeping your stuff.
Warning: If You Have Any Doubts, Call the Pros!
Before we go any further, I’m begging you, if you have any doubts about moving, placing or securing your safe to just call a professional safe retailer or installer for help.
There’s a lot that can go wrong with this operation, especially if you’re dealing with a truly massive safe that weighs close to a thousand pounds.
You’re going to be drilling into the frame of your home, or the concrete pad that it sits on, and this can be a structural problem if you mess it up… to say nothing of the risks of severing wires, pipes and other infrastructure!
The stage is set for disaster if you botch the operation, so take time to assess the situation in totality and give yourself a gut check. If you’re still up to the task, keep reading.
Picking the Right Location
Before you get down to business of actually bolting your safe down, you’ve got to be sure that you have found a suitable, semi-permanent home for it.
Moving a large safe is always a pain, but moving one that’s bolted down is a major one. Consider the following:
Can the Floor Handle the Load?
The number one consideration for any very large safe. This is doubly important if you’re putting the safe on any upper floor.
Especially for the largest safes, there’s a non-zero chance that it can weaken and eventually collapse the floor it is on, with catastrophic results for your structure and for anything unfortunate enough to be under the safe.
This isn’t something you can afford to get wrong! Consult the blueprints of your home and an architect or engineer if necessary.
Do not trust your own calculations or the minimum load rating prescribed by local and state building codes.
Do You Have Suitable Anchor Points?
If you’re going to get anything from anchoring your safe, the anchor points must be up to the task.
Securing your safe to a wooden subfloor is not actually securing it at all. Screwing it into drywall is a joke.
You must be able to position your safe so that the bolts can go directly into wooden framing members of the floor, wall or both, or directly into concrete. Nothing else is even worthwhile.
Wall / Floor Clear of Wires, Pipes, etc.?
Anyone who has ever done any drilling on the walls or floor of their home has probably had cause to worry about this, or else learn the hard way.
The location where you want to place your safe must not only be suitable for anchoring to, but also be clear of critical wiring, pipes, and any other obstacles behind the wall that can lead to disaster if cut or pierced.
You have to know for sure, and if you don’t, you need to inspect before you begin.
Is Location Environmentally Suitable for Safe and Contents?
Running down all of these prerequisites is going to narrow down your list of locations significantly.
For many safe owners that have a basement, the basement is probably where it is headed at the end of the day, or perhaps out in the garage to simplify things.
Keep in mind these environments tend to be damp, as is the case of a garage or other outbuilding subjected to significant temperature swings.
This can drastically impact the contents of your safe, particularly things that are vulnerable to moisture like electronics and papers.
You Cannot Secure Your Safe to Subfloor or Drywall Alone!
This is a reminder for everyone who skipped the list above: you absolutely, positively, cannot secure your safe to wooden subfloor or drywall alone!
Yes, it is possible to get screws into either, but it doesn’t give you any pull-out protection! A pry bar or wrecking bar will have your safe dislodged and ready to move with hardly any effort.
Don’t waste your time, or get lulled into a false sense of security!
Does Your Safe Have Pre-Drilled Holes for Anchoring?
Next thing you need to do is figure out whether or not your safe has pre-drilled holes in the bottom and on the back for this specific purpose.
Most large safes will definitely have them in the bottom, and some will have them in both locations.
Keep in mind that your safe might have them concealed behind racks, shelving, carpeting, insulation and so forth.
If the safe does not have anchor holes pre-drilled, and you still want to anchor it, you’re going to have to drill it yourself and this can be easier said than done.
Obviously, you’ll need a powerful drill and high-quality drill bits in order to get through this much steel.
If your safe is fireproof, there’s also the concern of compromising the safe’s insulation or sealing.
Check the manual that came with your safe (if you have it) for details on how to accomplish this, or contact the manufacturer.
You might need to prove that you are the owner of the safe, but they should be able to give you technical information to help you.
Assuming your safe has holes or you get them successfully drilled, proceed.
Mark Your Drill Points or Use a Template
Now to get on to the work of actually getting set to drill. You want to mark the holes where you were going to drill into the floor, wall, or both using the holes in the safe as a guide, or by creating a template.
Note that some safes come with a template precisely for this purpose, so if you still have the box for your safe check there.
Remember to be as precise as you can, and pre-check the size of the holes in your safe so you can make corresponding marks based on the size of fastener you’ll be using.
Are You Anchoring to Wood Framing or Concrete?
Okay, time for the real work. First, are you anchoring your safe to wood framing, or directly to concrete? Go to the appropriate section below, because though the methodologies are similar they are not interchangeable!
Steps to Anchoring to Wood
If you’re anchoring to wood framing, you must take care to precisely locate your floor joists and studs in the wall so you can hit them squarely.
You don’t want to accidentally run a bolt at an angle through either one, or just barely catch it so that it feels snug but doesn’t really offer your safe any security.
You’ll need some special tools to accomplish this task, listed below.
You will Need:
- Stud Finder – Useful for locating studs in the wall if you don’t want to probe for them.
- Drill – any dependable corded or cordless drill should be up to this task.
- Drill Bits – appropriately-sized drill bits for the holes in your safe and the size of the fasteners you are going to install. Could be 3/8 to 5/8 inches in size, but others are possible so double-check! Also get a significantly smaller drill bit to make a pilot hole. These bits should be at least 4 inches long, and possibly longer depending on the construction of your walls and floors.
- Lag Bolts – again, sized for the holes in the safe. You want to use lag bolts for strength and maximum resistance against prying and tipping. Choose a length that is dependent on the thickness of your safe and walls or floor.
- Washers – appropriately sized washers for your lag bolts. These go between the head of the bolt and the floor or back wall of your safe.
Step by Step:
1. Mark your holes
As described above, use the safe itself to precisely mark the holes where you will drill.
It might be helpful to snap or scribe guidelines on the wall or floor so you stay in line with the studs and joists when you are placing the safe itself.
Now is the time to perform the final alignment check before you start drilling.
2. Drill pilot hole
Taking care to stay square with the stud or joist, drill a pilot hole. This will make it much easier to stay centered when drilling the larger hole for your lag bolt, and ensure a cleaner job.
3. Drill bolt hole
Time to drill the hole for the lag bolts themselves. Remember, the drill bit you use for this operation should be slightly smaller than the diameter of the bolts themselves.
Remember to take care to stay square with the surface you are drilling in, but if you drilled your pilot hole correctly this should be easy.
4. Repeat Steps 2 and 3
For each hole location.
5. Position safe
Get your safe in position, and verify that every hole you drilled lines up with the holes in your safe.
6. Insert and tighten lag bolts
Placing a washer on each bolt, insert them into the holes in the safe and then tighten them down using a wrench or ratchet.
That’s it, you’re safe is now significantly more secure than it would be freestanding.
Bolting down you’re safe to wooden joists or studs is not ideal, but it is definitely worthwhile and will provide a significant increase in security.
Steps for Anchoring to Concrete
Anchoring your safe to concrete is the ideal, but there are a few caveats to this method.
First, and most importantly, you do not want to penetrate the slab that you are drilling into, either with your hammer drill or with the fasteners.
This can compromise the integrity of the slab, and in the case of a basement installation, it will promote water entering your basement. Not good!
Second, you should never, ever drill into post-tensioned concrete if you cannot reliably locate the cables.
If your slab was post-tensioned, it’s probably stamped or embossed with a marking that says accordingly, so be sure to double-check for it, and if you have any doubts, consult a trustworthy engineer.
With that out of the way, gather the following materials.
You’ll Need:
- Hammer Drill – a common drill is not going to cut it, literally, for drilling into concrete. You’ll need a hammer drill.
- Hammer Drill Bit – especially designed bit for use with a hammer drill, and specifically for drilling into concrete. Make sure you get one that is just a tad wider than the next item on this list, the threaded rod.
- Threaded Rod – threaded rod is basically like a bolt with no head to turn. You’ll be supplying the nuts to anchor the safe to the floor using the rod. Get about 3 feet if you’re installing your safe using four holes in the bottom. More if you have more holes.
- Nuts – high-grade nuts that are appropriately-sized to thread onto the threaded rod. You’ll need one for each hole.
- Washers – washers that are appropriately sized for the threaded rod. You’ll also need one for each hole.
- Angle Grinder or Hacksaw – you’ll use this to cut the threaded rod to size. You can use a Dremel tool or any other rotary tool with a cutoff wheel as an alternate option.
- Concrete Epoxy – you use this to secure the threaded rod in the holes you drill in the concrete.
- Epoxy Applicator (If Needed) – if your concrete epoxy doesn’t come with an applicator that has a self-mixing tip, make sure you get a syringe-style injector so you can appropriately fill up the holes with epoxy after mixing it. Pouring it in is just not going to work well.
- Shop-Vac – it is critically important that the holes you drill be thoroughly cleaned of dust and debris for the epoxy to bond correctly. A Shop-Vac will make short work of this.
That’s all you need for supplies and tools, time to get cracking.
Step by Step:
1. Mark your holes
Use the holes in the safe as a guide, or use the template you created earlier.
You can use a pencil, grease pen or anything else that will leave an obvious mark on the concrete you can reference.
2. Measure rod
You need to do a little figuring here. You want your threaded rod to be embedded at least 4 inches in the concrete, and deeper is better, but remember what I said earlier about not penetrating the slab.
You’ll also need about 1 inch of threaded rod sticking up through the holes in your safe when it is in place. Take the time to figure all of this out before you drill.
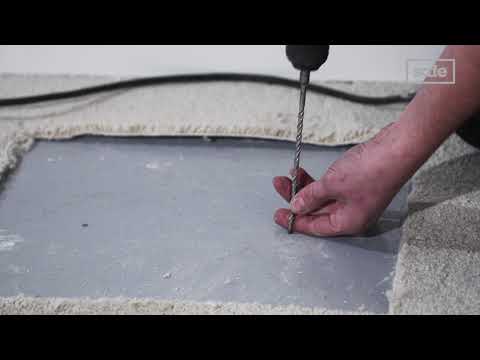
3. Drill holes
Make sure you wear eye and ear protection when running this hammer drill; they make a heck of a racket especially when going through concrete.
Drill your holes to the prescribed depth. You can measure the length on the drill bit and mark it with a piece of tape to use as an easy-to-reference depth gauge while you work.
Remember to keep the drill square to the floor as you go.
4. Clean out holes
Using your vacuum, suck all of the dust and debris out of the hole. It must be completely clean and dry or else this will interfere with the epoxy.
5. Check safe placement
Lug your safe back into position. Verify that all of the holes line up. You can use a wooden dowel rod as a placeholder if your threaded rod is too long and cumbersome to insert right now.
Assuming everything lines up, move the safe back out of the way and then move on to the next step.
6. Cut threaded rod
Time to cut your threaded rod to length. You can mark it with a marker or crayon at the lengths you need.
Use your hacksaw, angle grinder, or rotary tool to cut it off and keep them as square as possible. Lightly file or sand any burrs to clean up the edges.
7. Check depth
Assuming you paid attention when drilling your holes, they should all be of uniform depth. Now is not the time to guess.
Insert the threaded rod into the holes dry, and make sure you have enough protrusion that it will clear the holes in your safe. If everything looks good to go, remove the threaded rod.
8. Apply epoxy
If your concrete epoxy comes in a tube type dispenser that’s self mixing, you are ready to apply. If not, follow the package instructions for mixing and then grab your syringe.
Fill up each of the holes you drilled in the concrete with epoxy, not quite halfway.
9. Move safe into position
Muscle your safe into position one more time. Work quickly, and make sure the holes are lined up.
10. Insert threaded rods
Drop your threaded rods into the holes, pressing them all the way down until they are seated. Be prepared to deal with epoxy that might squeeze out.
11. Allow epoxy to cure
Let the epoxy cure according to the recommended time on the package.
12. Place washers and nuts
Put a washer and then a nut on each threaded rod inside your safe. Fully tighten.
And that is it, you’re finished!
Although it’s a significantly more involved process compared to simply bolting your safe into wooden studs or joists, anchoring it to concrete properly with these threaded rods and concrete epoxy will provide massive pull-out strength by comparison.
This is far more secure…
Safe and Secure
By properly bolting your safe down you’ll further improve the security of your assets by making it harder for thieves to simply take off with the safe itself.
It’s a bit of an undertaking, but well worth it. Use the procedures in this guide and you can make short work of the job.

Tom Marlowe practically grew up with a gun in his hand, and has held all kinds of jobs in the gun industry: range safety, sales, instruction and consulting, Tom has the experience to help civilian shooters figure out what will work best for them.