Just about everyone can agree that water is a top priority in any emergency or on a homestead. That’s why it is highly recommended that you stock up on as much water as you can.
So if you have a family of four and are stockpiling for a month (thirty days) for example, you’d need at least one half gallon of drinking, and one half gallon of personal hygiene water, every day for as long as you plan on surviving. That’s 120 of water in total.
While stockpiling water is important, it’s more so for you to have some sort of self-sustaining water source that you can turn to in the event that your stockpile runs out. After all, you never truly know how long a disaster scenario is going to last.
One of the most effective ways that you can have your own self-sustaining water source is to dig a well. Yes, it requires time, effort, and dedication on your part to build one. You may also have to dig your well significantly deeper than most depending on your location.
All of that hard work on your part will be well worth it in the end because there is simply no better way to ensure that you and your family will always have good, clean free water for the long term.
In this article, we will talk about some of the most effective ways to dig a well.
Table of Contents
How Much Does All This Cost?
Unless you get really lucky with a shallow well, you can expect to shell out some money for the installation of a well by professionals.
Even if you do it yourself, the cost of materials and tools will be fairly significant, and this cost grows geometrically the deeper the well goes. The cost of the excavation is also
Below is a list that calculates just some of the costs of installing a well using various methods:
- Average Cost of Professional Well Installation in U.S.: $5,000 to $7,000.
- High-Side Cost of Professional Installation in U.S.: $10,000 to $12,000
- Cost of Power Dug Well: $8-$25 per cu. ft. excavated. (Shallow Wells Only!)
- Cost of Power Drilled Well: $10-$35 per cu. ft. excavated
Equipment Costs for Well (Not Including Professional Installation Costs):
- Pump, shallow or deep: $75 to $1,500.
- Switching and wiring harness: $50 to $200
- Casing Pipe: $500 to $3,000
- Pressure Tank: $1,250 to $2,500
- Purification System: $850 to $3,000 (If required.)
Remember: None of this includes labor, none of this includes any permitting or licensing fees if required, and it doesn’t include the cost of surveying. This is all just the cost of parts and equipment.
But if you want to do the job correctly and give yourself the best possible chance of keeping your well water uncontaminated you want to do the job right. Simply digging a muddy hole in the ground and chugging that filthy water down is a surefire way to get sick or even die.
Considerations Before You Start
Check Local Laws
One of the most important tips that you can follow when digging your own well is to make sure that it’s legal.
There’s no universal advice that we can give you here because the laws in regard to building wells vary significantly by state and also by local cities.
For example, in some areas of the country you don’t need any kind of a permit or a license in order to dig or drill your own well, others areas do you require you to have a permit.
Other areas are even more strict and only allow certified contractors to dig wells. Read up on your local and state laws before digging or drilling your well.
Choosing the Right Location
Know What Soil You’re Going to Encounter as You Drill
Finally, the last important tip for you to follow is to keep in mind the different layers of the Earth when you drill.
There are many different layers of soil beneath us and each layer consists of a different kind of material, such as rock, dirt, coal, clay, and sand, for example.
Of these layers, the one with sand is easily going to yield the purest water. The trick, however, is digging deep enough because sandy soil tends to be several layers deep into the Earth.
As you dig, you should start to find water after fifteen to twenty feet. As you dig deeper and begin hitting more layers, each layer is going to yield a different kind of water because each is made out of a different type of mineral.
As we just stated, the best water is found in sandy layers, which are going to be down even deeper.
You can stop digging at that fifteen to twenty-foot mark if you want to, but if you want to hit the purest water in the sandy layers, you’re going to have to be prepared to dig a lot deeper (as in one hundred feet or possibly much more).
That being said, it might be best to consider hiring an expert who will be able to consult with the state geological survey office to find the best aquifer spots on your property, or who test out the specific areas on your property in person.
Even though it costs money to hire one to do this for you, it’s an investment well worth the cost to know for a fact you’re digging in an area where there is water. This also saves you a lot of time.
Plus, a certified expert will be well aware of any state and/or local laws that need to be explicitly followed when digging a well.
Remember that in certain areas of the country, only certified experts are permitted to dig wells in the first place.
Note: one VERY good reason to hire an expert is that, if you’re not careful, you can destroy the aquifer that feeds the spring. An expert would be able to tell you exactly where to dig your well.
Types of Wells
Drilled Wells
Drilling is the installation method of choice when installing a modern, private well. The only downside to drilling is that it requires more specialized equipment than any other method of installation.
Today, a drill rig is hauled or moved around by large and powerful trucks, but primitive drills of various types were moved and assembled by teams of men over the centuries.
Even when it comes to drilling, a variety of methods might be used depending on the substrate where the well is located. Conventional rotary bits will defeat rock; large, screw-shaped augers will get through softer soils; percussion bits will crush the hardest of materials.
Drilling allows installation of the deepest wells, sometimes going more than a thousand feet deep.
Pneumatic Drill
A pneumatic drill is exactly what you’re thinking: a drill rig that is powered by compressed air. This is one of the most versatile and adaptable types of drill rig out there, and also one of the most capable that is feasible for a motivated do-it-yourselfer.
Although they cannot compete with the large, truck-carried drill rigs we’ve discussed above, these compact kits are easily capable of drilling down 200 feet or more if you have the time and the skill to operate them.
They are capable of powering through most types of soil and even some rock with good success, meaning you can go far deeper than you would with other methods and also do so much more quickly, though this will still require days or weeks of physically operating the drill.
If you want to install a well yourself that’s deep enough to supply all of the water your homestead needs, using a pneumatic drill is probably your best option. I’ve provided you with a step-by-step overview of the operation further down in this article.
Driven Wells
Driven wells are another choice for modern installations, and are executed by driving into the ground a small-diameter pipe that serves as the well casing.
This method can only be used in softer substrates such as sand, gravel or certain types of clay, and relies upon a screen at the bottom to filter out any particulates you don’t want to wind up in your water.
Due to the trouble associated with driving any length of pipe through increasingly dense soil (which reaches maximum compression very quickly) driven wells are only used for shallow installations.
As we will learn later, shallow installations are significantly more vulnerable to contamination.
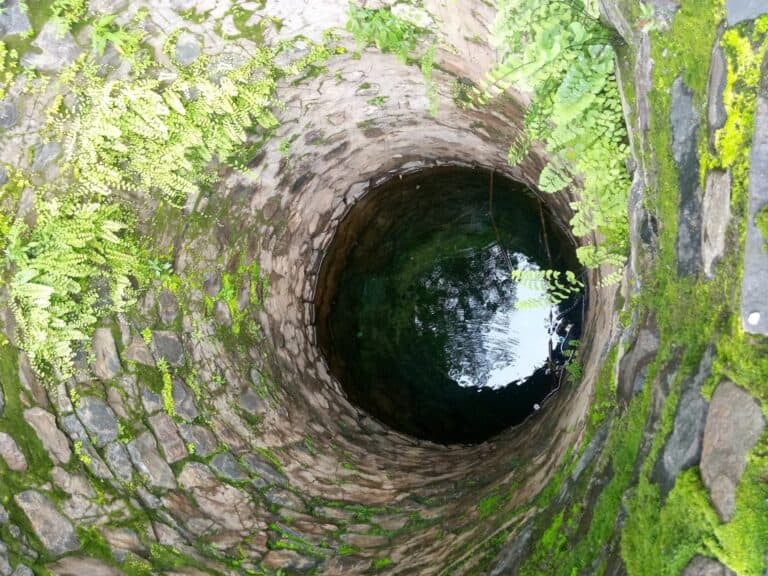
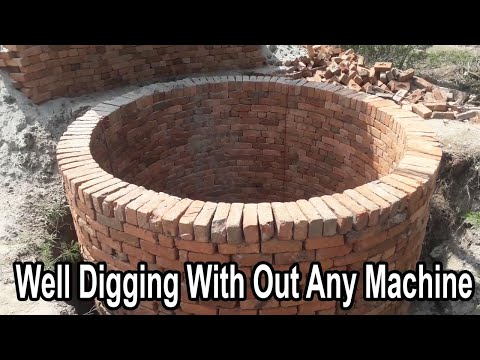
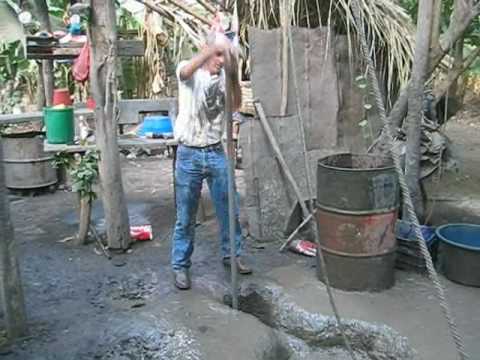
Dug Wells
Now we’re going old school. Dug wells are the oldest kind of well, and are still employed today all around the world. Dug wells rely entirely on human labor with common tools in order to excavate the well hole.
The work is either merely “hard”, but it can potentially be back-breaking depending on how tough the soil is.
Once the water table is reached and a satisfactory fill rate is determined, the digging stops, and the well casing is installed from the water table up to the well curb.
One obvious drawback to dug wells is that they are typically shallow and more vulnerable to contamination than other kinds of wells and can only go as deep as the water table itself and no deeper; human beings cannot dig a hole any deeper than the point where it fills in with water!
The majority of wells that are built today are drilled. This will involve a drilling rig, similar to the one that is used for digging for oil.
The advantage of drilling a well is that it will run very deep into the Earth, as in hundreds of feet deep. As a result, drilled wells are capable of not only sucking up more water, but more clean water as well.
The disadvantage to drilling a well has to do with price. You can plan on spending literally over five thousand dollars in total…
You’ll get cleaner water, yes, but it comes at a price. If five thousand is too much to spend, the alternative is to do it on your own.
This is where you dig a hole below water level to allow the water to fill up the hole. People have been digging wells like this for many millennia and still do in certain places in the world.
You can either dig a well either with a shovel, or you can use power tools and drilling equipment.
Regardless, dug wells are not going to be as deep as a drilled well and the water will likely not be as clean. But there are techniques that you can use to increase the chances of the water being as pure as possible.
By lining the top part of the water well with impermeable substances such as bricks or concrete, you lower the risk of your well being contaminated.
Shallow vs. Deep Wells
Determining whether the well should be shallow or deep is not just a matter of figuring out how far you have to go to strike water, although that is part of it.
Shallow and deep wells differ fundamentally in where they source their water from, as well as what challenges are present in keeping that water drinkable or otherwise usable.
| Feature | Shallow Well | Deep Well |
|---|---|---|
| depth | under 50 feet / 15 meters | over 50 feet / 15 meters |
| water quality | ❌ more likely to have bacteria | ✅ less likely to be infested / purer |
| cost | ✅ cheaper | ❌ more expensive |
| pumping | ✅ manual pump or electrical ones that are not very powerful | ❌ need powerful electrical pumps |
| maintenance | ✅ less maintenance | ❌ more maintenance |
| yield | ❌ lower yield | ✅ higher yield |
| water source | ❌ shallow groundwater | ❌ deep ground water or aquifers |
| probability to dry out in arid climates | ❌ higher | ✅ lower |
| mineral content | ✅ low | ❌ high |
Shallow wells are any well that is 50 ft. (15 meters) deep or less, with the bottom residing above the first impervious layer of soil strata.
The mineral content of the water source from a shallow well is typically low, meaning the water will rarely need any softening treatment, but there is a higher incidence of bacterial and viral contamination in water sourced from a shallow well.
Shallow wells are significantly more vulnerable to contamination by other groundwater, chemical spills, and other mishaps that can all leach through the soil to the well water itself.
Even worse, and a potentially major setback for people living in more arid climates, shallow wells can lose water or even dry up completely in the hot seasons or whenever the water table drops. Your well that you are completely dependent on for water might betray you if it is a shallow well.
Contrast this with deep wells, classed as any well that goes deeper than 50ft., but typically a couple of hundred feet and sometimes even over a thousand feet!
These wells are almost always below the first impervious layer soil strata and the water sourced from them is usually full of mineral impurities meaning the water hardness rating is ‘hard’ to ‘very hard’. Many sources will require softening to make the water usable.
On the other hand, deep wells do have some significant advantages, namely that the water they source is often safer and purer than a shallow well, discounting the mineral contamination.
You’ll be less in the way of bacteria, viruses, and other assorted nasty bugs to contaminate it. Additionally, deep wells will very rarely if ever run dry or otherwise run out of water, especially when compared to shallow wells.
Sometimes you can only get away with a shallow well, where other times only a deep well is viable. Occasionally you might be able to use one or the other, or even both.
Remember that there are two main ways to do it: digging and drilling. Is it possible to dig a well a hundred feet deep with nothing more than a shovel? Yes, but it’s going to take a lot of time and exertion on your part.
That’s why drilling a deep well is going to be your best bet for reaching the purest water. Even though it’s infinitely more expensive, drilling a well will not get you just hundreds of feet into the Earth but thousands of feet.
Well Components
There are quite a few variations in design and operation when it comes to private, residential wells, but they all operate more or less on the same principle, and indeed have many of the same components.
Take a look at the list below to learn the most common definitions of well nomenclature.
Well Hole – What might be called the well itself, this is the hole that is excavated or otherwise created in the earth that creates a path to the water contained in the soil.
Well Casing– The well casing is a constructed or prefabricated structure that is placed in the well hole and goes all the way from the water source up to the surface. This gives a well structure, and prevents it from collapsing.
Whatever the well casing is made from, its purpose is to keep out dirt and potentially contaminated groundwater from the water source that the well is drawing from. The most common modern materials used for well casings are metal or plastic.
Steining – The steining is the wall of the well above the ground, typically built over a base portion called the well curb.
A steining might be constructed in place, or might be designed prefabricated so it can be sunk under its own weight. A steining must be thick enough to hold up the weight of material or well cap above it.
Well Curb – A protective rim or other structure around the opening of the well hole in the surface of the ground.
This keeps things from falling into the well, including people and animals, and also provides the foundation for mounting a covering or mechanism for the raising and lowering of a water retrieval device.
Well Cap – A well cap is any protective cover placed atop the uppermost opening in the well as intended to prevent dirt, debris and insects from entering the opening. This prevents contamination as well as accidents.
Well Screen – A well screen is a crucial component for any modern well, and attaches near the bottom of the well casing in order to prevent the intake how many larger debris like rocks, gravel, sediment, insects, or small animals into the water drawn from the well.
Modern variations are typically made from metal or plastic, and designs can range from intricate to simple.
Pump – It is rare to find a modern well without a pump of some kind. The type of pump used will depend on the type of well and its placement, but the two most common are the jet and submersible types.
Jet pumps are typically employed for shallow wells and mounted above ground, relying on suction to pull water out of the well.
Submersible pumps can be used for deep wells, and are lowered into the well casing until they contact the water source where they push it up through a supply pipe.
Vessel – All kinds of vessels have been used in primitive wells for the retrieval of water; the one that is most commonly imagined being a bucket and rope on a pulley or even employed free hand. Other options include leather waterskins, ladles and similar.
Compared to pumps, using any kind of water-drawing vessel introduces significantly more chances of contamination, especially from microorganisms. Nonetheless, they might still be required in austere conditions.
Now that you generally know what you are looking at when examining the diagrams or plans for any kind of well, it is time to move on to well design itself, as well as whether or not a well is considered shallow or deep.
Hand Digging Methods
Now that we’ve learned about the different methods for constructing a well and some important tips to follow to yield you the best (and safest) results, let’s learn about the steps to follow to actually dig a well.
A majority of wells that are dug for off-the-grid purposes are at least two hundred feet deep and are constructed using some type of drilling equipment and power tools.
A well that is two hundred feet deep will provide you with more than enough water for irrigation purposes, and to allow any livestock you have to get enough water as well.
No matter how you want to dig a well by hand, it is going to be grueling work, and probably the work of many long days or even weeks depending on how deep you need to go and how tough the soil is.
The good news is, people have been digging wells using nothing but hand tools for centuries, and that means you can do it too with a little bit of grit and some sweat equity.
Just because you are forced or prefer to dig a well by hand does not mean you need to go willy-nilly with hand tools, however. There are some people-powered methods that could present huge gains in efficiency and save you a bunch of time and pain. We’ll talk about several of them below.
Hand-Dig
This as you are probably expecting is the simplest, most laborious, and often the most time-consuming hand-digging method. Tools commonly utilized for the task are shovels, buckets, picks, mattocks, and adzes.
Anybody who can swing a tool with basic coordination can dig a well using this method. When you have plenty of labor but little in the way of material or skill, this might be your best choice.
Unfortunately, hand-digging a traditional well means the well hole itself must be wider in order to accommodate the worker or workers, and that means that the well water itself is easier to contaminate even though the well produces more water compared to a smaller well hole.
Additional hazards include the risk of cave-ins for those working below. It is rare that a hand-dug well will ever go deeper than 50 feet, though some have been recorded nearly a hundred feet deep or more…
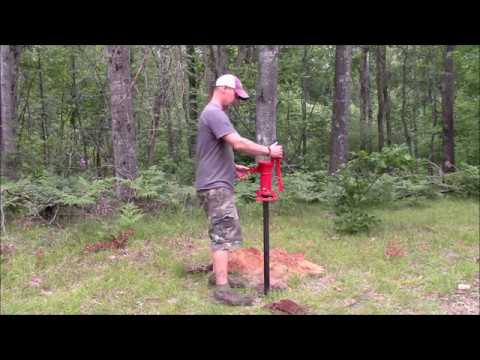
Sand Pointing
Sometimes referred to as drive pointing. This is a comparatively simple method of manual well installation where a sharpened metal point at the end of a perforated pipe is driven into the ground using a sledgehammer or a maul.
This is a true one-man capable installation that can be completed in as little as a couple of hours. This is an ideal installation method for shallow wells.
As you might be expecting, there is no free lunch and there are quite a few drawbacks with the sand-pointing method.
First, as the name suggests, it is only effective in sand or very loose soil where you can expect to find the water table comparatively near the surface. Near a river or a large lake, this method works well.
But rest assured, once again because soil reaches maximum compression quickly, after you get about 15 feet down it is going to be extremely hard going even with a large hammer.
Perhaps most troubling, it is very difficult to effectively seal a sand point well adequately meaning that contamination will always be a concern.
Sludging
Sludging is an interesting and ancient method of installing a well that relies on a combination of teamwork and simple physics. A rudimentary gantry is erected by which an open-topped pipe is rigged up to be lowered and raised via a lever.
The well site is a hole that is already full of water. Working in teams, the cutting pipe is lowered forcefully into the well hole where it will begin to cut into the soil.
Then another person on the crew will cover the hole in the top of the pipe at the very top of the upstroke, right before the pipe starts to plunge down again, the person covering the hole removes their hand allowing the excavated soil and water (sludge) to flow out of the top.
This method is adaptable for shallow wells or deep wells, and the needed materials can be fashioned from almost anything, even bamboo.
This makes it a viable method for installing a deep well even in austere conditions, but it is extremely tiring and works best with large teams of people able to contribute.
It is also only workable in soft soils with perhaps clay being the hardest substrate that is capable of being penetrated. Also, like sand pointing, it is difficult to install an effective sanitary seal.
Impact Drilling
The most advanced of the ancient well installation techniques, impact drilling, also called percussion drilling, consists of repeatedly lifting and dropping a heavy, cutting, drill head that is attached to a cord or flexible rod.
This is best employed by teams of people. It is hard work, but gravity takes care of all the impact, saving effort. The biggest advantage of impact drilling as it is the only method capable of reliably penetrating rock and the hardest soils.
Disadvantages of this method include its complexity compared to the others and greater reliance on specific materials and construction techniques to employ.
It is also only truly viable when you have a coordinated team of people to help you. On the other hand, it creates a nice, clean well hole that is easy to seal and can reach quite deeply for a manual well, in excess of 150 ft.
Manual Auger
This specialized manual drilling method is easy to execute but requires a purpose-specific hand drilling auger. This device looks like a bucket with the bottom cutaway with the lower rim lined by cutting teeth.
This auger head is attached to the bottom of a rod that runs up to the surface to the crew, who turn it using an attached t-shaped handle.
As the crew pushes in unison and turns the auger around and around, the head will eventually fill up with cuttings. It is then hauled to the surface and dumped before being inserted into the well hole for more drilling.
This is a fast and efficient way of installing a shallow well, but it does not deal with hard soil or rock at all, and becomes exceedingly difficult the deeper you go, meaning you will rarely be able to employ this method for installing a deep well.
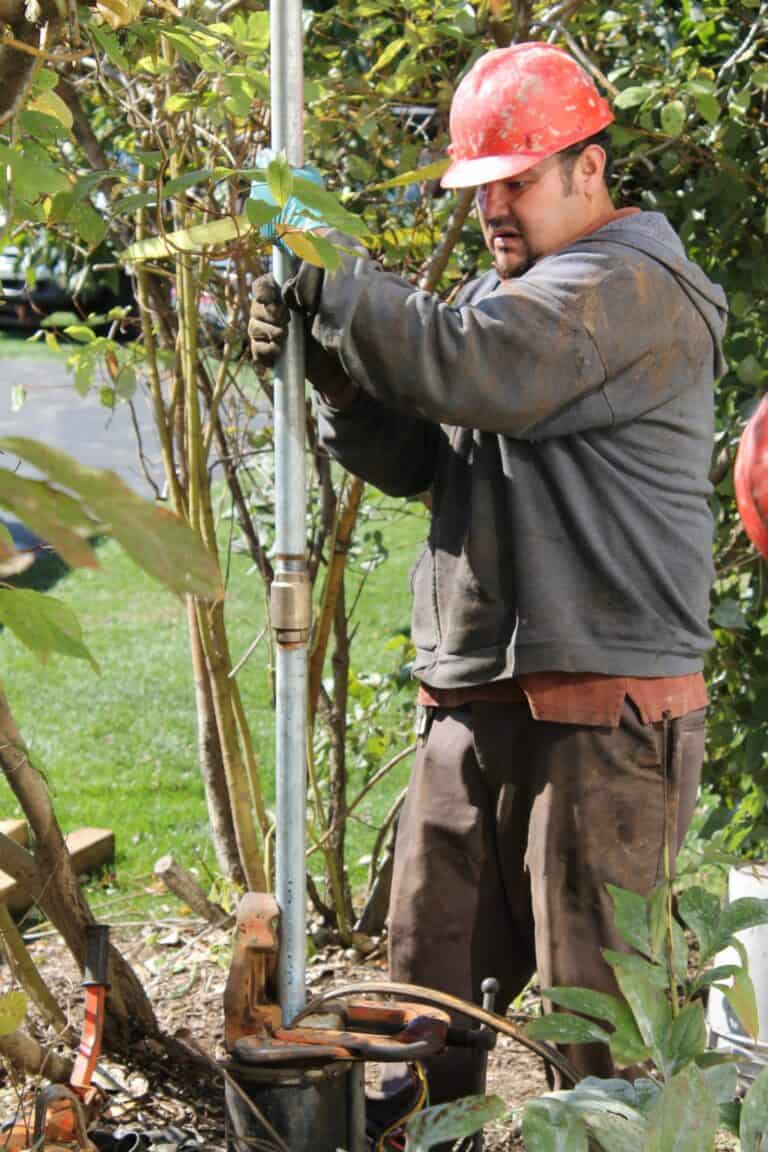
Steps To Digging a Well With a Pneumatic Drill
Materials and Tools
Although the installation of a well through the use of a pneumatic drill rig is fairly straightforward, there are still many tools and components you will need. They are listed, along with a description, below:
- Pneumatic Drill Rig, this is the drill itself and all of its associated components. Consists of a shaft, connections for the compressor and of course a drill head that looks a little bit like an auger, or sometimes a bent propeller.
- Air compressor, you’ll need a powerful and reliable air compressor to run the drill and make this operation work. This directly powers the drill, and it must be reliable to prevent malfunction and the subsequent stalling of work. Choose from gasoline, diesel, propane, and electric depending on your property and the logistical situation you are facing. If electric is feasible, choose that.
- Pneumatic Air Hose, 200+ ft, w/ appropriate connections for compressor and rig, used to connect and supply highly compressed air to drive the drill head.
- Inline Pneumatic Oiler, used to lubricate pneumatically powered tools. You must include this device or else expect catastrophic failure! Unlubed tools will seize and break!
- Pneumatic Tool Lubricant, used with the oiler to keep all of the moving parts of your pneumatic tools, in this case the drill, lubricated so they don’t seize.
- Generator (if required), if your air compressor isn’t electric and requires external power, you’ll need a generator. Make sure you have lots and lots of fuel on hand because you were going to need it before this operation is over.
- 55 Gallon Drum or Plastic Trash Can, this is your catchment drum that will collect water expelled from the well hole during the drilling procedure. It contains the sediment brought up with the water while the water itself will be recycled back into the hole.
- Stakes or Hoops (for drum), used to keep the drum secured in place.
- 150+ ft, PVC Pipe, Sched. 40, 1”D, this is the PVC pipe that you connect to the drill itself, and is the pipe that carries slurry back to the surface out of the well hole. Note that you’ll need about as much of this pipe as you expect your well will be deep.
- 20+ ft. PVC Pipe, 2″D, this slightly larger PVC pipe is used to allow water to flow from your catchment pond and drum back into the well hole.
- 5+ ft. PVC Pipe, 8″D, this PVC pipe is used to prevent the well hole from collapsing during initial digging. Essential for soft soils, if you have very hard or sturdy soil you might not need this, but I recommend you have it on hand.
- 150+ ft. SDR Pipe, Sched. 20, 4”D, this pipe will form the well casing itself once you are finished drilling and ready to install the pump. Again, you will need as much of this pipe as you expect your well will be deep.
- PVC Primer and Cement, for making solid, secure and waterproof connections on all PVC pipes you’ll need a PVC primer and cement.
- 200+ ft. of sturdy rope, you’ll need plenty of rope to lower equipment into the well hole once it becomes deep enough, and you can also use it to probe for the presence of water
- Hacksaw, used to quickly and easily cut PVC without the benefit of power tools.
- Measuring Tape, use of a measuring tape should be obvious for this project.
- Duct Tape, used to further seal pipe connections, secure rope and hose so they stay out of the way and more.
- Small Gravel, 800+ pounds, used in conjunction with concrete to permanently secure your well casing in place.
- Concrete Mix, 100+ pounds, used in conjunction with gravel to permanently secure your well casing in place.
- Marker/Pencil, used for making quick notes and also, most importantly, making hash marks on the PVC pipe connected to the drill so you can easily tell about how deep your well is at a glance.
Steps
The following steps will tell you how to drill your very own well using a pneumatic drill rig. Take the time to read over each and every step carefully before you begin, and if any of this sounds out of your depth, consult a professional driller.
Step 1: Assess Site
You must assess your sight for suitability before you begin. All potential sources of contamination should be downslope from your well, and consider having a geological survey done to determine the presence and depth of water and also what sort of soil you’ll be dealing with.
Step 2: Prepare Site for Work
Clear the area so you have enough room to work around the well hole and also so you can move equipment in. Now is the time to determine whether or not running extension cords out to your well site is feasible or not.
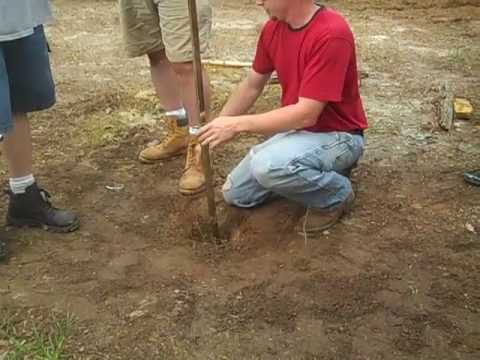
Step 3: Start Well Hole
Start your well hole using a manual or powered auger, or just a set of posthole diggers. Aim for a depth of about 4 feet to begin, and a diameter of 8” or a tiny bit wider.
Step 4: Setup Drill Rig
Gather and assemble all parts of your drill rig. Double-check everything for wear, tear, damage and defects. If you are not already familiar with the operation of the drill, now is the time to familiarize yourself with all the components before you put it down in the well hole.
Step 5: Prepare Shaft Pipe
Take about a 5 foot section of that 8″ diameter PVC pipe and insert it into the well hole, leaving anywhere from about 6 inches to 1 foot above ground. This will help keep the soil at the surface from collapsing on top of your drill as you work. This might not be necessary if you have very hard soil as described above.
Step 6: Dig Settling Pond
Time to dig the settling pond. Anywhere from 4 to 10 feet away from the opening of the well hole, and preferably slightly uphill from it, dig a trench or small pond that is about 4 feet in diameter and at least a foot deep.
From this pond, dig a small trench several inches wide and deep connecting the pond to the opening of the well. Use the 2-in diameter PVC pipe to allow water to flow from the settling pond to the well hole opening.
Step 7: Place Catchment Drum
On the side of the settling pond farthest from the well hole, place the catchment drum. The opening of the drum should be slightly over the edge of the pond.
The drum should be angled up slightly to allow sediment to settle in the bottom, while at the same time allowing water to overflow into the pond. Secure with stakes so it doesn’t blow around from water or wind.
Step 8: Route Water Pipe from Drill to Catchment Drum
Connect the 1” diameter PVC pipe to the pneumatic drill according to the specifications for your drill kit. Always use PVC glue and primer to make connections, and once the connections are set duct tape them to prevent leaks. Make sure that the pipe is totally dry before you duct tape it for a good seal.
The far end of your PVC pipe that is above ground should be inside the catchment drum to collect water expelled from the well hole during drilling.
Step 9: Connect Air Compressor to Drill Rig
Check the functionality of your air compressor, add lubricant, and then connect it to the pneumatic drill using the appropriate connections. Be sure that you do not damage the air hose before or during work and use tape as necessary to manage it while you drill.
Step 10: Double-check All Connections
You’re almost ready to start drilling. Take the time to inspect all connections- for PVC pipe, electrical power and air hose- to ensure they are securely fastened and there are no leaks. A loss of air pressure, for any reason, during drilling will result in you having to retrieve the drill and flush the motor before you begin again.
Step 11: Fill Hole with Water
Don’t drill dry! Fill the existing well hole up with water, fill the settling pond with water and then lower the drill head into the well hole.
Step 12: Start Drilling
Prime and start the drill according to the instructions with your kit. Then, start drilling. You will firmly move the drill head up and down, back and forth and in all directions as you force it lower and lower in the hole.
Even if you are dealing with harder soils, you shouldn’t need to use a ton of force. Let the drill do the work, but know that this will take a long time! When you run out of PVC pipe attached to the drill, halt operations, add more pipe according to the directions above and then begin again.
Step 13: Water Reached!
Once you suspect you have reached water, withdraw the drill and then it only shut it down after it is out of the well hole to prevent a time-consuming cleanout.
Take a piece of dry rope and lower it carefully into the hole until you feel it reach bottom. Withdraw it, and check for the presence of water.
Step 14: Install Well Casing
Use your SDR pipe for the well casing once you have reached water. Use rope to lower the first piece into the well hole, adding additional pieces using PVC primer and cement as it starts to clear the surface. Be sure that you allow the cement to set for the prescribed amount of time before lowering it further.
Leave at least 2 feet of well casing above ground before you cap it off, and try to keep the pipe centered in the hole..
Step 15: Concrete the Well Casing
Now all you need to do is secure the well casing in place. Pour all of your gravel into the hole, between the dirt edge and the casing itself, evenly on all sides. Next, all you need to do is mix up your concrete according to the package instructions and then repeat the process, making sure to evenly add the concrete on all sides.
Step 16: Install Well Pump
You should already have a well pump on hand that is suitable for the anticipated depth of your well and the needs of your property. Install the well pump and hook up according to the directions included.
Step 17: Run Pump Until Well Water is Clear
Your well is installed, now all you need to do is run the pump until it produces clear, pure water. It will definitely come out muddy for at least a day (and probably a couple of days), but this is normal.
Once that’s done, congratulations, your well is complete!
Site Selection
Proper locating is about knowing where to dig and also as importantly where not to dig.
Avoiding the trouble spots is many times easier than figuring out the “good” spots so you can improve your chances of a successful well installation by following the reductive method.

Anything like a marsh, swamp, sewer line, septic tank, in-ground cistern, oil tank, above-ground dump and so forth must be avoided as far as practical, and preferably you well sited no closer than 50ft., and even that is pushing it.
Additional below-ground hazards that you must check to avoid include buried utility and power lines and pipes, as well as any other underground installations.
After you’ve avoided the trouble spots, choosing the correct location to dig is mostly a matter of learning to read the terrain and any geological surveys, then choosing a site that will provide a dig path that presents the least possible resistance to your digging method while affording you the best chance of striking a quality water source.
Construct Your Well Screen
Each slit should at least an inch and a half apart from one another. Mark the slits with a marker before cutting them with a hacksaw.
Select a PVC cap for your well screen that is tight enough to prevent any leakages. To ensure that the cap stays onto the screen, consider sealing with primer and cement.
Simply lower a bailer rod down the length of the pipe and it will fill up with water when it reaches the groundwater. Lift it up, empty it out, and then repeat the process until the water is no longer dirty.
Pump out some water and have it tested to check for quality. Never check the quality of your water by drinking it.


Nick Oetken is a prepper, outdoor enthusiast but, most of all, he is our in-house firearms expert. Look out for his articles on guns to find out which ones you need for your survival.
=Thank you for mentioning that you need a drilling rig in order to get your own well. I have a lot of friends that have been curious about the process but just haven’t known how to go about it. I now know to direct them to the nearest drilling company. Thanks!
I have a we’ll just need a reliable hand pump. Any recommendations?
Why can’t you drill a well in the City.. I DID! a lot easier than DIGGING. I used a Gas Powered Post Hole digger. No you don’t need a drilling rig for drilling your well! You are making simple applications hard. Learn to thrive, not just survive! After you get to the bottom of your well and cannot go further, Set up a DIY well pounder after you put in your 4″ PVC pipe to keep the hole from collapsing.
post hole diggers usually dont go more than 5ft. was that enough? did you use some kind of extension?
Your water stockpiling figures are way off.
Refugee camps often use a 10 gallon, per person, per day, value for water needs. You can for a very short time live on less, say 5 gallons, per person, per day. But you increase your risk of disease and or death.
So 4 people x 10 gallons(a day) is 40 gallons x 30 days is not 120 gallons, but 1,200 gallons!
…or, alternatively, dig out with permits and Ms. utility if approved permits obtained. Concrete and rebar, put in food grade plastic water tanks in metal support cages, covered and locked. Pump in water during good times and store it there for needy times. There of course are issues like permits, size/volume of storage limitations, etc.
I live in Indiana and would like to know if there is anyone close to put in a hand drilled well? I do not require electric, just a hand pump.