So much of society has been built from cement, and that is no exaggeration. Cement is essential for roads, buildings, and countless other structures, and it is so ubiquitous we take it for granted. You can certainly buy the stuff cheap enough, from any hardware store worth the name.
But, have you ever thought about the fact that you might need cement in the aftermath of a major catastrophe? When the time comes to repair and rebuild, you might not be able to run down to the store to get it anymore, and so it’s a good idea to learn how to make your own from scratch.
Believe it or not, it is entirely possible to make several varieties of cement using common natural materials and a little bit of time and know-how. In this article, I’ll tell you how to make true limestone cement and a simpler grass and mud variation called cob.
Table of Contents
Benefits of Structures Built with Cob
- Very Inexpensive
- Sustainable Over Time
- An Activity the Whole Family Can Help With
- Satisfying and Almost Meditative Process
- Fireproof and Virtually Earthquake Resistant
- Energy efficient
- Flexibility in Design
- Healthier because of Natural Materials
- Termite Proof
- Customized and Built by You
Homemade Cement With Limestone
Materials
You won’t need much in the way of raw materials to make cement that is perfect for mortaring bricks and blocks, or for mixing with other ingredients to form concrete.
- Limestone: you need actual, real-deal limestone to make cement. You can buy limestone from many well-equipped garden centers or landscaping centers and put it away for a rainy day, or source your own naturally. Learn how to identify it by sight and texture, but if you aren’t sure you can scratch it with a coin, or pour a little bit of strong vinegar on it- if the rock scratches away or if the vinegar sizzles, you’re probably dealing with limestone.
- Water: you’ll need water to slake the limestone after the heating process if you want to make it suitable for motoring bricks and other blocks. Pure, clean, clear water is best. You’ll usually need three or four parts of water to one part of quick lime, so have enough on hand depending on the size of your project.
- Fuel (for Kiln): to produce cement from our limestone rock, you’ll need to heat it for a long time at a roaring hot temperature. You can use wood for a traditional kiln, propane in a gas-fired one, or anything else. You’ll just need plenty of it to keep the heat coming for at least 4 hours and probably a bit longer.
Tools
You don’t need much in the way of tools to make cement, but you do need some gear to make the process safe. The resulting quicklime is seriously nasty stuff!
- Gloves: to make cement, we must process the limestone into quicklime, a caustic, toxic substance. You’ll also be working with extreme heat, so sturdy gloves are a must.
- Apron: you don’t want to get quicklime or cement on anything you can’t stand to see ruined, so wear an apron. Additionally, this will also protect your torso and legs from incidental splashes or quicklime drifting on the wind.
- Respirator: I just said that quicklime is highly caustic, and as bad as it is for your skin it is 10 times worse for your lungs and mucous membranes. If at all possible, wear a proper respirator while working with this stuff or at the very least cover your mouth and nose with a double layer of cloth.
- Eye Protection: no surprise here, quicklime is hell on your eyes. Protect them!
- Kiln: a kiln or other suitable oven capable of attaining at least 1650°F is essential for processing your limestone into quicklime. This can be a natural kiln made from mud or other materials, or a propane-fired furnace, or anything else.
- Shovel: a shovel is useful for handling the crushed limestone and also for breaking it down into smaller sizes. If you’re making a particularly large batch of cement, it is also invaluable for handling the quick line and sometimes the cement itself.
- Hammer: a sturdy hammer or mallet is invaluable for crushing limestone into small chunks prior to firing it, and also for breaking down the resulting quicklime into powder for mixing into cement.
- Mortar and Pestle (Optional): a large mortar and pestle or similar grinding implement is useful for reducing the pebbles of limestone further down into a powdery consistency. You don’t have to have this, but it can make things a lot easier and quicker, and will greatly improve the consistency and reliability of your cement mixture.
With these tools and materials in hand is time to get down to business.
Instructions
***Wear Personal Protective Equipment at all parts of the process!***
Step 1: Obtain limestone. Assuming you have some limestone already on hand, it’s time to bust it out. Otherwise you’ll need to find some out in the wild. Your best chance for finding it is usually near rivers if you live in a place where it isn’t naturally abundant.
Step 2: Crush limestone. Use your hammer, shovel, or any other tool to start breaking up your chunks of limestone into smaller pieces. Smaller pieces will make the firing process go quicker and more reliably. When you’re finished, all of your limestone pieces should be no larger than 2 inches in diameter. If you can make it smaller, take the time to do so.
Step 3: Preheat kiln. You’re going to need roaring-high temperatures for at least 4 hours and probably closer to 5 or 6 hours. Get that kiln good and hot, and make sure you have plenty of fuel on hand and conveniently nearby to maintain it. If your kiln has temperature control, set it for 1,650 °F (900 °C).
Step 4: Heat limestone pebbles. Place the limestone pebbles you crushed into the kiln and leave them there for at least 4 hours. If you know what you’re killing is somewhat cooler than the prescribed temperature or if your limestone pebbles on the larger side, will probably need 5 to 6 hours.
Step 5: Shut off heat, allow limestone to cool. Your limestone, now baked, is called quicklime. It’s nasty stuff and nastier when it’s red hot, so leave it to completely cool in the kiln.
Step 6: Collect quicklime and crush it. Taking care to protect your hands and while wearing a respirator, start crushing the finished quick line into powder. A mortar and pestle is handy here, but you can use gloved hands or your hammer for the same purpose. A fine, regular consistency is what we are after.
Step 7: Store finished quick lime powder in airtight container. Quick lime will greedily absorb moisture and start a chemical reaction that will create mortar, so you should always store it in an airtight container in a very dry place.
Step 8: Mix quicklime with water to form cement (for simple mortar). With the quicklime powder made, all you need to do to make a simple mortar is mix it with water, around 3 to 4 parts water to one part of quicklime. Pour the water in slowly, mixing continually.
Make sure you wear safety equipment, because it will hiss, sizzle and pop for a time. Once the chemical reaction stops, you are ready to use the resulting slurry as mortar.
And that’s it! Making your own cement, assuming you have a way to fire it, is probably quite a bit simpler than you were imagining and it is very straightforward if you have a propane kiln or furnace. You can use your cement as is for mortar, or mix it in with sand or crushed brick to make concrete.
DIY Survival Cement Recipe (Clay and Grasses)
Step 1. Collect Some Clay
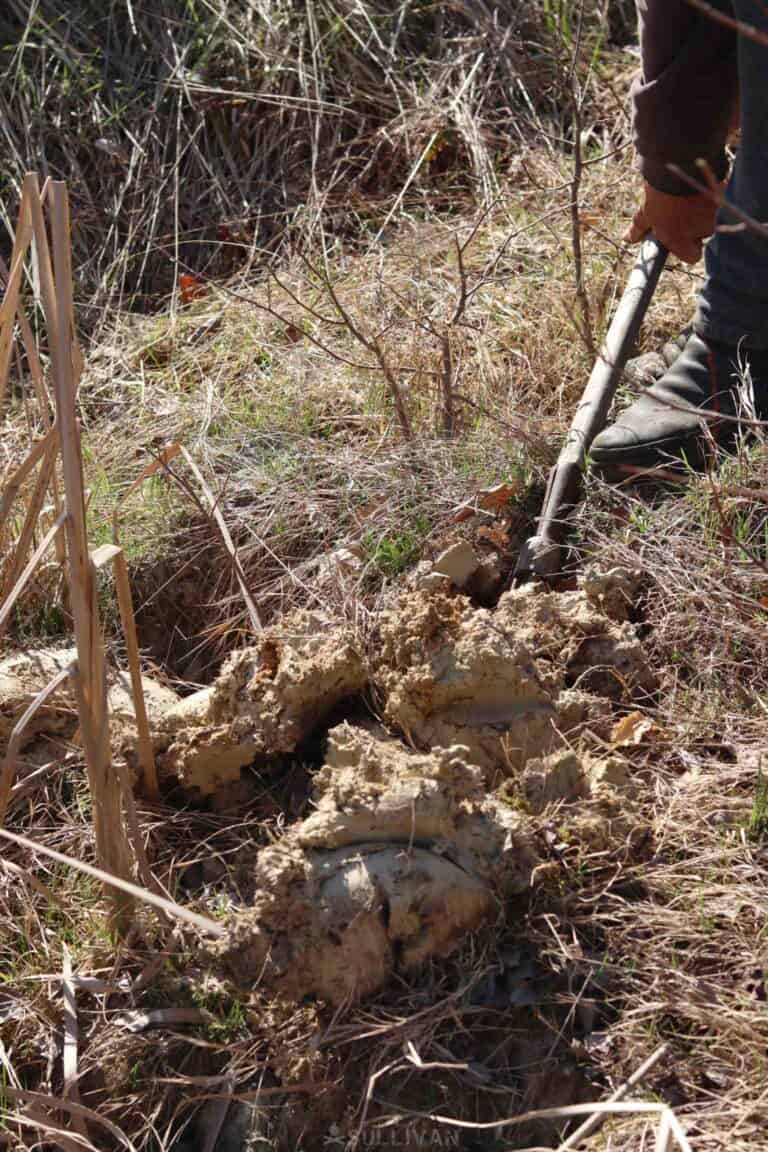
While most types of clay will work, you do want to try to get dirt or mud with more of a clay composition than sand or soil. The best place to find this type of mud or clay is along the edge or bottom of a stream or pond.
Clay is often found on the bank of rivers or any other location where the top layers of soil may have been stripped away. If you must, you can dig down through the topsoil yourself to locate clay.
Dry clay will have a chunkier or crumbled appearance and it may even appear to be small rocks. When clay is wet it looks and acts a lot like mud. Once you find some clay, test it by wetting it slightly and rolling it into a ball in the palm of your hands.
If it sticks together and remains in a ball, it’s clay. Once the clay holds its shape, put a large amount into a bucket or other container and add some water.
Step 2. Harvest Your Grasses
The best thing to use in your survival cement mixture is dry pieces of grass or straw. The correct length is determined by the project that you are attempting.
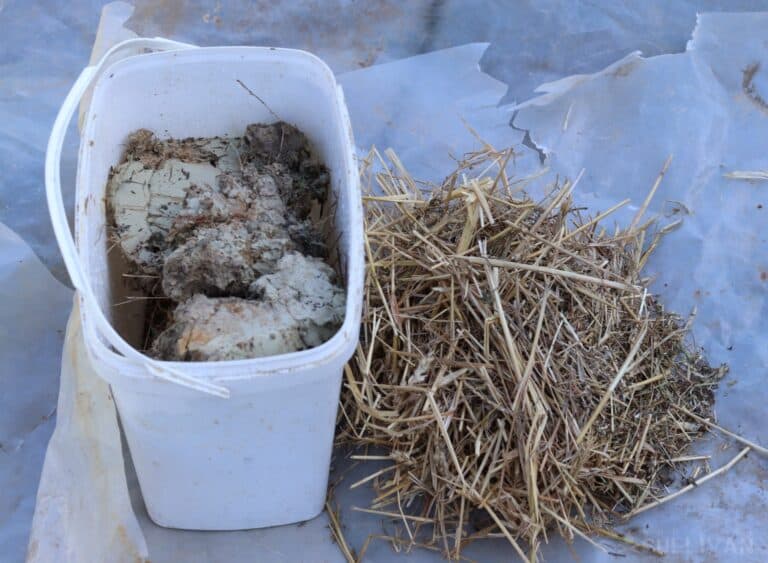
Typically, bigger projects such as a shelter or kiln, require grass pieces that are 8-12 inches long. It’s best to position the grasses so they will run lengthwise through your mixture, to provide additional support to the piece or structure.
Step 3. Mix Clay and Grass Together
Lay out a tarp on the ground and dump the wet clay onto it. You should have added enough water and mixed it so that it’s a sloppy but not too runny. It should still hold its shape if you roll it into a ball.

You can mix the clay with your bare feet or you can fold the tarp over the mound and step on the tarp to mix it. Keep mixing and folding the large mass over and over until the grass is thoroughly mixed into the clay.
Step 4. Shape Your Bricks
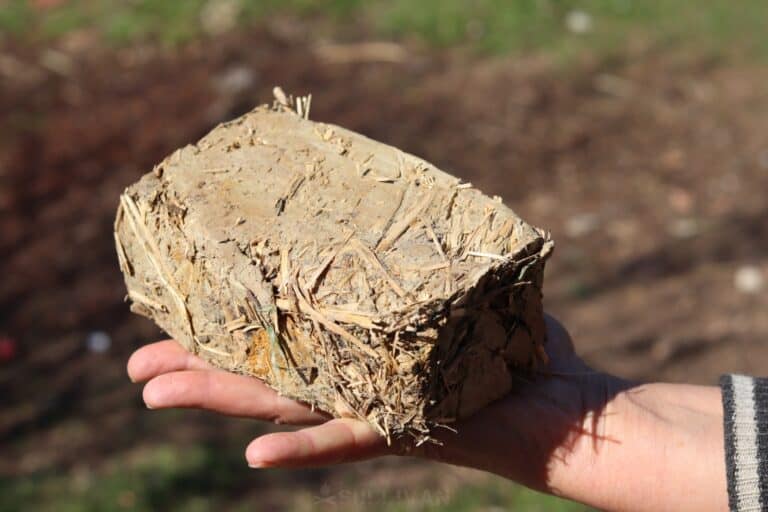
Once the clay and grass or straw are mixed together thoroughly, you need to form your survival cement into “bricks”. These can really be any kind of shape but are usually square or rectangular.
Some people prefer to use a ladder like a frame made of wood to form the survival cement into similar shapes. Each clay brick should be about half grass and half clay. Clay will begin to dry and firm up quickly so make sure you shape your bricks while they are still wet.
Step 5. Build Your Structure
Use the dried blocks to build your structure. This can be anything from a fire pit to a kiln, an outdoor oven, the frame for a bed, a shed, barn, or even a house.
Use a much sloppier, looser mixture of clay, without the grass mixed into it as a mortar to glue the cob bricks together. It’s best to have your structure designed and even drawn out or laid out in the dirt before you get started because clay dries very quickly in the heat of the sun.
Using Survival Cement for Repairs
Survival Cement can also be used for repairs when modern cement is unavailable. Survival cement used as mortar should be thinned out with water to a thinner consistency.
It can be used to patch holes in walls, driveways, etc. It can also be used as a mortar to seal other building materials and make them water-resistant and stronger.
In fact, if you must build a shelter quickly from logs and branches, you could use some survival cement to fill in the cracks and make it more water-resistant and draft-free.
Tips for Working with Cob
- It’s a good idea to wear gloves to avoid being poked by the straw in the cement
- Remove all rocks, sticks, and organic matter from your clay mixture before getting started.
- Pay attention as you work with the soil and adjust your ratio of clay to straw/grass accordingly.
- Once your survival cement bricks are shaped, use them as soon as possible to prevent setting up.
- If your bricks are set up, you can add water very gradually to make them flexible again.
- Some people have added sand to the clay and straw when making survival cement.
Books on Building Using Survival Cement or Cob
Disclosure: This post has links to 3rd party websites, so I may get a commission if you buy through those links. Survival Sullivan is a participant in the Amazon Services LLC Associates Program. As an Amazon Associate, I earn from qualifying purchases. See my full disclosure for more.
In a grid-down or survival situation, you will not have the luxury of a trial and error learning process when it comes to building with survival cement or cob.
The best thing you can to do to be prepared for whatever situation you find yourself in is to learn and practice making and building things from survival cement in advance.
There are many books on the market written by people who have worked extensively with survival cement or cob for building purposes. Take advantage of their knowledge and experience:

The Hand-Sculpted House: A Practical and Philosophical Guide Building a Cob Cottage
This book includes so much more than how to build with survival cement. It also includes checklists for choosing the right piece of land and selecting your building site.
It provides a tutorial in how to heat your home with passive heat. There are tips on interior design, including how to mold stoves and benches from survival cement. You’ll find tips on mixing, building, and finishing techniques, and more.

Building with Cob: A Step-by-Step Guide
This book includes detailed instructions, complete with photos, for building a home from cob (survival cement). You will find info about finishes made of natural materials including earthen plaster and homemade clay.
Construction details for how to build a structure from survival cement (cob) that is building code compliant are included.

The Cob Builders Handbook: You can Hand-Sculpt Your Own Home
Here you will find details on how to mold your own structure from survival cement. The book includes sections about how to design your cob home and all its elements from the floor to the windows and ceiling.
So, if a natural disaster takes down your home and you can’t afford to pay someone to rebuild it for you or when SHTF and your bug-out location becomes your new permanent home, keep survival cement in mind.
With proper planning and knowledge, it is possible to use survival cement for survival to build, repair, and create the things that you and your family will need.

Born and raised in NE Ohio, with early memories that include grandpa teaching her to bait a hook and watching her mom, aunts, and grandmothers garden, sew, and can food, Megan is a true farm girl at heart.
For Megan, the 2003 blackout, the events of 911, and the increasing frequency of natural disasters like Hurricane Katrina, spurred a desire to be more prepared. Soon to be living off-grid, this mother of four and grandmother of ten is learning everything she can about preparedness, survival, and homesteading.