Well as sure as I am that I’m writing this, I’m sure a lot of people will disagree with me, but this is how I have always zeroed my scopes and it works for me.
Although I’m not a professionally trained “scope zero-er” I can still consistently hit plate sized targets (coincidentally just about head sized) out to 400 yds with any scoped rifle I own or have owned.
I have never had the opportunity to shoot any farther than 400 yds, although I would love to try longer ranges. Unfortunately, (but fortunately) my state is known more for hills and dense woods than for wide open spaces.
Rifle scopes and long distance shooting can be a very complex subject if one delved into the subject deeply, but for the average shooter that just wants to hunt with one to distances of a few hundred yards, it doesn’t get too terribly complicated.
It’s definitely different than learning how to use your EDC handgun for home defense. However, this article should help get a beginner prepped for short and long distance shooting for hunting.
Getting Started
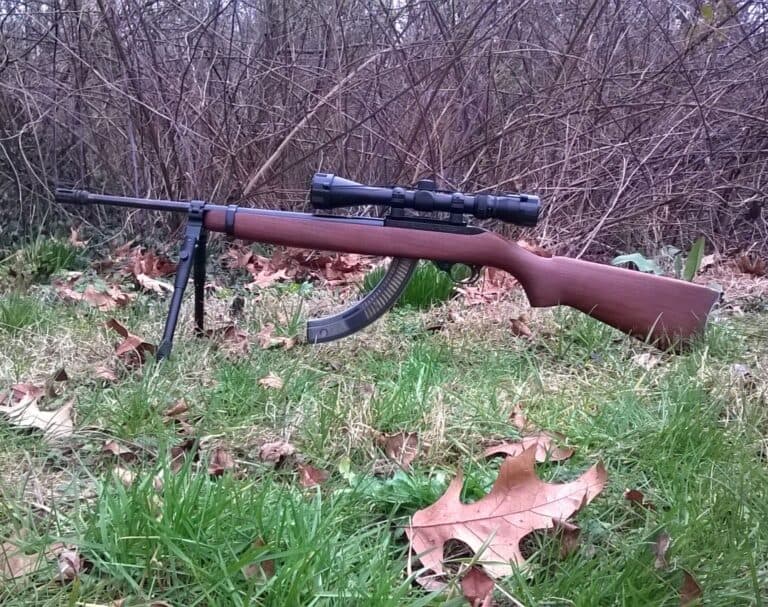
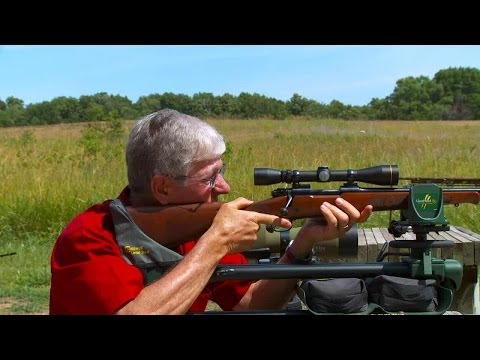
I have had several scoped rifles in my collection. One of my favorites that I still have is a Stevens model 200 in .308 Winchester caliber with an NcStar 6-24×50 AOE red dot scope. AOE means it has an adjustable objective (AO) and I assume the E means electronic because of the illuminated reticle. If this is wrong please correct me.
The very first thing I would suggest is to purchase a decent scope. If you have a $1000 rifle, you wouldn’t want to put a $40 scope on it?
I have a Ruger 10/22 with a Tasco 3-9×40 variable power scope from Wally World that was only about $40 and it does fine for that gun. For longer range and more powerful rifles you want to spend more money if you can.
It’s by no means an expensive scope, you can usually get one for around $100.
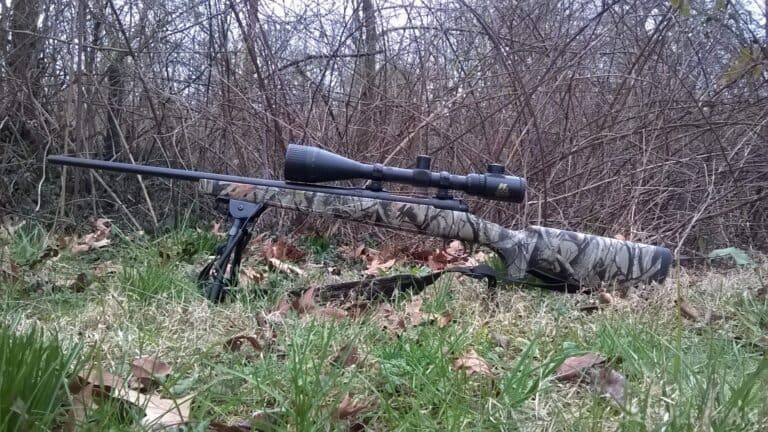
Do the research and buy the best you can afford that suits your needs. The rifle it sits on isn’t expensive either, around $400, but the deer I have taken with it don’t know the difference between this $500 setup or a $2500 setup (it’s just as dead).
A fellow at my gun club shoots AR15’s at 600yds in competition, and he told me that most of the guys there spend more on the scope than they do on the gun.
That’s fine if you can afford it, go for it, if not then a very decent scope can be had for a few hundred dollars that will serve the average “weekend commando” just fine. I have found some good deals on optics at opticsplanet.com.
What’s What
Scope’s Magnification Power Number
When referencing a scope’s technical data there are a series of numbers, what do all those numbers mean you may ask? Well, the first number, or set of numbers to the left of the “x” denotes the scopes magnification power. If there is just one number then it is a fixed power scope.
Variable Power Scope
If there is a number, a dash, and another number then it is a variable power scope, which means the magnification is adjustable. The magnification simply works thusly: a 6 power scope means that an object 600 yds away looks to be only 100 yds away when you look through the scope. It brings the target in closer to your eye.
Objective Lens Diameter
The second number, to the right of the “x,” is the objective lens diameter. So this means an 8×42 scope is an 8 power fixed magnification with a 42mm objective lens.
Likewise, a 3-9×40 scope will magnify the target 3 times at the lowest setting, up to 9 times at the highest setting, and the scope has a 40mm objective lens.
The larger the objective lens the more light it allows into the scope. A larger lens helps to see a target in lower light.
Bright Idea
The red dot illuminated scope means that you have the added feature of turning on a red dot that is visible inside your scope that will be right on the spot where the crosshairs meet.
This is handy for hunting in low light like early morning or late evening. I also have mil dot scopes that the entire reticle is illuminates wither red or green. This is one of my favorite scopes.
How it works is that when you look through the scope in low light you will lose the crosshairs on the silhouette of the target, the red dot lets you see the center of the crosshairs so although you are firing at a silhouette you can tell exactly where the crosshairs are presenting on the target and still make an accurate shot.
Accurate Scope
The first step in an accurate scope is, of course, an accurate rifle. If the rifle doesn’t shoot consistently straight no scope in the world will change that. The second step is to have the scope properly mounted to the rifle, and the third step is to know the trajectory of the round that you are firing.
Often, store bought ammunition will give ballistics on the side of the box; otherwise you can look it up online. Serious marksmen that reload their own ammo for maximum accuracy take all this many steps further.
Most of us do well enough with off the shelf ammo to get by and put meat on the table, which is definitely a needed skill for the self-sufficient survivalist or homesteader.
Mounting the Scope
Moving on, you now have an accurate rifle, a decent scope, and good, solid scope base and rings. If your rifle has iron sights you would do best to buy see through scope mounts so you can use the irons up close.
This is also handy in the unfortunate event you happen to drop the rifle and the scope gets broken or knocked out of zero.
Prepping Scope Mounts
Now that you have gathered the components, what do you do? When you mount the scope mounts (base and rings) to the rifle you should use some Lok-tite to make sure they stay tight and where you put them.
Blue is good, that’s usually what is recommended, red works too but you have to use it very sparingly if you think you might ever want to take the scope off because it really holds tight.
When you place the scope in the mounts, you will want to make sure that the scope is positioned correctly with the elevation turret on the top and the windage turret on the right side. I have seriously seen people mount the scope wrong by having the elevation turret on the left and the windage on top.
Serious shooters precision fit the scope to the rings by lapping the rings until all surfaces have been burnished (sanded).
This ensures that the scope nestles firmly in the rings, rather than sitting in them with random points of contact which can twist your scope and render it inaccurate. I recommend lapping the rings.
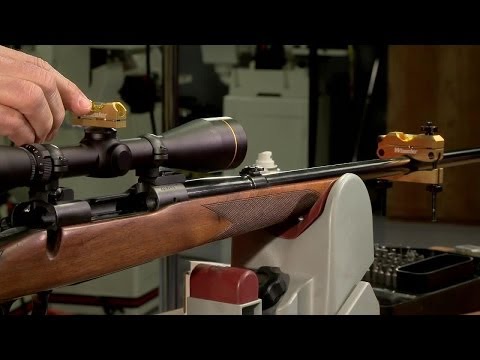
Here is an excellent video of a master gunsmith installing a scope. The mounts and rings in the video are not the kind of mounts I’d use. But the process is basically the same no matter what type of mounts and rings you use.
Making Do
Most of us don’t have all of these fancy tools and you can mount a scope well enough without them, as I explain in this article. For example, you can align the rings fairly well without the fancy alignment bars.
You can accomplish this by using a metal tube or rod the same diameter as the scope tube, and carefully aligning the rings parallel and aligning the centerline of the rod to the centerline of the barrel.
I have a knack for “eyeballing” things like that, I suppose from a couple decades of woodworking, but you can use a level or square if you want it perfect.
Lapping the Rings
For lapping the rings without the fancy lapping tool you can use 200 grit sandpaper wrapped around a wooden rod, metal rod or tube.
Wrap it until the clean cut edges just meet (you can overlap the ends then cut down the seam with a razor for a perfect fit). Tape the ends to the rod where the tape is away from the rings.
If you have cash to spare you can always buy a scope mounting kit for anywhere from $90-200. But if you don’t have the extra cash or in the event of SHTF and there are no more stores, this is a decent way to do it.
Up is Up

The elevation turret usually has the word “up” and an arrow indicator on it and the windage turret usually has an “L” or “R” and an arrow indicator on it.
When you are certain that you have placed the scope properly you will then need to make sure the scope has the proper eye relief. This is the distance from your eye to the rear of the scope where you will be looking through (ocular lens).
Loosely fit the scope in the rings, and then gently hold the rifle as if you were firing it, with your cheek in position on the stock move the scope closer or farther from your eye until you comfortably see the reticles clearly and fully.
When you have determined the proper eye relief make note of the position or mark the scope with a marker next to a ring.
Proper Eye Relief
Proper eye relief ensures that when you look through the scope you are seeing the whole picture and not just part of it.
Otherwise, your parallax will be off and you will never get it properly zeroed. Parallax in rifle scopes defined: perceived movement of the target in the viewfinder.
In other words, offset from center, if your eye is not directly in the centerline of the scope it will be off.
The best example I could find to explain this in is to imagine looking at the speedometer in a moving car from the passenger seat, to the driver it may read 55mph but to you it will look like 35mph because you see it from an angle.
Keep in mind on larger caliber rifles the recoil. If you have your eye too close to the scope you can get a cut or black eye.
Tighten it Up
After determining the proper eye relief, you then need to make sure the scope is plumb and level to the rifle. If you have a rifle that has a flat sided receiver, or a flat topped receiver, such as an AR15, this can be easily accomplished using small bubble levels.
On bolt action style rifles you may have trouble finding a flat spot, sometimes the ring bases can be uses, otherwise it’s eyeball it.
Making sure the scope is plumb and level to the rifle
Now, here is the part where I’m sure many will say I don’t know what I’m talking about but this is how I do it, and a few people I have told that did it said they have never had a more accurately zeroed scope.
Having a bipod on the rifle is good as it is a more stable platform than sandbags, but sandbags can be used. Best case scenario would be to have a rifle sled, but those don’t come cheap if you’re on a budget. If you have a $2500 setup like mentioned earlier then you can afford a sled, get one.
Using a level for accuracy
What I do is collapse the bipod legs completely so I know they are the same length, and I put a 4 foot level on the wall across the room, place it on a picture frame and then adjust until its level (the bubble is between the lines). Then I aim at the level so to have the horizontal reticle aligned right along the level on the wall.
Another way to do this is if you have a brick building outside check the mortar lines with a level to make sure they are level this works well too. I then position the rifle on a table and level it for plumb and level with the small bubble levels by placing one on the side and one on the top.
When the rifle is level and plumb, I sandbag it in place to keep it level and plumb. (Plumb, in case you don’t know, means perfectly vertical from all directions, but here it means the side of the receiver is vertical).
After the receiver is level and plumb, then I place a small bubble level on top of the scope turret (take the cap off so it is a flatter surface) and level the scope to the rifle. Then I look through the scope again and make sure the horizontal reticle is still aligned with the level line on the wall.
Tightening the scope ring screws
I then slowly tighten the scope ring screws alternating back and forth diagonally and across, regularly looking through the scope to make sure it is still level with the wall level, and making sure the rifle is still level and plumb.
Continuously check all the levels while tightening. Also watch the gap between the upper and lower rings halves to make sure they are evenly spaced.
If you tighten one side of the rings too quickly it tends to rotate the scope in that direction and your horizontal reticle will be off and you will not have an accurate rifle.
Also be careful not to over tighten the screws or you can strip them and the scope will not stay tight. If this happens the scope will move from the recoil and you will lose your zero.
Take your time and be patient and do this very slowly to make sure everything stays lined up, after all, once it is on there it will be on there for a long time so do it right the first time.
Zeroing the Scope
After all that has been done to your satisfaction and everything is level and tight, you are now ready to actually zero the scope.
Zero simply means the round goes to the point of aim. This is where understanding your rounds ballistics and trajectory comes in, and what kind of shooting you will be doing.
For the sake of this article we will say you are zeroing a scope for hunting and you will shoot out to distances of 400yds with a .308.
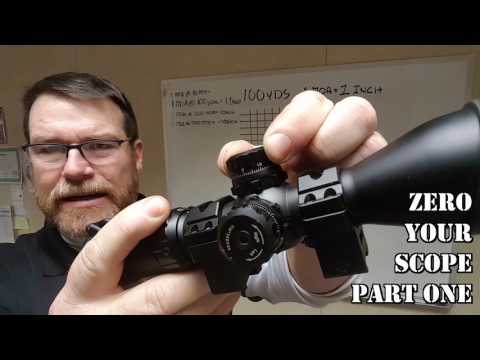
Here is a good video of zeroing a scope:
This is very basic information as with the multitudes of rounds and rifles available there are many variables.
You would be well advised to look up your particular round and rifles ballistics and trajectories for optimizing the performance, but this is a good starting point for beginners. If the rifle already has accurate iron sights on it and you are adding a scope to it with see through mounts this will cut back on a few shots.
Sandbag the gun as you did when you mounted the scope (or mount it in a rifle sled), aim at the target with your irons starting wherever you know the sights are on, 25yds is always a good starting point.
Once the irons are on the bullseye and the gun is leveled and bagged, simply adjust the scopes reticle until the crosshairs are on the bulls eye.
The Spotting Scope
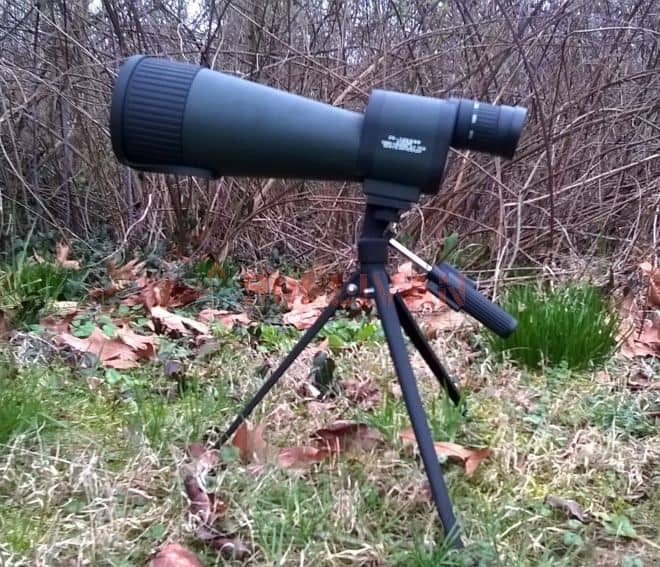
It is also for locating potential targets (or intruders on your homestead) in the great distances, this buys you time to prepare your rifle to give them a warm welcome.I should mention that it is a good idea to have a spotting scope with you.
A spotting scope is a scope that is much more powerful than your rifle scope that you use to see the target better to determine where your rounds are going.
This should put you on or near the bullseye at 25yds. Fire one shot and see. Hit the bullseye or get close? That’s good, now you may move the target farther back.
Didn’t hit the target or bullseye? Are you sure your irons are accurate and that they were on the bullseye when you adjusted the reticle to it?
If your irons are for certain accurate and they were for certain sighted on the bullseye when you adjusted the reticle to the bullseye it should have hit right on or very near the point that the irons were on, so check all of that again.
Starting from Scratch
If you are starting with a rifle that does not have irons on it, it may be more difficult to get that first round on paper, but there are a couple of ways to do it. The first method only works on bolt action rifles. You remove the bolt and look through the barrel and line it up on the target.
Sight Picture
The sight picture will not be on the bullseye, but rather you will see the entire target through the barrel. Just try to evenly center the target on the bore. If you aren’t using a bolt action rifle that’s where a bore sight laser comes in handy.
There are two types of these, one is useless, and the other works well. The useless one is the type that sticks in the muzzle end of the barrel, these can fit crooked, not line up correctly, and be frustrating.
The good ones are the type that fit into the rifles chamber just like a round does. It actually shines the laser through the bore and you can line the bore directly on a bullseye then adjust the scope to it.
Starting at 25yds, simply point the laser on the target and adjust the scopes point of aim to match the lasers just as you would for the iron sights.
Hitting the Target
Once you have hit the target at 25 yds you should be ok to move the target back. I prefer small steps rather than going way out all at once because a miss is easier to figure out when you are closer as it will probably still hit the paper.
If you hit on or near the bullseye at 25 then move the target out to 100yds. Fire one shot and see where it hit. If you were very near the bullseye at 25 yds then at 100yds you should have been off by only a few inches.
Adjusting the scope to hit the bullseye
If that is the case, then you may move the target out to 200yds. If not, then you will need to adjust the point of impact to match the point of aim by using the adjusting screws in the turrets at the top and side of your scope.
Adjusting the top screw in the “up” direction raises the point of impact and adjusting the side screw marked L or R in that direction will move the point of impact left or right.
Usually a scope will have a ¼ inch MOA (minute of angle) at 100yds, which means that each “click” of the screw moves the point of impact ¼ inch at 100 yds.
Ready to Hunt
Once you have correctly adjusted the scope so that it hits the bullseye at 200 yds you are done. For the purposes of hunting you will simply put the crosshairs over the location of the heart on the animal.
Do not be too concerned with any holds. Most people hunting deer generally don’t shoot past 300 yds or so, and within that range they just put the crosshairs on the heart.
The “hold”
A hold for those who may not know is how much higher or lower you should aim to compensate for distances, but a .308 zeroed at 200yds will hit within a few inches of the point of aim anywhere from 0 yds to 300 yds or so. When you get out to 400 you have to hold just a little high, maybe 6 inches or so.
The mil dot reticle scope
Beyond 400 yds, you need to know your projectiles ballistics to be effective. A handy thing to have when concerned with holds is a mil dot reticle scope.
This type of reticle, pictured here, has dots along the reticle that can be figured for certain measurements at certain distances:
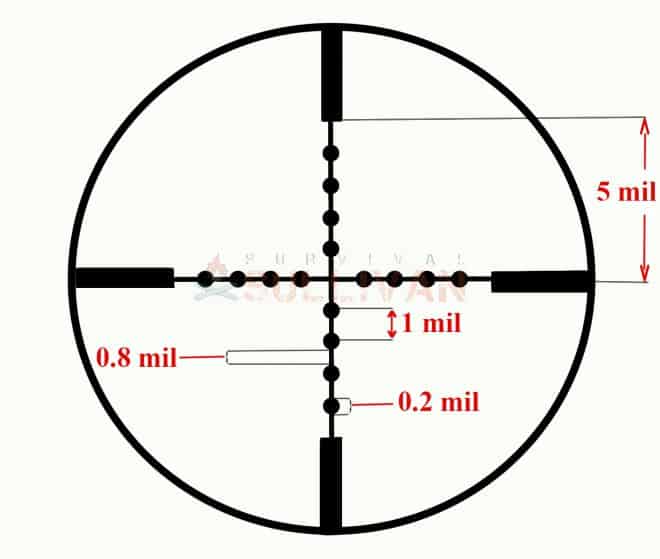
Mil dot scopes can also help you determine range with some practice by determining the size of an object relative to the dots.
Serious target shooting and the art of scout sniper require much more information and practice than what is in this short article. The main thing to know is that for maximum effectiveness you need to understand the ballistics and trajectory of the round fired, and the ability of the weapon it is fired from.
There are many variables to very accurate, pinpoint shooting at great distance. For instance, I did not mention a phenomenon called “spindrift”. Most of us will never need be concerned with it.
Spindrift
Spindrift is when the projectile is at the very limits of its range and will start to drift off trajectory in the direction that the projectile spins due to the inertia of the spin having equal or greater energy than the forward velocity.
This variable is only a matter of concern at the farthest reaches of the range of the round. 400yds is well within the limits of a .308, which in the right hands can easily hit targets out to 1000yds.
If I’m not mistaken, it was American Marine sniper Sgt Ethan Place in Fallujah Iraq who hit an insurgent sniper at over 1200yds with his .308 rifle, which as far as I know is the farthest confirmed kill with a .308.
He stated that he had to hold about 12 feet high in elevation and 12 feet left for windage and that he missed the first shot then hit with the second. That man knew his ballistics.
Final Shot
This article gives the basic information you need to get started. For the sake of the article the caliber .308 Winchester was discussed. Obviously if you are zeroing a scope on a .22 LR you will want to zero it for a shorter distance. I usually zero my 22’s at 50 yds.
DOPE (Data On Personal Equipment) log
Rounds like the 30-06 Springfield and .300 Winchester magnum of course have the ability to reach greater distances than the .308. So you may want to zero them at more than 200 yds. It depends on what you plan to shoot.
If part of your plan is defending your homestead it is a good idea to create a DOPE (Data On Personal Equipment) log, this is a journal that you create so you know the distances to various target areas around your property. This will enable you to more accurately place your shots.
Range Adjustments
Some scopes have range adjustments on them that allow you to DOPE your scope for different ranges and then once you have set the range you just hold the crosshairs on target. There are many calibers available and they all perform differently. Like I said, know your ballistics.
But if you need to shoot farther than you are comfortable doing with iron sights a scope is the answer. Buy the best equipment that you can afford. Learn the equipment, and practice. Practice makes perfect, or close to it.
I’m sure most of us will never need be concerned with hitting a man sized target at over 1000 yds, (for awhile anyway, there’s time to practice) but you may want to hit a deer heart sized target at 200 or 400 yds. This bit of information here should get you well on your way.
As always, know your target and what lies beyond, especially when shooting at great distances.
Eric Eichenberger is an avid outdoorsman, skilled marksman, and former certified range officer and instructor with nearly 40 years experience handling and repairing firearms.
A skilled craftsman with a strong love for working with his hands, Eric spent 20 years as a carpenter and custom woodworker in high end homes. As a gold and silversmith he has created hundreds of pieces of jewelry over the years using the lost wax casting method.
The grandson of humble country folk, he was raised with the “do it yourself” mentality and so is accustomed to coming up with unique solutions to problems utilizing materials at hand.