Having potable water to drink in a survival situation is absolutely essential no matter the environment, no matter the situation.
A complete lack of water will see you die of dehydration in a matter of days and you can bet you’ll be so debilitated you are non-functional well before that.
In very hot, arid climates a lack of drinkable water is a death sentence. It is no wonder that preppers place so much emphasis on storing and carrying drinking water as well as water filters.
We truly do not want for choice when it comes to water filtration equipment, sterilization tabs and other modern, high-tech resources for making questionable water safe in our modern era.
That is all well and good, but where the rubber meets the road is when you lack those modern accoutrements, and still need to purify water.
Sure, you can whip together a primitive charcoal filter, or boil water in a vessel to kill pathogens, but what if you are so hard-up that you can’t even build a fire?
What if you lack the resources or the capability to gather the material you need for a multi-stage filter? What will you do then? Take your chances with sketchy water, and perhaps contract some terrible disease?
No, that isn’t going to be you, at least not today. There is one resource that is readily available the world around that you can make use of to purify water, and that is the unquenchable fire of the sun itself and its abundant UV radiation.
Solar water purification is not a myth, shows good effectiveness and can be done with virtually no effort.
This is one skill you will definitely want to add to your prepping bag of tricks. In today’s article we will clue you in on this ingenious purification method and provide steps for doing it successfully in the field.
Table of Contents
Water, Contaminants, and You!
Virtually no water source you will come across out of doors in the wild is safe to drink out of, or at least, totally without risk should you drink from it.
Even the clearest, purest looking mountain stream babbling down off of an untouched glacier can be contaminated with microscopic pathogens, both viruses and bacteria, as well as other exotic gribblies like prions, parasites and other nastiness that can make you gravely sick, or even kill you.
The vast majority of these biological hazards can be killed by boiling water, or by adding sterilization tablets that will fry all the nasty little buggers before you drink them, rendering them harmless.
High-end water filters may be effective at catching some of these critters, but not necessarily all of them, especially viruses. Buyer beware.
What’s worse, beyond organic pathogens your water can contain all sorts of chemical or metal contaminants. Some of these things are a mere nuisance, at least in small doses over a long period of time, and will do little more than make your water taste nasty. Some, however, can be frightfully harmful or lethal.
Chemical and metal contamination is especially tough to deal with since so many filtration methods are completely ineffective against them. Boiling water, long a prepper standby for sterilizing water in the field, will do nothing against such contaminants.
But discounting chemical contaminants for the moment, far and away the most common and often times the most troublesome waterborne contaminants are biological in nature.
Luckily for us, these can be tackled by using field-improvised water purification techniques, including the solar purification method that is the subject of this article.
The Sun Will Disinfect Water? Really?
Yes, reader. Really. Most microorganisms cannot survive high heat, to say nothing of intense, direct radiation. One source of both that is available the world over nearly any time of year is the sun.
The sun’s rays are combination of both UV and thermal radiation and countless laboratory tests conducted all over the world at various times show both types of radiation to be effective at eliminating microorganisms, including those that dwell in water while they are in the water. Pretty cool.
By doing nothing more than exposing your collected water to intense sunlight bombardment for an extended time, hours or a day or so, you can drastically reduce or even entirely eliminate the microorganisms in the water.
No fuss, no muss and no real work. The only additional equipment you will need assuming the water is not murky or filled with sediment is a clear, preferably plastic container to hold the water. That’s it.
But as with any purification technique, especially one that is of an improvised nature, compared to more advanced techniques using modern technology there are a few catches.
Yes, but Be Careful
It is this fact, that sunlight can disinfect water, that has led to the old wives’ tales that it is safe, or safer at least, to draw and drink found water from standing sources such as ponds, puddles and other placid, non-moving sources.
The reasoning is that since the water is still, heavy solids are more likely to sink to the bottom, while the sunlight will nuke the germs in the clear part of the water near the surface. The reasoning behind this is badly flawed, even though the hypothesis can get at least a C-. Okay, maybe a D…
The problem with drawing any water from a standing source, especially a nasty, scummy pond or puddle is that these waters are disproportionately likely to harbor high or even extreme amounts of organic pathogens.
Anyone who has more than a passing understanding of thermodynamics, or who has even dipped their toe into pond water in the middle of summer, will know that the sun does not heat the pond water enough to kill the organisms within. Not on the surface, and definitely not down near the bottom where it is colder and darker.
Additionally, any standing, exposed body of water large or small is an open system, vulnerable to being re-contaminated by anything inside or outside of itself.
It is easy to see how external sources of contamination can get into the water.
Consider just a few of the major sources of contamination that are likely present in pond and still water all around the world, things like:
- animal or human urine or feces,
- corpses,
- insect larvae,
- and potentially chemical contaminants from the dumping of rubbish or liquids
… and you are not setting yourself up for success using solar disinfection if you draw your water from a pond or puddle.
Many parasites can also survive warm temperatures with no problem, or even flourish in warm water.
To ensure they are killed you’re going to have to get the water hot, really hot, and it can be done with the sun alone but not while that water is in a pond or puddle.
To ensure success we need to take the water from an open, exposed system, and place it into a closed system to prevent recontamination and better control the turbidity (murkiness), exposure and temperature of the water.
This is most easily done by drawing it into individual, smaller containers to really heat things up and “rinse” it in UV.
The Basics of Solar Water Disinfection
Assuming the water you have drawn is reasonably likely to be free of major contaminants that solar radiation will do nothing against (things like chemicals and heavy metals), you will likely enjoy a good success using this technique.
It is also the picture of simplicity itself and requires only a simple, clear vessel and unobstructed access to the sky.
What you’ll need:
- Open Sky – The clearer the day and the more intense the sun, the better.
- Clear Container – Clear, thin, untinted plastic is ideal. Alternately use glass.
- Time – Even at its fastest, this process takes about 5-6 hours, and as long as 36 hours.
- Pre-Filter – Optional, but murky, hazy water will effectively shelter some germs from the sun’s exterminating rays. Prefiltering the water for clarity is all that is needed to prep it.
- Backer – If possible, a light color/metallic backer that can support your container is helpful.
Get the full scoop on each of these elements below:
Open Sky
Simply stated, the more sunlight you have and the more intense it is, the better. More radiation more of the time is the name of the game, and though this technique will still work even on a cloudy day in the winter time it will take much longer.
With clear, blue skies in the middle of summer and a crystal clear container, you can have disinfected water in as little as five or six hours.
Obviously, this technique will not work if you are inside, underground or in hours of darkness. Use your head: you have to have line of sight to the sun.
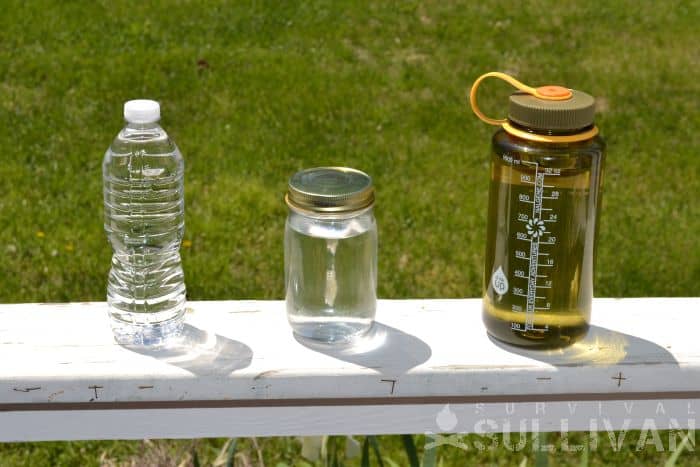
Clear Container
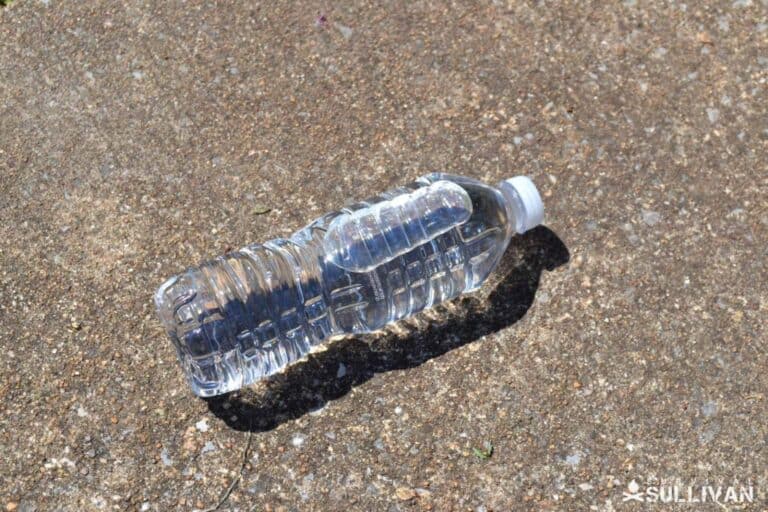
This is the other really important part of the equation. One of the best containers you can have for this operation is actually just a bog-standard plastic water bottle with cap.
The reason why is that these containers are highly translucent, durable and just as importantly very thin walled. In essence, you want to avoid anything which can impede the transmission of the radiation into the water.
Glass containers are okay, but you definitely want them on the thinner side. Even crystal clear glass that is thicker will slow down the process somewhat.
Avoid any vessel that is tinted, frosted or otherwise hazy. Again, there is some wiggle room where the technique will still work without an ideal container, but it will be much slower.
Time
The sun is not a microwave and it surely isn’t your fancy electronic UV water sterilizer or portable water filter. This procedure will work like a charm but you must be patient according to what you have to work with.
If everything is in ideal conditions, or nearly so, you should allot anywhere from five to ten hours. The farther away you get from ideal, say with a slightly frosted container that is tinted and slightly murky water on a partly cloudy fall day, you might need to allot 18 to 24 hours or even longer. When in doubt, give it more time if you can!
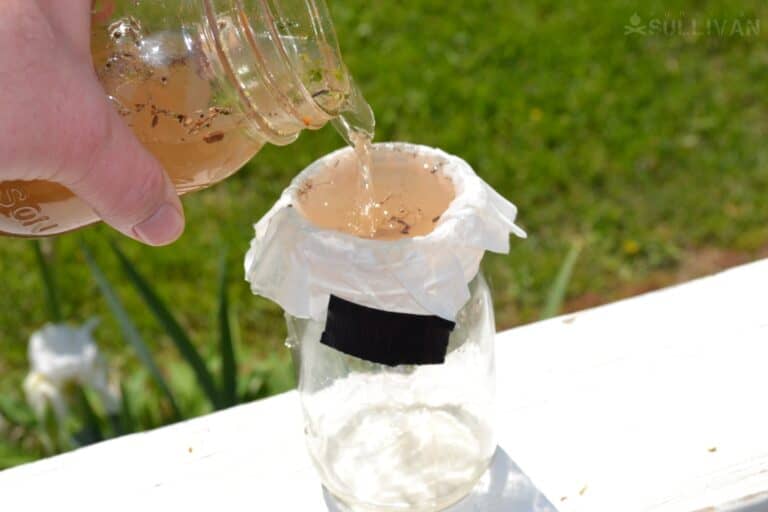
Pre-Filter
The Achilles’ heel of this technique is murky water. Water that has sediment or other contaminants in it.
Anything that keeps you from seeing all the way through or even into the water is bad news, and must be avoided or removed before you can consider this technique reliable enough to drink the water afterward.
Even a rudimentary filter that can just clear the water’s color, or at least improve it, is much better than leaving it as-is:
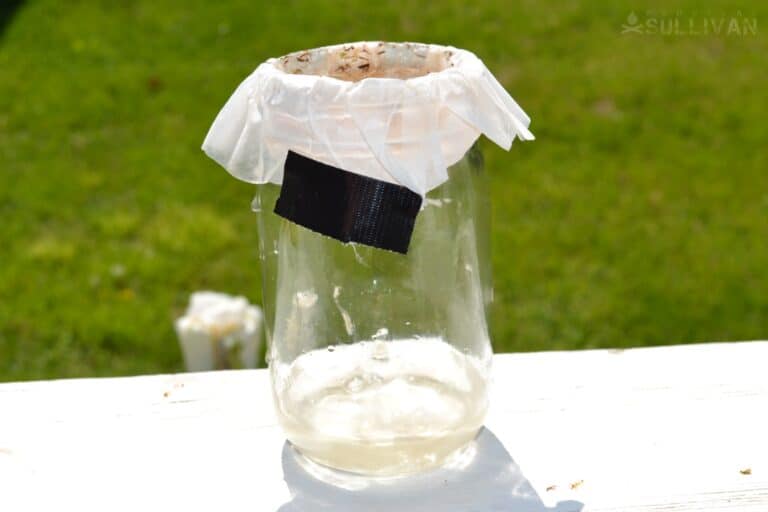
Remember, anything that impedes the sunlight will impede the transmission of the radiation that we are relying on to kill the germs.
The cloudier the water the more places the germs have to hide, and the longer we have to give the sun to do its work if it is capable of doing a complete job at all.
Backer
You ideally want to place your containers broadside to the sun, just like you would if you were placing a solar panel for maximum gain; that is with the sun’s rays striking the container at a perpendicular angle to its longest surface.
This will ensure the water is catching maximum rays at all times, and will also heat much faster, providing a useful one-two punch.
Your supporting backer should be light in color to help scatter the rays back into the water or, if you are sure your container can sustain the heat, metallic for maximum efficiency in heating.
That is absolutely everything you will need to make use of solar disinfection. See the section below for a step-by-step guide to doing your first batch!

Solar Disinfection Steps
Step #1: Clean Container
Do whatever you can with what you have to clean the container or containers that you will be using for solar disinfection. It does no good to add questionable water to a dirty or filthy container, and then leave it in the sun.
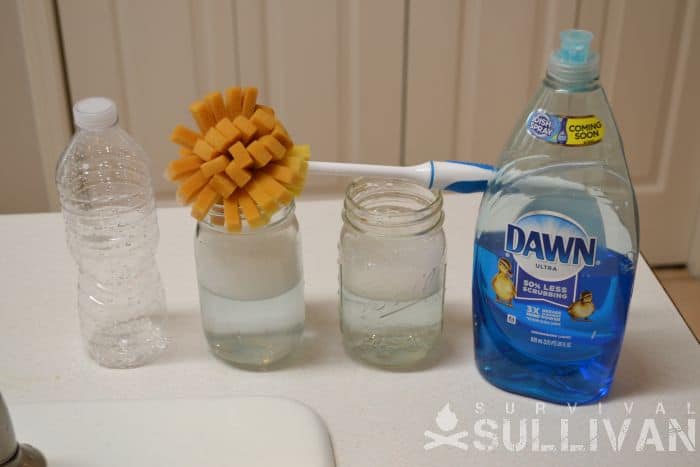
Solid biomatter will not be disinfected by the sun’s rays. You need to start with a clean slate for this technique to work, or at least a clean-ish one, and that means the cleanest container possible!
Step #2: Gather Water
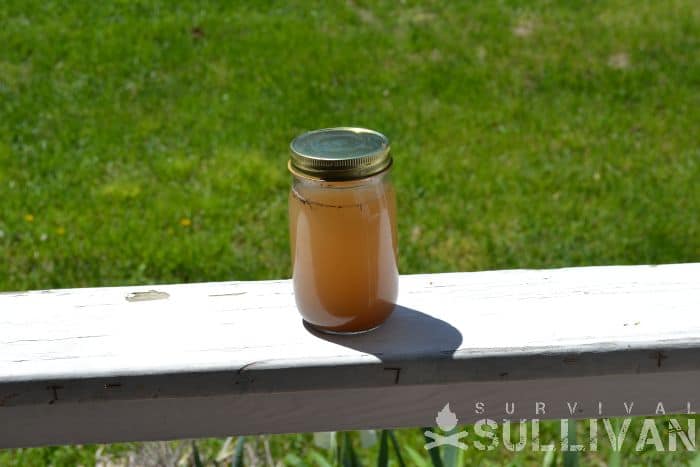
Gather water in whatever way makes sense to you. You could use a series of containers in order to efficiently pre-filter water if necessary, or if the existing water source is clear enough, and otherwise not suspected to be heavily contaminated you can draw directly from it using the vessel you will employ for solar disinfection.
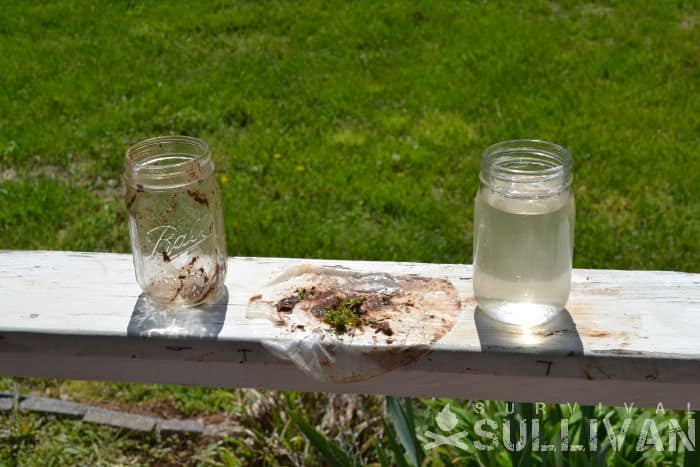
Step #3: Pre-Filter
If your water is murky at all, use any available materials to filter it as best you can for improvement. The clearer your water is, the faster it will disinfect and the safer it will be in the long run:
Step #4: Lay Water Container in Direct Sunlight
Now simply lay the container full of the water you need disinfected in direct sunlight:
Remember to keep it broadside to the sun, and take care that it maintains full sun throughout the day. Pay attention to shade from buildings or plants that might cover it as the sun moves across the sky.
Step #5: Wait
Now you wait. There are no strict, scientific guidelines for how long this process will take. With an ideal container and clear water and very strong sunlight, it should be disinfected in 5 to 6 hours.
With partially cloudy skies, a non-ideal container and hazy water, you should leave it at least 24 hours and preferably longer to be safe.
Step #6: Cool and Drink
After the prescribed amount of time passes your water is now safe to drink, but you would be well-advised to let it cool off first. Especially in the summertime in more arid climates your water could be piping hot! Be careful.
Tips for Success with Solar Disinfection
Solar disinfection is a technique that is easy to employ and so long as you pay a little bit of attention and make sure your water and container are clear there’s not much to go wrong unless you get impatient.
That being said, you can still make mistakes if you don’t know what to watch out for. Check out the tips below and you will be a solar disinfection pro in no time.
Beware Recontamination
It does no good to disinfect this water if you are simply going to re-infect it with the contaminated source or something else that harbors germs.
A couple areas to pay attention to are your hands if you have been handling bottles of water that are wet with untreated water as it can spoil your freshly disinfected container.
You must also take care to clean and rinse the cap and the threads of your container if you are using it to draw water directly from your source, as droplets of infected water will remain in this area safe from the sun’s rays. Be smart, be diligent and follow protocols to reduce cross-contamination.
Use Multiple Small Containers
If you can use multiple smaller containers for solar disinfection instead of one larger one:
A smaller, closed water system will heat up more rapidly and presents less overall impediment for UV and thermal rays from the sun, meaning that you ultimately get a more thorough disinfection much faster compared to using a larger container.
A large container will still definitely work, it will just take longer than a smaller one all things being equal.
Drinking from Bottles Exposed to High Heat and UV
A common question brought up about the safety and efficacy of solar disinfection is whether or not it can be done safely at all considering the typical vessel used in the process – disposable plastic water bottles – have long been suspected or even proven to leach various chemical compounds into their contents over time.
Some suspect that this leaching is exacerbated by exposing the bottle to high temperatures. There is truth to this, but like most concerns of this sort it has become somewhat overblown.
Plastic bottles of all sorts, reusable or not, are made from and contain all kinds of chemical used in their manufacturing process, among them phthalates and adipates. A great many of them are toxic if ingested in sufficient quantities.
Studies from institutions as revered as Harvard Medical School have shown that these chemicals do in-fact wind up inside the liquids placed inside these bottles, and are further detectable in the urine of people who drink from them.
That sounds grim, indeed. One of the biggest plastic compound boogeymen from a few years back and still found in preponderance throughout the world is bisphenol-A, more commonly seen abbreviated as BPA.
Another raft of medical studies and laboratory analysis long ago determined that BPA accumulation in the body can cause adverse health effects ranging from behavioral modification to outright brain damage. Scary stuff.
But that is only half of what you need to know: the really important bit is the practical part, where studies that were conducted on human test subjects showed that even sustained and regular drinking from plastic bottles elevated detectable BPA in the urine from “trace amounts” to “infinitesimal amounts,” both far, far below any threshold of accumulation in the body that might cause health problems.
Could constant drinking from bottles used in the solar disinfection process arise due to a slow but steady buildup of harmful chemicals?
In theory, yes. But that is going to take a very, very long time. In a survival situation, drinking biologically contaminated water is a swift and sure way to get very sick, compounding your problems, or even die.
By any stretch of the imagination a much larger threat than the far longer term issue of trace toxin buildup in the body.
Conclusion
Solar water disinfection is a purification method that can work the world over with minimal setup and hardly any work. While it is not 100% effective against all microorganisms, it is more than capable of completely killing the vast majority of the ones that will make you sick in a survival situation.
So long as you steer clear of water that is badly contaminated by sewage, chemicals, or heavy metals, all you will need to do is find your warm place in the sun, place your water and be patient. In no time at all you will have water that is safe to drink!

Tom Marlowe practically grew up with a gun in his hand, and has held all kinds of jobs in the gun industry: range safety, sales, instruction and consulting, Tom has the experience to help civilian shooters figure out what will work best for them.
The system works by the UV from the sun disrupting the DNA of viruses and bactria. Simple.