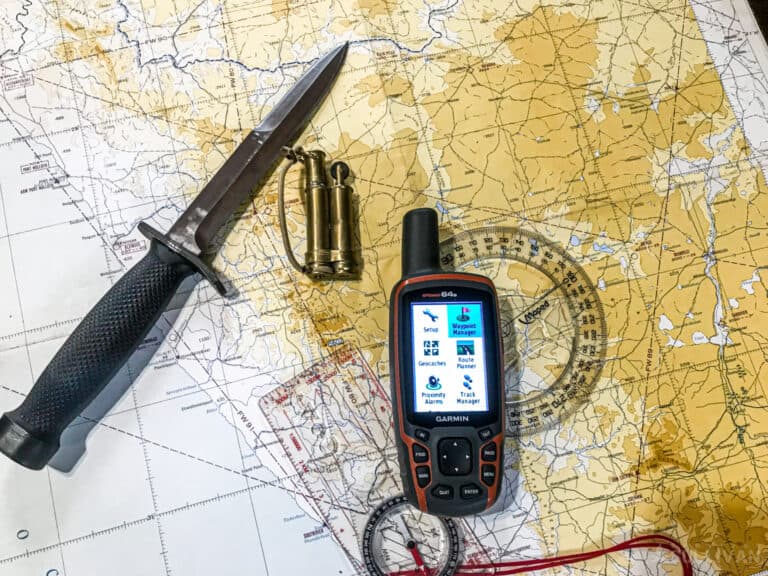
One of the most important skills that an Infantryman uses is their ability navigate. We cannot rely on technology to save our ass when the shit hits the fan, so within our first weeks of basic training, we are taught how to effectively use a topographic map.
This is a bit of a complex process and has a few major steps… so let’s get right into them!
Military Grid Reference System (NOT Lat/Long Maps)
Most topographic maps that are easily bought by in the civilian sector use the Geodetic Coordinate System, which is the grid that splits the world into latitude and longitude.
While it is completely possible to navigate using these types of maps, the military has created a much simpler system called the Military Grid Reference System of MGRS.
Though an MGRS map might be a bit harder to find, it is definitely worth the trouble as the process to using one is far simpler than use geodetic map.
Google Maps allows an MGRS function which can be used to plot exact coordinates of important landmarks of your area, and MyTopo will print custom MGRS map for any location that you want.
An eight-digit MGRS coordinate would look like this: AB 12345678. While I am sure that this looks like gibberish it is actually very simple to understand. There are three separate parts of this grid: the letters, the first four numbers, and the last four numbers.
The two letters at the beginning of an MGRS grid coordinate designate a unique 100,000 square meter area.
This is used to help determine what map needs to be used, or if you are looking to give a coordinate to something or someone who is very far away. In the hands-on navigation level, these letters can mostly be ignored.
Types of Grids
The first four numbers are reference east to west grid lines. In this example 12 would be the major east to west grid line and 34 would be the minor east to west grid line.
Every map with a scale of 1:50,000 (the standard scale for a military map) will have the major grid lines numbered. A protractor is needed to determine the minor grid lines.
The last four number are exactly the same as the first four, but instead of referencing east to west, they reference north to south grid lines.
By following major east to west and north to south grid lines it is easy to find the grid square for a specific area.
AB 12345678= AB (Map designator) 1234 (East/West) 5678 (North/South)
Technically, an MGRS coordinate does not have to be eight digits; it only has to be an even number.
If you come across a four, six, or ten digit grid all you have to do is split the number into the appropriate east/west and north/south grids. The difference between the varying numbers is accuracy.
A four-digit grid will cover a one square kilometer, a six-digit grid will cover one hundred square meters, an eight-digit grid will cover ten square meters, and a ten-digit grid will cover one square meter.
Though a ten-digit grid is technically more accurate than an eight-digit grid, the precision required to plot an appropriate point often leads to more mistakes than if one would only use an eight-digit grid. Now it is time to use this information in order to plot a point.
Plotting a Point
Plotting a point follows a simple pattern. Start by placing your finger at the bottom right corner of the map. Find your major east/west coordinate, then move your finger right across the map until you find the corresponding grid line.
Once you have the 12 east/west grid line, move your finger up until you find the appropriate north/south grid line, or in this example the 56 north/south line.
When you are beginning to use a topographic map, try saying the phrase, “Right up your ass,” in order to remember to move right across the map before you move up on the map.
It can also be helpful to break the intended grid into the appropriate major and minor components before you begin plotting it on your map.
1234 = 12 (Major and can be found on a map) 34 (Minor and must use a protractor)
Now that you have your intended grid square, you will not need the rest of the map to find your specific location. Take out your protractor and line up the appropriate triangle based off of the scale to your map.
Most military maps use 1:50,000 though you might have something different. The triangle should cover half of whatever grid square that you are using.
There are a few more advanced techniques that can help with using a protractor, but for now, we only want to talk about the basics. Imagine that the single grid square is a little map.
Just like before, you will start at the bottom left corner and go right and then up. Instead of using the major grid lines you will want to use the minor ones now.
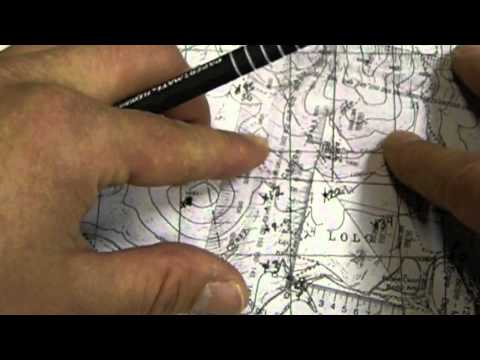
In our running example, the minor east/west grid lines are 34. Move your protractor until the major east/west gridline (12) is covering the number 3 on the protractor.
Next find the unnumbered tic-mark between 3 and 4. This is 35; adjust your protractor so it is a little bit before the unnumbered tick and you will be on the 34 minor grid line.
Without moving your protractor, take a pencil and find the corresponding north/south minor gridline by using the vertical side of the triangle. Place a dot on the map next to the appropriate number.
This dot should be inside of your original grid square. If it is not, then you were plotting in the wrong grid. Trying to learn this concept is much easier with a video, so please using the above example to truly guide you through the process of plotting a grid.
Finding Your Location
This is how you would plot a point using a topographic map, but it does not help you for actual navigation. Instead, you will need to plot where you are and where you want to go. Once you have two points on a map it is possible to find the direction that you need to walk in order to get there.
Let’s say that you know the grid that you have to walk to, but you do not know where you are on the map, and you have no piece of technology to help you find it.
The simplest way to figure out your location is to search the map for an identifiable landmark. Most topographic maps will display roads and an intersection is a great way to pinpoint your location. Check the street signs, then find where those roads meet on the map.
A similar strategy is to find a man-made the feature on the map, like a water tower, and see if you can see it in the real world. Once you get there you will have your point of reference. Boom. Now you know.
While the above methods provide an easier and more accurate way to find your location, sometimes they are not ideal. If you want to stay away from other people it would not be wise to frequent primary avenues of approach such as a roadway. Instead, you will need to use a technique called terrain association.
By using a compass, orientate your map so that the north lines of the map are pointing exactly north. This will allow the real world and the map to align correctly. If there is a town to your right, then you will know that the town is somewhere right of your location on the map as well.
Try to find a few major terrain elements like hills, valleys, rivers, etc. around you, so you can get a good idea of the location you are on the map.
Once you know your area, try to find a large hilltop on the map, that you can also see in person. If you walk to that hilltop, you will now have your location on the map.
Terrain association is an advanced technique and can easily get you lost. This should only be attempted once you have adequate experience using the map, and only as a last resort.
Finding an Azimuth
Now that you have both your starting point and your ending point, take a ruler and draw a straight line that connects both and extends well beyond your endpoint. This is the path that you will eventually be walking on.
Next, pull out your protractor and place the dot at its center directly over your starting point. It is imperative that protractor is not canted to one side, otherwise this entire process will be worthless and you will only get yourself lost.
The protractor’s horizontal and vertical guidelines need to be parallel to the map’s east/west and north/south grid lines.
The line that you drew earlier will extend from the center of the protractor out to the far edge where many numbers will run along the protractor perimeter.
Whatever number that the line cuts through will be your Grid Azimuth and is a crucial piece of information into navigating with a map. For the rest of this example let’s say that the number was 178 degrees.
Once you have your grid azimuth, go to the legend at the bottom of the map and find the declination chart. You will need to find the formula that tells you how to convert your grid azimuth to a magnetic azimuth.
Every map is different, so it is important to check the declination every time you use a map. For this example, we will say that you need to add 4 degrees to convert a grid azimuth into a magnetic azimuth. Your 178-grid azimuth will then become a 182 magnetic azimuth.
Measuring Distance
Before you are able to begin walking, you need to see how far you will need to walk. While down in the legend, find the distance chart and use that to measure the distance between your starting and ending points.
Since you had drawn a line between the two, this step should be easy. You always want your distance measured in meters, so make sure to use the appropriate scale.
Once you have your distance measured, it is time to pull out your compass. While you are physically standing on your starting point open your compass and rotate your body until the compass point at your intended magnetic azimuth, in this example it is 182.
Look straight ahead and imagine a line running from you and out in that direction. Pick a far landmark that falls along that line and walks to it.
Determining a Pace Count
This is when it becomes important to know your distance. If you know that it is six hundred meter between your start and end points, you know that you have to walk six hundred meters. For many people, guessing how far they went isn’t a good idea.
If they happen to overshoot their distance they can easily become lost. In order to fix this problem, it is important to have established your pace count well before you ever need to navigate on foot.
To establish your pace count, go to your nearest track. You will want to start one hundred meter dash starting line and you will walk to the one-hundred-meter dashes’ finish line.
The entire distance should be just longer than a football. Every time your dominant foot hits the ground you will count.
The first time is one, then your other foot will step. You will not count when your non-dominant foot hits the ground. When your dominant foot hits the ground again, you will count to two. You will repeat this until you cross the finish line.
At the end of the process repeat at least two other times and average all of the paces together to get your pace count. Mine is 63.
It is important that you do not change how you would normally walk. If you run, your walking pace count will not help you because stride is longer while you run than when you walk. If you would like to find your running pace count, repeat the same process.
My running pace count is 42. Knowing your running pace count can help save time, while still allowing you to navigate effectively.
Navigating With a Compass
Going back to our example, we will say that you know your pace count. You know that it takes 63 steps with your dominant foot for you to travel one hundred meters. You will simply count until you hit 63.
Once you hit your pace count, find some way to mark the fact that you have traveled one hundred meters. Tick marks on paper, shifting pebbles from one hand to the other, and using ranger beads are all great ways to keep track of your pace.
Once you have found your intended landmark, but you know that you have farther to go on your pace, reshoot your azimuth.
This helps correct any deviations you may have taken while walking and allows you to get a better idea of your surroundings. Find another landmark, just like you did before, and repeat.
It is important that you do not lose count of your pace, even if you are reshooting your azimuth. You will pick up directly where you left off. Once you have finished your pace count, stop and mark your exact location.
Due to deviation while you walk and any inaccuracy during plotting, it is possible that you will not walk directly onto your point. Search the nearby area, until you find what you are looking for. If you cannot find your endpoint, return to where you marked your location, and use that as your new starting point.
My name is Steven Capps, and I am currently serving as an Infantry Sergeant in the U.S. Army National Guard. Don’t imagine some badass, because I’m far from it. If the skinny kid from Superbad (Michael Cerra Google tells me) played an NCO in Saving Private Ryan, you’d get SGT Capps. I have a B.A. in English: Writing from the American Military University and have been published in Fiction, The Bird & Dog, and been awarded an Honorable Mention in the Writers of the Future contest.