There are many other forms of communicating other than with technology. Knowing these other forms can benefit you in many ways, one of which is adding backup plans in case the main forms of communication (electronic) fail.
A main example of this would be in the event of an EMP (Electro Magnetic Pulse). An EMP is basically a nuclear explosion set off 30-300 miles into the atmosphere, releasing particles that destroy electronics.
Knowing different signaling techniques could also end up saving your life in case of a disaster where you require immediate help.
There are many documented cases in WWII where a fighter plane went down, and the survivors had to use mirrors to reflect the sun and signal friendly aircraft to save them.
The best part about manual signaling techniques, is that there are multiple ways to effectively communicate with whoever you need to without technology (which is prone to EMPs).
Although an EMP can cause major damage to electronics within its radius, there are other effective ways to communicate with people.
Though they might not be as effective as electronics, these other forms of communication can prove to be very useful. One very effective way is by using Morse code.
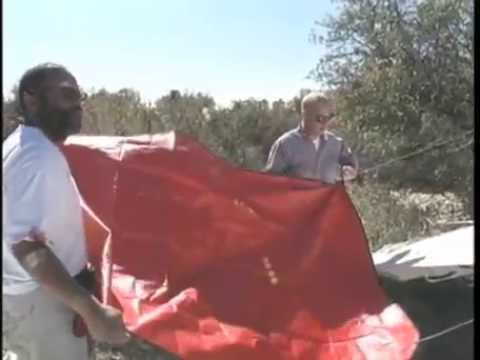
Table of Contents
Signaling Situations
There are a vast number of situations where you may need to communicate with others in the absence of technology. Many of these situations don’t even involve a post-collapse environment.
If you become lost at sea or your plane crashes, sending signs of distress could end up being observed by rescuers, which could save your life and the life of others.
While there are hundreds of scenarios that could require you to use these signaling techniques as a prepper, here is a list of 10 real-world scenarios where you would need them:
- Plane Crash
- Lost in the Wilderness
- Lost at Sea
- Kidnapping / Hostage Situations
- Clearing your BOL Upon Arrival
- Moving Through the Wilderness / City
- Communicating with Others at your BOL
- Communicating Dangers over a Long Distance
- Sending an SOS (Distress Signal)
- When Silence is a Priority
In what follows, we’re going to go through the main wilderness survival signaling techniques, but know that these can work in other places as well.
Morse Code
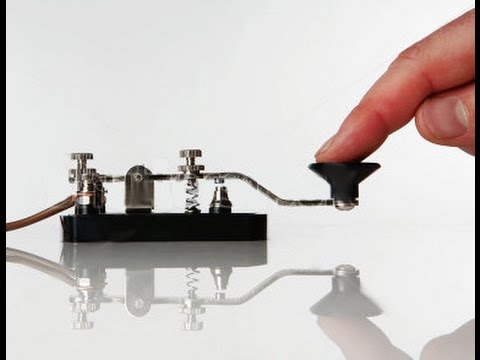
Morse code was invented in 1838 by Samuel Morse, and has been an effective method of communication that is still used today.
When it was invented, it was used to communicate messages long distance by using a Telegraph. Today, however, Morse code is used for much more.
Morse code is a series of dots (“dits”), and dashes (“dahs”). When speaking Morse code, you won’t say “dot” or “dash”. Instead, you’ll say “Dit” pronounced “Di” with a short “I” sound and a silent “T”, or “Dah” with a short “A” sound.
In the military, Morse code can be used by soldiers when their radios break by flashing their lights at each other over a long distance.
I’ve personally had to revert to Morse code by banging a stick on a tree when our radios went down, since cell phone communication can easily be hacked and yelling a message is a clear violation of OPSEC.
Morse code doesn’t have to be communicated only by sound, it can also be effectively communicated visually (i.e. flashlights).
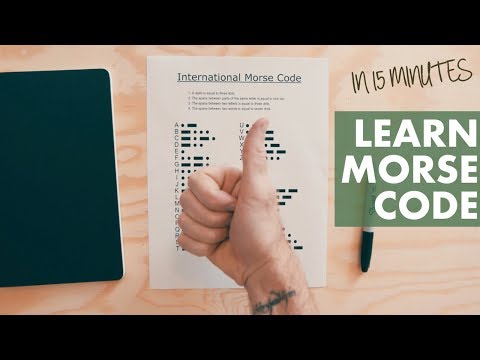
The Morse code international alphabet is simple to learn (with the right dedication), as well as the numbers. On top of just numbers and letters, there are also prosigns.
These prosigns are procedural signals generally not part of the informational portion of the text. Below, I’ve included the Morse code international alphabet, along with a list of prosigns.
Morse Code Alphabet
- A: .- / Ä: .-.- / Á: .–.- / Å: .–.- / B: -…
- C: -.-. / Ch: – – – – / D: -..
- E: . / É: ..-.. / F: ..-.
- G: –. / H: …. / I: .. / J: .—
- K: -.- / L: .-.. / M: – – / N: -. / Ñ: – -.- –
- O: – – – / Ö: —. / P: .–. / Q: –.-
- R: .-. / S: … / T: – / U: ..- / Ü: ..- –
- V: …- / W: .- – / X: -..- / Y: -.- – / Z: –..
- 0: – – – – – / 1: .- – – – / 2: ..- – –
- 3: …- – / 4: ….- / 5: ….. / 6: -….
- 7: – -… / 8: – – -.. / 9: – – – -.
- Delete Last Word (in case of a mistake): ……..
Morse Code Prosigns
- SOS (Distress): …- – -…
- AA (New Line): .-.-
- AR (End of Message): .-.-.
- AS (Wait): .-…
- BK (Break): -…-.-
- BT (New Paragraph): -…-
- CL (Going off the Air, Clear): -.-..-..
- CT (Start Copying): -.-.-
- SK (End of Transmission, Also VA): …-.-
- SN (Understood, Also VE): …-.
There are multiple advanced factors that surround Morse code, but this list describes the more basic aspects of it. As a prepper, you won’t need to know the absolute most advanced areas of Morse code, but knowing the basics of it could end up saving your life when you need to relay a message long distance when technology fails.
A simple way to use Morse code with a radio is to depress the PTT button (walkie talkies) in a Morse pattern. If you’re an avid prepper, I highly recommend learning Morse code.
Everyone learns differently, so some learning methods might work better for you than others. A great method I used to learn Morse code, was copying down simple books in Morse code, then reading it back to myself. There are also YouTube videos that show examples if that better suits your learning needs.
Another great learning method is to have you and a friend flash lights back and forth at each other, this allows you both to learn simultaneously.
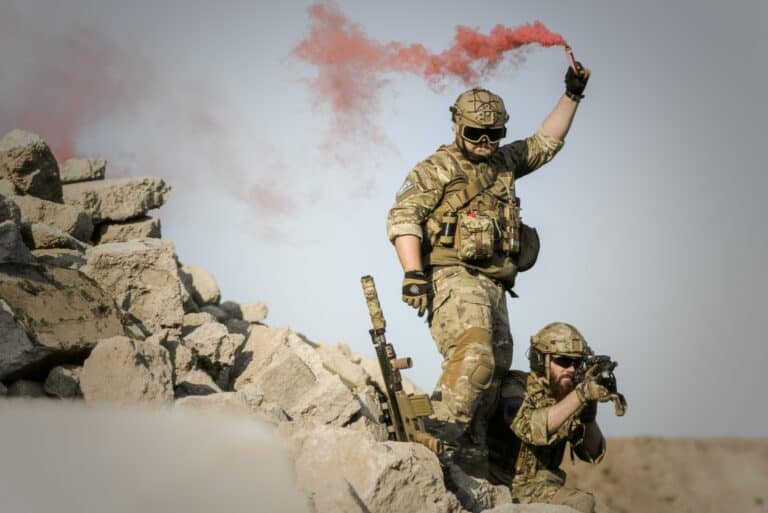
Flares
Disclosure: This post has links to 3rd party websites, so I may get a commission if you buy through those links. Survival Sullivan is a participant in the Amazon Services LLC Associates Program. As an Amazon Associate, I earn from qualifying purchases. See my full disclosure for more.
Flares serve many purposes in today’s world. Ranging from a signaling method, to emergency fire starters, to even a weapon.
There are two types of flares; white, and red. White flares are used for non-emergency situations like signaling a lap in a race, while red flares are used for emergency situations.
Make sure when you purchase flares, you acquire the red ones. Most emergency personnel are trained to associate a red flare with somebody in distress.
While there are two colors of flares, there are also aerial and hand-held. Both types serve a different purpose (depending on your location and situation). Hand-held flares can be used for fire starting in a situation where your ignition source might be faulty, or the wood is too damp for the traditional flint and steel method.
Most flares operate by burning magnesium, sulfur, or charcoal. More than likely the flare you’ll acquire uses magnesium. Most marine flares (flares that can be used while submerged in water) use magnesium as a fuel source. In order for the fuel to ignite and burn, it needs an oxidizer.
Most flares use potassium perchlorate, or potassium nitrate as their oxidizer. Without getting too involved in chemical compounds, most flares contain phosphorus.
Hand-Held
These types of flares are extremely useful for pinpointing your exact location in case of an emergency. While you can hold most hand-held signal flares while it burns, I don’t recommend it.
Most flares can burn as hot as over 5000 degrees Fahrenheit (2860 Celsius), so any slip up can cause extreme burns to you, or to your fellow preppers around you.
Hand-held flares can also be used for a great ignition source in case your primary ignition source for fire isn’t working, or the wood you’re burning is damp.
Most hand-held flares have an igniter built into the flare casing, and are water resistant. While all igniting sources on flares are different, most flares have their igniter under a cap on one end. Read the instructions printed on the flare to know its proper usage.
While signaling for somebody with a hand-held flare, don’t just wave your arms around like a crazy person. This can cause the particles released by the flare to burn you as they shoot up. Instead, raise the flare above your head and away from your body.
Then slowly move your arms into an X shape, and back to their original position straight up. This method of signaling works best when you have two flares available.
Not all hand-held flares shoot hot phosphate out of the top, smoke flares are more effective during the daytime.
The concept is the same, however instead of relying on the brightness of the flare for signaling, these flares shoot massive amounts of smoke from the tip. Tthese flares can be held in your hand if you follow the right safety precautions.
DISCLAIMER: NEVER horseplay with flares, they can cause serious injury (or worse) if mishandled. Read all of the safety instructions that come with the flares you acquired.
Aerial Flare
These types of flares are either fired from a special flare gun, or they come in a tube that can be primed and fired internally. In the military, we use ones that are in a tube called “star clusters”.
Aerial flares are highly recommended for any personnel traveling on open waters, as they can be seen from up to 47 miles away by boat (or even further by air).
There are several different types of aerial flares, but my favorite brand is “Orion”. Their lineup of flares are all coast guard approved, including:
- “pocket rocket” flares (visible up to 21 miles),
- 25mm aerial flares (visible up to 27 miles),
- “Skyblazer II” aerial flares (visible up to 31 miles),
- 12 gauge HP aerial flares (visible up to 34 miles),
- and “SOLAS” (Safety of Life at Sea) parachute flares (visible up to 47 miles).
The most effective aerial signaling flare is the parachute flare, due to its long exposure time (40-45 seconds). The parachute attached to the flare allows it to stay in the air longer, increasing your chances of it being seen by potential rescuers.
There are many different ways to deploy your aerial flare, but I recommend using the “Orion” safety flare gun. When it comes to your safety, trust a name that’s trusted by the USCG (United States Coast Guard).
Making a Hand-Held Signaling Flare
There are many ways that you can make a hand-held signaling flare, but these two ways seem to work best (if done right).
The first homemade flare is made out of two easily accessible items; electrical tape, and eight inch sparklers (the kind you would use on a cake).
While this method requires an outside ignition source, it can be quite effective at signaling for help (and will stay lit in the rain, if you can light it).
Method One – Cost: $1 per flare
Materials:
- 20, eight inch sparklers
- black electrical tape
- Bunch the sparklers together in a spherical shape.
- Locate the middle sparkler and pull it about a half-inch higher than the rest.
- Wrap the black electrical tape around the sticks of the sparklers, along with the sparkler heads themselves. The entire bundle should be wrapped in a layer of tape (I recommend at least two layers for the handle). The middle sparkler should be exposed at the top from the tape.
To use this flare, simply light the sparkler that is sticking up and hold it away from your body. A massive amount of sparks will shoot up from it, so I recommend having some form of fire resistant gloves on (most tactical gloves are) when you light it.
Method Two – Cost: $2-3 per flare
Materials: 20, eight inch sparklers / match box / 1” x 6” cardboard tube / black electrical tape / striking surface from a matchbox / small zip tie / steel wire (to make a pull-pin).
- Cut a small hole on one end of the tube big enough to fit two matches (stripped of the phosphorus tip) through on either side.
- Take one of the sparklers, and tape four matches (with the heads still attached) around the tip of the sparkler so that the sparkler is sticking slightly up above them.
- Make a ring out of the steel wire (a key chain ring will work). Then, place the striking surface of the matchbox that you cut out in a U-shape around the pull pin with the striking surface facing inwards. After that, tape the striking surface of the matchbox to the steel ring to hold it in place.
- Carefully insert the sparkler (that you taped four matches to) inside of the matchbox striking surface that you taped to the steel ring. Then, use your zip tie to secure them together (make sure the zip tie is underneath the match heads).
- Crush the rest of the sparklers, so only the powder remains.
- Pour the powder into the tube (obviously make sure the bottom of the tube is sealed by either tape, or something else) about half way.
- Insert the igniter into the tube with the pull-pin outside of the tube.
- Insert the two match sticks through the pre-cut holes, and through the space between the matchbox striking surface, and the match heads on your igniter to hold it in place.
- Next, push paper (toilet paper works best) around your igniter to increase the pressure inside of the tube. Note: you don’t need a whole lot of it, just enough to fill the gaps.
- Finally, tape the outside of the tube completely to seal the contents inside of the tube.
To use this flare, simply pull the pin and walk away. You do not want to hold this flare, due to the massive amounts of sparks it emits. The total burn time may vary; however, it usually lasts around 10-15 seconds continuously.
These types of flares are a good last-resort to have in case your other flares are used. You can also use these flares to start a fire, or create a movement trap using a tripwire to pull the pin (thus, alerting you to their presence).
Disclaimer: ALWAYS use extreme caution when handling flammable/explosive items. Use responsibly, and keep away from ignition sources.
Fire
Fire has been used as a method of signaling since it was first founded by cave men. In the medieval times, fires were lit in observation towers to signal the presence of enemies from the area where they were spotted, all the way to the castle area to alert the armies.
While their fires were much larger (in order to see them long-distance), it was a very effective method to alert one another back when technology wasn’t available.
Native Americans (particularly the Navajo, Apache, and Sioux) refined communicating with fire when they incorporated using “smoke signals”.
The revolutionary new way to communicate with fire by using smoke made the Native Americans able to communicate basic messages over a long distance.
While there is no specific language for smoke signaling, there are a few basic messages that are still used and recognized by preppers today.
Another very effective way of communicating with fires, is sending an SOS signal with three fires lit in a triangular pattern. The USCG (United States Coast Guard) is trained to associate this pattern with an emergency, thus sending the proper response to help you.
This method will help you save your use of flares, or make the use of flares more effective if combined with this method of fire signaling.
Smoke Signals
This type of signaling is only effective if there isn’t a heavy presence of wind in your vicinity. If there’s a heavy wind, the smoke will more than likely be blown away without effectively communicating the message.
While this method is considered “ancient”, it’s still very effective for communicating over a mid to long-distance range.
You don’t have to be in the wilderness to convey messages using smoke signals. If you have a fire place in your home, you have the perfect setup needed to use this signaling method.
Every house with a fire place has a chimney that smoke escapes from. If you’re in distress and have no other means to communicate with potential rescuers, you can use smoke signals to convey your distress message.
To use smoke signaling, you first need a fire hot enough to produce smoke. Adding pine needles, or other leaves can help produce more smoke if necessary.
Once you have a good amount of smoke billowing from your fire, you’ll need a blanket (or something to block the upward flow of smoke temporarily). Don’t lay the blanket directly over the fire, as this can cause it to catch fire also, rendering it useless.
Take your blanket and wave it over the fire in the same pattern you would use to shake the dust off a rug. This temporarily blocks the upward flow of smoke, creating a pattern of smoke puffs in the air (like a train).
There are three basic messages that are easy to convey using smoke signals, and can be easily remembered by anybody you teach.
- One puff of smoke: This signal is meant to get the attention of somebody, relaying that you’re preparing to send a signal to them.
- Two puffs of smoke: This signal relays that your camp is established, and all is well and safe.
- Three puffs of smoke: This is a distress signal (much like firing three rounds in succession) to relay that you require immediate help or assistance.
Sending signals with a fire can be very simple, if you have the means to do so. Make sure you only use these types of signals if you aren’t worried about concealing your position.
These signals are more easily recognized during daylight hours, as smoke can be difficult to see at night over a distance. Fire attracts attention, so only use it if you aren’t worried about concealment.
Mirrors / Fresnel Lenses
Mirrors are a great way to reflect light towards whoever you need to get a message across to. Back in WWII, pilots who were shot down used signal mirrors to reflect sunlight toward friendly aircraft to help provide their location in order to send a rescue their way.
POWs who got their hands on a mirror (or reflective piece of glass) would also use these to signal to friendly aircraft to let them know that they were being held captive.
Most signaling mirrors are small enough to keep in your wallet, making them very useful and versatile for your EDC. You can also relay Morse code by using a signal mirror, giving them a dual-purpose.
To use a signaling mirror, practice reflecting the light from inside of your house on it towards somebody. This can help you familiarize yourself with the angles necessary to use it.
Fresnel Lenses
These lenses are see through pieces of plastic that have a circular layout inside of them. This helps direct whatever light is passed through them in a more concentrated form.
These lenses can be used like signaling mirrors, but also carry light over a further distance. The great part about Fresnel lenses is that you can direct sunlight through them to start a fire if you need to.
How this works is the sunlight is concentrated through a series of lenses (just like a magnifying glass) onto a surface, heating the surface up immensely until combustion happens.
This is an extremely useful tool in case your primary ignition source is rendered useless. Most Fresnel lenses are small enough to carry in your wallet, so you can put them in the same compartment as your signaling mirror if you want to.
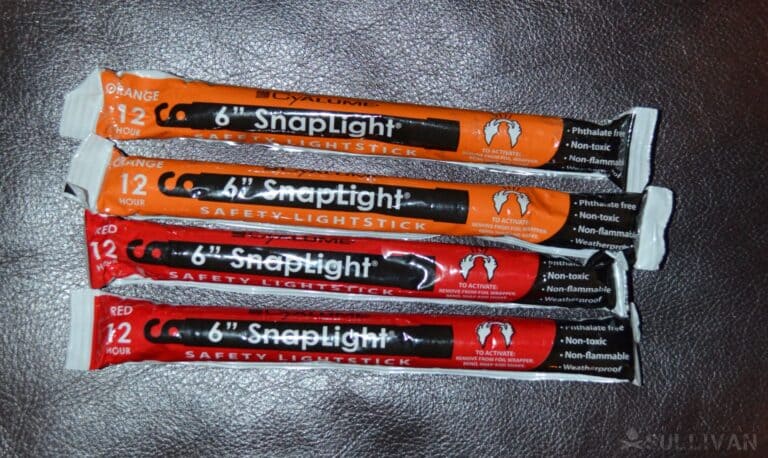
Chem-Lights (Glow Sticks)
Chem-lights are used extensively in the armed forces, proving them to be a very reliable means of communication in the absence of technology.
Their multiple uses, along with their easy to use design make them a great tool to store away in your BOB, along with your BOL. The best part about chem-lights are the fact that they’re light-weight, making them easy to carry over long distances in your BOB.
Different colors for chem-lights offer a different meaning. White isn’t necessarily associated with anything, and can be used as a simple illumination source.
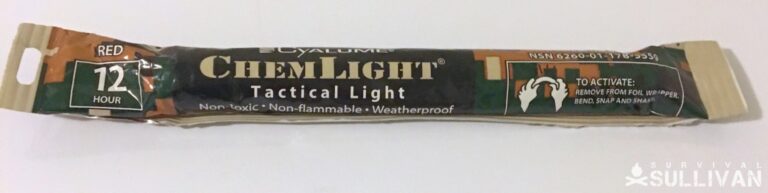
Red chem-lights often are associated with an emergency. When you combine the use of a red chem-light with a blue one, it means that you require immediate assistance that could mean life or death (think police lights). Green chemlights are often associated with safety.
To relay that your area is safe, drop a green chem-light in the area you’ve deemed safe. Blue chem-lights alone convey the same message as green lights, or could warn others of a water crossing while moving through the woods if silence is your motive.
Yellow or orange chemlights convey the message of “use caution”. This message is for an area that you haven’t deemed safe yet, but doesn’t necessarily require the use of a red one.
These sticks can be used to communicate in a variety of ways. One of the best uses for them, is to signal that everything’s okay after you’ve cleared a room (think of clearing your BOL once you’ve arrived).
Once you’ve deemed an area safe for the rest of your team to move in, drop a green chemlight on the ground either in the doorway of the room, or in the area you have deemed safe.
This allows you to quickly communicate to your family (or team) that an area is safe, without having to step back and tell them verbally.
Another great way to communicate with chem-lights is by taping them to trees to mark where you’ve been, or to mark where your location is for friendly parties.
If you don’t wish to advertise your location to potential enemies, that’s understandable. However, most forms of communication you use pose a risk of doing so. Chem-lights are only effective during the night, because they rely on the chemicals inside of them to cause a glow effect.
Another item you can use for this same purpose is tape. You can mark your prior locations to prevent you from getting lost, and make back-tracking easier by wrapping a bright-colored tape to a tree every hundred feet or so.
The downside to this method, however, is your enemy can also find your location. If you decide to use this, heed caution to the potential risk of your enemies exploiting this method.
To use a chem-light, remove the stick from the water-proof wrapper it comes in. Then, bend it in the middle until you hear a crack.
After it has made a cracking sound, shake it vigorously to maximize the mixture of chemicals to produce the brightest glow possible. Make sure you don’t actually break the chem-light open, as this will render the light useless and can cause skin irritation.
Close-Quarters Communication (for Distress Situations)
In the Vietnam War, United States troops would use blinking as a method of communication if they were held as POWs (Prisoners of War).
Communicating certain messages verbally could mean instant death to anyone who is caught, so soldiers would blink in Morse code to convey messages that required secrecy.
This could be incredibly useful if you find yourself and your team (or family) captured and in need to make a plan.
Blinking isn’t the only method of conveying messages in Morse code. You can also tap a finger on your leg, or on any surface. This is why Morse code is very important to learn as a prepper, you may find it extremely useful one day in a desperate situation.
To signal that you’re about to be using Morse code, blink or tap the “SOS” signal repeatedly until the person you’re trying to relay a message to acknowledges your intent.
Using this method can be very useful to communicate a plan to retaliate against your kidnappers, or an escape.
Another use for this is if they are recording you, and worst case scenario you know you will die. You can relay your last message in Morse code, so that whoever sees the video can relay your message to the proper parties.
Semaphore
Semaphore flag code, sometimes referred to as an optical telegraph, is a method of visual communication that has been around for several hundred years.
Still used by Navy’s and other organizations today, semaphore works similarly to Morse code for conveying characters or digits through a standardized system of positioning utilizing small flags held in either hand.
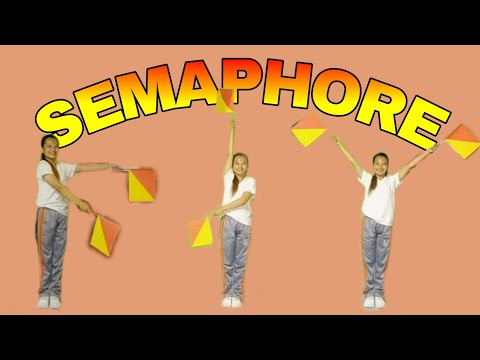
To visualize semaphore, think of the arms of the person transmitting as the hands on a clock. The various combinations of positions with a flag in hand indicate either prearranged codes or signals, or a letter of the alphabet or a numeral.
By running through various positions in sequence, an observer at a different station can quickly record and assemble the message being relayed.
Although commonly used at sea for close range and comparatively secure communications in the absence of radio or other signals, see before can be used over nearer distances on land to communicate effectively with or without optical enhancement. simple variations on semaphore flag code can also be employed akin to Morse code in a pinch.
Considering that semaphore only relies upon a couple of simple flags, impromptu versions can be made utilizing sticks and bandanas or pieces of clothing, sturdy paper or cardboard or any other similar devices, making this a great field improvised method so long as a few people in a group understand the code and are distributed accordingly.
Simple Auditory Signals
Sometimes you don’t need to convey complex information. Sometimes you just need to be heard to let people know you are around or to let them know that a pre-discussed event has in fact occurred.
To accomplish such simple relays of information, an equally simple auditory signal might be used and transmitted via any means that are close at hand.
One excellent example of a simple auditory signals is the use of three sharp blasts, evenly spaced, to signal distress in the wilderness.
This could be done with a whistle, by cracking rocks together or as is commonly taught in outdoor survival and hunter safety courses three reports from a firearm.
Waiting for a lengthy interval before repeating the signal will allow anyone listening to determine that there is, in fact, an emergency.
You don’t have to use a standardized signal like the one above. you can discuss and rearrange any number of simple signals with your group in a way that makes sense to you and will prove to be useful in the environment and circumstances you anticipate needing them.
It could be a variation on Morse code or even things that are easy to remember, such as short jingles or tempos.
Something like the common knock pattern “shave and a haircut” could indicate all clear or danger.
What is important is that the codes can be remembered, are easy enough to produce and not so complex that background noise could result in misidentification, something that could be disastrous in the context of an SHTF event or other crisis.
Simple Visual Signals
Like auditory signals above, equally simple visual signals can be used to similar effect. These can be confirmation under close observation or transmitted through the use of flashlights or anything else that can be readily seen under specific circumstances.
Signals created from stacked, arranged, broken or colored vegetation, rocks, branches and other natural or man-made materials that can be observed from a vast distance on the ground or in the air also fall into this category.
One of the most popular and best is a simple go code, usually transmitted via flashlight or sometimes by color indicator from one party to waiting observers.
Simple codes are things like wait there, come to me, danger and so forth and can be prearranged or changed to help prevent compromise.
A giant arrow made from bundles of branches that contrasts with the ground can point the way to your location or your path of travel for rescuers.
A simple stack of rocks arranged in a pyramid shape can be used as a trail marker. Many other methods about.
simpler is almost always better, and compared to using well-known standardized codes like Morse code this can prevent eavesdroppers from compromising your communications.
As always, simple signals are limited only by your imagination, your capabilities and the context in which the signal will be utilized.
Written Messages
in times of trouble, it is often best to go with what you know especially when clarity and detail is imperative.
For this reason, there is much to support the use of simple written messages, either left in the form of a note for other parties to find or used temporarily through the use of chalk on a wall, whiteboards with markers or any other system of creating written language.
It is even possible, with enough visual aid, to use this signaling method over vast distances. But oculars, a spotting scope, telescope or, used with abundant caution, a rifle scope can easily read text inside their effective range, and the writer can always fall back on making characters bigger if the situation allows.
This is another excellent option for signaling help from aerial rescuers, as a giant sos, help me or some other stereotypical written message stands out boldly from natural shapes so long as a little care is paid in taking care of color and contrast.
depending on the context, security can be very high or quite lacks, as anyone who can see what is written and can read the language can interpret the message.
Even so, simple commands and status updates are often in valuable if other methods of communications are offline or out of the question and are usually worth the risk, particularly if they can be scrubbed or taken down in short order.
Esoteric Signals
Esoteric signals are one of my favorite low or no tech methods of signaling. these are the signals often times employed by spies, agents, saboteurs and other clandestine types.
Tightly rehearsed and pre-planned between collaborating parties, esoteric signals can be quite literally anything and yet look like nothing to those who are uninitiated.
By way of a for instance, an esoteric signal could be something as rudimentary as leaving one shutter on a window open and the other one closed to mean one thing, leaving them both open, or leaving them both closed.
Positioning a flag on a certain quadrant of a flagpole. Flipping over a bucket. Even an active signal such as carrying a designated object in one hand or the other or in one pocket.
More than anything else, this can serve as a method of communication that is virtually unbreakable and untraceable by those who are uninitiated so long as the party’s coordinating the use of the signals are on compromised.
This is an excellent method to employ when moving in and out of secure areas, bug out locations or when a follow-on party or group is trailing an advanced element or scouts.
This is really one type of signaling where the coordination and intricacy of the signals used is limited only by the skills and intelligence of the people using it.
At the very least these signals can be used to signal danger or all clear to parties who are leaving and returning to base camp or other safe areas.
I highly recommend all Preppers who are serious about security and defense learn and implement their own completely unique esoteric symbols.
Practice These Today
Technology won’t always be available for us to use post-collapse, or even in the event that you don’t have access to technology where you are.
Battery supplies will run out, electricity won’t always be here for you to use. This is why it’s very important as a prepper to learn different signaling techniques that don’t require technology to use.
As preppers, we prepare for the worst-case scenario. What good does this do, if we rely on technology to communicate? While you don’t need to know every non-technology communication method, it’s best to keep a few of these methods in your mental arsenal.
Morse code is incredibly useful to learn, as it can be fun to know a new language, as well as its uses in distress situations. Morse code is also a universal language, so if you’re in a foreign territory, you don’t have to worry about a language barrier.
Heed caution when using different signaling techniques, as some of them could give away your position.
If your goal is silence, as well as being hidden, limit the communication you convey to others. However, if you need help, these signaling techniques could end up saving your life one day.
I’m an active-duty infantryman with the U.S. Army, and I’ve served a combined-service of over 5 years. Throughout my career, I’ve learned various survival techniques, as well as self-defense techniques. I specialize in weapons, long-range reconnaissance, distance shooting, and long-term isolation survival. I’m a very conservative, very “to the point” kind of person.
Very informative and thorough. A lot of people always depend on electronic communication devices such as cell phones to use if they have to ask for help. But technology won’t always be available as a way to communicate during a disaster. So it’s really important as preppers or survival enthusiasts to learn how we can ask for help without the use of technological devices. Anyone can learn Morse Code through practice and there are many great tutorials, books, and articles out there that teach how to use Morse Code. Thank you for listing Morse Code’s Pro Signs. It’s very useful, especially for beginners.
If you don’t want to spend the hours it takes to learn Morse Code, there’s a much simpler code called Tap Code which has been used by soldiers, which can be learned in a minute or two! Google it.
I took your suggestion and you were right – Tap Code IS easier. Only problem is, the other party needs to know it too, so you might still need to learn Morse Code to communicate with others. But when you think about it, if only you and your family knows Tap Code, you basically have an “encrypted” method of communication 🙂