The Swedish fire log is a great addition to any base camp or bug-out area. The fire it generates feeds itself, lasting for anywhere between 2 and 5 hours (depending on the size of the log), and the contraption is easy to build and use.
The technique has been used for centuries in Scandinavian countries. The Swedes invented it in the 16th century to make the most out of limited wood supplies – which is why this type of fire is great for emergencies.
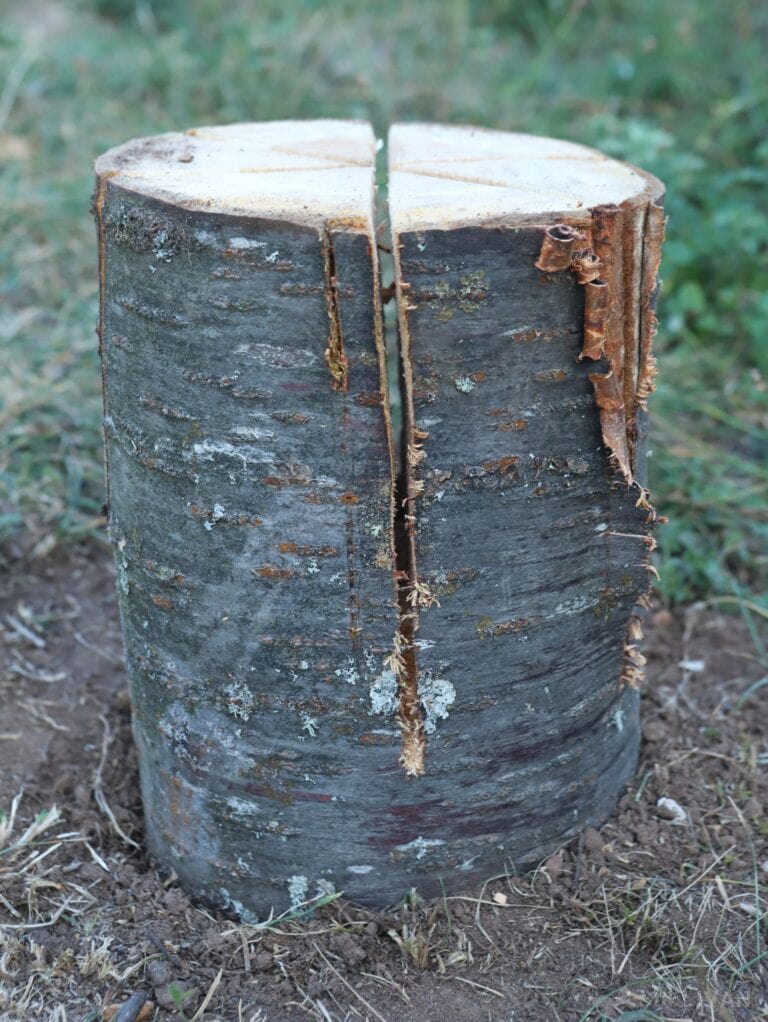
For those who are unfamiliar, a Swedish Fire log (sometimes called a Swedish log candle, Swedish fire torch, or Canadian Candle), is a fairly large, perpendicular log with three even saw slices.
Once constructed, there are several uses for it. It can be used to produce light, boil water in a kettle on its flat top, slow roast a kebab of meat, and give off steady, reliable heat.
Tips Before Making a Fire Torch
Before going into how to build a Swedish Fire Torch, there are a few components that must be fully understood to create the best final product.
Log Size
The size of the log you choose will depend on the function(s) you want the log candle to perform. If it will serve primarily as a light source, a smaller log is better. This will allow you to create multiple fire logs, and line a path or entire campsite with their glow.
If you’re looking for a good heat source and cooking tool, use a larger log. Just don’t go overboard. If the fire torch is too long, it won’t be stable. A good rule of thumb is to never build one that is longer than your chainsaw blade.
Lumber Choice
No matter what, the wood on a Swedish Fire Torch must be well-seasoned. Moisture will ruin any chance of a powerful flame and make it extremely difficult to season meat.
Birch, fir, and pine are good choices if you’re looking to create a light source. They are softwoods, meaning they will burn fast and be very bright.
That being said, softwoods are terrible to cook with for the same reasons. Your meat and kitchen appliances will get covered in ash and soot.
Look for hardwood like apple, beech, cherry, oak, or hornbeam if you are going to use the Swedish log candle for grilling or roasting meat.
Materials You Will Need
To build one you will need:
- A Log (Seasoned, between 2-2.5 feet)
- A Striker or Lighter
- An Axe or Chainsaw
- Safety Gear
- A Pencil and Protractor
- Kindling (Birch Bark is Best)
Steps To Building a Swedish Log Fire
Step 1: Choose a Log
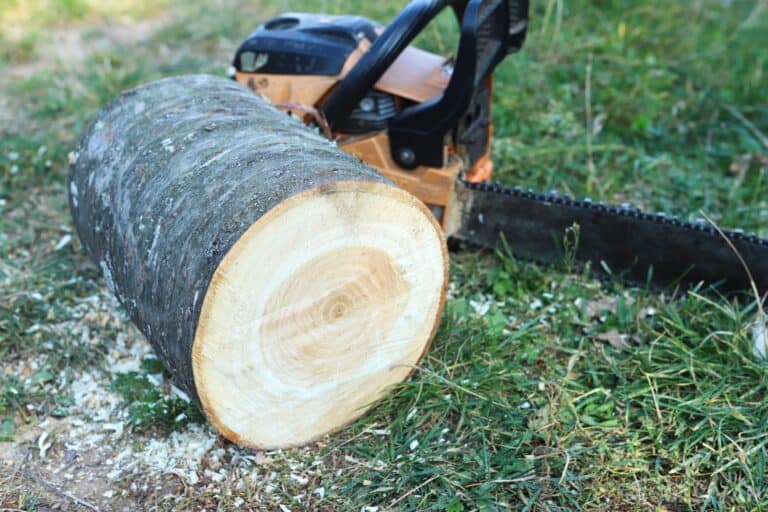
As stated above, the size and wood type you choose will depend on the function the log will serve. The standard dimension for a multi-purpose log is 32 inches up and 10 inches across. If you are a beginner, make your first log this size and adjust it according to your needs. Make sure the wood is well seasoned, if possible…
Step 2: Choose a Base
A common mistake often made by beginners is picking an uneven log. Both ends of the log must be totally level. Determine the side with the longest width and make it the base of your fire torch.
Step 3: Mark Where to Cut
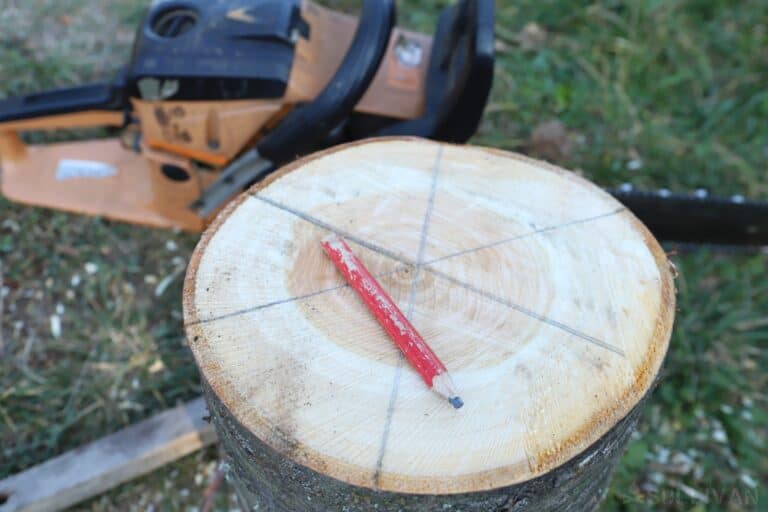
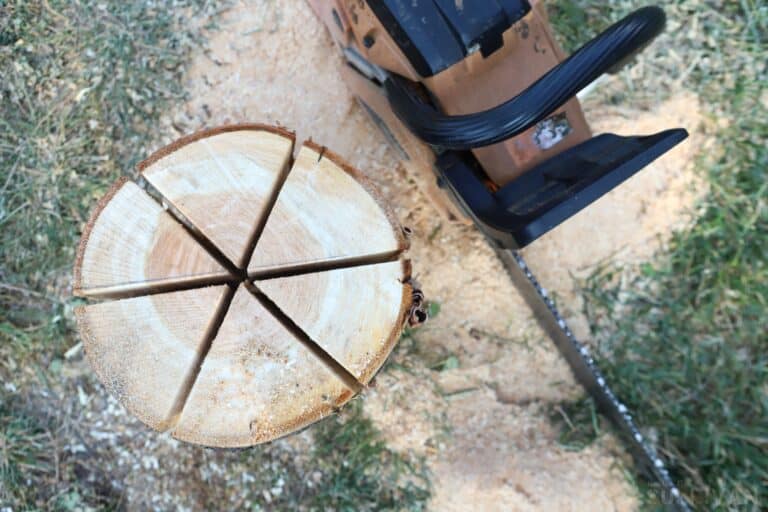
Once you have chosen a base side, place the log vertically on the ground. Take a pencil and trace, with the help of a ruler or straight edge, where you will cut. Think of the top of the log as a pie and draw it into six slices.
Step 4: Start Cutting
Make sure the log is secure before cutting. If it tips over mid-cut, the whole process will be ruined.
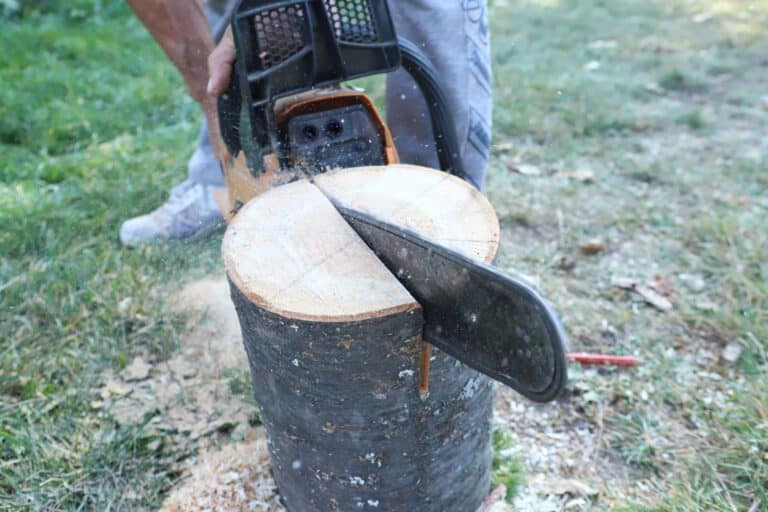
The first cut should go evenly across the log’s midsection. Slice down at a slow, steady, and conservative pace. An even cut is key, here. Continue moving the blade through the wood until you are five inches from the base:
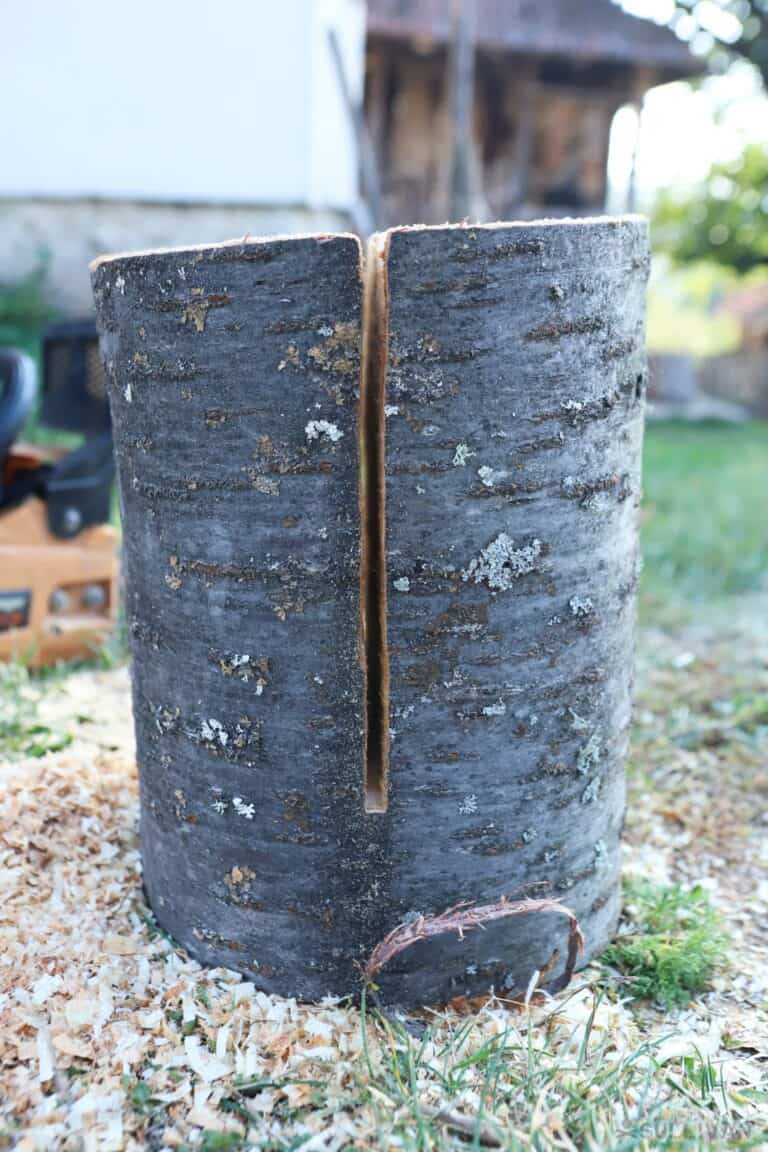
At this point, aim the axe or chainsaw blade downward and in – to make it so the exterior of the wood has a lower angle than the inside. This will allow more air to shoot through the log after it is lit, for a more consistent and reliable flame.
Step 5: Continue Slicing
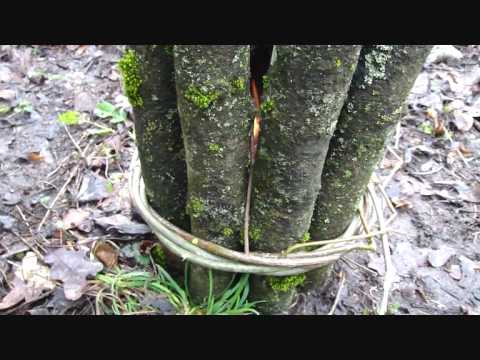
Once you have one solid incision, repeat the process above so that there are three grooves from the top to the base of the log. Always stop five inches from the base and be careful not to splinter the wood.
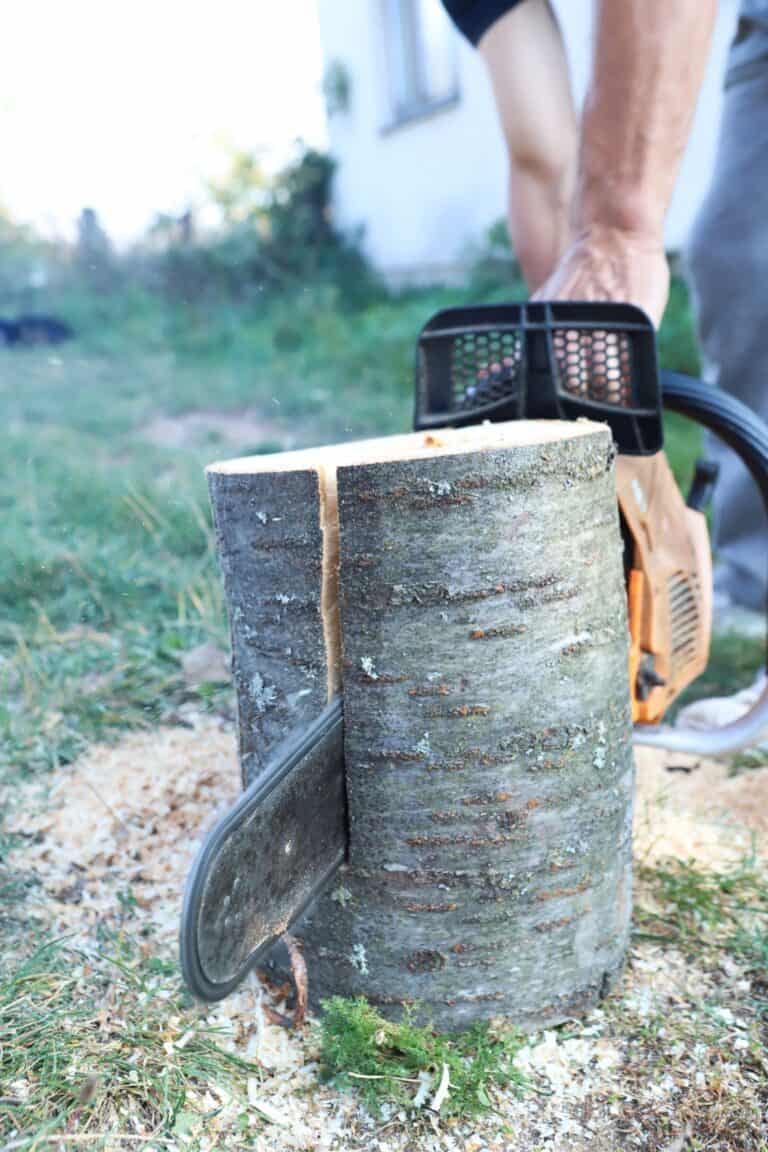
Now go ahead and make the 3rd and final cut…
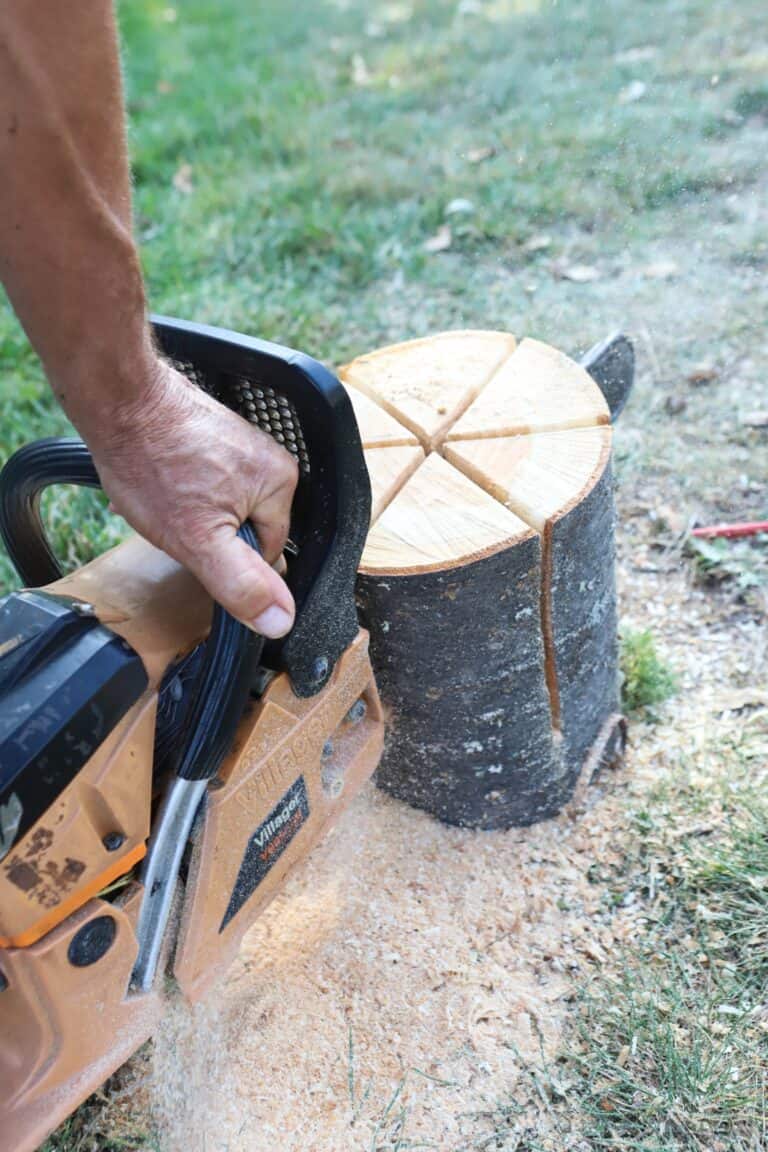
When you’re done, your log should look like this when viewed from above:
Step 6: Bury the Base
After you’ve created the structure, it is safest to bury the base of the log in two inches of dirt. This will make it extremely secure to prevent tipping and avoid any accidents that may occur. Clear the area around the log to avoid unwanted fires.
If you’re in a hurry, burying the log is not totally necessary. Extremely flat ground will serve much the same purpose. Do not, however, cut corners. Never leave the log tilted at an angle. It’s an accident waiting to happen.
Step 7: Pack Tinder in the Three Divots
The best bet for tinder is little strips of birch bark. Its natural oil content is high, which allows it to burn well even when moist. Don’t pack kindling in too tight or there won’t be enough air to allow the flame to burn.
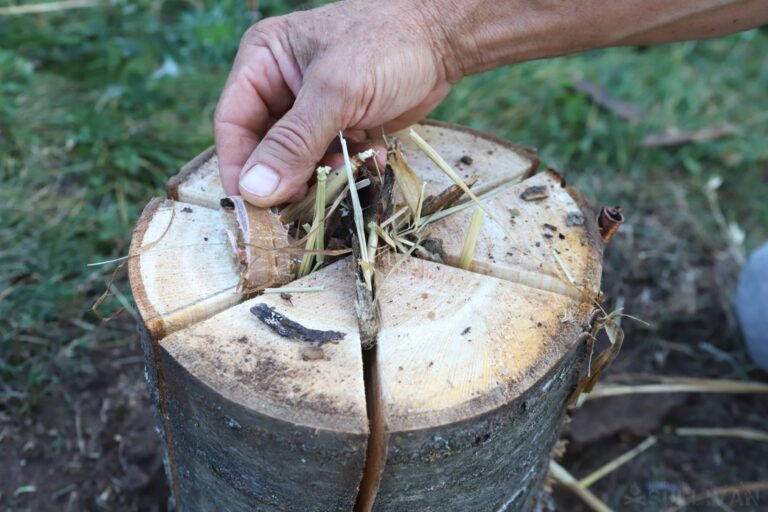
Practice this process a few times before you go out into the field so you know the right balance between too little and too much tinder. This will give you the confidence that you can make this work when and if you ever need this technique to survive. If no wood is available, you can also use simple paper and sticks as tinder.
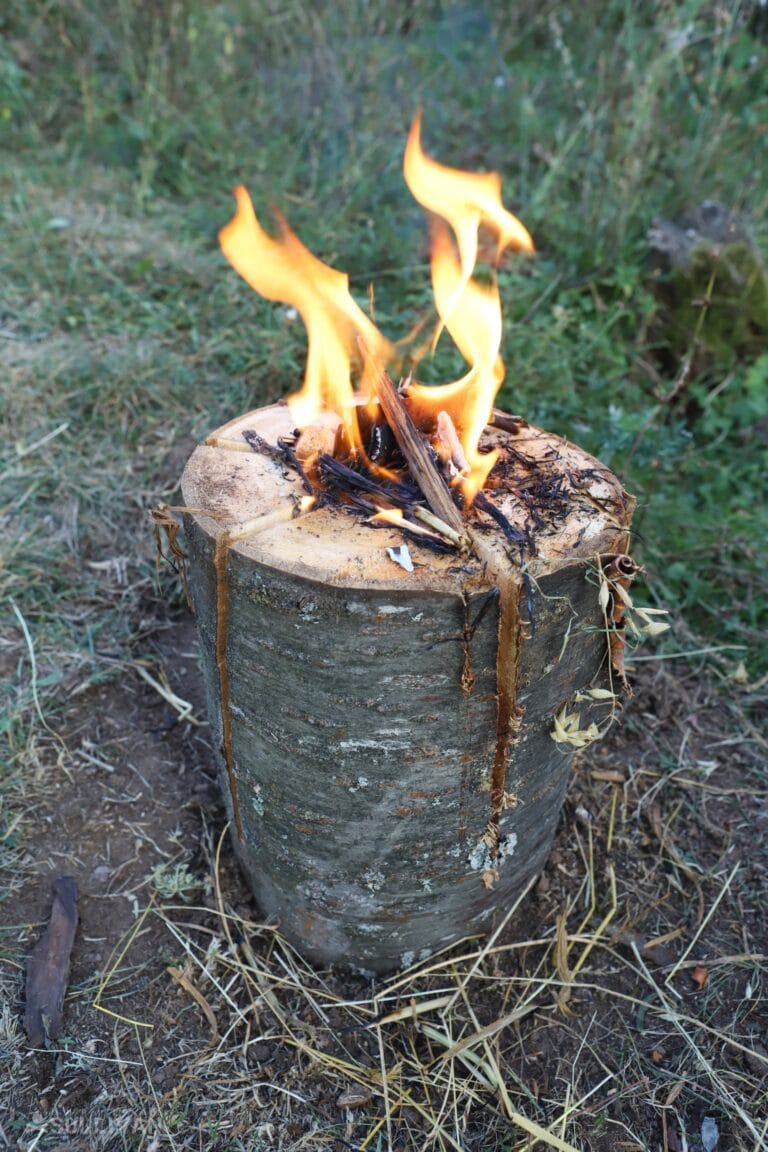
Step 8: Light it Up
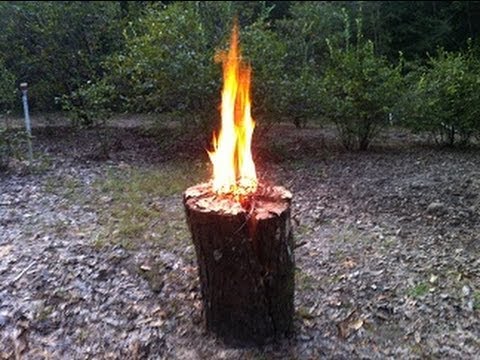
Always start the flame at the top of the log. Use a spark from a striker or even a simple lighter to get the fire going.
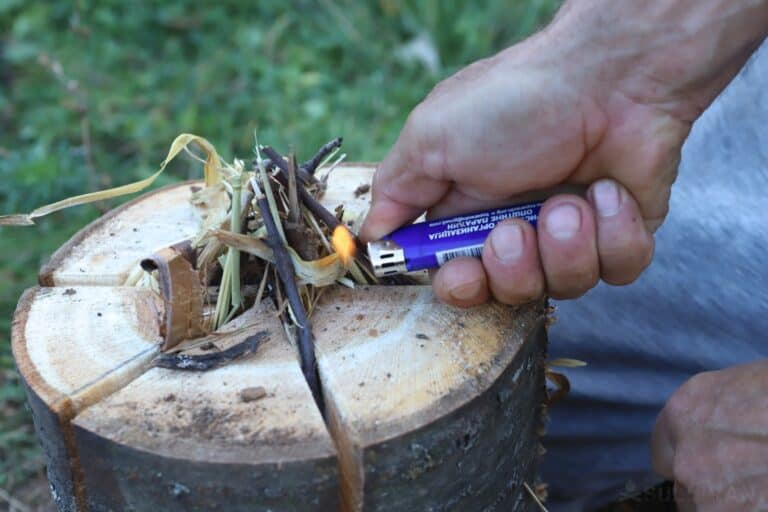
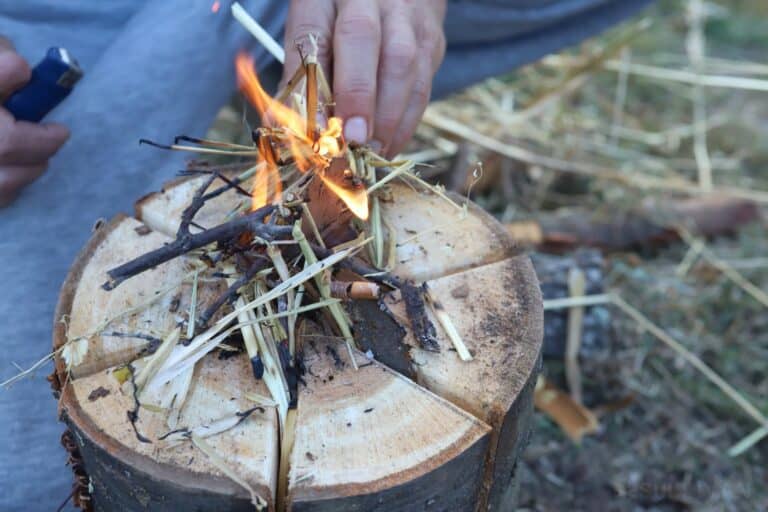
Don’t worry if the flame seems to flicker out at first; this is actually important to the process. Typically, a tiny flame will flash at the top of the log and slowly dissipate. There should still be smoke emanating from the wood.
The goal is to make the log burn from the inside. After a few minutes, flames will begin to emerge. A Swedish torch typically burns for 2 to 3 hours without you having to put more wood.
A Few Helpful Videos…
These videos will help you along the way and give you a good frame of reference. They even have some original ideas for how to make a Swedish torch in a resource-scarce environment.
This video demonstrates an alternative method for building a Swedish Fire Torch, using multiple large sticks, in the event a log is not available. Although this isn’t the ideal way to build one because it allows too much air into the structure, it is an interesting alternative.
Pay attention to how the man in the video deals with his wet environment. In a survival scenario, things will rarely be perfect. You will need to be able to adapt.
This is a good example of a survivalist who followed the same steps listed above. Notice how powerful a flame is. This is because he had the right amount of tinder and air in the log.
Conclusion
The Swedish log fire is a great method for making fires. It is easily adaptable to multiple environments and functions for the critical tasks of cooking, warmth, and light.
Perhaps its biggest pro is that you do not have to tend to the flame for as much as 5 hours, which gives you time to work on other needed tasks at your bug out location or campsite. It’s a great makeshift stove and a good source of light.

My dad was military. My grandfather was a cop. They served their country well. But I don’t like taking orders. I’m taking matters into my own hands so I’m not just preparing, I’m going to a friggin’ war to provide you the best of the best survival and preparedness content out there.
This is so very cool !!! I’v never seen this before and I really love it!!!