For preppers, life can be a little luggage centric. Talk of BOBs, Go-Bags, INCH bags, and others go on ‘round the clock. That’s with good reason, as keeping the equipment you need to deal with disasters great and small handy is a tall order if you plan on storing it all on your body (no matter how many cargo pockets your clothes have).
To mitigate this, we rely on bags of all sorts. Big, small, carried, worn or rolled. One of the most important to prepping in general is the BOB, or Bug-Out Bag, which serves as our lifeline if we need to get the heck outta Dodge City in a hurry to avoid some terrible fate.
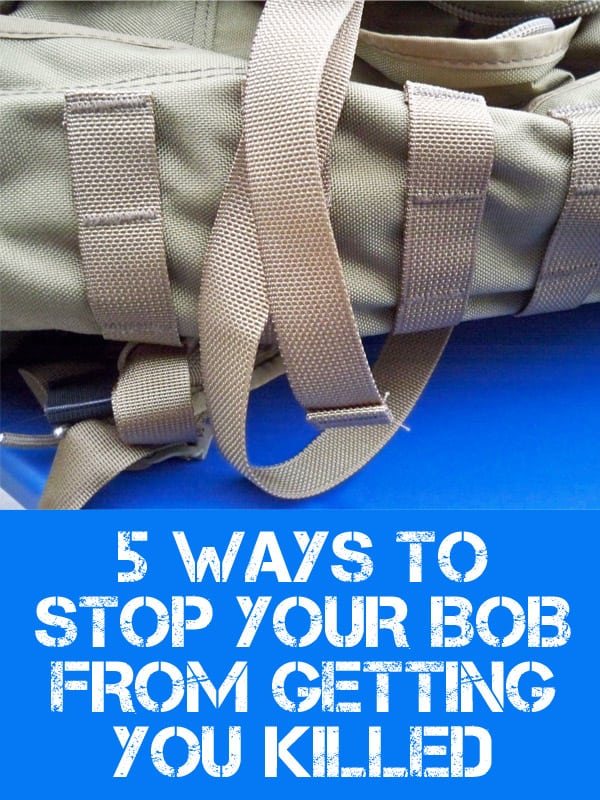
The BOB serves as our toolbox, storeroom and house when we are on the move, containing goodies from all the major categories of necessary life support and sustainment supplies.
Preppers expect to be intimately acquainted with their BOB’s when SHTF, either used as intended when fleeing to a secondary shelter or fallback location, or as a ready source of easily portable supplies if we are sheltering in place.
What some preppers fail to anticipate is the fact that one of their most important material preps, their BOB, may… In fact…
GET THEM KILLED! Okay, forgive the melodrama. Your BOB is not going to somehow turn on you and strangle you in the night, but you should know that there are some hazards associated with carrying one all over creation, either rurally or in an urban area, that you can and should address in order to minimize risks.
After all, that is all that prepping is about, minimizing risks while giving yourself the best chance to survive and thrive after a major incident. Read on to find out more.
Improving Survivability
The ideas that I’ll present in this article are not rocket science, and are intended to either enhance your BOB to make it easier to use (read that as carry and access) or reduce your profile when carrying it.
A BOB that works against you will either bog you down and wear you out, or attract the wrong kind of attention, even give away your location.
Neither outcome is desirable no matter where you are or what your plan is when disaster strikes. While your plan may not be affected by either, on paper, you also have no way of knowing what you’ll be facing until it kicks off.
It is far better to eliminate possible drawbacks now while you can do so easily and with no stress, rather than attempt a field expedient cure when it turns out you need to.
As with many facets of preparation, you might see these as marginal or nitpicky improvements. That’s fine; your time may be better spent on other things that will result in bigger gains to overall readiness. I’m not here to tell you these improvements and fixes are absolutely essential. They may not be. But they are issues that you may spare time to address.
The following tips are presented in no particular order, and I within each section I will address both the “how” and “why” of each solution.
#1 – Blend in to Reduce Visibility
“Blend” does not necessarily mean “camouflage pattern”. In the woods or in the city, you should strive to make your BOB as inconspicuous as possible. If you are afield, this will probably mean an earth tone or, yes, a camo pattern to preclude easy sighting from afar.
But if you are in the city, or any are where you expect to be seen often a camo colored pack may draw more attention than something in a traditional, bright colorway. Put a Mossy Oak or woodland camo pattern in the middle of town and it will stick out.
Consider too that if you carry your BOB in your vehicle where it is visible (a bad move, but sometimes unavoidable) that its exterior and other accoutrement may make it a target for theft pre- or post-SHTF, or see you “marked” as someone who may be worth mugging, or at least watching closely.
For these reasons, give some thought to appearance when selecting your BOB. “Gray Man” does not mean bland colored; it means you blend in to the people (and environment) around you in a way that does not draw attention.
Accessories are another thing worth addressing. Take care if you have magazines, shotshells, their related pouches and long gun scabbards on the exterior of your pack. I have a personal theory that the chances of finding ammo or guns in any given bag directly correlate with the number of American flag and morale patches velcro’d to it.
I know I’ll catch heat over this, but take care that you do not let individuality and flair take the place of prudence. You aren’t impressing anyone, but you may be painting a target on yourself. This won’t be a factor for some people, but it is a factor for anyone in populated areas.
However, even though you might be best served by a brightly colored pack in an urban setting, there may very well come a time when you need to camouflage yourself and gear to help evade detection. For these instances you have a few choices.
A rain cover that you can slip over your pack will not only help to waterproof your pack and contents, but can also be had in a ready-to-go camo pattern. Slip it on and your neon orange hiker will be ready to disappear.
Additionally you might consider a rain cover that is dual sided, with one being camo and the other a bright signal orange or green for, well, signaling purposes. Another alternative for going low profile, though one you cannot reverse easily, is simple spray paint, which works very well on most pack fabrics.
It does not need to uniformly coat the pack, only cover a highly visible color. Dye is another messy, but effective solution for turning a day-glo pack into a more stealthy color.
There are times you want to be seen, and times you want to remain unseen. Have a way to accomplish both close at hand, but your pack’s “default” color should be one that is less likely to draw attention to itself and you based on your immediate environment.
#2 – Reduce Noise to Improve Awareness and Reduce Detection
You may not have considered just how much noise your pack makes when it is loaded with all your goodies and you are tramping around with it.
Pay attention to it next time you go out for a practice march with it: the clink of your charger against your mug, the squeak and rasp of the pack against its frame, the rain-like swishing of cartridges in their boxes, your knife clattering against your flashlight, and so on. Dropping your pack or setting it down may as well sound like clashing cymbals.
You’d be surprised how fat sounds can travel, especially at night or over flat ground. Reducing noise from your pack and gear is a good idea, not just because it will help ease the burden on your sanity on a long march, but also because it is good fieldcraft.
Constant noise near your ears can mask somewhat other sounds emanating from elsewhere, to say nothing of revealing your presence to anyone in the area nearby. God forbid you should have real cause to evade other humans, but if you do know that sound is a big telltale of activity.
Taking a page from the military’s playbook for ground warfare, you should load your pack in such a way to muffle or eliminate completely any errant sounds.
Metal contacting another hard surface (especially other metal) will be your biggest offender, but just your gear shifting and swaying inside the pack may make a surprising amount of noise.
In general, insulate or isolate all hard materials against softer ones, and take care to pack your BOB down as tightly as possible to reduce shifting. After you think you have everything sorted, don your BOB and move around. Take note of any noise you hear and then track it down and eliminate it.
Use straps, bands, clothing, anything you need (within a reasonable weight restriction) to muffle noise. Once you have your BOB “silenced” and go for a hike you may be pleasantly surprised at how much better you can hear what is going on around you. And, if the time comes to be really sneaky, you will have a much easier time slipping around thanks to your newly quieted tread.
#3 – Have a Way to Release Your Pack Quickly
While a great many packs have built-in buckles, snaps and clasps to hold straps and belts together, or hold the pack to the frame, not all do.
You definitely want that capability considering you might have to ditch your pack in a hurry. A few instances may be when conducting a water crossing, moving through a built-up area or when being pursued.
The same thing that makes a pack desirable, strong webbing and materials, can work against you anytime that material is a snag or entanglement hazard.
As I mentioned above, this is crucially important anytime you are wearing your pack over or near water of any depth. Your pack may or may not yield any flotation capability, but even so the chance for it binding you and holding you underwater exists.
If your pack does not have built-in quick releases, you can add your own with a little crafty cutting and sewing. Be sure to choose quality and load rated fasteners for this job, and position them in a way that they will not be grinded painfully into you when carrying the loaded pack.
If adding buckles is not an option or you find yourself unable to access them, and you are in a situation that sees your pack trapping you, you should have a knife conveniently placed and sharp for the express purpose of allowing you to slice through straps and webbing to free yourself.
If would be a shame to have to destroy your strap or belt to get your pack off, but if the alternative is drowning, burning or something else equally terrible, it is no choice at all. Have a surefire way to free yourself from your pack, no exceptions.
#4 – Pack Smart
Sure you can cram everything you need into your giant BOB and hit the road, but that is not really best practice, is it?
I can see you now, someone gets badly punctured on a jagged piece of glass after a slip, trip and fall when you are bugging out, and you quickly doff your bag to whip out your trusty trauma kit. Lucky you, you have trained for just such an occasion.
Okay, let’s do this, your party member is leaking like a sieve and ruining their pants. Alright, pack open and camp stove, fuel canister, mess kit, cup, spork, granola, compass, hygiene kit, MRE, ammo, ammo, teddy bear, survival guide, aha! Trauma kit!
No, that’s your GPS case, damn it, tarp, solar array, cleaning kit, socks, harmonica, there it is! Trauma kit. Let’s giddyup, and meanwhile your friend is looking pretty pale…
Seconds count when you need certain things. Some items you might need yesterday when you need them. Your medical gear, above, is a great example.
The challenge is packing in such a way that the things you may need in a hurry are the easiest to access when you open the pack and your pack is still packed in such a way to improve balance by keeping weight closest to your body and below your shoulders.
This might mean lashing certain items to the outside of your bag or storing them in external pockets. For large, single-cell packs this will invariably mean the most critical items go in last so as to be closest to the opening on the compartment.
Take care that things do not shift easily in transit. Items that may fit in this category could be certain tools, lights, signaling items and trauma or first-aid supplies as mentioned above.
For really, really important items, you might consider making them first line gear, i.e. carried on your body or in pockets.
#5 – Cut Weight Wherever You Can
This one hardly needs an introduction. Any prepper who has schlepped a heavy pack (or one simply beyond their fitness level) any distance or over rough terrain is well trained in suffering. No matter how fit you are, moving a load over a given distance is far tougher and drains more energy than just moving yourself.
Weight is not your friend. We might have to put up with it, we may even have good, no, great reasons for coping with it, but it is never our friend when it is time to march.
Weight saps energy, weight creates blisters and hotspots, weight will exhaust you, slowing you and making you far more vulnerable to injury or a silly mistake from brain fade.
Weight also tests your BOB that much more. A stitch here, a seam there, and suddenly, sickeningly SKEERITCH! A busted strap and precious few ways to mend it.
We have all heard it from our friends, brothers and sisters in military service, but it bears repeating once more: ounces make pounds and pounds make pain. You must, must, must do everything possible to cut weight. Justify, really justify every piece of gear.
Have you looked for light or flyweight alternatives? As tough as it might be, do you really need a duplicate of any but the most critical or light items?
Is there something you can eliminate entirely, either being superfluous to your needs or readily improvised or created afield? There are certain pieces of equipment that can be omitted entirely if your bushcraft and improvisational skills are good enough.
Don’t forget to look to the pack itself. Some super tough fabrics like the heavier weights of Cordura or canvas are damned heavy. Have you investigated alternate models or brands of pack for a lighter option?
If you carry a framed pack, do you really need the support a frame offers? Is its capacity alone perhaps enticing you to add everything except a generator to your loadout?
It is tough striking the right balance, but in my experience cutting a few pounds, perhaps more, from all but the most minimalist packs is doable.
Conclusion
Your BOB is undoubtedly a lifeline in certain crises, and a precious asset. Treat it accordingly but do not take for granted that it too may be improved to minimize shortcomings and liabilities.
Use the tips above to go over your pack with a fine-toothed comb, and you’ll be even better prepared when the sky falls one day.

Charles Yor is an advocate of low-profile preparation, readiness as a virtue and avoiding trouble before it starts. He has enjoyed a long career in personal security implementation throughout the lower 48 of the United States.
Great job of saying it like it is, Thanks fivegunner
If you ever think about dieing/color choice, I like taking no 2 blue packets and 1 black. It gives that dark look, but when you really look at it you will see blue. Also, when you die something, so it a couple times with a couple rinses inbetween. Afterward try it on and sweat with it with something old underneath it.
One thing often overlooked: what is your back strap breaks?
No matter how solid is you bag, always plan for an alternative to repair it