There’s an old saying my dad told me that goes:
If there’s nowhere to get shade from the sun the best time to plant a tree was 5 years ago.
We can take this saying and apply it to prepping. If disaster comes, the best time to start prepping was a few years ago. However, many would-be preppers are dissuaded by the costs associated with stockpiling and prepping.
While it may seem like a daunting task to start to prepare particularly on a budget, there are some strategies and ways to make it cheaper.
One thing to keep out of your mind is a perfect prepping kit. Maybe you searched the internet or YouTube and have seen videos of expensive, intricate and complex prepping systems.
The fact is, the people who make these have invested a lot of money and spent a lot of time building to where they are. Start to think of prepping as small, baby steps. Build slowly and keep in mind that it can be a long process.
That being said, this article will look at building a prepping budget and prepping on a budget in general…
Determining Your Financial Survival Time
Anytime the writing is on the wall that we are heading for a major economic downturn or your primary source of income is in jeopardy, don’t wait for the detonation to happen before you start tightening your belt.
Think of this as a scuba diving exercise where however much money you have in the bank including how many assets you can turn into liquid cash equals how much air you have in your scuba tank.
When you are scuba diving if the air runs out, you drown. During an economic crisis if your money runs out you drown just the same, only figuratively instead of literally.
When scuba diving if you breathe slowly, steadily and evenly you will use less oxygen than if you’re gulping air in a panic. You want to treat your financial air tank the same way. Get your pencil out along with your calculator, then get to work.
You should ruthlessly cut everything, and I do mean everything, that you can that is non-essential. Gym memberships, car payments on additional vehicles, luxury goods, luxury foods, entertainment, subscriptions and even the internet if you do not use the internet for money-making purposes.
Of course all of this does not make much difference if you don’t know exactly how much you need to spend on the things you have to have every month, things like paying for your mortgage or for rent, utilities like water, electricity, gas and sewer.
Paying for groceries, hygiene items, and so on and so forth. That is the real bottom line. That is what it takes to pay for your “life support” as it were.
Next you need to get clear using the same process on things that you pay for that are not strictly essential, but do increase your work efficiency or help you make money easier, things like vehicles.
Once you have cut out all the fat and pork and tallied your expenses, your essential expenses, down to the cent then you can figure out how long you can last with your current financial reserves. From there, you’ll have your budget.
That is how long you can last for the current crisis until your income resumes normal levels. Once you have your budget, stick to it no matter what!
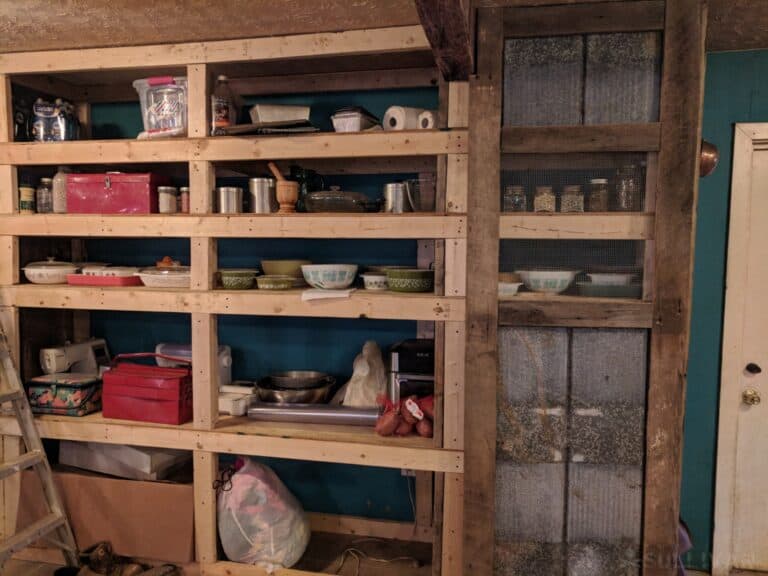
Take A Current Inventory
What do you have that you can use for prepping? You might be surprised what you have laying around your house. Chances are you have quite a few items in your pantry that go unused. It doesn’t stop there!
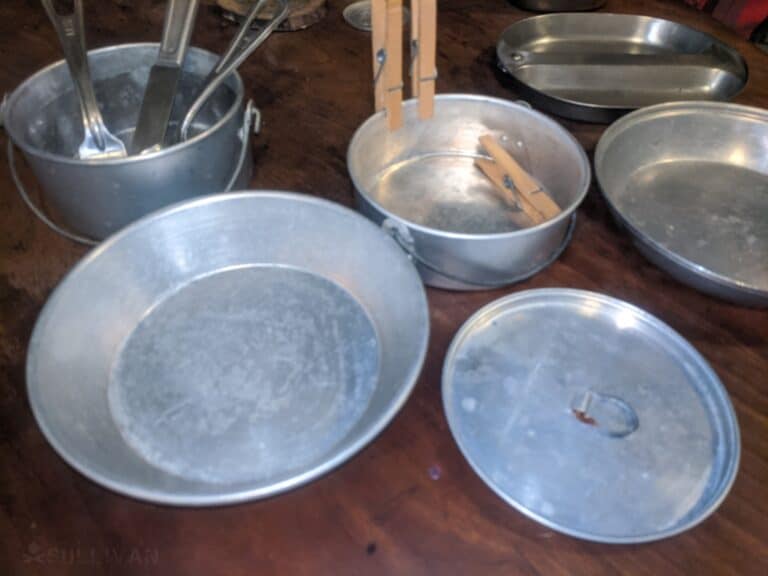
Blankets are essential for warmth. You need pots and pans to cook. Do you have tools for gardening? Do you have any weapons? Take a serious look at what you already have.
Set a Budget
Your next step should be to set a budget for prepping. You may have no disposable income for prepping; that happens to everyone at times. You may have $10 or $20 per paycheck you can spare. Figure out what you can afford.
There is no specific amount that works for everyone. Any budget you set is better than nothing. Perhaps, you have $5 per week to spend. What could you do with $5?
- Purchase a few bags of dried beans and seal them in Mylar bags with oxygen absorbers
- Buy some seeds and store them in envelopes or mason jars in proper conditions
- Buy a few gallons of water.
- Add a few items to your first aid kit.
You might have $50 per month to work with. While $50 per month doesn’t seem like a lot, you could actually do quite a few things with it!
- Purchase a box or two of ammunition, depending on type.
- Stock up on fishing lures and line.
- Buy a few whole chickens and veggies to can homemade chicken soup.
- Get five dozen boxes of canning jars.
- Buy one or two sleeping bags.
Focus on the Basics
You might want to purchase everything, but your focus should be on the essentials. What are the essentials?
You need shelter, food, water, first aid, light and hygienic needs. The most important out of the bunch are food and water because you will die without them.
First aid kits are important as well. Without medical care and hospitals available, you will be expected to take care of ailments and injuries yourself. Start off slow.
There are basic first aid kits you can purchase in stores for less than $20. As time goes on, you can invest into the kits, adding a new item each pay day. The thing about first aid kits is that you can see the benefits immediately. I know I use mine on a regular basis with three kids and an accident-prone husband!
How Much Money Should There Be In Your Nest Egg?
The wiseguy answer is as much money as you can afford to save. The answer that is more tangible and actionable for most is an absolute bare minimum of three months worth of all expenses at your current standard of living.
That sounds like a lot of money for some of you. It isn’t, unless you’re living in the freaking Taj Mahal or Buckingham Palace already.
That money will disappear in the blink of an eye, and as we are already learning, it takes hardly anything for the plug to get pulled on your primary source of income.
If all you have is three months’ worth of all expenses saved up and you tighten your belt immediately and drastically, cutting all non-essentials and saving money everywhere you can, you can eke out another month or two.
What you should be striving to do is saving up an entire 6 months to one year of all living expenses at your current standard of living. I mean every nickel’s worth of every expense, everything you need, in your piggy bank.
Talk about a relief! If you lost every cent of income- everything!- you and yours would be A-okay at your current standard of living for 12 months, and significantly longer than that if you instituted emergency rationing and reduction of all expenses.
Saving up that much money takes a significant amount of work, discipline and willpower. You will have to save, scrimp and sacrifice over and over and over again until you get that saved up.
But I will tell you one thing, reader, it’s 100% worth it, and is among one of the most practical and actionable preps that any prepper can I obtain in our modern era.
Plan your retreat
When starting to think about a prepping budget, it’s important to prioritize the survival necessities: food, clean water and shelter. These are the most important things to prepare because they can mean the difference between life and death.
Prepping a shelter depends on what you plan to do in case of a disaster. This can mean modifying a basement or underground shelter for survivability, buying a tent for mobility or making modifications to a car to get out of dodge. Shelter can have different costs based on your plans.
Once you have your budget planned out, you can assign priorities to your sheltering components. As an example, let’s say you plan to use your basement as a prepping location.
Disclosure: This post has links to 3rd party websites, so I may get a commission if you buy through those links. Survival Sullivan is a participant in the Amazon Services LLC Associates Program. As an Amazon Associate, I earn from qualifying purchases. See my full disclosure for more.
A budget might include:
- Water purification equipment.
- Stockpiled food and cooking gear.
- A generator.
- Heating stove and a makeshift chimney system.
- Survival books and supplies.
Upgrading your home or retreat is an important step but it can also be the costliest. As we will see later on, a generator, shelving and stove system could cost around $1000. It’s important to prioritize immediate and long-term goals when looking at sheltering.
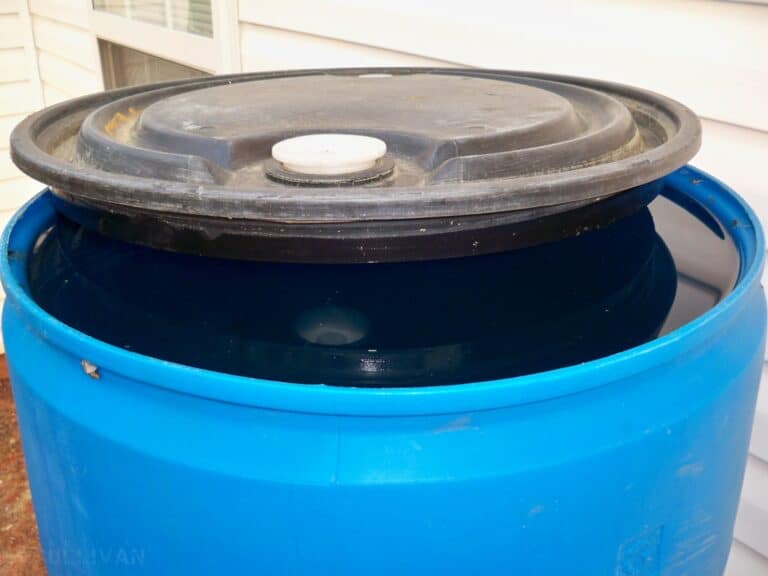
Stockpile water
Water is the single most important thing to consider when prepping. In a bugging-in situation, you’ll need to stockpile water in case you cannot leave your shelter. As for costs, we can do some simple math to calculate how much to budget.
At my local supermarket, a gallon of water costs around $1.00. I prefer to use gallons of water because the jugs can be reused in more ways as compared to a pile of 10oz bottles. However, if you prefer bottled water, you can do a similar calculation.
Considering that 1 gallon is likely a minimum per day per person, stockpiling a weeks’ worth of water would be $7. If you raise that to $9 for some extra volume, it’s still a relatively cheap price.
Obviously, this number is for one person, so if you have a family of 4, as an example, this number would be multiplied per person.
$9 x 4 people = $36.
So, for $36 you can stockpile a week’s worth of water for a family of 4.
Other water solutions
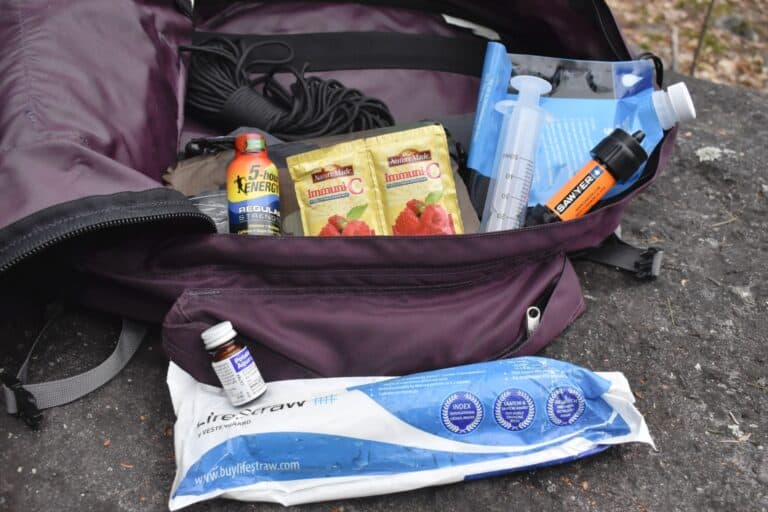
Another alternative to consider in addition to stockpiling water is to invest in a water purification system. If the disaster lasts long enough, you’ll need more than what you can fit on a few shelves in your basement and this is where purification can come in.
There are a ton of different ways to purify water from elaborate and expensive home rigs to handheld filtering systems or boiling.
One of my favorite filtering systems is the Sawyer PointOne Squeeze. I like how easy to use and light it is and how it can be used from a backpack for a quick drink or as a way to fill larger bottles, like the gallons jugs you will have from stockpiling.
Another added extra to consider is something like Nuun hydration tablets. Adding a Nuun tablet into a gallon of water will give some light taste but more importantly it will add electrolytes and salt to fight off dehydration.
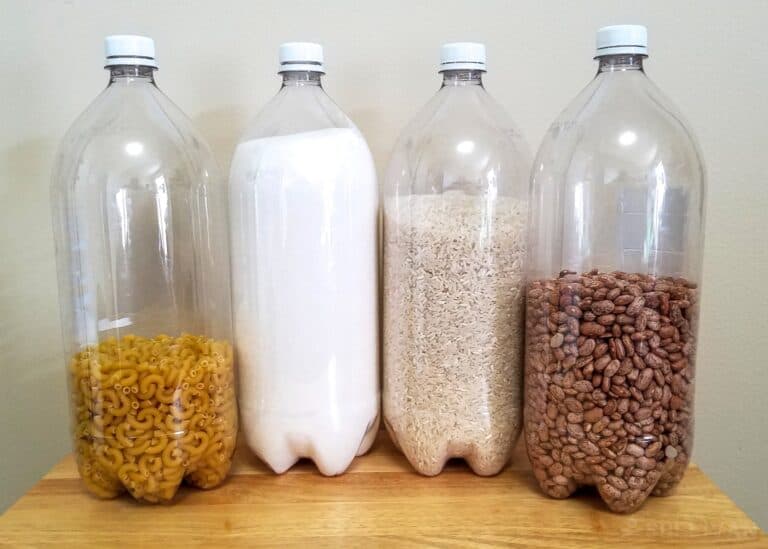
Buy food in bulk
It sounds like common sense, but buying in bulk is a good way to get a lot of food for cheaper prices. Buying bulk ingredients like vegetables and beans can be a long term solution, as well as looking for canned and premade meals. If you buy bulk and canned foods, you can stockpile a weeks’ worth for around $75-$100.
I generally recommend staying away from expensive, commercially produced prepping food kits. While they seem like a good investment, they are often crazy expensive for what you get and may only be partially usable.
What I mean by that is that if the bulk container has food that you don’t like or that will make you sick it isn’t worth having.
From my experience this is especially true with military surplus M.R.E. meals. M.R.E.s are generally expensive and poor in quality.
They are meant to keep soldiers fed until they can get back to the base, but not necessarily meant to feed them long term. M.R.E.s tend to have a lot of filler ingredients or gross-tasting meals in them too all at a huge cost.
Other Necessities
Apart from the main necessities there are other things to budget for survival.
Other necessities include:
- A knife or cutting tool, $15-$50.
- Clothing, $50-$100.
- Shelter, $100-$1500.
- Fire starting supplies, $10-$30.
- Rope or cording $10-$50.
- Containers, tarp, duct tape and other extras, $50-$100.
Using knives as an example of this, it’s not always necessary to spend all your money at once or drop it all on a single item.
A favorite cheaper knife for me is a Mora carbon steel knife. It’s rugged, dependable and keeps its sharpness, and it can be purchased for around $15, which is very inexpensive compared to other knives on the market.
Other cutting tools like hatchets or machetes can be purchased at lower prices but will still hold up to repeated use.
Where to start the budget
So now that we have an idea of what’s important to prep, you can start to make your own budget.
When making a prepping budget it’s important to start by looking at what you already have. Get out a notebook and follow along with a simple 3-step list to see where you stand.
- Take an inventory of what you already have and how much you can spend per month. What prepping and survival materials do you already have ready to go?
- Make a list of what you need. Do you have a knife but no shelter? Cooking gear but no food? Write out what you need. Prioritize based on necessity and survivability. Sure, a solar-powered oven or complex radio setup is nice to have, but prioritize the survival necessities first. Make priorities of immediate needs and long-term needs.
- Build a budget and set goals that allow you to buy what you need. Ask yourself what can be bought quickly or what needs to be saved for. Or, ask what ways can you save money by buying second hand or waiting for a sale.
Sample budget
So now that we have some ideas for what is necessary for our prepping budget, we can look at a sample scenario. I’ll make two broad categories of immediate and long-term priorities with a monthly budget of $200.
Monthly budget for prepping: $200
Immediate priorities:
- 2 weeks of stockpiled water for 2 – $26
- A water filtering system – $40
- Stockpiled food – $75
- An axe to chop wood for a fire-burning stove – $50
- Various extras like tarp, duct tape, fire starter, containers and cordage – $50
- A few hardbound survival books – $25
Long-term priorities
- A dependable backpack – $120
- A generator – $500-$600
- Shelving for my basement shelter – $100
My immediate priorities are things I’ll tackle first, and the total amount I’d need to spend is $431. If I use $150 of my $200 budget per month, I can purchase all that I need in around 3 months.
The long term-priorities will obviously take a little bit longer and are often high-cost items that should be saved for. In this example my long-term priorities equal $720-820 dollars.
Of my $200 monthly budget I can decide to save $50 per month for my long-term priorities and then add the remaining $150 once my immediate needs are met.
This means I will have a base savings for long-term priorities or to use for other short term needs if they come up without planning.
And then once I purchase the long-term priorities, I can then save the $200 per month for other prepping needs.
Savings Accounts: In-Home or Institutional
If you are using an at home piggy bank you will always have control of your money, and it will always be available no matter what happens or how quickly. If you need to pull that cash out right this second it is in your sweaty hands and then in your wallet in no time flat.
Obviously, any large quantity of cash is vulnerable to discovery, loss, destruction or theft.
Also, money that is sitting in any kind of box is not earning interest, and if your money is not earning enough interest to keep pace with inflation the money you have saved is actually shrinking. Something to think about.
An institutional savings account makes your money almost completely safe from theft (at least up to the amount your banking institution is insured by the federal government)…
It will also earn you a return in the form of interest, even if the interest in virtually every savings account is so small it will barely keep pace with inflation and fees if it does that.
The biggest disadvantage to having your money in a savings account is it is no longer in your possession and it is no longer cash money.
You’ll have to go to the bank to access it and they will have to convert it from electronic ones and zeros on a computer into greenbacks.
If you have a sizable savings account there is a very high likelihood that you will not be able to draw it all at once without giving the bank notice. That’s a major bummer if some disaster causes a major run on the banks.
Both of these methods have merit and you don’t have to choose one or the other. You can choose to keep a sizable chunk of cash in your home for dire, in-your-face emergencies and the rest of it in a savings account safe and sound in the bank.
This reduces the chances that if you lose one you will lose everything, and also allows you a certain amount of flexibility.
A savvy prepper will be reading the wires daily keeping an eye on the national and world situation reports, so that if they get nervous they can head to the bank before anyone else starts panicking to pull their cash out. Better safe than sorry.
Realize It Takes Time
Before we dig in, I want you to know that prepping with very little money takes time. You can’t run out to the store and stock your bug out bag in one shopping trip.
It takes time. You will be tempted to feel frustrated and annoyed, but don’t let that happen! Your efforts will come together eventually.
Alter Your Mindset
It is time to change your mindset. If you want to be ready for anything, you have to be ready to not depend on a store. It is a different way to think. Homesteaders have this mind frame, and it is important for you to adopt it. What do I mean?
- I have eggs, but I need some berries for the kids. Can I find someone to barter?
- We need to build a trellis for the bean plants. What do I have around my house that I can use?
- Don’t toss out a shirt because it has a hole. It can be fixed or used for rags.
- You don’t have to be an extreme coupon user, but there are ways to you can use coupons to prep. You don’t need 50 tubes of deodorant typically, but it might not be a bad idea in a permanent SHTF scenario.
- Check out the local sales. Once, my local store had boxes of rice on sale for $.75 each, a decent price by themselves. I just happened to have 15 $.50 coupons for that particular box of rice. I spent $3.75 on 15 boxes of rice. Then, I went home and put them in Mylar bags for long term storage.
- I love manager specials and markdowns. My local stores seem to have more markdowns right in the morning or late at night. If you stumble upon a whole chicken marked down, you can take it home and boil it. Then, strain the broth into jars. Add pieces of the chicken, celery, and carrots for your homemade chicken soup. Make sure you process it through a pressure canner or freeze it!
Lean on Your Local Library to Skill Up
Libraries are often thought of as places to go to check out books. But in reality, most libraries offer so much more than that!
They are a wealth of resources and information, and best of all, they are free to use.
Here are some ways you can take advantage of your local library for prepping purposes:
- Take classes on everything from cooking to gardening to computer skills.
- Use the library’s computers and Wi-Fi to stay connected and do research on emergency procedures and likely threats in your area. (you might be surprised at how much you can learn by doing a simple Google search).
- Check out DVDs, CDs, and books on tape on any survival subject. A great way to stay entertained while you learn and save a bundle over buying books at the same time!
- Attend community events and meetings that are hosted by the library, such as book signings, author talks, and more if they are related to community preparation or disaster preparedness.
If you are diligent, you can use the library’s resources to help you with all your prepping needs, from finding information on how to build a solar oven to learning about first aid and CPR.
Now that you have an idea of what you need and what a sample budget can look like, here are some tips and tricks to save money.
Go to shows and military surplus stores
Gun shows and surplus stores are excellent places to find prepping gear on a budget. Not every piece of gear needs to be brand new and perfectly suited, sometimes you can get by with buying old or used.
I have found that gun shows and military surplus stores are best for buying sleeping bags, packs, rain gear and clothing. You can even sometimes find military medical kits, gas masks, and electronics cheaper than other sources.
Another reason to consider gun shows and military surplus stores is that they are good places to legally buy firearms and other self-defense tools. I frequently visit gun shows to check prices and find that guns can generally go for $50-$100 cheaper than at a gun store.
There is always usually bulk ammo and reloading supplies in abundance at shows. Look around for other self-defense gear too, gun shows will often have booths that sell Tasers, survival bows and close-combat bladed weapons.
Apart from this, these locations are great places to have conversations with people and learn about prepping. The folks who run military stores or booths usually have a broad knowledge of survival and gear, and can point you in the right direction if you ask.
Learn skills
It’s a belief of many preppers that knowledge is as important as gear. And the good news is that knowledge is free. Gear can let you down or get misplaced or broken, but survival knowledge is something that can stay with you long after you learn the skills.
Skills to learn that are as good as gear include:
- Canning. Do you know someone who is an expert at canning food? Ask if you can help during canning days. Learning how to preserve your food is an essential skill for all preppers! Put this at the top of your list, especially if you are a gardener.
- Gardening. Does your neighbor have a vegetable garden? Ask if you can come weed and learn how to garden (I would love if someone offered to help weed my garden in exchange for information).
- Hunting. Do you know anyone who hunts? You can trail along and watch a hunt. There is no better way to learn how to hunt than to go out with someone.
- Sewing. Does your grandmother know how to sew? Sewing is a great skill. You can use it to fix clothes. Plus, it is a craft that can earn you money on the side. You may need to know how to sew to fix a tent. Don’t disregard this skill!
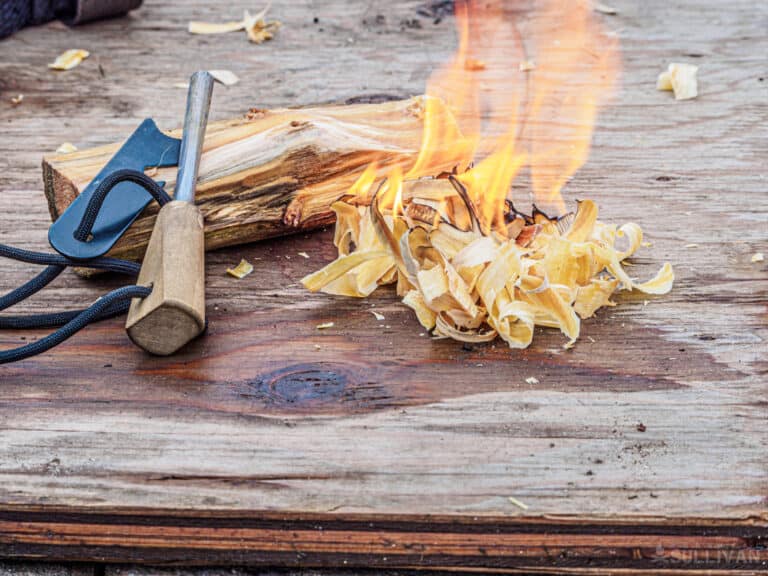
- Can you start a fire from tinder, kindling and one match? Do you know how to start a fire with flint and steel? Learning how to build a fire is an essential skill. You can do this in your backyard in your spare time.
- How to grow or scavenge for food.
- How to clean and disinfect water and how to store water.
- How to build shelter.
- Using duct tape, tarp and cording for shelter or repairs.
- How to navigate in the wilderness or in an urban environment.
- How to repair and take care of your gear.
Having a knowledge of survival and prepping is as valuable as anything else, it’s why people can survive in the backcountry for weeks with little gear or food.
As part of your prepping education, frequent sites like this one and looks for books on the subject of prepping and survival.
Find ways to use what you already have
Sometimes it’s possible to use what’s already laying around as a prepping tool. This is true for shelter, as things like cardboard, tarp or dumpsters can be used in a pinch.
Trashcans or construction buckets can be repurposed for water collection, growing vegetables or storage. Old clothing can be used to make blackout curtains, rugs or blankets.
Never buy during a crisis
We started off by saying don’t feel like you have to rush out and buy everything all at once. While this is true, it’s also important to prepare so that you aren’t buying during a panic.
A very real-world example of this is prepping for a hurricane. The worst time to buy hardware to board up windows, sandbags to keep out water, a generator for electricity and food to survive the storm is when the rain starts falling.
Take stock of what sorts of disasters can happen to your area and stock up on supplies that will let you survive it.
After creating a budget and shopping smart, it’s possible to prep with limited resources. Prioritize the survival necessities, visit surplus stores and gun shows and invest in knowledge and survival training to cut down on costs.
And remember to take it slow and enjoy the process. If you stay on a budget everything you buy will be that much more valuable.
Use Coupons and Watch for Sales
You don’t have to be an extreme coupon user, but there are ways to you can use coupons to prep. You don’t need 50 tubes of deodorant typically, but it might not be a bad idea in a permanent SHTF scenario.
Check out the local sales. Once, my local store had boxes of rice on sale for $.75 each, a decent price by themselves. I just happened to have 15 $.50 coupons for that particular box of rice. I spent $3.75 on 15 boxes of rice. Then, I went home and put them in Mylar bags for long term storage.
I love manager specials and markdowns. My local stores seem to have more markdowns right in the morning or late at night. If you stumble upon a whole chicken marked down, you can take it home and boil it.
Then, strain the broth into jars. Add pieces of the chicken, celery, and carrots for your homemade chicken soup. Make sure you process it through a pressure canner or freeze it!
Re-purpose Everything
In a true SHTF scenario, pretty much anything that isn’t nailed down can and will be pressed into service for one purpose or another.
Re-purposing is key to making your limited resources go further. You might say you are dealing with the same restriction now while your cashflow is sharply limited!
Here are some tips on how to get the most out of what you have without breaking the bank:
- Try to think outside the box when it comes to everyday items. For example, an empty plastic container can be turned into a handy carryall for small items or as a toolbox that can hold fasteners and a repair kit in a pinch.
- Utilize every inch of space in your home by using storage containers and hanging racks to store clothes, canned goods, or anything else you can think of.
- Get creative with cooking. There are many recipes that can be made using simple ingredients and minimal equipment. If you can boiling water in a pot on the stove, bake bread in an oven (or even in a Dutch oven over an open fire), and make stew in a slow cooker you have a world of possibilities!
- Learn to improvise solutions to your problems instead of thinking of the correct “buy”. Consider everyday items and supplies as components in the solution you can implement.
When it comes to living in a SHTF scenario, remember that one man’s trash is another man’s treasure. You never know what you might be able to devise from something you consider to be of no use.
Learn to Forage
Unfortunately, foraging is a lost art. People forget that nature once provided all the food we need. There still are hundreds of edibles in the world that grow freely. You might find some in your backyard. While you could purchase a guide for foraging, a library should have plenty of information about wild edibles.
Take a few hours each week to discover what you have locally. Don’t just find the edibles. Take them home and incorporate them into your dinner or lunch. Knowing how and where to find wild food is a great skill for any prepper. You will have food no matter where you go.
Purify Water on the Cheap
You can only live for three days without water. It is crucial for life. One of the first things you want to purchase is a way to purify water or learn how to make a purification system.
There are purification tablets that you can purchase for a few bucks in the stores. You could also spend more money for a straw that purifies any water. Building your purification system will take time, but it is a great asset. You need water, especially in an SHTF scenario.
Purchase Lower Quality if You Must
I typically encourage people to purchase middle of the road priced items. If you have three choices, go for the one in the middle. It may not be the best quality, but it is better than the lowest, without spending extra.
You are going to need to buy some things, such as a knife. Having a pocket knife comes in handy. At first, it is fine to invest in a lower quality; you have the knife now. Later, when your money situation is better, you can invest in something even nicer.
Shop Second Hand
Shopping second hand is my favorite way to get quality gear for pennies on the dollar. Check out your local Goodwill, Salvation Army, or other thrift stores.
You can often find clothing, tools, appliances, and other useful items in good condition at a fraction of the retail price.
Especially for durable goods like tools, guns, and other hard-use gear, unless the item in question has been truly abused you won’t have to worry too much about its serviceability or longevity.
Prepper swap-meets are another ideal way to pickup worthy second hand gear.
At most of the large ones I’ve been to there’s always a healthy selection of gently used prepper gear being sold by folks looking to declutter or upgrade. You can often find some great deals if you keep your eyes peeled.
Some of my favorite things to get are tents, outdoor clothing, bows, luggage, boots, and backpacks.
You’d be surprised what kind of high-end stuff people will let go of cheap under the right circumstances! You can also find some great deals on second-hand websites like Craigslist, OfferUp, LetGo, or eBay.
Just be sure to use caution when meeting strangers to exchange goods, and always meet in public places with plenty of people around.
After a few trips of second-hand shopping, the savings you net on gently used goods will be substantial. You can put them to use for even more gear or to improve your preps in other ways.
Only Stock Up on Food You Eat
In a real SHTF scenario, chances are you won’t be picky about what you eat. However, if you are preparing for a short term problem or job loss, it is senseless to stock up on the food you won’t eat. For example, our family hates beets. Even if canned beets were on the lowest sale ever, all the cans would expire.
Stop Obsessing
It is easy to become obsessed with prepping. At one time, that was my life, prepping consumed me. Now, I have learned we have to live our lives. I strive to do one thing each day for prepping. What are examples of small things?
- I might store some water for the day.
- I could make some fire starters with lint from the dryer.
- My friends and I may trade some eggs and veggies, further establishing our bartering community.
- Time spent in the garden counts as prepping.
- I might take inventory of the first aid kit.
- Tonight, I could read a few prepping articles.
One small thing each day adds up to a whole lot of knowledge and preps. Over time, all of your efforts will come together.
Join a Local Community
Prepping is a worldwide activity and lifestyle. You may be surprised at the number of people locally who consider themselves preppers. See if you can connect with them. Facebook is a great way to find them!
Many towns have prepper groups. You can also look up larger prepping Facebook groups. It is a great way to gain information and to find people who may live close.
- Family Preparedness – Helping Women Prepare
- Prepping for Beginners
- Doomsday Preppers
- Survivalists
- Medical Survivalists
- Survivalist Base Camp
In an SHTF situation, you have a higher chance of survival when in a group. Can you find people who would want to band together in emergencies? Everyone is responsible for something, but not everything. Best of all, you can focus on the skills you are good at and things you can afford. What does this look like?
- Someone might have the land to host people in an emergency situation.
- Someone might be responsible for transporting chickens and taking care of them.
- You might be an excellent gardener. You bring to the table the ability to produce more food for the group.
- You or your spouse might be an avid hunter, capable of providing meat for the group.
- You might be able to preserve food in solar dehydrators.
- First aid could be a skill you excel in; you would be a huge asset to the group.
While it is important for everyone to be versatile, prepping with a group of people allows you to focus on fewer things.
Prepping for Pennies a Day
There are many ways to get the most out of your resources, even when you are on a tight budget. With a little creativity and resourcefulness, you can be well on your way to being prepared for anything.
Do you have any suggestions for prepping on an extreme budget? We would love to hear from you! Let us know in the comments.
Jonathan is a prepper from Youngstown OH, US who’s simply in love with camping and hiking.
Awesome post. I live in the city so, come snowstorms or power outages, trying to stockpile anything is an absolute nightmare. Of course, its hard to stockpile in general when you’re living in an apartment. Do you have any advice for those of us trapped in the urban anthill? I feel like when stuff starts to go down, the cities are going to be chaos.
Hi Angelica! Sorry this is 9 months late, but any place you have vacant space is also prepper space. Under the beds (use bed risers to give yourself a bit of extra space), inside closets, up on closet shelves, closet organizers like over the door shoe organizers or hanging organizers, under end tables, in unused drawers, under decorative tables (put a table cloth over it to hide them), under the sofa, and any other furniture you can put things under. Luggage you aren’t using, which can also double as your bug out bag. You could use a piece of plywood over water bricks with a tablecloth to hide them. If you have space under your bathroom vanity, put stuff in an under bed box, if it will fit, and put it under the vanity, then get a piece of plywood with a piece 1/4 round to put in front of it to make it look like a kick plate and it’s blocking the view of what’s underneath the vanity. If you have space above your kitchen or bathroom upper cabinets, things can be stored there, too. I love the various sizes of the clear SteriLite boxes with the “locking” lids. You can see what is in the box and the lid locks to keep out bugs and 4 legged vermin, and it keeps stuff from falling out because the lid is “locked” down. I’ve also thought about putting plywood under the box spring to store preps. Space is space, and it is all valuable to a prepper!!