Before the advent of modern refrigeration, canning was one of a handful of food preservation methods available. Meat could be salt cured and vegetables dehydrated, but to store ready-to-eat foods, there was almost no better option than canning. A quick look at your local grocery will prove that things haven’t changed that much.
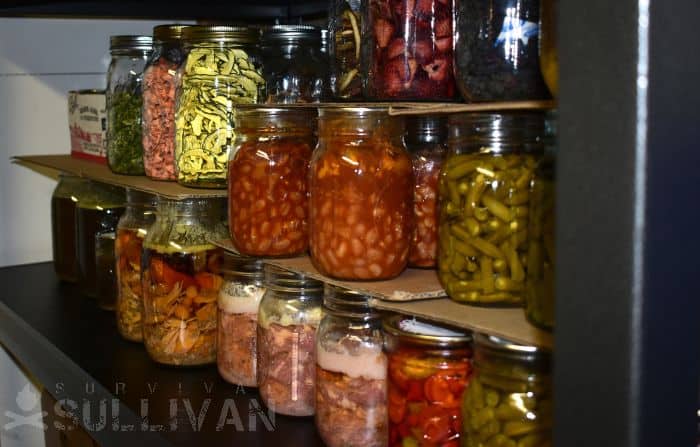
Refrigerated items are in coolers around the outside. Dry goods can be found in bags and boxes on several aisles. Right in the middle of the store are the good old canned products. Store shelves are stocked with cans of sauces, vegetables, fruit, and yes… meat. With a little know-how, your pantry shelves can be stocked with these items as well.
It would be hard to describe canning without a basic explanation of the methods involved. The 2 most common types of canning required for simple food preservation are water-bath, and pressure canning. While both methods produce safe food, each method is individually suited to the food being preserve.
To minimize the chance of failure, and to increase safety, we will focus on pressure canning. Most foods can be processed in a pressure canner. For items low in acid, a pressure canner is a must.
Get to Know your Pressure Canner
Disclosure: This post has links to 3rd party websites, so I may get a commission if you buy through those links. Survival Sullivan is a participant in the Amazon Services LLC Associates Program. As an Amazon Associate, I earn from qualifying purchases. See my full disclosure for more.
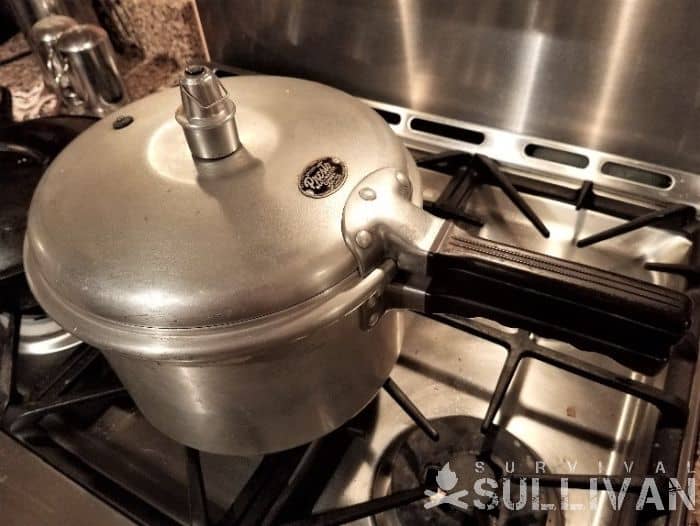
A pressure canner looks like a big pot with a heavy top. That is not surprising, because it is a big pot with a heavy top, but the additional hardware involved allows us to safely stockpile food for future use.
The body of the pot is where the water and items being canned are placed. The size of the canner body determines how many jars you can process at one time.
Any canner should contain a cooking rack which fits into the bottom of the canner body. This ensures the glass jars do not rest on the excessively hot bottom of the canner.
While the body of the canner is heavier than a standard cooking pot, the canner’s cover is where the magic happens.
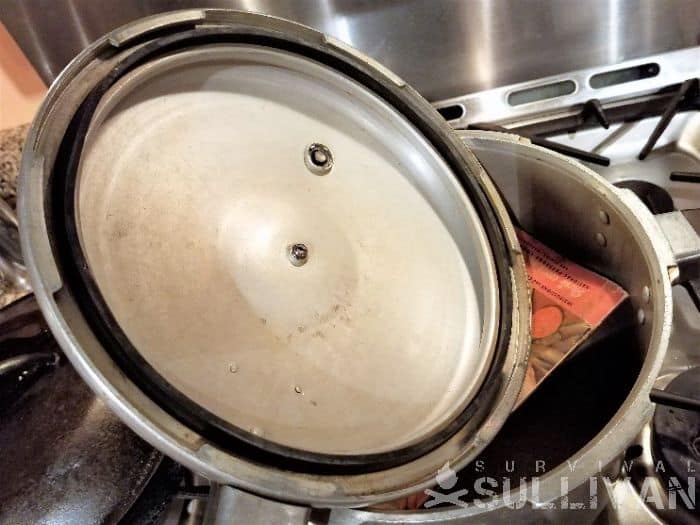
The cover has several vital parts to safeguard both you, and your food. It is a good idea to check these parts for wear and functionality before attempting to can your own food.
The sealing ring is on the underside of the cover and does what you would expect it to. It creates an airtight seal between the body and lid of the canner.
An overpressure plug is there to prevent damage to yourself or the canner. A vent pipe directs the steam upwards during the canning process.
A pressure regulator (often known as a “jiggler”) sits atop the vent pipe and is used to create and maintain pressure. While large pressure canners may have dial type pressure gauge on the cover, some have a pressure indicator built into the pressure regulator.
Pressure Canning Necessities
No matter what you are preserving, you will need jars and lids and rings. I have seen some save jars from the grocery store for reuse when canning. I have also seen low rates of success with the thin commercial glass used in those types of jars.
Stick with jars and lids designed for the purpose. Ball, Kerr, and Mason are probably the most respected brand names when it comes to both jars and lids for canning.
There are many brands of pressure canners to choose from. “Presto” has been making them since before any of us were around. Technology has allowed the pressurized canners to be crafted from stainless steel. Once you have tried canning and are ready to go all out, the “All American” brand of canners are hard to beat. Huge, heavy, and expensive, but hard to beat!
I would like to add a few of the smaller items often used in canning to the list. These may not be required, but you will wish you had them during the first batch of food you process.
Jar funnels – The wide mouths allow easy filling of jars and more importantly, keep jar rims clean while filling.
Canning Tongs – These tongs have ends made to fit around the canning jar necks. Extremely useful when you want to empty a hot canner and get another batch going.
Tea Towels – Great for cleaning jar rims, drying wet lids, and making a comfy spot on the counter for your hot jars.
Preservatives. Did I say a bad word? Not really. Any food that will be stored beyond its normal life will often need a slight modification.
Sugar is often used with fruit in the form of a syrup. Vinegar is a common preservative when pickling. Salt is added to almost any other type of food to be canned. Please note that canning salt does not contain Iodine as table salt does.
Do not use iodized table salt when canning. Additives in table salt will produce cloudy results, or leave sedatives in the bottoms of your jars.
There are commercial preservatives available to help retain color, texture, and extend storage times. I will leave that decision up to you, but there will be preservatives of some type, whether natural, or man-made involved.
Canners on the Cheap
If you are just starting to learn the skill of canning, I wouldn’t rush out and spend hundreds of dollars on a large canner. Many old canners are still out there at garage sales and auctions. Most of those can be bought for less than 20 bucks.
Don’t give up on an old canner if the seals wear out or crack. I have a Presto Meat-Master 606 (no giggling please) that was manufactured in the 1940s.
Everything that can be replaced on the cooker can be found online. It does not get as much use as I had hoped, as I am leery of pressure cooking meat in aluminum, and it is a bit short for canning.
That did not stop me from replacing the seal, the automatic pressure valve, and the pressure indicator. The parts are out there for most old pressure cookers. You may not even need parts. Your local ag extension service can still test pressure gauges to ensure functionality.
What to Pressure Can
What do you like to eat? Tomatoes are a favorite as they can be quickly turned into sauces, salsas, and soups. Fruits like peaches, pears, cherries, or veggies.. from green beans to beets. Basics are always good to have on hand because they allow flexibility when are ready to create a meal.
Once you gain a knack for the process, why not can some venison, pork tenderloin, or sausage? It is quite doable, and many prefer the results over that from the freezer. Still looking for adventure? Try canning your salsa pre-made. The same goes for soups, stews, and seafood dishes.
Whatever you decide to preserve, the best portions should be reserved for canning. A bruised apple is better consumed now. Use only the best produce and edibles when filling those jars to ensure a long shelf life.
Fill ‘em Up
Clean everything! A good result depends on it. While lid rings may be used if in good condition, the lids themselves with sealing rings should be new.
Use a pot or pan to simmer the lids and rings. As you process batches, add more lids and rings to the hot water. Add a few inches of water to the canner, place on heat and turn in up.
Place canning jars mouth side down into the hot water and allow them to sterilize. Remove jars from the hot water and place upright on tea towels placed on a solid surface.
You are ready to fill the jars. I will once again bring up the importance of cleanliness at this point. Whether you are packing apple slices, or pouring homemade pizza sauce into your jars, a wide mouth funnel will help keep the jar rims clean.
Once fruit or vegetables are packed in the jars, add the liquid or syrup while the funnel is still on, then move the funnel to the next jar.
No matter what you are placing in the jars, headspace is required. In larger jars, an inch of space is recommended between the contents and the lid. In smaller jars, the headspace is closer to a half an inch. It is also important that fruits or vegetable are covered by the liquid used, to ensure uniform quality and long lasting goods.
Once the jars are filled, use a tea towel or cloth to carefully clean the jar rim. Place a lid on the jar, and loosely screw down the lid ring. How loosely? It helps to consider that gases need to escape during processing. Screw them on only as tight as light pressure allows. Carefully place the lidded jars into the canner.
Make sure you have enough water in the bottom of the canner to last through longer processing times. About 3 quarts is suggested for large canners. Crank up the heat! Secure the lid on the pressure cooker and, STOP!
Allow steam to exit the canner for up to 10 minutes before placing the regulator on top of the vent pipe. This process is known as venting and is necessary to ensure consistent results. Removing air from the canner in this way results in consistent steam pressure and processing temperatures.
The Process
Note: I will not try to list processing times here. Depending on what is being preserved, the time required may be from minutes to well over an hour, and at different pressures depending on your altitude.
I would do a quick internet search for processing times with the trusted brands that provide the jars. Ball has a reference book known as “Complete Book of Home Canning”. It is a great resource, and I suggest it to those who plan to preserve their own food.
Keep a close eye on the gauge or indicator. When pressure approaches the required processing pressure, back off the heat and begin timing. Once the processing time is completed, turn off the heat. With the heat turned off under the pressure cooker, pressures will gradually reduce. Depending on your cooker, it may be quick, or very gradual.
Don’t rush it. Understand that the interior of the canner and the interior of the jars are at a similar pressure. Opening the canner prematurely basically creates rapid decompression, and the contents of your jars will spew through the lids, ruining the seals on your jars. Wait until the pressure is zero, then carefully remove the lid, being careful of the escaping steam.
Use the canning tongs to remove the jars from the canner, and place them on the tea towels to cool. This may be the hardest part of the process… Leave them alone! Do not poke at the lids or turn them upside down.
As they cool, the lids will begin to pop as the seal is completed. After 12 to 24 hours, the rings can be removed, and your processed jars are ready to be stored in a pantry or cellar.

My dad was military. My grandfather was a cop. They served their country well. But I don’t like taking orders. I’m taking matters into my own hands so I’m not just preparing, I’m going to a friggin’ war to provide you the best of the best survival and preparedness content out there.