If you are prepping for your family and you have infants or toddlers still in diapers or think you might be adding to your family in the future, you are going to have to think of what your baby needs for survival. Prepping should include baby friendly foods, toys, clothing that will fit them as they grow, and diapers.
Sure, babies will survive without diapers, but your life will be a whole lot easier if you have them. If you stock up on dozens of cases of disposable diapers, you will get by for a while after the collapse, but eventually they will run out.
Plus, buying all those disposable diapers is expensive and they are very bulky, so storing them would be a great challenge.
Prepping aside, many families would rather find a solution that is reusable and more environmentally friendly and when it comes to prepping you simply cannot rely on disposable diapers.
The solution is to use reusable cloth diapers, but purchasing cloth diapers is also expensive. The alternative is to make your own. If you think you aren’t creative enough to make your own homemade diapers, you might be surprised. It really isn’t as hard as you think. Here are a few ways to make cloth diapers.
Table of Contents
Simple Flat-Fold Diaper
This is the most basic type of homemade cloth diaper and it is the easiest. It doesn’t require any sewing! Essentially, this diaper is just a big square of fabric.
Materials
- Large piece of heavy flannel
- Scissors
- Ruler or measuring tape
- Safety pin x1
Steps
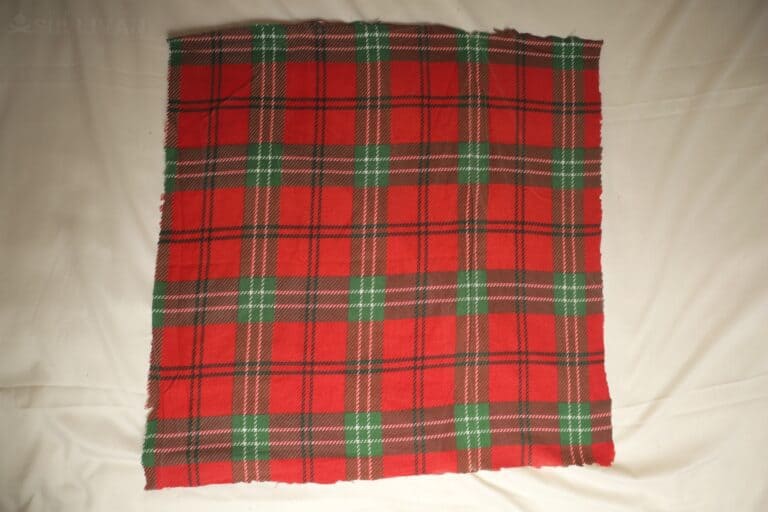
Step 1. Cut a square out of the fabric that is 28 inches x 28 inches (71 x 71 centimeters):
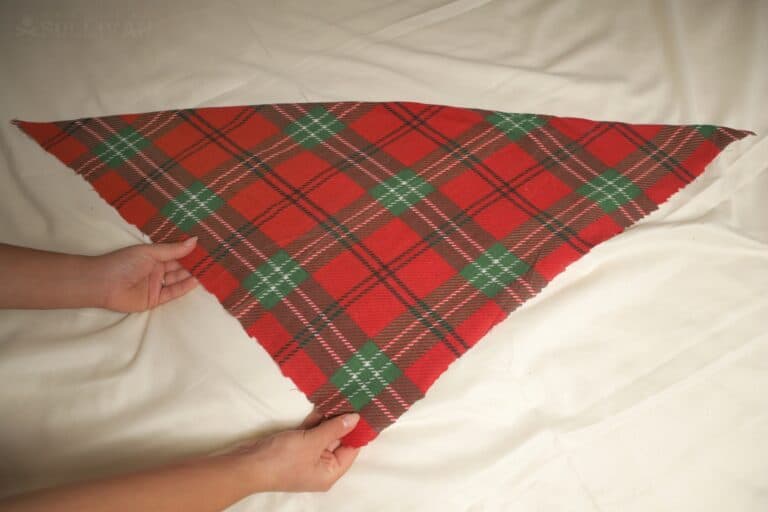
Step 2. Fold the cloth into a triangle:
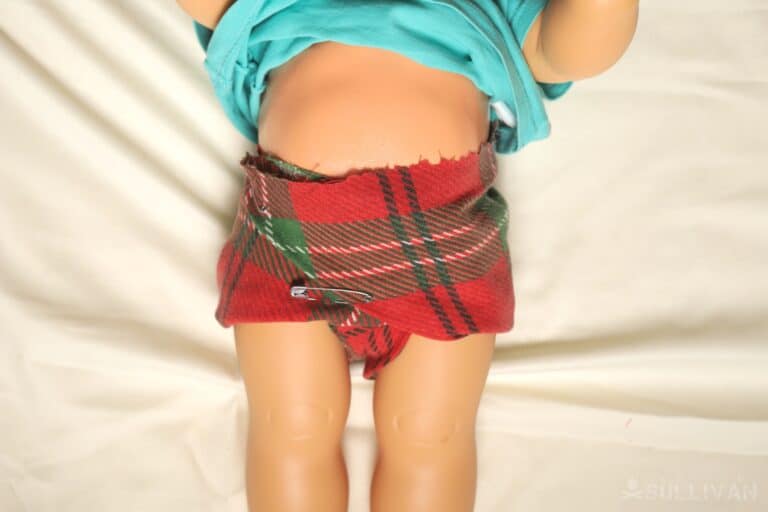
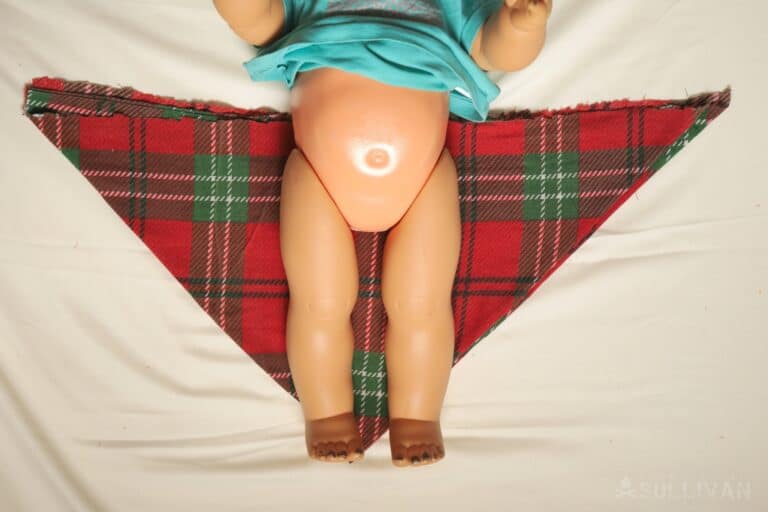
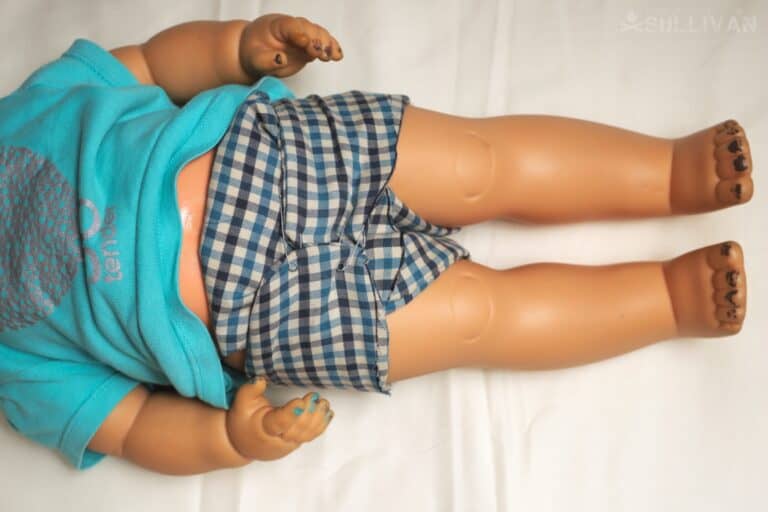
Step 3. Place the DIY diaper under the baby. I used a baby doll for the purpose:
Step 4: Fold the bottom part of the triangle upwards.
Step 5: Fold one of the sides towards the middle:

Step 6: fold the other side of the diaper, and fasten with a safety pin.
And that’s it! Just make sure you use a plastic cover with your diaper to prevent any leaks, which are bound to happen with this type of DIY diaper design.
Regular Cloth Diaper (Sewn)
For this cloth diaper, you will have to do some sewing. You will start by making your own pattern, which is easily drawn out on a piece of newspaper or another large piece of paper. But first, you need to gather what you will need to make this diaper.
Materials and Equipment
You will need:
- Sewing machine (or thread and needle)
- Scissors
- Measuring tape
- Thread
- Large piece of cloth of 50 x 50 inches (1.3 x 1.3 meters), or two pieces of 25×25 inches (65 x 65 cm)
- 1 foot x 1 foot (30 cm x 30 cm) square padding. This padding can be made from microfiber or cotton quilt batting. If you don’t have access to those, then terrycloth or heavy flannel will do the job.
- Safety pin x2
- Marker
- Large piece of paper to draw the pattern
Steps
Step 1. Draw a large “T” on the paper. The top of the “T” will measure 21.5 inches across and 3.5 inches wide. The stem of the “T” will be 18 inches long and 6.5 inches wide. Note that this will fit a baby that weighs between 10 and 25 pounds, so you might need to adjust this depending on the size of your baby.
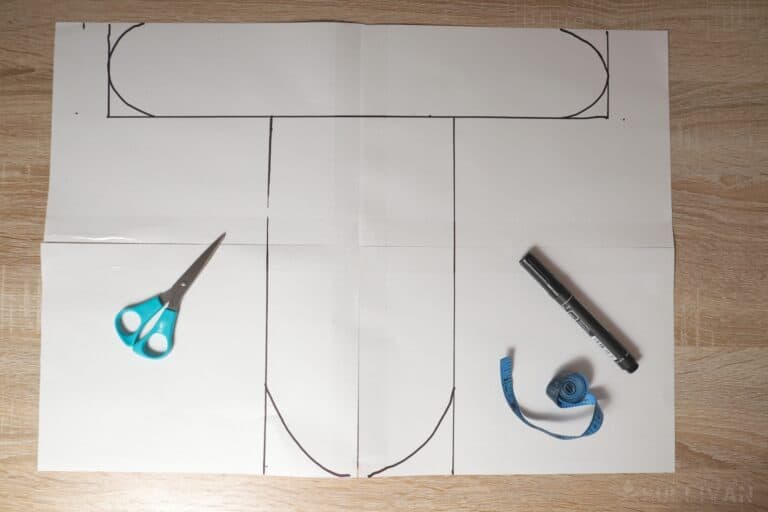
Step 2. Make the corners of your “T” rounded (it will have a sort of airplane shape to it).
Step 3. Cut the pattern out of the paper:
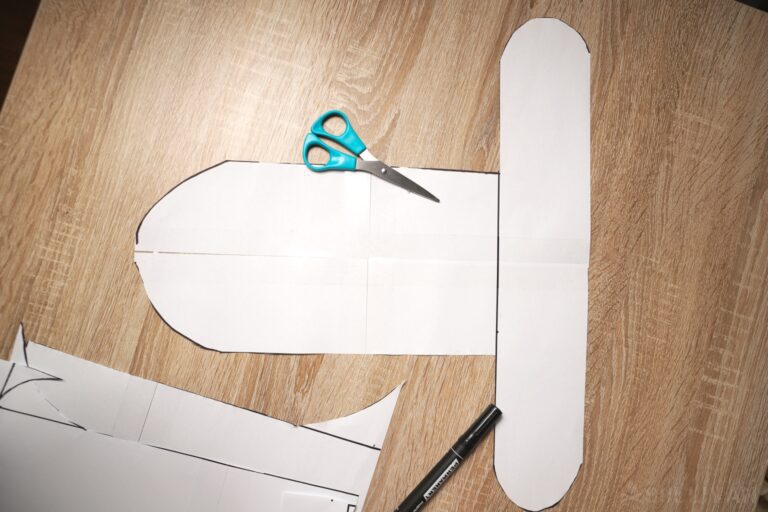
Step 4. Place the pattern to your fabric, and draw a shape on the fabric with your Sharpie:
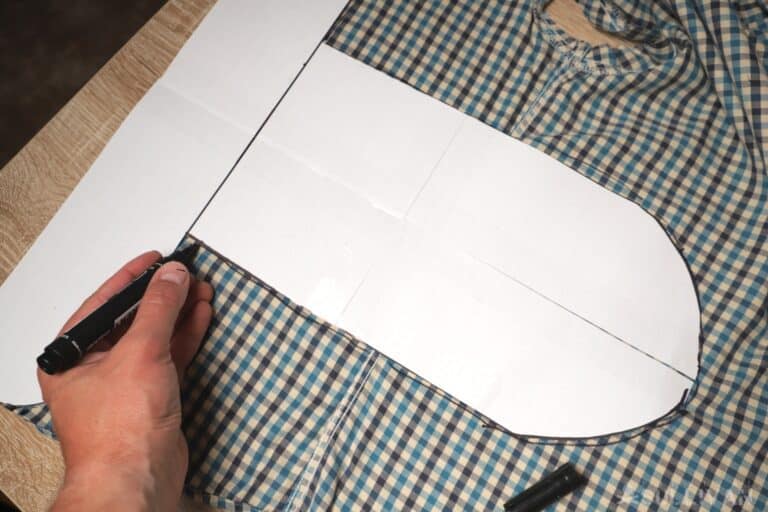
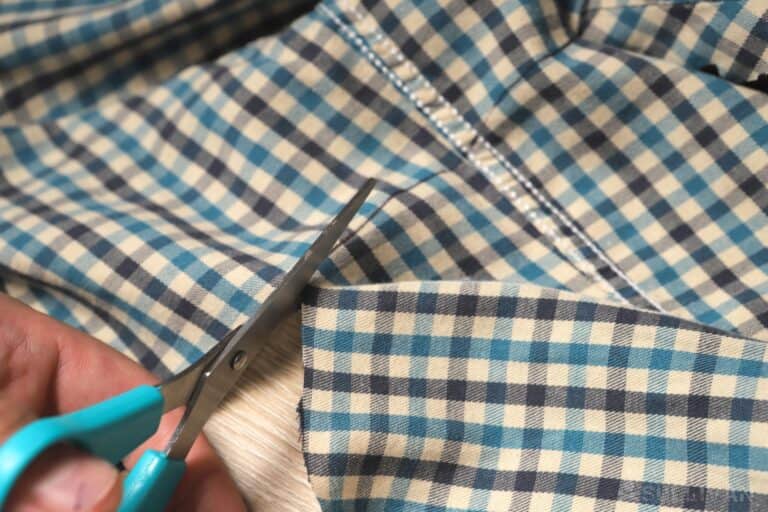
Step 5. Cut two T-shaped pieces from your large pieces of cloth:
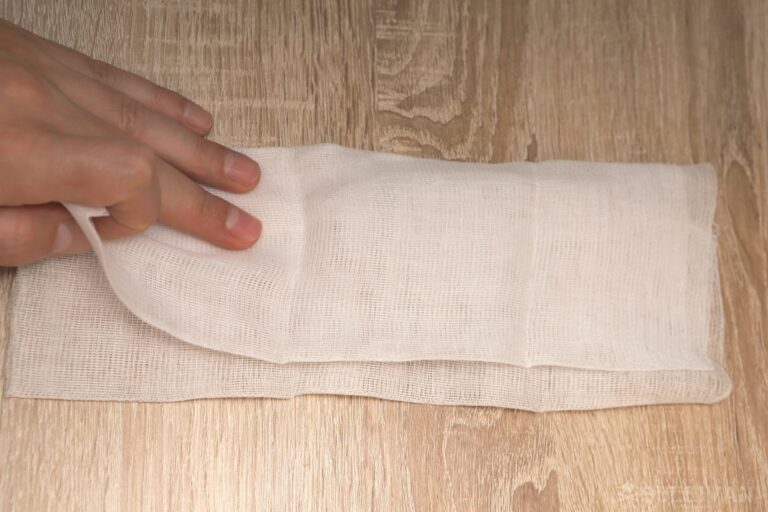
Step 6. Cut a square from your pad material that is 1 foot x 1 foot (30 cm x 30 cm).
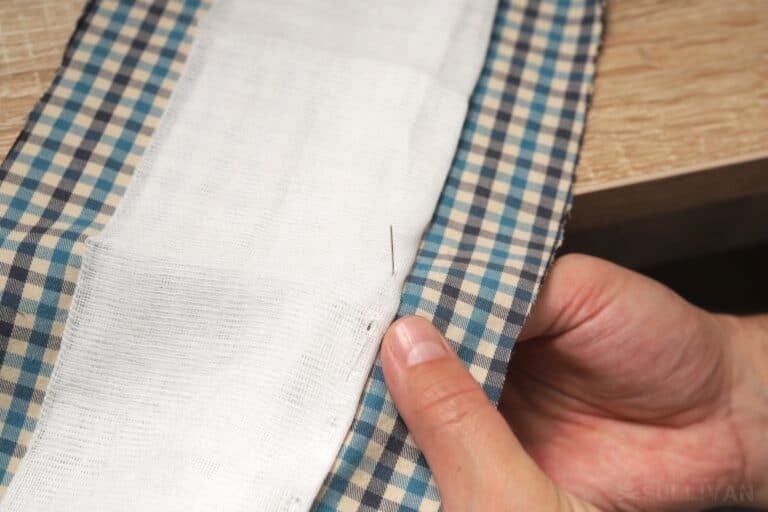
Step 7. Fold pad material into thirds and pin lengthwise along the narrow middle section of one piece of fabric that is meant to be the inside of the diaper:
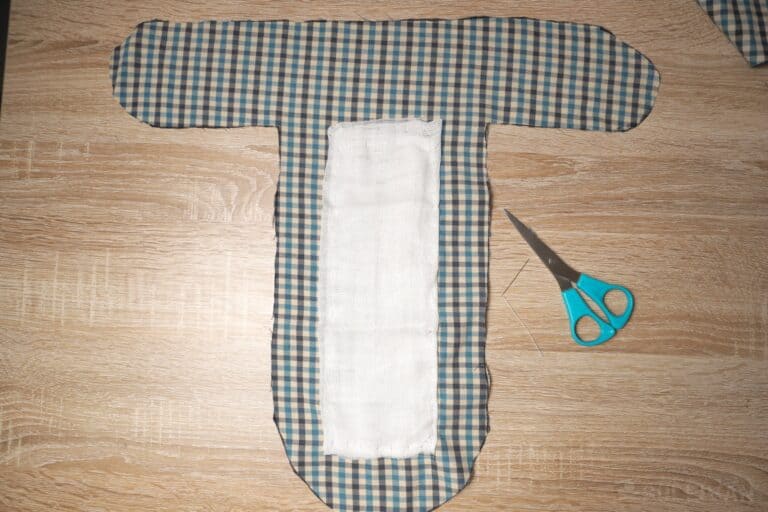
Step 8. Sew the pad into place:
This is how the sewn padding should look relative to the first layer of T-shaped cloth:
Step 9. Layer the second piece of cut fabric so that you have an inside layer, and an outside layer. The padding will be sandwiched between.
Step 10. Sew the layers all the way around, leaving the bottom of the “T” open.
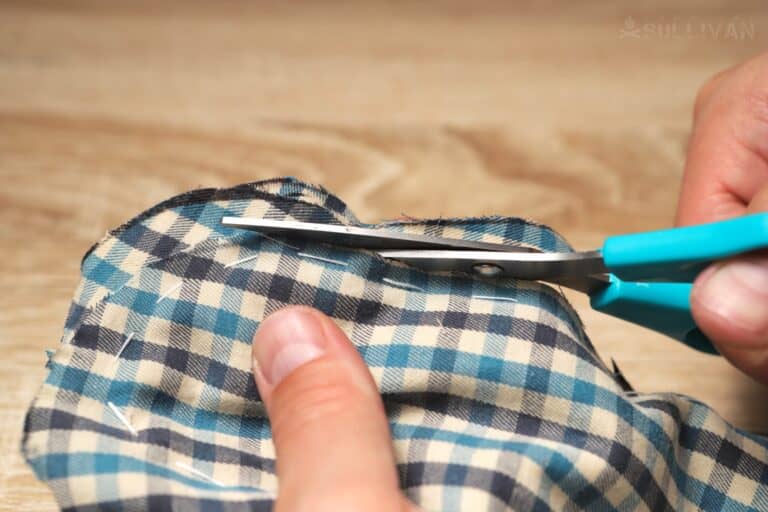
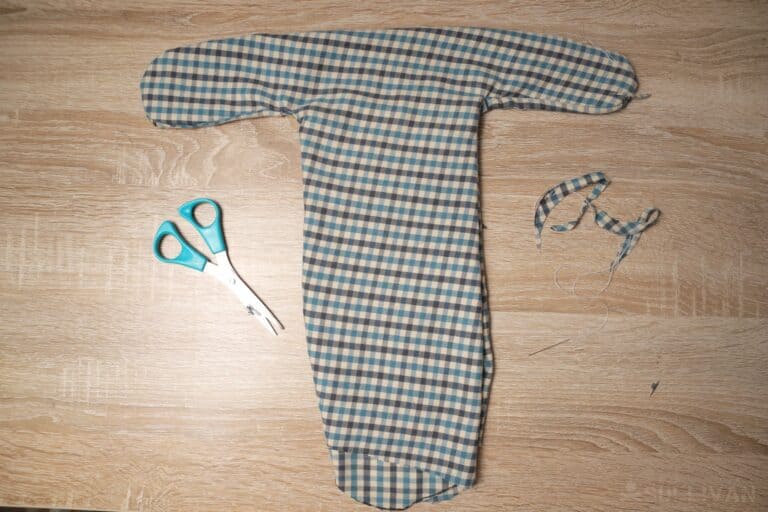
Step 11. Trin excess fabric:
And there you have it!
As with the flat-fold diaper, this cloth diaper will require a plastic cover to protect against leaks.
Folding a T-Shirt Into a Diaper
This will work in a pinch or in an emergency, when you won’t be able to run to the store to get more diapers.
You will need:
- a t-shirt
- a safety pin
Instructions:
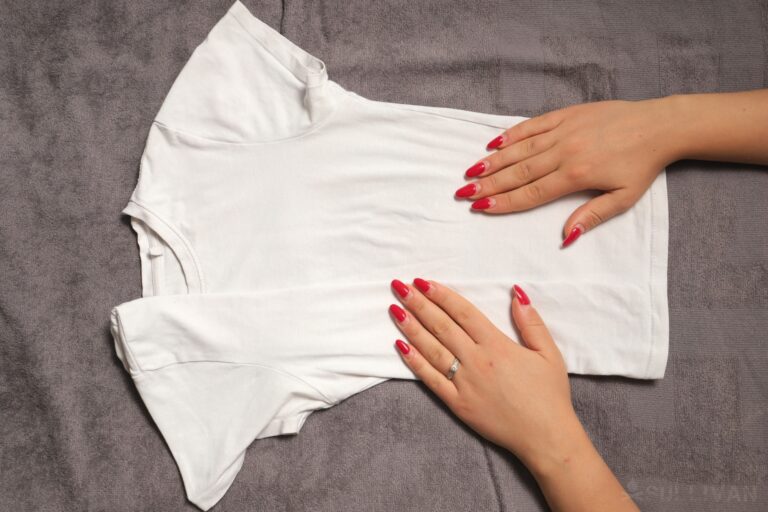
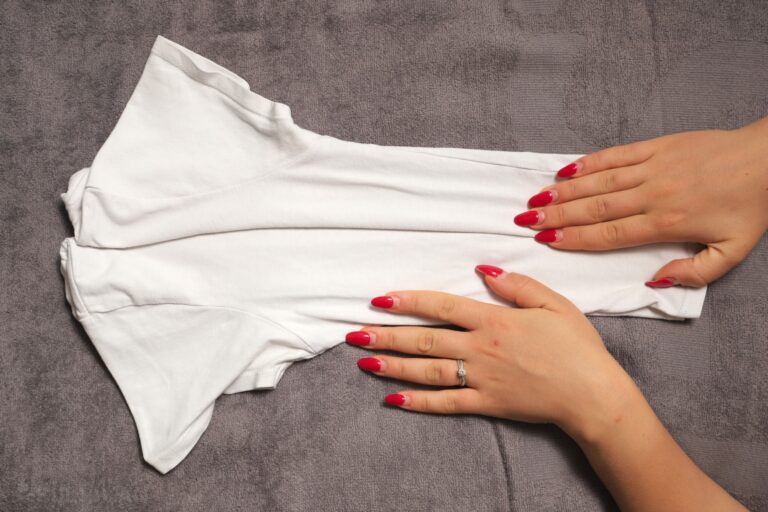
Step 1. Fold the t-shirt flat on a table.
Step 2. Fold one half of the t-shirt lengthwise like so:
Step 3. Fold the other half in exactly the same way:
Step 4. Fold the top part downwards (the neck and sleeves):
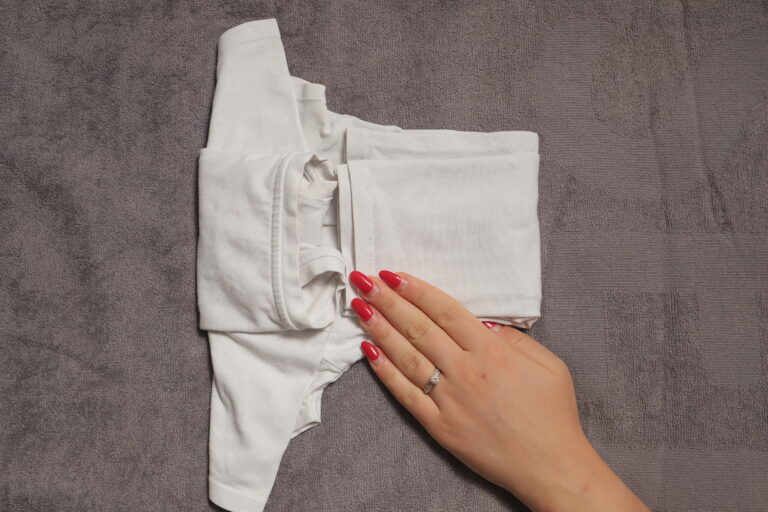
Step 5. Fold the bottom part upwards.
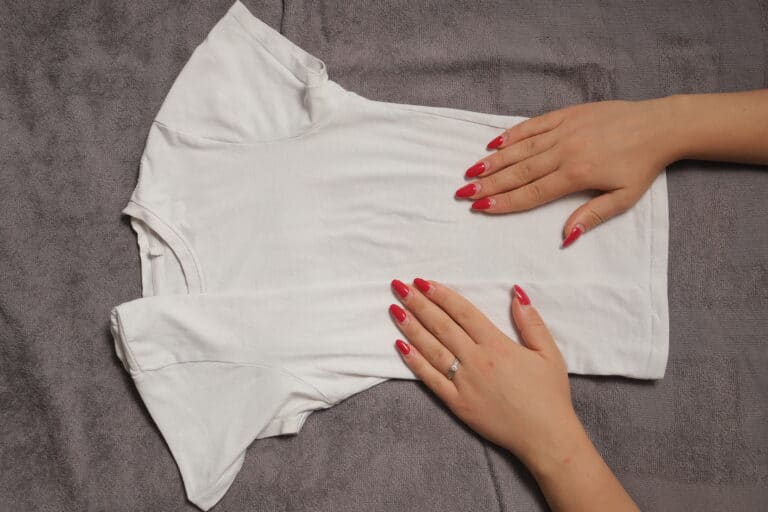
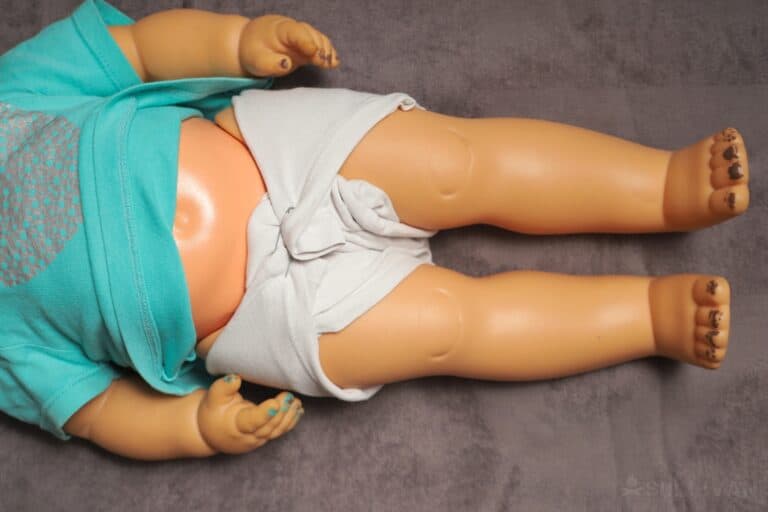
Step 6. Put the baby on the diaper, bring the two tabs and bottom part together and secure with a safety pin.
Extra Tips
- If you don’t have enough old clothing and sheets from which to salvage fabric, check out garage sales and second-hand shops before buying new fabric.
- If you do purchase new fabric for your diapers, be sure to wash it before you use it.
- Purchase organic cotton if you want a greener, less chemical-laden diaper.
- Be precise when making all measurements and cuts as even a quarter of an inch can make a difference when sewing your diaper.
By planning ahead, you can make a pile of diapers that you can start using now, plus you will have the knowledge on hand should you ever need it again for yourself or someone you know.
Being able to keep baby comfortable and happy while you take care of the serious matter of survival is worth its weight in homemade cloth diapers.

An urban prepper and rural wannabe, Karen has been working as a freelance writer for a decade and prepping for about half that time. She has gathered a wealth of knowledge on preparing for SHTF, but there is always more to learn and she has a passion for gathering and sharing that knowledge with other like-minded folk. Karen lives in London, Canada with her two children and plethora of cats.
If in a survival situation, laundering all those diapers will come into play. I found the flat 28″ square worked best. Being thin, it washes and dries easier. Since a washing machine is unlikely, there’s less chance of bacteria lingering between those layers. The squares can be folded to fit the age/size of the baby. Yes, you need rubber pants, but if changed as often as you should, one pair can last through several changes or most of the day. Just food for thought.
Can I purchase a fabric that is not plastic to use for outer cover?