In any long term SHTF or bug in/out situation, your clothes and other items will be damaged. You’ll need to be able to stitch clothes, backpacks and tents back together, and you will need to do it by hand in a survival situation or out on the trail.
Inevitably over time, some things will break beyond repair. If you have materials to hand, or know how to improvise them, you can just sew brand new kit (or you can do that first because it’s cheaper than buying new and good training).
You will notice that this guide only covers hand sewing. While there are many things sewing machines can do, hand sewing can do all of those (if a little slower) and more, and it is much easier to carry a small hand sewing kit on the trail or in a BOB than to lug around a sewing machine!
Equipment
Needles
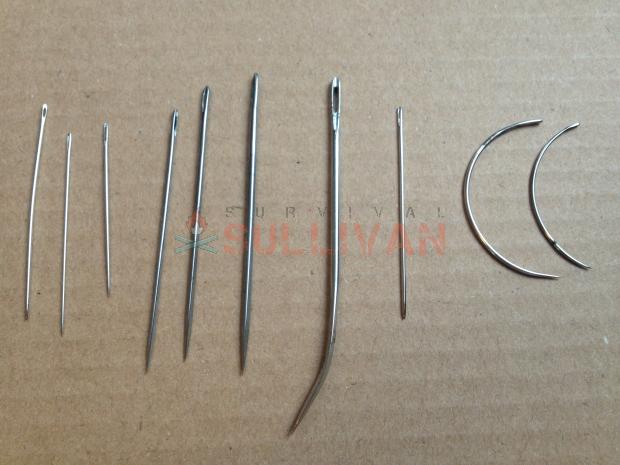
From left to right: three standard sharps, three sailmaker’s needles, a sacking needle, a leather needle and two glover’s needles.
Needles are obviously the most important piece of equipment for sewing, but not all needles were created equal. Most of the time, small, light needles (standard needles are sometimes called ‘sharps’) which come in small, cheap sewing kits will do everything you need for quick repairs. However, for heavy materials, unusual stitches or dense fabric you need specialist stuff.
Needles are often numbered to indicate their size and use. As a general rule of thumb, the higher the number, the finer the needle. However, exact sizes are only really important for fine embroidery and quilting, not really within a prepper’s immediate needs. These styles of sewing have a completely different range of needles which are not covered below.
Sailmakers Needles
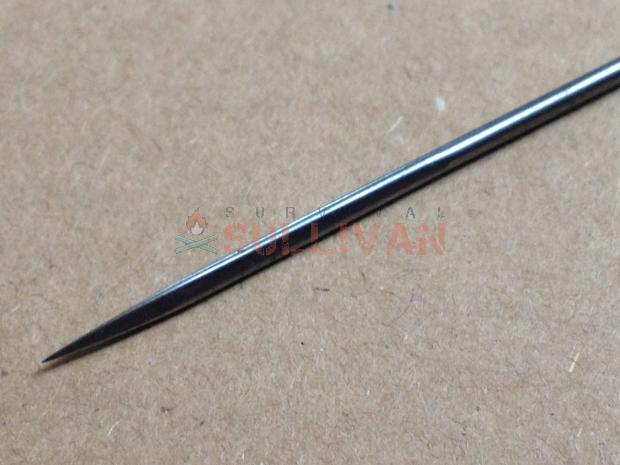
Sailmaker’s needles were developed for the rigors of making and fixing sails made of heavy canvas onboard ships. They are tough, strong, and easier to grip (they have a triangular cross section at the tip, see the picture below) than the average needle.
They are also much more expensive (though that isn’t saying much for needles), but this is a lot like comparing a child’s go kart with an SUV. Sailmaker’s needles come in a range of sizes, will never break and are definitely worth it.
There is only one good manufacturer of genuine sailmaker’s needles left, WM Smith & Son. Their pack of five needles contains everything you’re likely to need for most jobs, but the twenty pack has more variety and the tube makes a good needle or pin case.
Sack Needles
A sack needle is a large curved needle with an extra-large eye for repairing fabric on the go (originally for repairing sacks, but most often used for stitching tears in sails without bringing them down to deck). They can be useful in some cases, but for most things you can probably get by perfectly well without one.
Leather Needles
Needles specifically for sewing leather are rarely good for anything else, but if you have important kit made of leather or heavy nylon (which can behave in a similar way) a couple of small leatherwork needles are cheap and probably worth it. They are intentionally blunt at the end because in leatherwork the holes are made before putting the needle in. When repairing kit the holes will almost certainly be there for you so the tools for making them (prickers, awls etc.) are unnecessary.
This should be enough for mending, but construction leatherwork (making things from scratch) is a huge set of skills in itself and is far beyond the scope of this guide.
Glovers Needles
Glover’s needles are curved (‘C’ shaped) needles, specifically for stitching the very fiddly seams in the backs of gloves. If you think you will need to do serious repair work on handmade leather gloves, these are absolutely necessary. If not (much more likely), they’re difficult to store and no use for anything else. Don’t bother.
Accessories
Sometimes called ‘notions’, there are a few small accessories which will make your life easier when sewing. You don’t need everything in your Bug out Bag, just try everything once and see what works for you.
Snips
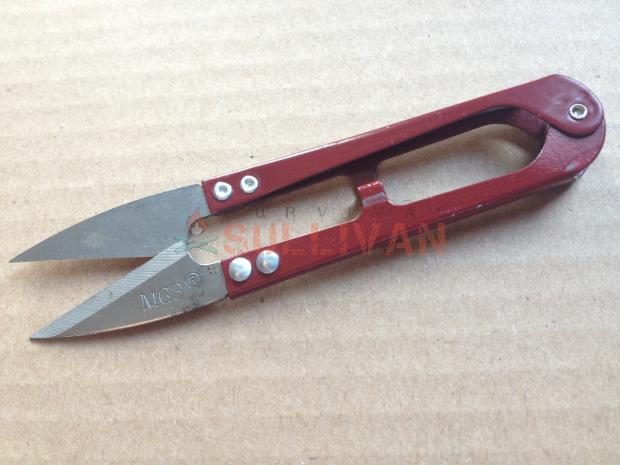
Snips are like tiny sprung scissors, built to work in exactly the same as those on a SAK. If you already have a good pocket knife with these you definitely don’t need snips, otherwise you definitely do. A knife will thread and for a small survival sewing kit just for repairs that is probably fine, but for longer projects good tools will make the work easier.
A good tip is to thread them onto a length of paracord around your neck while you work, so always know where they are, or to make a knotted sheath for them on the end of a zip pull for your sewing kit pouch.
Thimbles
A thimble is a metal guard which fits over your finger (or hand) so that you can apply more pressure to the needle without hurting yourself in the process (if your skin isn’t as tough as the fabric). Unless your hands are made of stone, thimbles are incredibly valuable, so get yourself at least one, maybe a couple to fit different fingers.
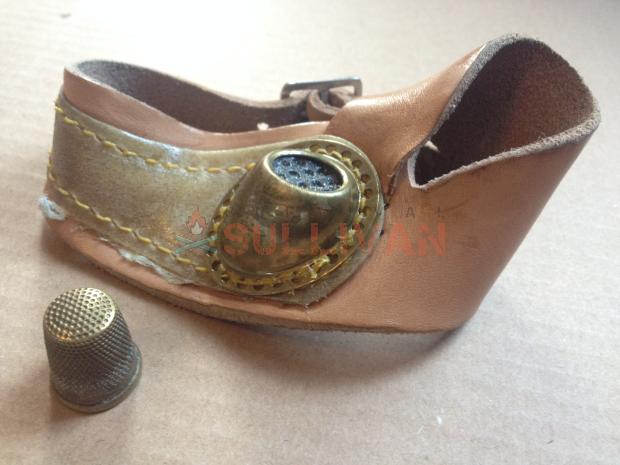
A ‘sailmaker’s palm’ is a particular type of thimble, rarely seen these days but very useful. It fits over your hand, putting a strong dimpled metal plate between the base of your thumb and the needle, so that the strength of your whole arm can push the needle through several layers of fabric.
Adjustable ones can be shared by different people so you only need to carry one between you (and they are an awkward shape to pack so this can make a big difference). Palms are made of molded leather and come in left- and right-handed versions, so make sure your get the right one!
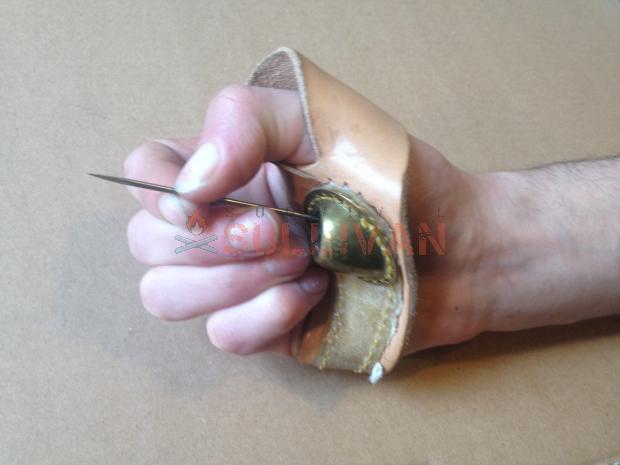
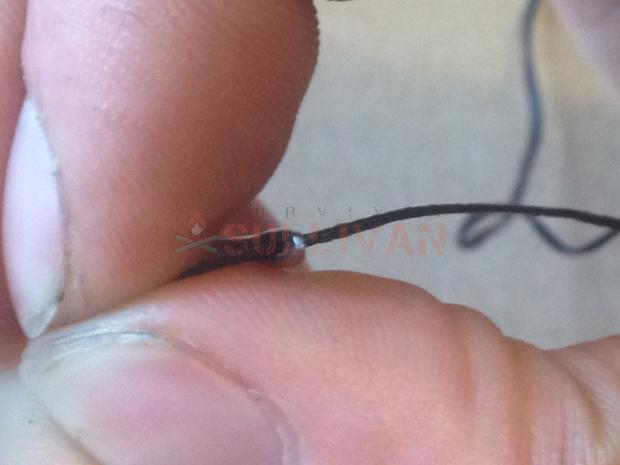
Using a palm properly is difficult and awkward. The classic techniques is to hold the needle very close the the pointed end using the tips of the thumb and forefinger, with the other end of the needle kept in the palm. Use the fingers to direct, then use the palm to push the needle through (shown in the picture below).
This does work and is good for longer sewing with the palm, but for quick stuff just sew as usual, then use the palm to push the needle through if it sticks.
Pins
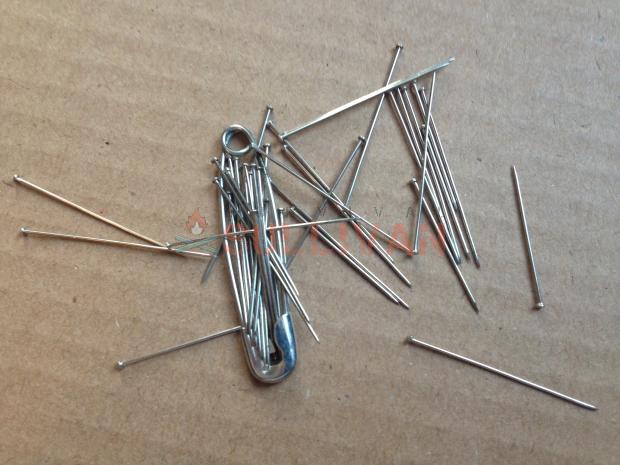
Pins are really useful. There’s an old sewing proverb: if you think you have enough pins, you need more. Have a dedicated case (old film canisters work well and are even waterproof) or scrap of cloth (just push the pins through twice, in and out, like a needle roll) in your sewing kit with lots of pins in.
Straight pins are very different from safety pins. Straight pins are cheaper, lighter, smaller, easier to store and more versatile than safety pins. On the other hand, if you have shaky hands safety pins can be good.
Pin Cushion
You’re probably remembering your mother’s frilly floral pin cushion. If you want one of those, go for it, but you can definitely get by with a small cushion in a dark fabric if you would rather be more ‘tactical’. Joking aside, a pin cushion will stop you from losing pins on the floor.
You might think you have loads of pins but if you knock over your pin case in a dark room while sewing by torchlight, you are going to be very thankful of those few pins in your pin cushion. Yep, I speak from experience.
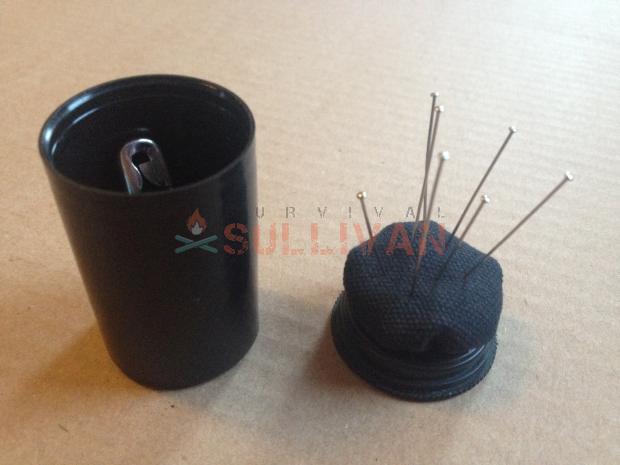
You can fix a small pin cushion inside the top of a pin case. First cut out a small circle (I found 2½” worked fit well into the film canister I used) , then sew all the way around the edge with running stitch.
Place some packing (wool, string, cotton etc., I used the scraps from cutting out the original circle) in the middle, then pull the sewn thread tight around it.
You should get a small lump with an open side where the sewing is. Epoxy the side with the opening to the inside of the lid of your pincase and you’re good to go.
Finished! The lid should still fit into the film canister, so you can keep your pins safe in the cushion all the time.
Wax
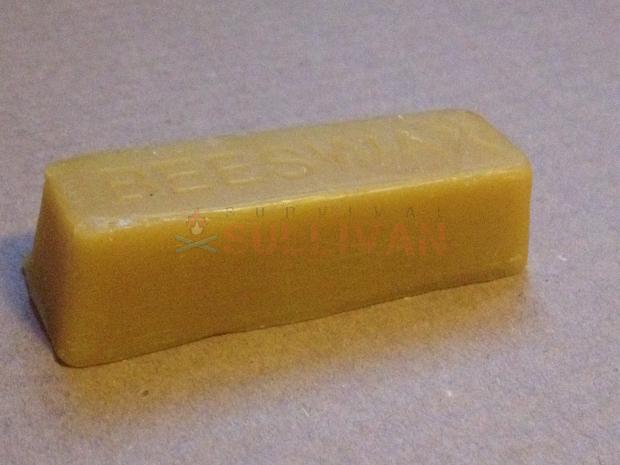
Waxing your thread is often a good idea, especially if dealing with heavier seams, or seams which need to be waterproof (as the wax helps seal the seam).
Waxed thread will ‘glide’ through a hole more easily without catching, will be slightly stronger (because the wax will bind it together) and is easier to stop from slipping out of the needle. Waxed thread will also look slightly darker than unwaxed and be heavier to work with.
Beeswax is traditional and smells a bit nicer, but really any wax will do. You can keep a small lump wrapped up in grease-paper or cloth in your kit, or just make sure to always buy pre-waxed thread (see Thread, below). It should be available very cheaply from all sewing and carpentry shops.
To wax your thread, hold one end of the thread against the wax with your non-dominant hand, with a small ‘tag’ poking out towards your dominant hand. Use your thumb to hold the thread onto the wax, then take hold of the tag (with your dominant hand) and pull the thread across the wax. Finally, turn the thread ‘over’ (because only one side of the thread will have been coated with wax), and repeat.
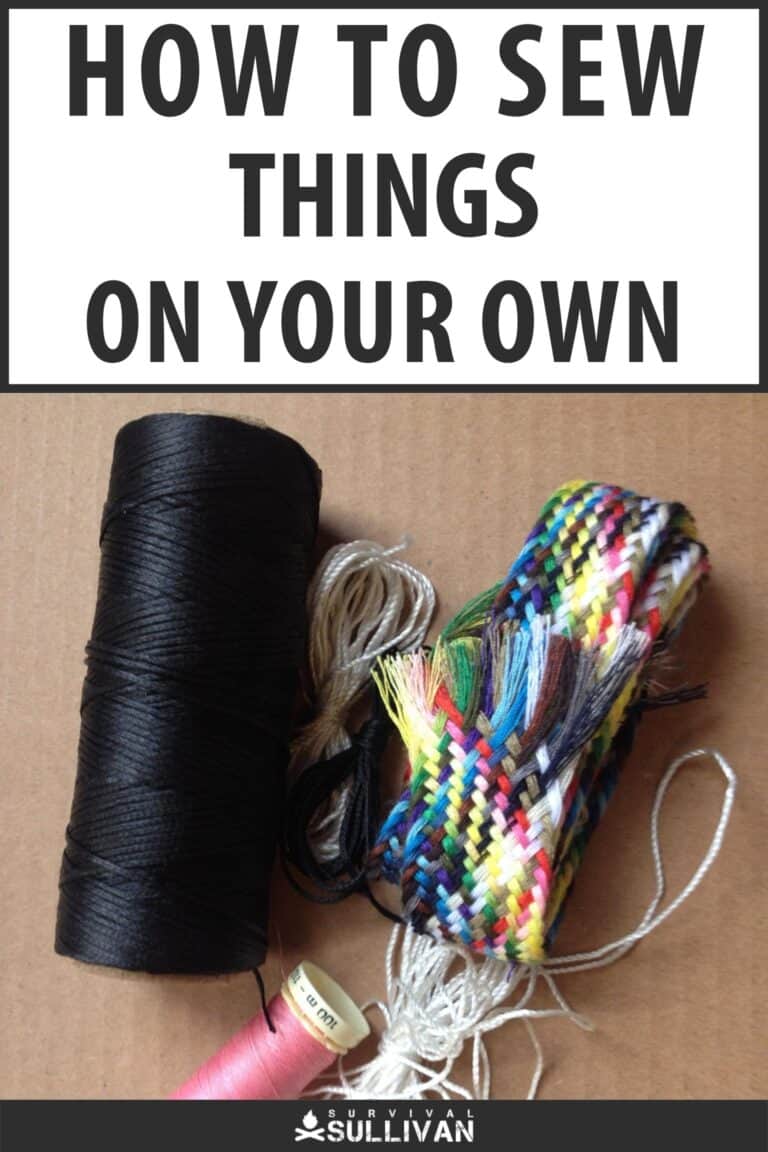
Thread
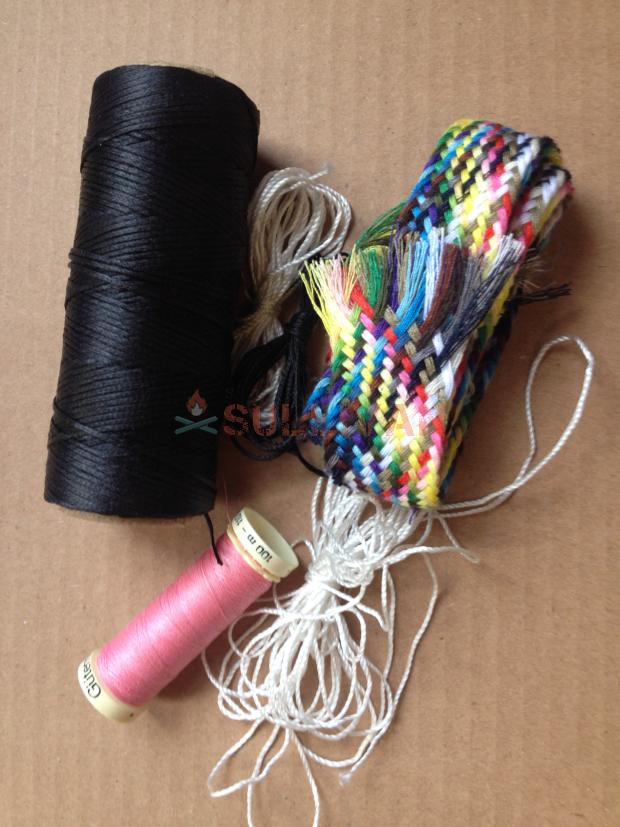
You need a few different types of thread in your kit. You should have at least one dark and one light color, and a range of weights.
Braided thread is always stronger than a nonbraided thread of the same material, but will be heavier. You can buy pre-waxed threads which will weigh more, or wax your own as described above. Kevlar thread is cheap, very strong and available in a wide variety of colors. If you would rather use a natural fiber linen is probably best.
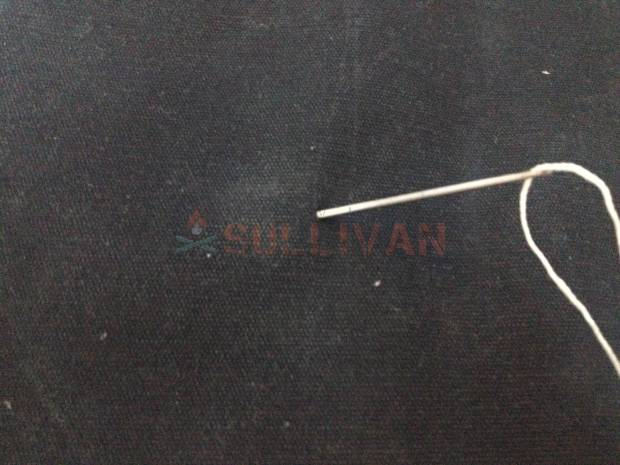
How to Thread a Needle
This is harder than it looks. Do not just try to push the end through the eye. It might work sometimes, but there is a much better way. Pinch the thread between your thumb and forefinger, and pull it back until you can just see the tip between your fingers.
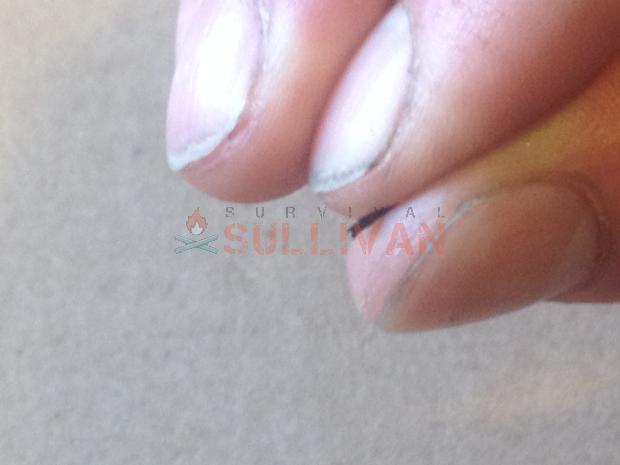
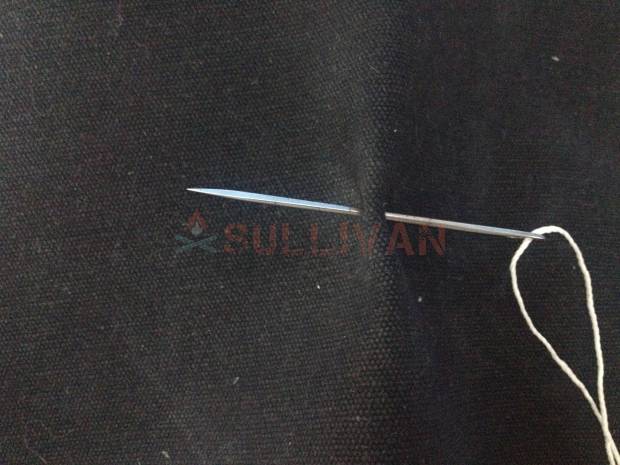
Bring the needle to the thread (not the other way around) and let the eye slide over and onto the thread.
Finally, close your fingers a bit more to take hold of the thread on the other side of the needle (the end of the thread) and pull it out, so a decent amount of thread is on each side.
With some practice you should be able to feel when the needle is being threaded properly.
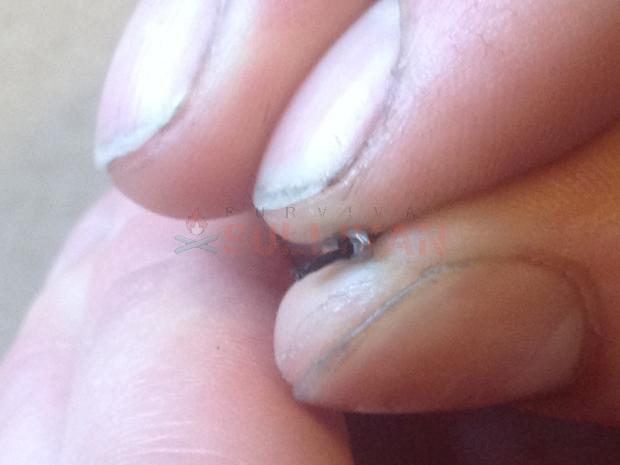
You can also buy needle threaders. These work, but are fiddly to pick up and use, will add some weight to your kit, and if you lose your threader you won’t be able to thread the needle. Threaders can make life easier but aren’t really worth it, just learn to do it with your fingers.
Once you’ve threaded your needle, you want to keep it that way. Whatever you’re doing, make sure you have at least four or five inches or thread on both sides of the eye at all times. This should keep the thread where it is. There are a few other things you can do for extra security:
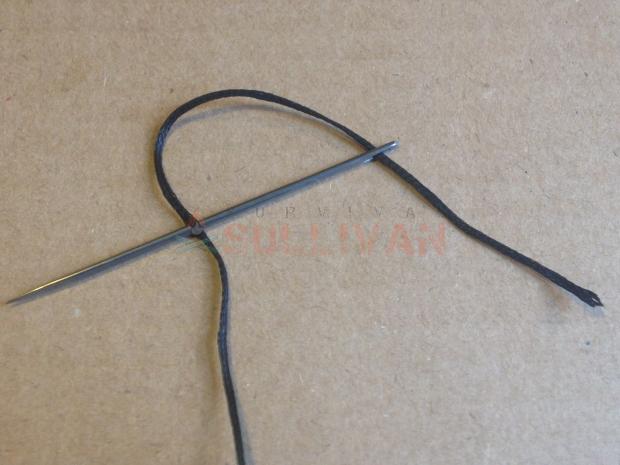
- Tie a small knot (a blood knot makes a good lump) in one end of the thread to stop it coming through the eye. This will also make it more difficult to pull it through fabric. A blood knot is just like a standard overhand knot, but with an extra turn:
- Once the needle is threaded, push the needle (like sewing) back through the thread itself, then pull it all the way through, forming a knot.The resulting knot should look like this:
- Apply a small lump of wax to the eye of the needle smooth it down with your fingers. This should make the thread stick to itself well and works especially well with the tip above.
- When you start to sew, leave a couple of inches thread free and sew over it as you proceed along the seam.
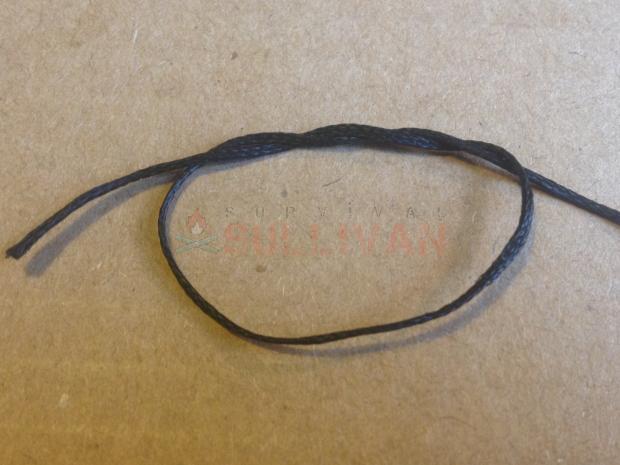
- Double your thread (using doubled thread is bulkier but twice as strong) and use the bight (a knot-tying word for a loop or bend) in the end to tie a cow hitch/slip knot through the eye of the needle.
Making your Own Survival Sewing Kit
Disclosure: This post has links to 3rd party websites, so I may get a commission if you buy through those links. Survival Sullivan is a participant in the Amazon Services LLC Associates Program. As an Amazon Associate, I earn from qualifying purchases. See my full disclosure for more.
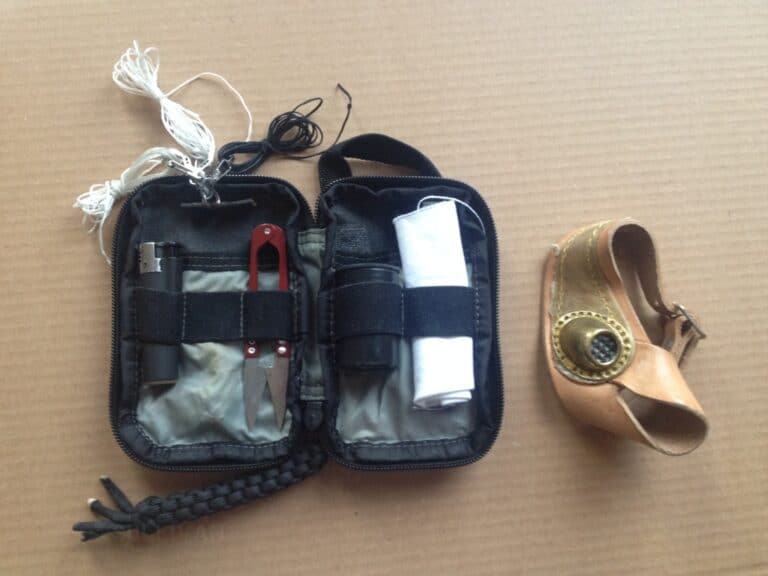
When putting together a sewing kit work ‘outwards’ not ‘inwards’. Choose the best possible equipment and materials you need, then choose a good case or pouch to hold it, not the other way around. The Maxpedition Micro should hold everything you need.
Obviously needles are a must. A good start is a pack of sailmaker’s needles, some leatherwork needles if you have any leather kit (or you can get some large and some small), and a few small sharps for finer stuff.
The easiest way to keep them is in a rolled-up rectangle of heavy fabric, hemmed at the edges (which is a good first thing to make as practice).
Pins are also important. I recommend a case or wrap (scrap of material rolled up), with the pins stuck though like a knife roll) of straight pins as they pack smaller and a small wristband cushion. These should be available from any crafts or sewing shop.
A sailmaker’s palm (this is a good (right-handed) one as it’s adjustable) is a surprisingly useful tool, as are snips and wax. A range of different threads wrapped around small card squares (because they are light and pack easily).
Materials
Different materials demand different needles, different threads, and different techniques. If you’re repairing kit you won’t have much of a choice as to what you use, but if making something from scratch what you use makes a big difference to the end result.
Before moving onto specifics, a good rule of thumb is to always follow the holes left by the original stitches when repairing (if possible and practical) and use the strongest, heaviest thread possible.
Nylon and other synthetics
Nylon (especially in outdoor and tactical gear) is often heavy and thick, so it needs a large (probably a sailmaker’s) needle and ideally a palm to sew. Use a strong, heavy thread.
Lighter synthetic fabrics are often prone to unravel easily, especially the ‘mesh’ style ones. This just means they need to be hemmed well all the way around, and should not be sewn with loose running stitch.
For waterproof synthetics always use waxed threads, as this will make the seams better sealed. To improve on this, sew waterproof tapes over the seams, making sure to place the sewing for the tapes well away from that of the seams.
Felt
Felt (and other thick insulating fabrics like it) is thick and dense, so make sure to use sharp needles (you can resharpen needles on a whetstone just like a knife). For the same reason you should be using fairly heavy-duty needles, so sailmakers’ are a good bet.
Felt is not woven so you can stitch very close to the edge without it unraveling, but be aware this is more true for denser felts than lighter ones.
Canvas
Canvas is a very versatile material. As with anything, heavier canvas needs heavier stitches, but apart from that anything goes.
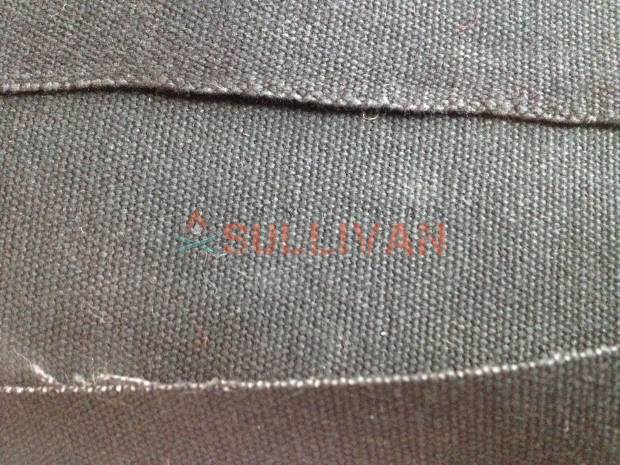
Canvas is woven so is prone to fray if you stitch too close to the edges, except on the selvedge, the woven edge of the fabric (as opposed to a cut, raw edge). In the picture below the upper edge is the selvedge and the lower is the raw edge.
Leather
Leatherwork is a law unto itself and cannot be covered in full here.
Suffice it to say that holes or stitching must always be made before stitching with a needle and thread (ideally with a leatherwork awl, if necessary with a knife point), waxed thread is always best and the best approach is to follow the holes already in the leather, overlapping the original seam and the repair at least a few inches.
Knit
Knit unravels very easily, so tears cannot be mended like other fabrics (it has to be darned instead). Other than this, providing it is made to shape (rather than cut, which will just unravel) it can be sewn with a large, blunt needle and pretty much any thread.
Net
When sewing net use a heavy enough thread to take the weight of the net, and make sure to get your stitches all the way along the edge (or wherever you’re sewing) of all of the complete squares of net (if the cut of the edge does not go with the grain of the net you may have to sew along a zig-zag of edges).
Stitches
Different materials and types of seams require different stitches. In all cases, shorter stitches will make a stronger seam, but longer stitches will be quicker. The following list is far from complete, omitting blanket stitch, back stitch and ladder stitch to name only three.
Running Stitch
This is the most basic stitch, what you probably think of as ‘sewing’. Best used on light materials and seams which do not need to bear much strain, as it is not a comparatively strong stitch.
Long running stitch (about ½” is probably the longest you can reasonably go) is called ‘tacking’ or ‘basting’ and is used to hold two pieces of fabric temporarily, like pins. Do this is very loosely in a light thread, so that it can be pulled out in one go, by pulling hard on the end.
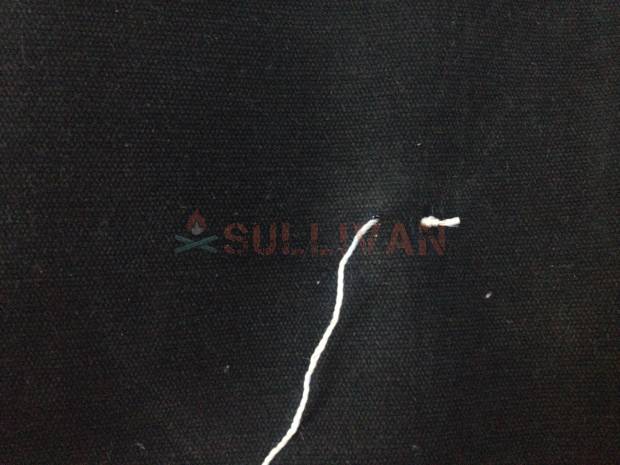
Start by pushing the needle through the fabric:
Keep pushing and angle the needle upwards, so it comes up again out of the fabric (for tougher materials like canvas or multiple layers you might have to push it all the way through, then turn the fabric over and push it through again).
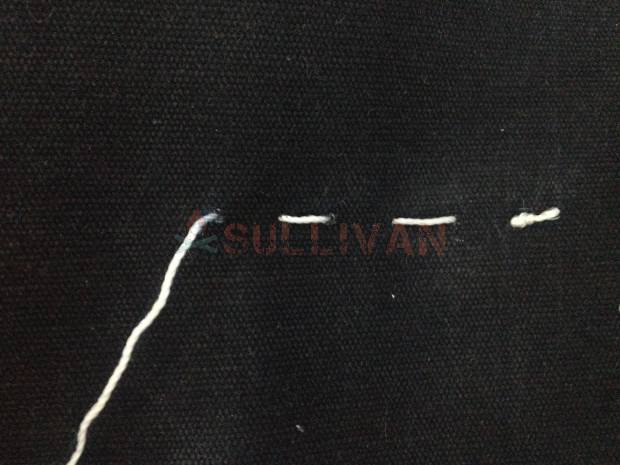
Pull the needle through from the the side, pull the slack thread through.
Repeat along your seam, you should get a ‘dashed line’ effect.
Whipstitch
If running stitch is a ‘flat’ stitch, whip stitch is ‘round’. It is slightly stronger than running stitch and binds two edges next to each other, or an edge to a flat piece. Start by pushing your needle straight through the fabric near the edge.
Move about ¼“ down you seam and make your next stitch in exactly the same way as the first. For this picture, the first stitch came from ‘behind’ the fabric, so the second stitch will too. The thread should go over the outside edge of the seam.
Continue like this along the seam, the thread should form a spiral shape.
This can also be used to bind two pieces together ‘flat’:
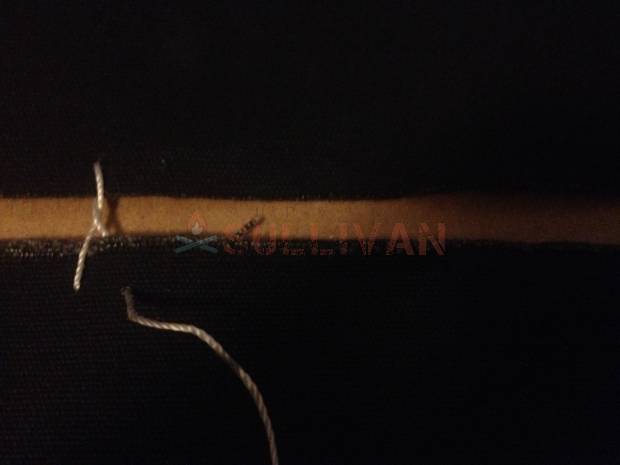
Herringbone Stitch
Herringbone is a little-known but very useful stitch, used for bringing together the edges of a rip or where two pieces need to be joined without overlapping.
Sailors often use it for emergency repairs in torn sails. It is also the stitch most often used for suturing wounds, but don’t go ahead and try this without proper training.
There is a lot more to it than just herringbone stitching, far too much to cover here, and an incorrect suture can do more harm than good.
Begin on either side, the first stitch will come up through the fabric ‘towards’ you:
Then take the thread over the line of the rip, then down through the fabric on the other side:
You should now have something which look like this:
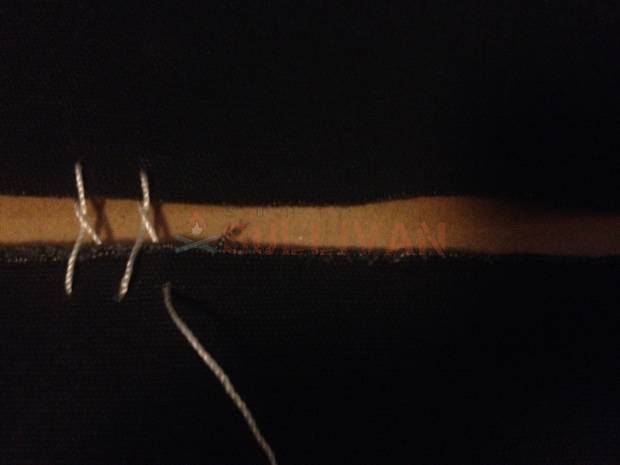
Bring the needle up through the hole of the rip itself, further back along the seam than the stitch you just made (if you’re sewing left to right, this will be further left than your first stitch, right to left is vice-versa).
Bring the needle across the thread of the first stitch you made, and across to the opposite side of the seam from where it just came out. Make your next stitch by coming up through the fabric on this side. This completes you first stitch of herringbone.
The two threads should form a cross shape.
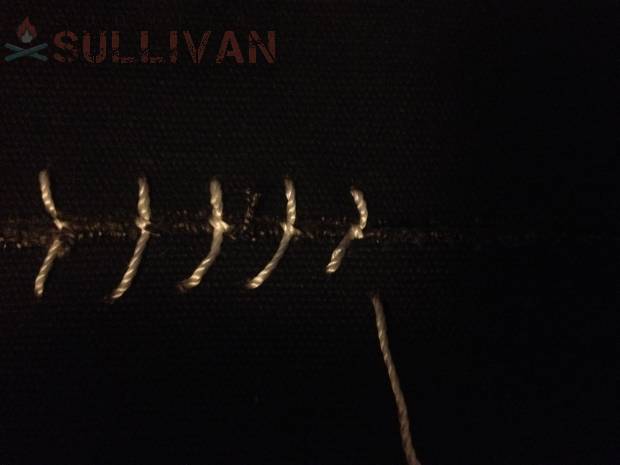
Now come across the seam again, down into the other side, bring the needle behind the stitched thread and over it, then up through the other side, like before. Repeat. You should get a flush joint of two pieces of fabric with an alternating pattern of perpendicular and diagonal stitches.
The pictures above show a loose version of this seam for the sake of illustration. When actually using it make sure to keep everything as even and tight as possible as you sew. The finished stitching should look like this:
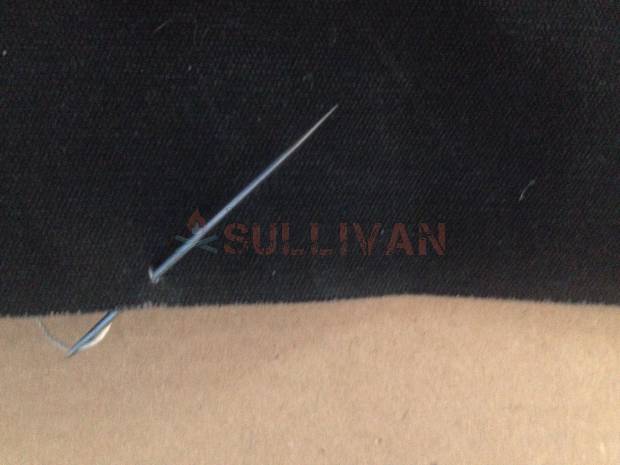
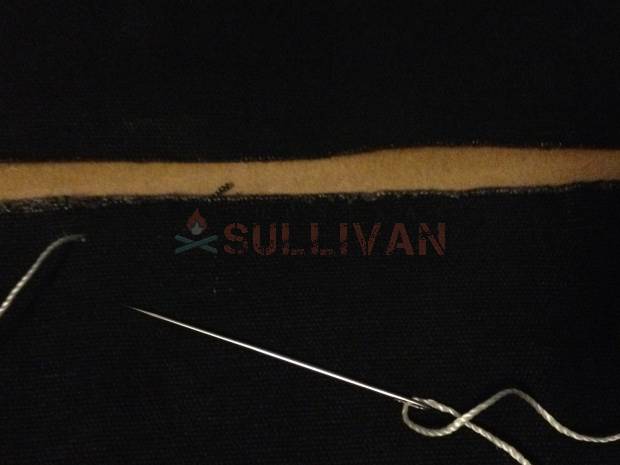
How to Mend a Seam
This is how I, the author, have always mended seams. I put my clothes and equipment through a lot of hard wear and none of my mended seams have ever ripped again.
That said, there are lots of ways to do it, and if you find another which works for you (or you (grand)mother/father taught you a better way) then use that, and maybe even share it in the comments.
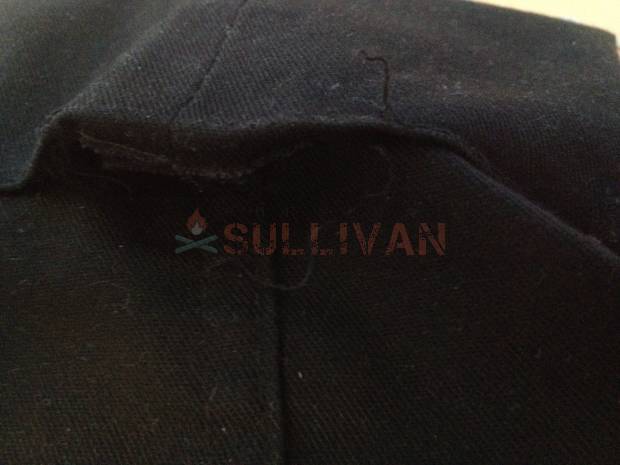
This is a torn seam in the bottom of a thigh pocket in some old cargo pants:
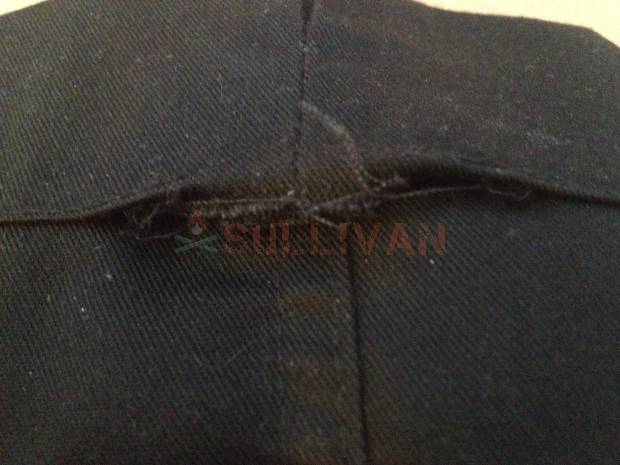
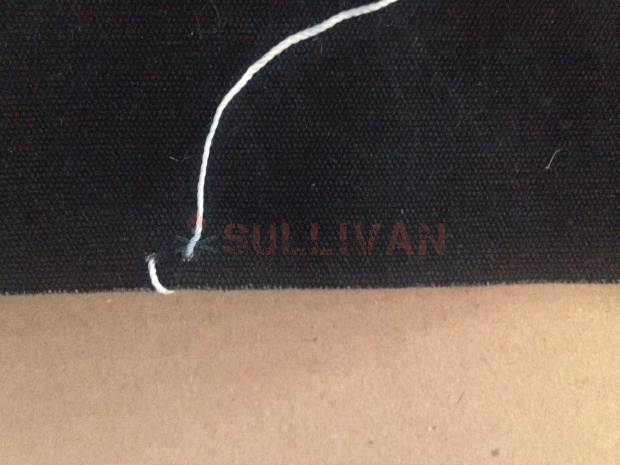
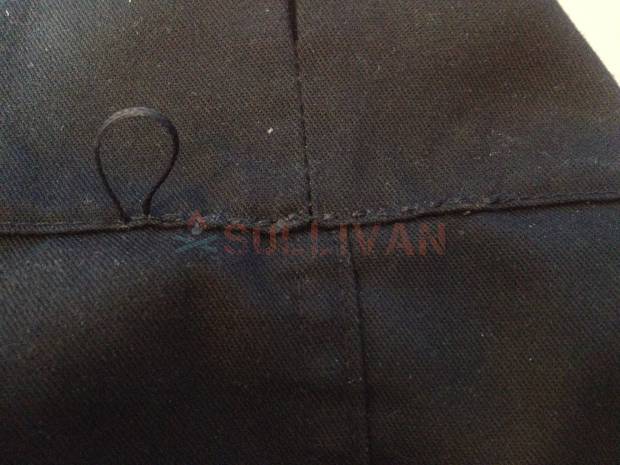
Begin by neatening up what you are working with. I do this by pulling out the ends of the threads along the tear, until I get back to a seam at either end, with a gap in the middle.
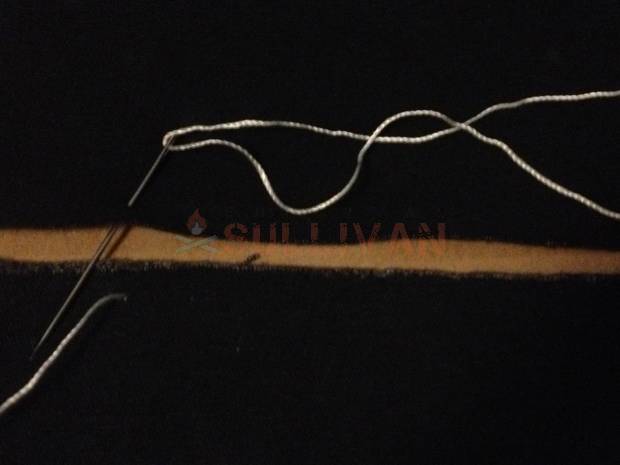
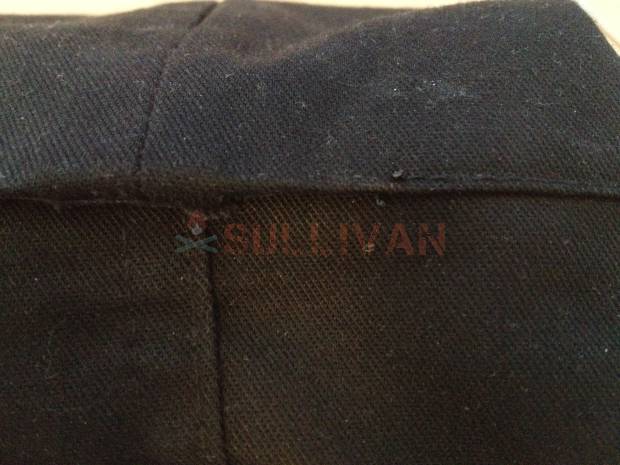
You then need to fix the ends of thread on either side of the gap in place. The threads in these pants were synthetic, so I used an old military trick: burn the ends with a lighter, and the thread will melt down to the fabric, forming a tight seal.
This works best if you cut the thread nearly to length first, then melt the last half an inch. If you don’t have synthetic threads you can always just tie the threads in stopper knots (a blood knot works well), or tie them together (a reef knot is probably best).
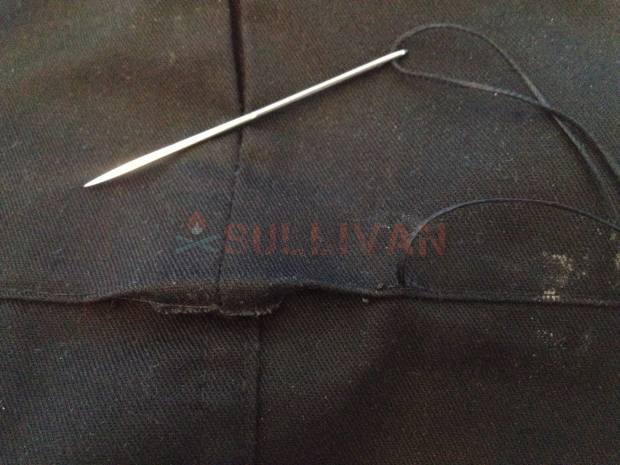
Thread your needle and put a stopper knot in the end (the non-needle end). Start your seam a few stitches back along the seam from the tear.
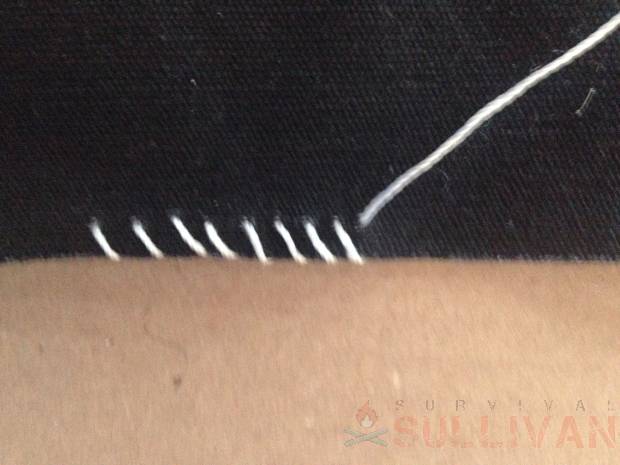
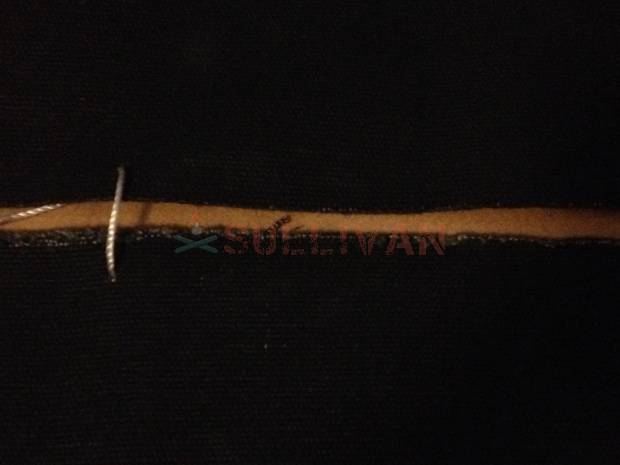
For the sake of tidiness I began on the inside of the seam so that the knot would be invisible once I was finished. Begin your stitch through a pre-existing hole, made by the original sewing.
As you can see, I’m using a medium sized sailmaker’s needle and strong, braided, waxed thread. The thread was originally meant for leather working, but it was what I had around and it has never failed me for strength.
Using a running stitch, measure your stitch by following the pre-existing seam. Make sure to go through all layers of the fabric, especially with seams like this where the layering and folds are critical.
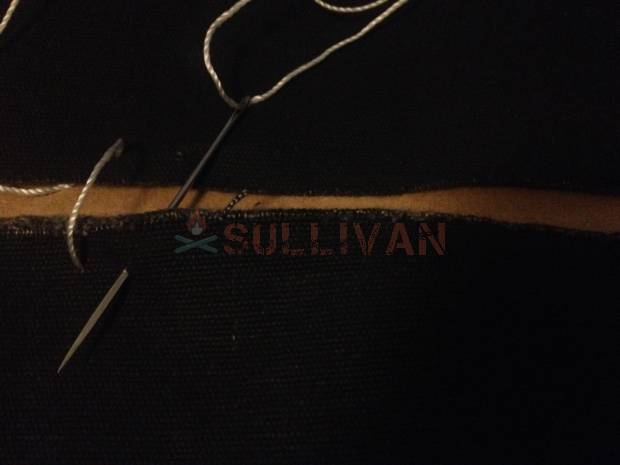
Continue along your seam, trying to keep every stitch as tight as possible without the material puckering and of equal length.
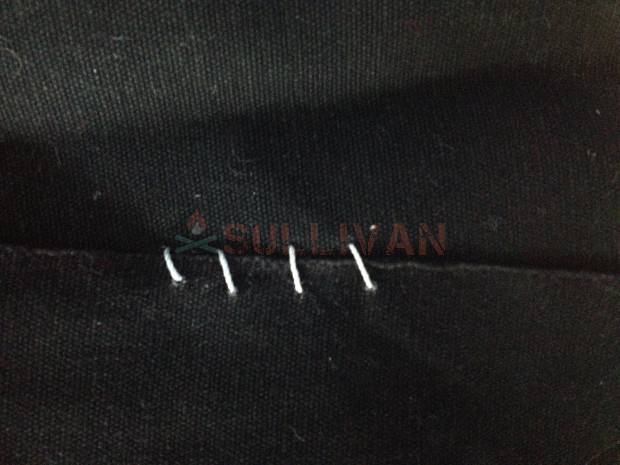
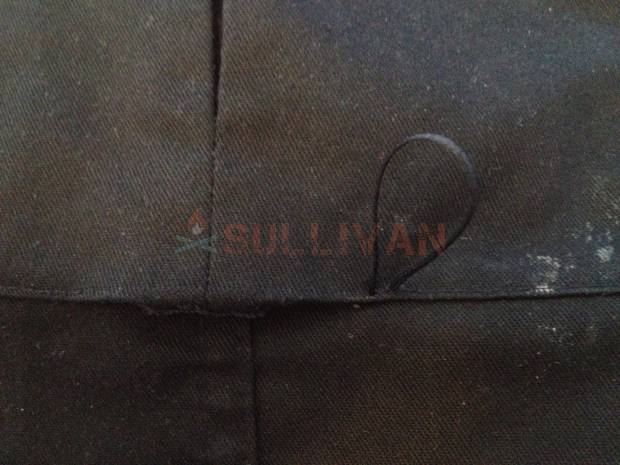
Make you last stitch into the fabric, again to hide the ends.
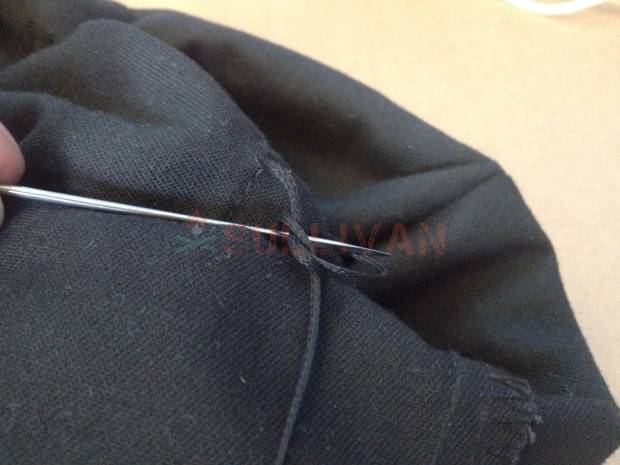
Turn to the back of the seam (I had to turn my pants inside out). Finish the other end with a blood knot too, to stop it from slipping back along the seam. To make it as tight as possible put a needle through the loop of the knot and hold it tight to the fabric, then tighten the knot around the needle.
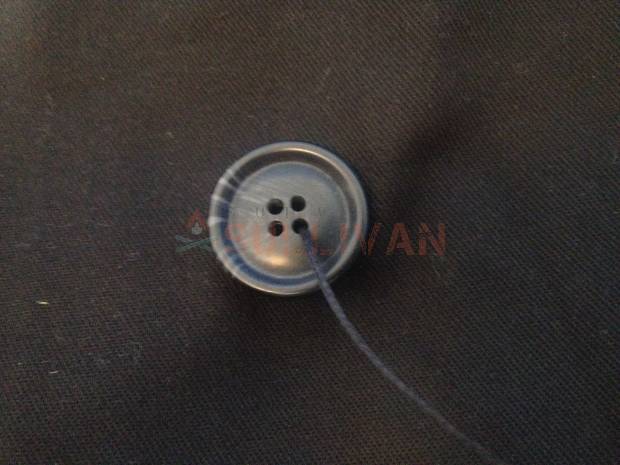
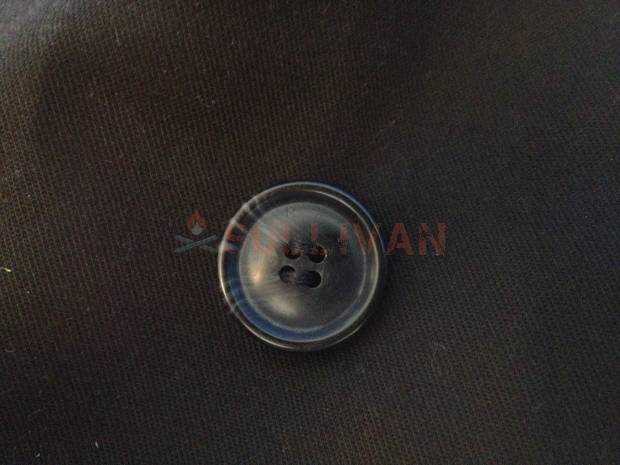
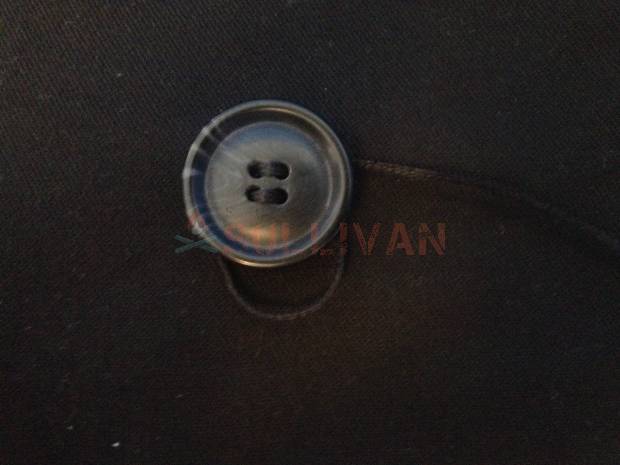
How to Sew on a Button
Knowing how to sew on a button is really handy. Most shirts and jackets come with spare buttons stitched onto the labels inside in case the factory stitched ones come off.
A good tip for packing long term bug out or INCH bags is to make sure that all your clothes with buttons have spares sewn to the labels, that way you don’t have sort through a big bag of spare buttons for the right ones when you need to do a repair.
Tie a knot in one end of the thread and push the needle through the fabric where you want your button to go (make sure you line it up right with the buttonhole first!). Pull it all the way through, so that the knot is on the opposite side to where the button will go.
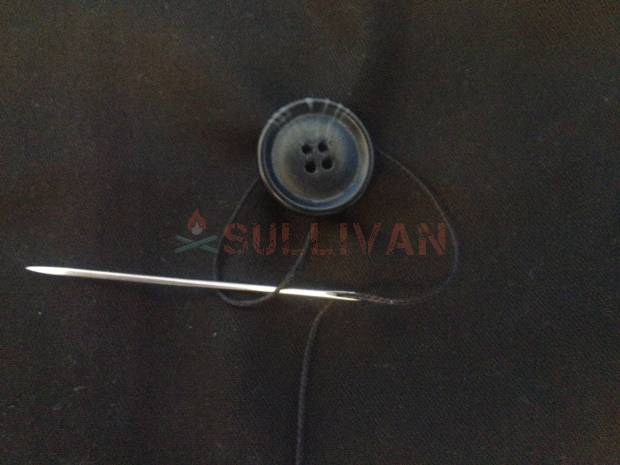
Now put the needle through the button, putting the button onto the thread, and pull it all the way along the length of the thread to sit on the fabric.
Next sew down through the next hole, straight down through the hole in the button and then the fabric. Then come up through the next hole and down through the last one in the same way, going through the button and the fabric each time and always pulling the thread all the way through. Don’t yank the thread tight though, you want a bit of play in it.
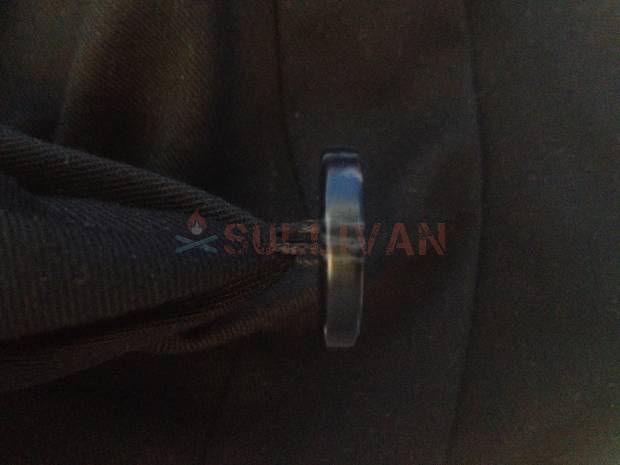
If you want to, you can around again for strength, but the thread I’m using here is plenty strong enough to hold the button on with just one pass. The work should now should look like this:
From the side you should see this. See how the button isn’t completely tight against the fabric?
Sew up through the fabric, bringing the needle to the same side as the button again. Make the stitch as close as possible to the stitches between the button and the fabric. Pull the thread tight.
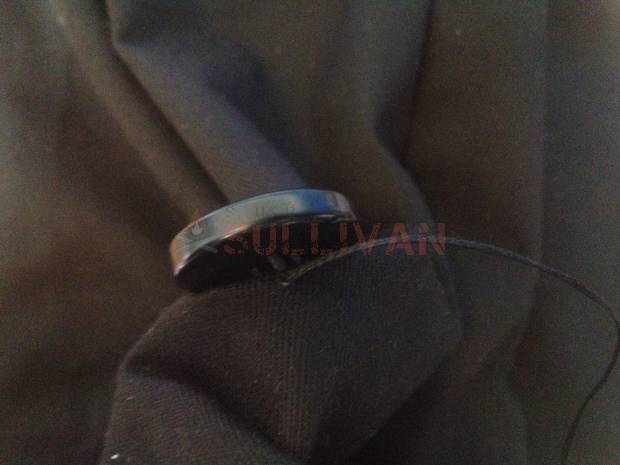
Now wrap the thread around the stitching you have already done. You want lots of passes for stability, but also to provide distance between the button and the fabric (because another layer has to fit in there when the button is done up).
Finish the tightening passes with a few (at least three) hitches around the column of thread you’ve built up under the button. The picture shows the way to make the knots:
The button should now look like this from the side. Notice how much thicker and stronger it looks than the last side-picture.
Finally sew down to the same side as the knot, again making the stitch as close as possible to the sewing you have already done. On the other side use the same trick with the needle to make a stopper knot as close to the fabric as possible, then snip the end of the thread to length:
Nick O’Law has been exposed to survival from a very young age. In his teenage years, he learned A LOT about bushcrafting, such as making snares and traps, and even how to make DIY knives.
If you haven’t ye read and tried his knot-making articles on Survival Sullivan, you should definitely check them out.
Outstanding article!
Clear, concise, and very informative!
Best article of the series!
FIVE STARS!
Terry
I would add a small but very powerful magnet to the kit this will keep the pins and needles from getting loose and being lost. A good way to have a supply of thread in you sewing kit is to wind it up on bobbins in a sewing machine. That way you will have a fairly large amount of thread in a small package. I would add mix of some buttons to the sewing kit as well. Sewing kit like this were know as “house wife’s” during the Civil War. And using 35mm film containers is a good way to keep it all organized. I would add an awl because you might need to sew up leather of heavy canvas. I do not see any daring needles in your kit. As a side note glovers needles can be used to stich up wounds I would use dental floss for that.
Nick (author) here.
A magnet’s a really good idea, I hadn’t thought of that but I’m going to add one to my kit. The trick with the bobbins is cool too. I don’t have an awl, I tend to use a big needle and a sewing palm to keep things lightweight, but I did make a rather nice pricker from my biggest needle with a star knot at the top and fender hitching for a handle. That works really well. That said, I now keep the pricker, a larger awl, AND a palm AND large needle all in my bigger tool kit, and just carry a palm and a bus needle in my little sewing pouch.
I use the back stitch for almost everything. Its very strong, and one side looks almost like a sewing machine was used (with some practice). The back side is kind of a mess, so keep it on the back if possible. I found the stitch when I was getting ready to make a tarp. Apparently it is used to join two pieces of fabric for drapery work. I have found it useful for most things and it has never failed. I also use nylon upholstery thread. I’m fairly certain its unbreakable.
I’ve never tried burning the ends. I will have to give that a shot.
Another useful tool, for heavy jobs, is a sewing awl using waxed thread.
Good article. This is a skill that is very useful.
Thank you so much! Nick (author) here, it always means so much when people say they like my work!
Another ‘high five’ from me as well. I learned a lot (that ‘threading needle’ trick is awesome!), I have a very compact sewing kit in my wallet, a sailer’s needle, prethreaded and stored in coffee stirrer straw, thread wound around the straw. About five feet of thread. Along with this, a small multitool called the SOG Crossgrip which has small pliers for gripping needle to push through. And the key ring, has a metal bobbin of G.I. snare wire for really tough repair material. A small piece of glue stick is also carried, melted with lighter to form a quick glue. I think (but have not tried) inserting regular needles in the glue stick for storage,
I remember a post a long time back which mentioned that really strong thread can actually cause more harm then good. Standard thread would break, leaving the original seam to be repaired. Strong thread would hold, causing the rip to be increased in size.
the end of the thread coming off the spool is often a bit frayed. to thread the needle more easily, trim that frayed end. also, if you are having difficulty pulling the threaded needle thru the fabric, use a hemostat or small pliers to grasp it and pull thru. finally, backstitch is usually done on the stitching line of to pieces of fabric, with the right sides facing. it does, indeed, look similar to machine stitching when done well, tho if you did it correctly, you won’t see it, as it will be on the inside of the garment. before sewing machines, this was the stitch used on any garment seam that would be stressed. think side seams of closely fitted garments, etc.