One of our biggest challenges when using primitive methods is finding tinder that will catch your particular ignition source. Primitive ignition sources include things like friction fire, lenses, chemical, electrical, striking, and air pressure. Some of these create a coal or ember large enough to start most tinder, and some actually create a flame.
Lenses and striking methods require tinder that is pure, fluffy, and has a ton of surface area. This is where char cloth can come in handy… Char cloth is a substance that can be used as a fire starter (with no need of a lighter or matches).
In this article I will cover how to make it, how to use and preserve it. I will also cover a few ready-to-use options that you can buy to help get that fire going.
Table of Contents
What Exactly Is This… Char Cloth?
Char cloth is nothing more than a low-temperature ignition fabric that you can carry with you and use it to start fires.
The idea behind it is very simple. You’re taking cotton fabric and purifying it to remove anything synthetic. This leaves pure carbon. In the right form, this is the perfect product to catch a spark or hot spot.
Steps To Making Char Cloth
To create char cloth, you need a few supplies:
- An old cotton t-shirt (or something else made of organic fabrics)
- a tin such as an Altoids can
- a knife
- and supplies to start a fire.
Here are the step by step instructions to create your char cloth:
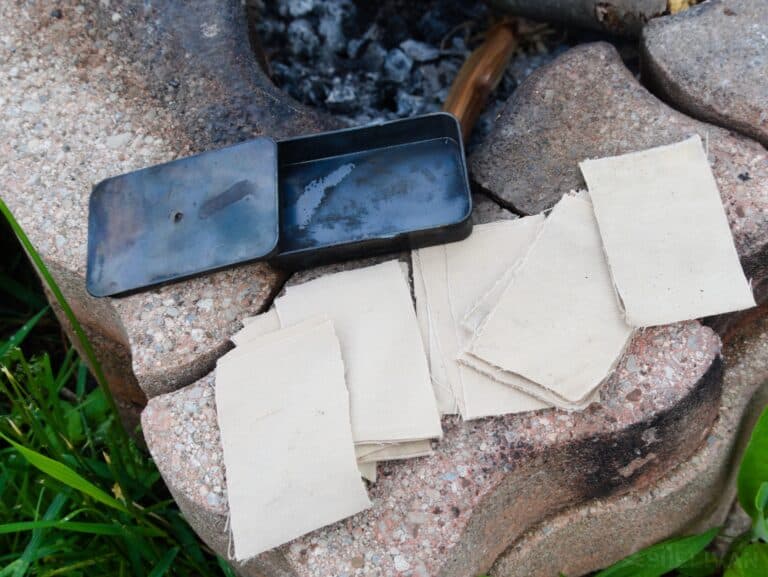
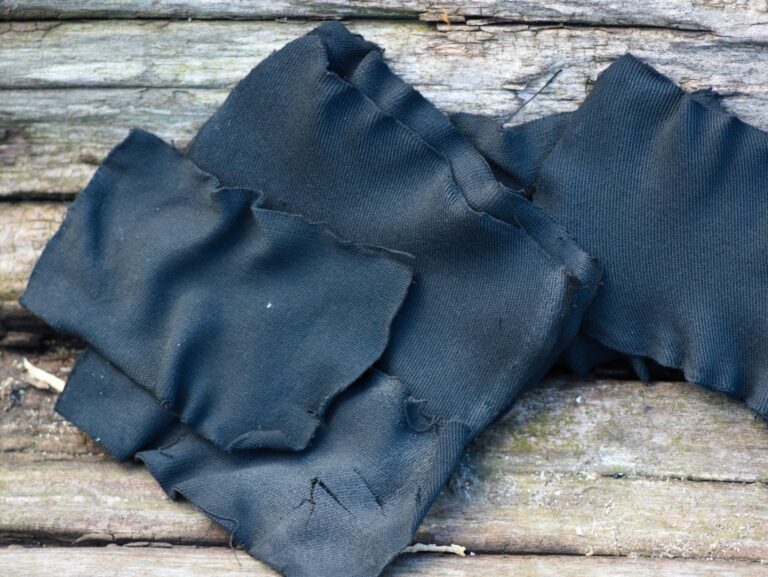
Step1. Cut your fabric into pieces that are one inch by two inches. This will be the right size to fit in the tin:
Step 2. Build a fire.
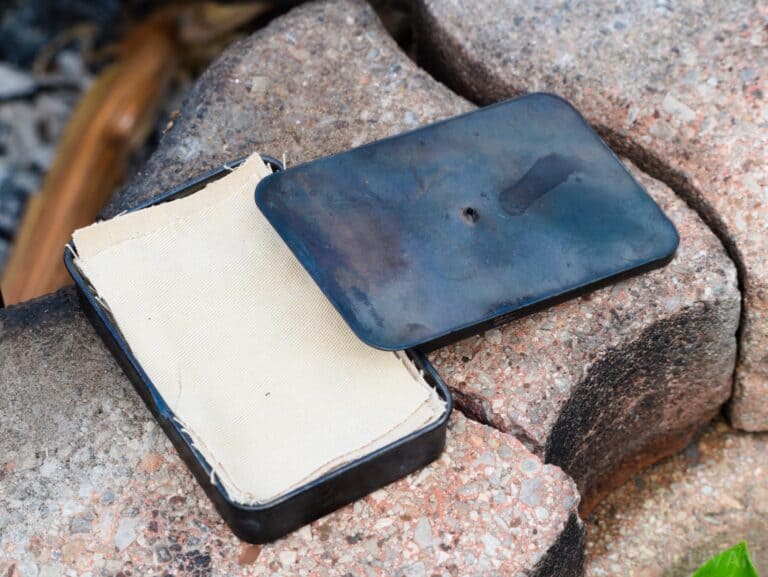
Step 3. Put your pieces of fabric in the tin:
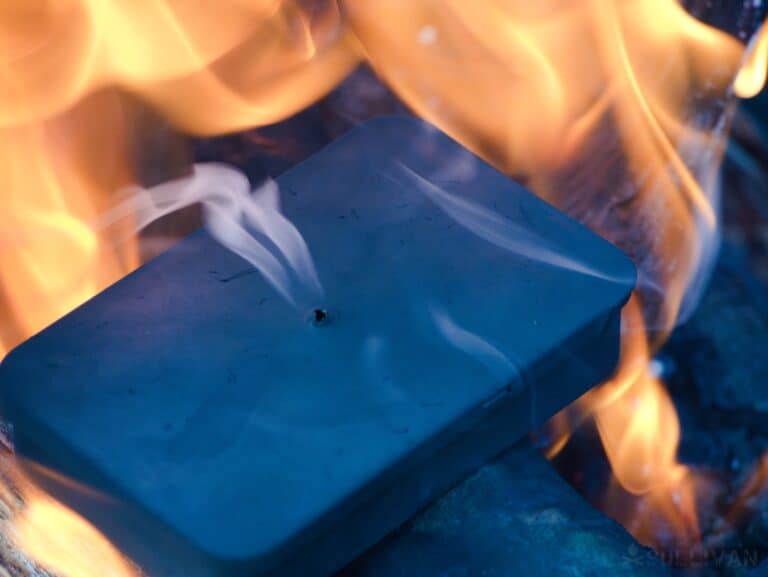
Step 4. Punch a tiny hole in the tin. It needs to be barely large enough to let air through. This hole is only to let the impurities out of the tin. If you let enough air into the tin to create a flame, then you have to start over.
Step 5. Throw the tin in the fire, and let it sit for 10 to 20 minutes:
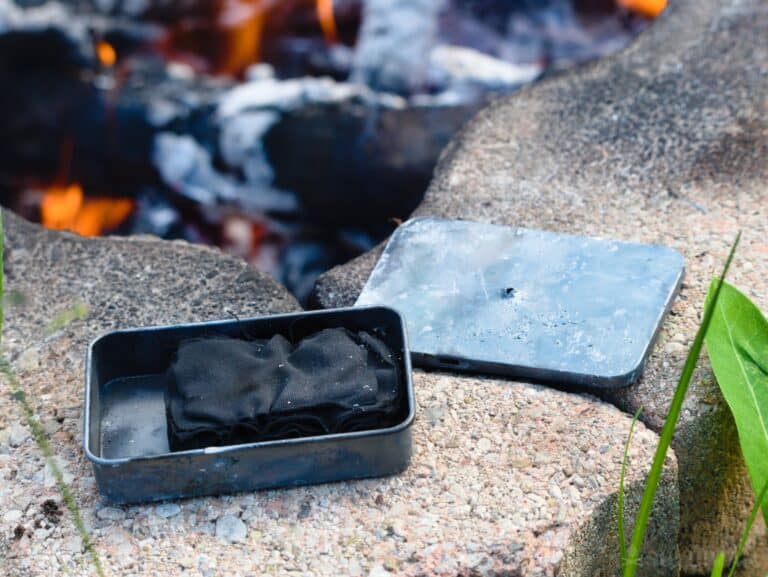
Step 6. Let it cool, and make sure your cloth is charred before you put out the fire. If not, throw it back in for a few minutes:
Starting a Fire With Char Cloth
The process is very simple. Make sure the rest of your fire supplies are gathered and arranged. Get a tinder bundle formed and have it ready to use.
Put a piece of char cloth in the center of your tinder bundle. Place your ferro rod on it, and then get out your knife.
For a ferro rod, you want a high-carbon steel blade. Strike your blade on the ferro rod shooting sparks onto the char cloth. Even one spark should create an ember.
During the day the ember is hard to see, but if you lightly blow on it you will see it glow red. Feed oxygen to your tinder bundle until it flares up and then apply it to your fire structure.
Char cloth is also great if you are using a lens to start a fire. Some parts of the process are similar to using a ferro rod. You still want to have the supplies gathered and arranged. You also want to have a tinder bundle and place your char cloth in the center.
The placement of your lens is essential to getting this right. You want the lens to be completely perpendicular to the sun. You also need to adjust the distance from the lens to the char cloth. When you have it right, the focal point will only be one or two millimeters across.
You should see smoke almost immediately, and once you see smoke you should have an ember. Lightly blow on the cloth to verify the ember is there, and then feed it oxygen until it flares up. Place the tinder bundle in your fire structure, and you are good to go.
How To Store Char Cloth
Storing your char cloth the right way is every bit as important as making it the right way. You have to keep your char cloth dry for it to be effective. Remember that you have a small hole in that tin.
If there is any chance that water could get in that hole, you need to transfer it to a water-tight container. A plastic bag or Ziploc container would work, or you can put it in a dry box with matches.
Char Cloth Alternatives for Fire-starting
One other product you can make to get a fire going is to rub cotton balls in petroleum jelly. You can easily get one of these to flare up with a few sparks, and it will normally stay lit for 30 to 60 seconds. If in strong winds or wet weather, this fire product does the trick.
There are also fire assistance products that you can purchase online or at any store that sells camping supplies. Several companies make waxy fire cubes that work great.
Most come in individual watertight wrappers. Once you open up the wrapper, take your knife and shave a little off the side to get a pile of fine powder.
I rarely use a whole fire cube all at once, so I like to cut the rest into several chunks. Use your ferro rod to shoot sparks into your shavings, and the shavings should catch on fire almost immediately. You can then put a chunk on top and it should burn for several minutes.
A few benefits of fire cubes are that they work even when wet, and only cost a few dollars. Any time I know rainy weather is coming my way, I take these with me.
Another option is a small tin called Live Fire. This little tin slides open and there is a fibrous material inside. Use your knife to rough it up a little bit and you can generally get it to take a spark quickly. I will warn that the flame is very small so you need to get some additional tinder burning right away.
The best part about this product is that you can just slide the lid shut and it extinguishes the flame. You can then stick it in your pocket and reuse it over and over. It also only costs a few dollars.
Fire Sticks are very useful, but serve a completely different purpose. These wax covered sticks will not take a spark, so you have to get a small flame going before they help. However, they are waterproof, windproof, and last a long time.
If your firewood is wet and you need a flame to dry it out a bit before it will catch, this is a good option. Once you have one of these lit, you can often skip over the smaller wood and get straight to larger pieces.
One of these sticks will actually stay lit for about 20 minutes in the worst conditions you can imagine. When I absolutely, positively need to get a fire going on the first try, these products are awesome.
You also can purchase a ferro rod with fire assistance built in. The ones I buy are attached to a chunk of magnesium and come with a little serrated blade.
You can use this to shave off magnesium which flares up nicely; however, I am not a fan of lighting just a pile of shavings. I really prefer to add these to other tinder to make it that much more likely to catch.
Sometimes thinking outside the box is the best way to get your fire going. I vividly remember a survival challenge from last fall. It took me all day to build my shelter, and night was approaching.
I had tried using magnesium to get a fire started, but it would not take. I tried using a jump pack to get some sparks, but still had no luck.
At this point, I was really shaky from working in the hot sun all day. It was getting dark enough that I kept losing my ferro rod when I set it down.
Finally, I remembered that I had a product with me that is designed to treat poison ivy. I had read that it was simply urushiol diluted down with alcohol.
I ripped a strip of cloth off of the sleeve of my t-shirt and doused it with the product. After a few tries with the ferro rod, I had it lit and a roaring fire shortly followed.
Maybe strips of paper would make good tinder. Perhaps thin strips of birch bark would do the trick. You could rub pine resin on your tinder to make it that much more flammable. A few drops of gasoline might be all it takes. Look at all the resources you have at hand and get creative.
I am always a bit torn when talking about fire assistance products. On one hand, I am a purist and feel that I should be able to get a fire going by rubbing two sticks together, or just by using my ferro rod.
There are plenty of survival scenarios where I would not have char cloth or any of these other products with me. Nevertheless, I also believe in giving myself the best possible chances of survival.
I intentionally go on outings without these products to develop the ability to overcome these challenges without assistance.
That being said, if I was bugging out today and grabbing my pack and my family to head for the wilderness, you can bet I would pack these products in each of our survival kits. Each of them works differently, so I suggest trying them before your life’s on the line.
Problem: Why Is My Char Cloth Not Lighting?
There are several reasons why your char cloth may not be lighting. Even though the process is easy and your own char cloth should light with a single spark once you have all of the proper components, something can still happen that delays the process.
The reasons your char cloth isn’t lighting could be due to:
- If you let oxygen get at your char cloth while it’s cooking it could ruin the material by incinerating it. You want no oxygen to get at the material which is why you only poke one hole in a sealed metal tin.
- You didn’t let the char cloth finish, and there are still some spots that are not turned to carbon. You can easily see these spots by looking where it isn’t black. Put it back on the heat source to finish up.
- Moisture got to your char cloth and it won’t light. If you can sit it out in the sun or around another heat source to dry out, it should work for you.
- It’s not cotton or some other organic material. Plastics such as nylon will fuse together and make shiny patches. You will also notice the same with any chemicals added to the clothing for waterproofing or bug control. You will have to redo it with the right materials
Make Char Cloth Without A Tin
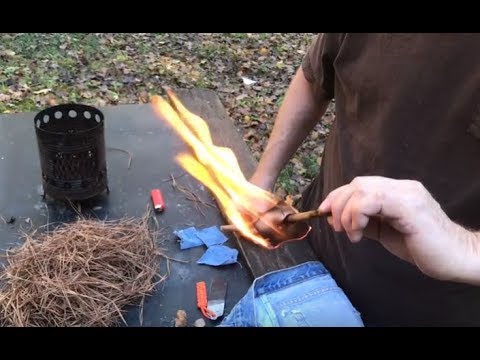
Sometimes in a survival situation you don’t have access to a tin to make some char cloth for lighting fires. The easiest way is to take squares of your fabric of choice (it can also be a blend as long as the majority is cotton) and char them on the fire.
Snuffing out the flame at the last moment will do the same thing as a tin would do and create char cloth.
Check out a video on how to do this here:
Making Char Cloth Indoors
You can make char cloth using an indoor heat source. The process is the same as you would on a fire outside except you are using the burning on your stove instead.
Simply place your natural fiber inside a small metal can and sit it on your stove burning. As you crank it up to high you’ll start to see the smoke rising from the hole in the can. When you see the smoke stop it is time to check your char cloth to see if it’s done.
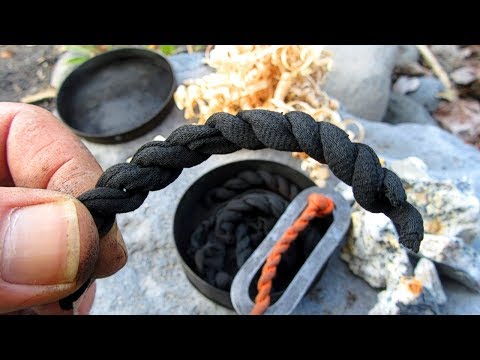
Twisting Your Char Cloth
One of the common gripes about char cloth is that because it’s made with such thin pieces of material the resulting ember can be fragile if not handled with care.
Essentially all you do is twist the material before you char it. The idea is that it will give you a larger chunk of charred cloth so that the ember stays lit longer and is easier to light your dry tinder bundle with.
Check out this video on twisting your char cloth:
Making Charred Punk Wood
If you don’t have any cotton or cloth material on hand you can always use some old, rotting, punky wood from stumps around you. The spongier and dryer the better, you want the same carbonization effect as the other natural fibers.
Simply follow the same process as you would making regular char cloth and you’ll end up with a nice piece of charcoal that can be pieced off and used to start a fire. It has the same low ignition temperature that regular char cloth has.
Frequently Asked Questions
Making char cloth is easy once you’ve done it a few times but at first there may be some questions you need answered. Here are some of the top questions people have when they first start out making char cloth.
It can take upwards of 20 minutes for your container to be finished transforming your material into char cloth. An Altoids container that is packed loosely will have to be flipped a couple of times, about 5-10 minutes each side.
The important thing is to remember to take it off when it has stopped smoking or flaming from the little hole.
Char cloth can be stored in the Altoids tin that it was made in. Odds are if you’re using this for personal use then you won’t need to make much more than what’s in the tin for a long time. You don’t need a large amount of char cloth to start a fire.
Keep the char cloth away from water and try not to let it near a large fire as it could catch. Otherwise char cloth has a long shelf life and it has no maintenance requirements for long-term storage.
The main reason that your char cloth is uneven is that you didn’t let it sit on the heat source long enough. As long as oxygen doesn’t get to the char cloth there is no way you can overcook it. Wait until the smoke stops coming out of the can before checking.
Don’t overstack your char cloth pieces in the tin as it could also delay finishing your char cloth. It might even do it unevenly as the heat might not have penetrated all of the layers correctly. Regardless, just leave it on the fire and it’ll finish in time.
The best way to light char cloth is with traditional flint or ferrocerium rods. The striker will cause the char cloth to become an ember which you can then transfer to a tinder nest to ignite. Be careful though, an absence of oxygen can put your ember out so being gentle is key.
Absolutely, in fact using tin foil can be a compact way of being able to make char cloth. Simply put your cotton or vegetable fiber into the tin foil packet, poke a hole and toss near a fire. Once the smoke stops coming out, it’s done!

My name is Ryan Dotson and I am a survivalist, prepper, writer, and photographer. I grew up in the Ozark Mountains and in the foothills of the Pocono Mountains. My interest in survival started when I was in Boy Scouts and continued as my father, uncle, and grandfather taught me to hunt and fish. In the last few years I have started taking on survival challenges and have started writing about my experiences. I currently live in Mid-Missouri with my wife Lauren and three year old son Andrew.