If you are brand spanking new to prepping, you might be feeling pretty overwhelmed right about now. You might be confused, even anxious.
That’s okay; no matter what pushed you to make the decision to get serious about your personal safety and the safety of your family, welcome aboard!
I will wager that this will be one of the most rewarding and valuable investments that you will ever make in your own well-being.
The trick is knowing where to start. There is an awful lot to know, learn and acquire as a prepper, and the longer you think about it, the more you’ll be able to think of that you should be prepared for! It is kind of a vicious cycle in that way.
If you think about it too hard and for too long, you might convince yourself that you have already missed out on too much experience, that you cannot possibly catch up now and that you should just forget about the whole thing… No way! That is definitely the wrong answer, and the wrong attitude.
You are more than capable of becoming prepared for whatever life throws at you. Everybody started somewhere on this journey and you have to do the same.
Luckily your dear author, Tom, is here to provide you with a sort of checklist that can help you get a big boost on your prepping, and, in fact, can help you get it done in an afternoon. Don’t believe me? Why don’t you read on and find out!
Table of Contents
Here’s Why I Got Started
Believe it or not I haven’t been prepping my whole life. There was a time even after my childhood years and into young adulthood where I was more or less carefree about the whole matter.
You might say I was sort of a laissez-faire type when it came to serious personal responsibility. I wasn’t a complete scumbag, but like so many other people, I outsourced my safety and my outcomes to the people in charge.
What a fool I was. It only took one seriously bad weather event, and seeing my neighbors and a few of my loved ones lose everything and get badly hurt physically and financially to light a fire under me.
I, to this day, keenly remember how it felt seeing them suffer, with no one to call on the phones that already weren’t working. Everyone around us that might have helped was busy dealing with their own problems. Things worked out okay in the end, but it was a dark, dark day.
I vowed then and there that if anything like that ever happened again I would be ready to stop it, or rather stop the damage if it was within my power.
I was serious, but once I embarked on actually learning what was what and what I needed to know things got confusing.
Building Your Survival Kit in a Single Afternoon
Take a deep breath and relax for a moment. I’m here to guide you through the sometimes-confusing first steps. All you need to do to get started is get a handle on the basics, and I mean the basics.
We are talking baby-steps, tying-your-shoes, truly simple basics. If you can just do that you will be better prepared than 9 out of 10 people. It’s true, I am not kidding, and I have been doing this long enough to tell you that with authority.
With just a few simple acquisitions for your beginning survival kit, often called a 3-day kit or 72-hour kit, you will have a core of essential survival supplies that can keep you and yours alive when society falls apart, and all essential services are suspended, or out of action in the wake of a disaster.
If you have the cash to spare, you can even whip this thing together in a single afternoon. No joke!
Using several things you already have, and just a few purchases you can put together a kit that will contain all of the essential items necessary to ensure your survival when disaster strikes, and whatever form it looks like.
If it seems too good to be true, pause and reconsider. Most disasters will not be so bad that you won’t be able to affect escape in the aftermath or get rescued within 72 hours. That is the most crucial time period after a disaster.
Statistically if you can survive three days without any support and without many modern conveniences you’re going to be okay. So that’s why we shoot for that 3-day kit standard.
I have no doubt, as you grow on the path to prepperdom, that you will expand this 3-day kit to a week’s worth of supplies, and then a month’s worth, and then on to a couple of month’s and eventually a year or more. That is some serious freedom!
Have a look at the items below to complete your shopping list. I will be going into detail about the “why” of each of them in the rest of the article:
- Water Supply: Obtain 1 gallon of bottled water per person, per day, minimum. So 3 gallons for now.
- Food: Shelf-stable and ready to eat food that requires little or no prep. Aim for 2,000 calories a day for adults. Include disposable utensils.
- Hygiene Items: Soap, Hand Sanitizer, Deodorant, Foot/Body Powder, Moist Towelettes, TP, Toothbrush, Toothpaste.
- Shelter Items: Blankets, sleeping bags, and other items to keep warm when temperatures fall. Consider some thick foam padding, also. This can make sleeping on the ground or floor of a shelter much easier to endure.
- Lightsources: Never head into any disaster without a good collection of bright and dependable flashlights. Also, make sure you have plenty of batteries to feed them!
- Fire Extinguisher: A house fire is disaster enough, but fires also commonly break out in the aftermath of many disasters. Be prepared to combat either with quality, ABC-rated extinguishers.
- NOAA Radio: If electricity is out and you have no phone signal (or phone) you can still get up to the minute info using a hand-cranked or battery powered emergency weather radio.
- Personal Documents File: If you have to become a refugee, it might be important to prove you are who you say you are. Keep a file with copies of all of your vital docs and info ready to go with your survival kit.
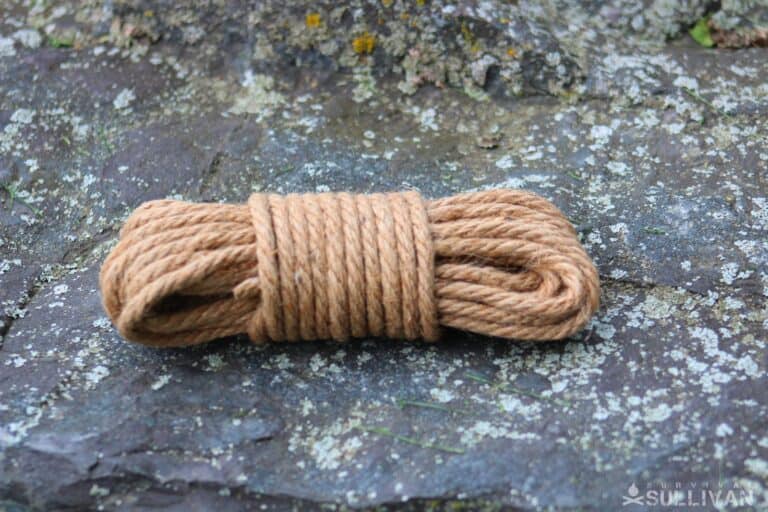
- Tarps and Cordage: Tarps are one of the best survival multi-tools, capable of sealing holed roofs, blocking wind, forming a ground cover and even making a temporary shelter. Get some good, strong ones for your kit, and some sturdy cordage to hold them in place where you need them!
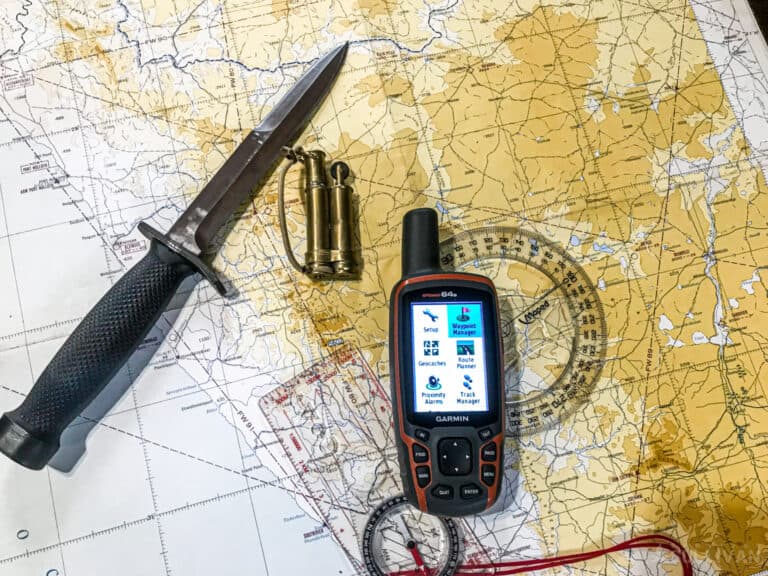
- Maps and Compass: You might be able to make use of a GPS after a disaster, but you might not, and no matter what the landscape will look very different. Be ready for this eventuality by having a set of maps and a dependable compass.
I’ll help you sort out what is what in the sections below.
Step 1: Stockpile Some Water
Water is an essential prep that needs little in the way of introduction. You can, at most, go only a few days without any water. Assuming you can even survive that long you will become incapacitated well before then from dehydration.
Ensuring that you have a supply of clean, safe water that is ready to drink is one of the most important first steps to becoming a prepper.
The easiest way to do this is to simply buy a supply of bottled water (or water and large jugs) at the grocery store, and put it back for a rainy day.
You have to be cautious if you are banking on getting water out of a tap after a disaster, because even if the water is still flowing there’s a high likelihood that the supply can become contaminated, meaning you are drinking water that can make you seriously ill without even knowing it.
It pays to have plenty of water, and you can always use a little more so long as you don’t have to carry it. You also need water for more than just drinking, including such tasks as basic hygiene.
Generally speaking, you want one gallon of water per person in your family or household, per day. So let’s say you have a family of four that would come out to 12 gallons of water on hand for your 3-day kit.
Also be advised that you will need more water if you live in a hot climate, or have to be very active, since you will lose so much moisture through perspiration.
Water does not generally go bad over time as long as those seals are intact, but it will slowly lose some of its volume to evaporation and can take on a bad taste, so consider rotating your water supply along with all of your other consumables.
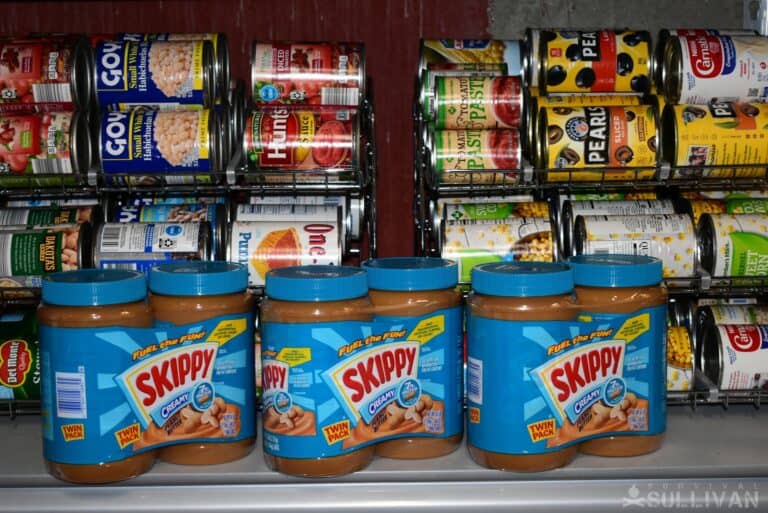
Step 2: Start Building Your Food Stash
If you look like me, you might be raising an eyebrow on this prep since you probably have plenty of surplus calories that you carry with you at all times, if you know what I mean.
But, all kidding aside, people need energy to function, especially at peak performance, and that means you need food.
You can stay alive a lot longer going without food then you can without water, but your performance will be significantly degraded, both mentally and physically.
Eating regular meals, even if they are smaller than normal, will keep both your energy and your morale levels high.
Also keep in mind that the raw stuff of survival can make for some highly laborious days; you don’t know what you might have to do in order to improve your situation, escape or generally just take care of business.
It would not do to be suffering from fatigue and mental haziness due to a lack of energy. Go ahead and plan for 2,000 calories to 2,200 calories a day for every person in your family.
That figure is for adults; children will need less, but they also suffer more from calorie deficits compared to adults so keep that in mind.
You can trim back your food consumption, in effect rationing, for quite a while with no ill effects in order to stretch your supply if it looks like you might be dealing with the aftermath for a long time.
The ideal foods for your 3-day survival kit will be in sealed cans, pouches, or some other containers that will keep them safe and ready to eat with very little in the way of preparation necessary.
The longer the shelf life the better unless you are going to be very diligent about rotating your food. MREs are another option you might consider, but they are generally quite expensive for what you get, though they do have very long shelf lives.
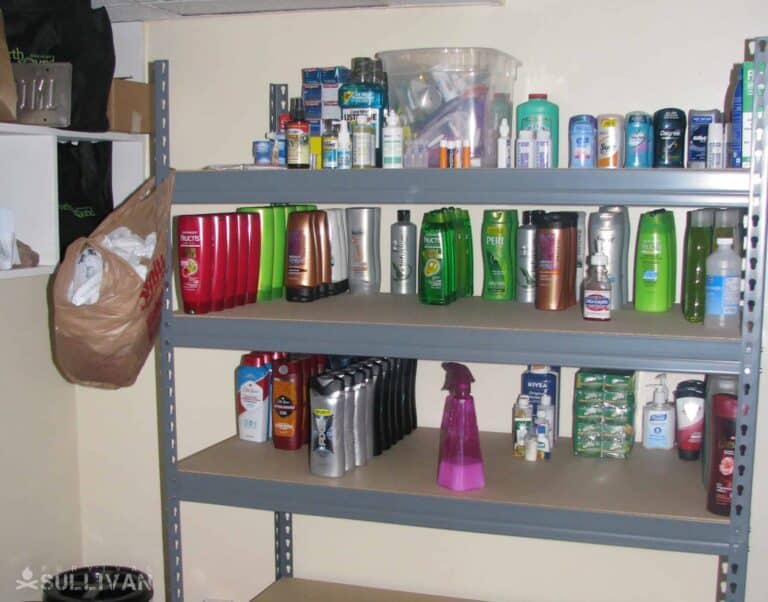
Step 3: Get Some Hygiene Items
Don’t even think about skipping on your daily hygiene routines just because there is a disaster on! Keeping clean is a virtue, and it is not just about manners.
Unwashed bodies harbor germs in tremendous abundance. You’ll know they are gathering because you will start to stink.
Aside from driving the people around you absolutely crazy with disgust, this is a surefire sign that infection and disease will not be far behind.
Soon you’ll be dealing with skin ailments and after that full-blown infections. This will definitely hurt your prospects for survival, especially when you likely cannot summon medical help.
You don’t need to plan on enjoying your day-to-day pampering routine at full blast, but you should make allowances for cleaning yourself daily.
Including as part of your survival kit some soap, foot and body powder, hand sanitizer and a jumbo pack of baby wipes will go a long, long way to keeping you clean and disease-free.
Also, don’t forget deodorant and some toothbrushes and toothpaste. If you have women in your family make sure you get their feminine hygiene products in abundance as well.
Step 4: Expand Your Shelter Options
This might be a surprise to you, but dehydration, even traumatic injury, is not the number one thing that kills people in survival situations. It is exposure! And in this case exposure means exposure to the elements.
You can depend on any disaster knocking out the electrical grid and likely inflicting serious damage to buildings all around. This means you might not be able to wait things out safe and sound, and cozy, inside your own home or any other building.
Anytime you are exposed to the outside elements you can be in danger.
Even in temperate areas, night-time temperatures can go low enough to induce hypothermia. Likewise spending a lot of time in the blazing sun can induce heat exhaustion and heat stroke after that.
You must have ways to control your body temperature, and we are predominantly worried about cold temperatures doing us in.
Make sure you have a good supply of decent sleeping bags and plenty of warm blankets to ensure you can stay warm when you can’t be inside, and you don’t have access to any heat.
It is also a good idea to get some thick padding to go beneath the sleeping bags in case you have to sleep on the ground or an uncovered concrete floor, both of which are notorious for sucking warmth out of your body.
Step 5: Get Some Light Sources
Any disaster that even qualifies for the name will knock out power pretty much immediately, and do so over a wide area.
That means that when things get dark, be it inside a building or outside at night, you’re going to be dealing with serious darkness, the kind of darkness that leads to accidents and misadventures, compounding your chance for injury.
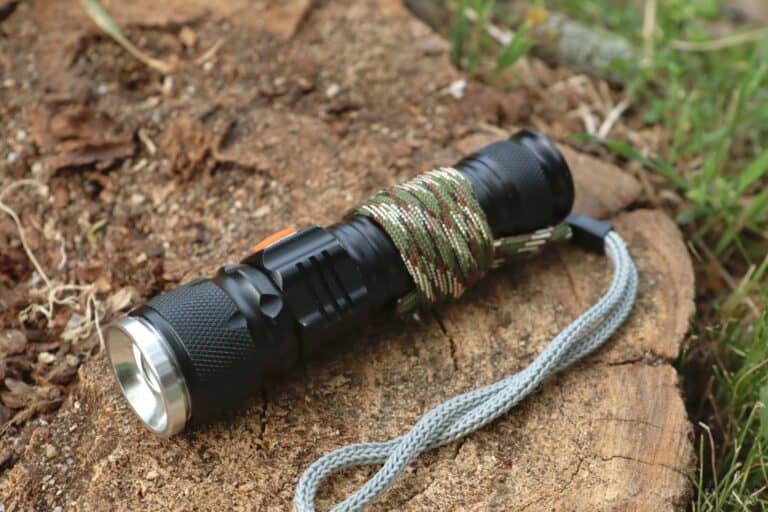
Your best bet for keeping the darkness at bay is to rely on modern lighting tools in the form of flashlights, lanterns and other tools.
Flashlights are a great choice, and give you excellent handling characteristics, portability and general utility. You should never be without a good flashlight on your person during a disaster.
Electric lanterns are also entirely viable, and work better than flashlights when you need to provide all around lighting when at your campsite, or when working on something.
You can easily hang a lantern from any convenient protrusion and it will work nearly as good as modern interior lights.
Your last good option is a headlamp, which generally combines the area flood lighting of a lantern with the convenience and the mobility of a flashlight that you wear on your forehead.
These are the ideal tool when you are walking or biking at night, or when need to work on something with up close lighting for the task.
No matter what kind of lighting devices you get, get several, and you can make a case for having some of each type.
But also ensure that you get plenty of batteries, and you can make your life a lot easier by keeping each type of lighting device the same or at least ensure they use the same type of battery.
Fire Extinguisher
Fires are one of the most common threats that anyone will face in their lives. In any given year, fires will claim thousands and thousands of lives, cause tens of thousands of injuries and result in property damage tallying tens of billions of dollars. Yes, billions with ‘B’. Your first line of defense against a fire is a fire extinguisher.
A fire extinguisher is pretty much the only tool available to you that can let you clear a path through a fire in order to escape or even potentially save your home from total destruction if you act quickly enough before the blaze grows out of control.
You must have inside your home one (preferably two or more) high-quality, high-capacity fire extinguishers that are ABC rated.
That rating means they are capable of handling any kind of fire except one caused by flammable metal, which is not something you are likely to encounter outside of a laboratory or industrial setting.
Put these fire extinguishers in strategic places that you will be able to access when you are alerted to the fire, and keep them regularly maintained to ensure they work when you need them.
I would also advise you to get the largest fire extinguisher that you and your family can handle easily. Don’t get something so big that will hamper your response while at the same time avoiding one so small it is barely suitable for putting out a trash can fire.
NOAA Radio
When the electricity goes, your access to television and internet updates on the situation at large will be toast as well. There is also a high likelihood that your phone or cable will have either disrupted or severed internet communication also.
Knowing this will be a common feature for most serious disasters, you can ensure you stay up-to-date on what is going on as well as recommended procedures by investing in an NOAA emergency weather radio.
These handy radios are not expensive, and most of them also include convenient features like USB charging ports and built-in flashlights. Their defining feature, though, is often a hand-cranked dynamo to supply power, meaning you don’t even need batteries.
As long as you can keep cranking the handle you can keep charging its onboard power supply and through it perhaps other electronic devices. It is laborious and boring but this is good capability to have.
Staying clued-in to announcements from government- and non-government agencies could make the difference between getting to a safe place or a relief point, and missing out.
Personal Documents File
Whether you stay in place to survive or evacuate you will probably find that disasters will strain technological and analog databases, as well as their administrators, to the absolute breaking point and beyond.
Especially if you get turned into an evacuee trying to survive in a different town or even a different state there’s a high likelihood that you’ll have to prove your identity and your access to certain resources. If all the networks and the grids are down or destroyed, how will you accomplish that?
You’ll need bona fides, and that means you’ll need official documents or at least copies thereof.
This will be comprised of all of the usual suspects, things like your driver’s license or state issued ID card, passport, mortgages, deeds and titles, certificates, diplomas, as well as account information and anything else they can prove you are who you say you are, and have access to what you say you have access to.
You have two choices for keeping this information. The first is digital, specifically on a flash drive that you then encrypt for security. The second way is via a paper copy file that you weatherproofed to prevent its destruction.
It goes without saying that this is quite literally the keys to the kingdom when it comes to your identity and much of your life. You must take all precaution to ensure it does not get lost or separated from you and fall into the wrong hands.
Tarps and Cordage
Tarps are the original and under-appreciated multi-tool for preppers. They have all kinds of uses during all kinds of disasters and other emergencies.
Using a tarp alone you can create a reliable ground cover, a windbreak or a patch for a leaking roof. You can use it to create simple shelters like tents or lean-tos.
You can even use it to create a water catchment system for collecting rainwater, or for making yourself a simple bath. The more you think about it, the more uses you will come up with for your tarps.
Any tarp you purchase for emergency preparedness should be completely waterproof, have heavy duty grommets and be made from high-quality material if you want it to survive the rigors that you will put it through.
Don’t cheap out here. You don’t have to buy the most expensive tarp on the market but you shouldn’t be buying a dollar store tarp either.
You also need a way to attach your tarp to various things. High-quality cordage is a favorite, like paracord, but you can also consider thin rope or heavy duty twine.
Maps and Compass
Major disasters can easily wipe out landmarks and street signs that you might need to navigate when traveling or trying to escape from the affected area. GPS systems are surprisingly robust, but you should not count on them to get you where you need to go.
An inexpensive and smart investment you can make in your escape and travel plans post-disaster is to get a road atlas, some local city maps and some regional maps along with a quality compass.
You might know the area you are living in like the back of your hand, even having lived there pretty much your entire life, but you cannot know how badly the landscape will be scarred and twisted in the aftermath.
It is probably hard for you to predict how stressed out and afraid you’ll be and how that will affect your memory!
The bottom line is that paper maps will remember what your mind will forget, and what your eyes won’t be able to recognize. The compass will help you keep your bearing when everything else has been turned upside down.
Don’t neglect these essential items even if you think there is no way you would be fleeing from your home!
Conclusion
You should not, as a new prepper, give in to the feeling that you are too far behind the readiness power curve to make much headway.
Don’t compare yourself to people who have been prepping for 10 or 20 years; only compare yourself as a prepper to the prepper you were yesterday!
With one afternoon of shopping and a little bit of organization you can be far more prepared than the majority of your neighbors, and from there you’ll have a good core of survival supplies to build and grow from.
Beyond that, with a little bit of training and a little bit of practice you’ll be a hardened survivor and no time!

Tom Marlowe practically grew up with a gun in his hand, and has held all kinds of jobs in the gun industry: range safety, sales, instruction and consulting, Tom has the experience to help civilian shooters figure out what will work best for them.
We having been preparing for several years. Great advice for everyone.
Very thorough article I appreciate it very much
This is a timely read! Thank you so much!
The last few days I’ve been feeling so inadequate for my state of prepping to the point of anxiety-induced paralysis. My meager supplies are scattered around… I’ve been meaning to organize them, preferably in a BOB, but I lack the energy, focus and time to do so. I read about organizing prepping stuffs and overthink things way too much. I’m gonna follow your advice and do the basics and get the 72-hour kit going first. Feeling better, more positive and encouraged! Thanks again, Tom!