If you are using your guns the way you should, they’ll benefit from periodic function and safety checks in addition to routine cleaning. If you are planning on buying a used gun, you can conduct a similar check to quickly ascertain whether or not there is anything majorly wrong with the gun you have in hand.
Guns are very durable, but like all machines they wear and can break down. Most of the time, thankfully, there are symptoms that will usually crop up before something major happens. This series of checks
In this article, I will present a series of steps that you can employ with a semi-auto or a revolver in order to sniff out any mechanical issues before they bite you in the rear when you need your gun most.
***DISCLAIMER: This article is not to be treated as gunsmith advice. The author is not a gunsmith. Neither this website, its principals, owners, operators, contractors or employees, or the author of this article, claim any criminal or civil liability resulting from injury, death or legal action resulting from the use or misuse of the information contained in this article. Any comprehensive inspection of a firearm for determining suitability and safety for use will include consulting a trained and certified gunsmith who specializes in the firearm in question. The reader should hire and consult with a competent gunsmith as part of your preparations. ***
Before Commencing Function Checks
Take the time whenever you have your gun torn down for maintenance or cleaning to really inspect its components. Look for cracks, pitting, chipping erosion and other forms of wear in all the parts.
Finish wear is probably nothing to worry about, but any physical destruction of edges and mating surfaces of parts is a problem. Pay particular attention to the barrel so you can be on the lookout for bulges. Make sure the barrel is clear of any obstructions!
Pins, screws and the like should be tight, not loose or wobbly. The sights should not be bent, dinged or otherwise upset. You should not find any rust or other corrosion on internal or external surfaces.
A little rust can be cleaned off with no fear of ill effects, but serious rusting should be checked out by a gunsmith to ensure structural integrity was not compromised.
Once you have given the parts a thorough going over, reassemble the gun to complete the checks below.
IMPORTANT: If you are commencing these checks with a loaded gun, or immediately prior to loading the gun, you must unload and verify that the chamber is empty! Then separate the ammo from the weapon entirely while performing these function checks.
Semi-Auto
- With magazine removed, cycle slide to cock action; slide should move forcefully with no hesitation
- Pull trigger. Trigger pull should feel normal and gun should audibly snap on empty chamber.
- Depress trigger and hold; cycle slide. Slowly release trigger, you should feel and hear the sear reengage.
- Pull trigger again; gun should snap on empty chamber.
- Insert empty magazine; magazine should lock positively into place.
- Pull slide to rear; slide should be locked into place by follower of empty magazine engaging slide release.
- Press magazine release; magazine should drop free.
- Depress slide release; slide should return to battery.
- Check other controls for function:
- Decockers should return hammer to resting position; half-cock or full-down depending on model.
- Mechanical safeties should be checked for travel and function; engage safety, pull trigger. Gun should not snap/hammer should not move.
- Hammer-Fired Semi-Autos:
- DA/SA guns should be fired in DA and SA modes.
- SA guns should be fired SA, also safeties checked for function when hammer is cocked.
- Both types should be checked for “push off” (inadvertent release of hammer) by cocking manually and then firmly pushing hammer toward muzzle; hammer should not go forward with all safeties disengaged or engaged.
- Insert pencil eraser first (or appropriately sized wooden/resin dowel) into muzzle with slide closed. Point pistol up, pull trigger; pencil/dowel should jump noticeable when struck by firing pin during simulated shot. Lack of movement means potentially a broken firing pin.
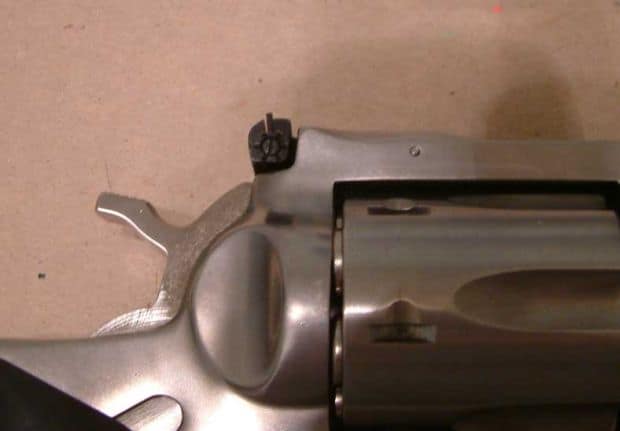
Revolver, DA
- Inspect crane with cylinder closed; look and feel for looseness and sloppy fitment.
- Pull trigger; cylinder should rotate smoothly and hammer should visually/audibly snap home.
- If external hammer: manually cock and press trigger; hammer should fall.
- Depress cylinder release latch and swing out cylinder.
- Inspect ejector rod for tightness (on screw-in models) and straightness; rotate cylinder and observe rotation of ejector rod to verify straightness.
- If ejector rod is non-rotating type, pay extra attention and inspect visually for straightness or use gauge.
- Fully depress and hold ejector rod; look under ejector for grit, lint and debris that may prevent it seating fully home.
- Release ejector rod; rod travel should be smooth and positive on press and return.
- With cylinder out of frame, pull trigger to rear by first manually moving cylinder release latch to engaged position if necessary (S&W’s, Taurus, some Rugers) or by using small punch to depress plunger in breechface (some Rugers); firing pin should protrude from breechface, inspect for deformity and damage.
- Older revolvers with hammer-mounted firing pins can simply be cocked manually to reveal the firing pin.
- Close cylinder. Manually cock hammer if present, check for cylinder bolt engagement by attempting to rotate cylinder manually. Cylinder should not turn.
- Begin to pull trigger until you can observe or feel bolt engage cylinder; hold trigger in place and try to rotate cylinder. Cylinder should not rotate or rotate only short distance before locking positively.
- If external hammer present, cock hammer and check for push off.
What about Ammo?
Your ammunition will not last forever, especially ammo carried in the stuffy and moist confines of a gun kept close to the body in an everyday carry role. One thing many shooters take granted is the degradation of their carry ammo.
You cannot unload and rechamber a cartridge over and over again. This constant action will result in things like bullet setback in the case (and subsequent high pressures) or a shock-deadened primer.
Whenever you remove a round from the chamber, mark the head of the cartridge with a sharpie so you can distinguish it and put it in the bottom of the stack feeding into the gun. When it gets a second mark, or third at the absolute most, either get rid of it or toss into your training supply. Don’t trust it anymore!
Also you should be painstakingly inspecting your rounds prior to loading them into defensive guns. Since ammo is one of the most likely things to fail (not necessarily the gun itself) you should be paying extra attention to it.
Look for dents or mauled mouths and crimps on the cases, deformed rims, and primers that are backwards, missing or just high in the pocket. Any of the above can lead to malfunctions or a failure to fire with revolvers or semi-autos.
If your rounds start to look grubby or even mildly corroded, it is time to get fresh ammo. I know the good stuff is expensive, but you cannot take the chance that it will fail you.
Do These Checks Regularly…
Don’t assume that just because guns are so reliable or that yours has always worked it will continue to do so. Make sure you are performing regular function checks so that you can stay ahead of potential problems before they turn into major showstoppers.

Tom Marlowe practically grew up with a gun in his hand, and has held all kinds of jobs in the gun industry: range safety, sales, instruction and consulting, Tom has the experience to help civilian shooters figure out what will work best for them.