The basics of forging will unleash limitless possibilities for you to experiment with and turn metal into tools and weapons.
In this article we will look at forging a very sharp spear tip from an everyday garden spade. Survival and SHTF scenarios will usually catch you unawares, the need to have working tools and weapons becomes fundamental to survival.
This article will take you through the forging and construction of a basic spear and how to fit it to your spear shaft. The spade short cut will familiarize you with the forging process and the treatment process.
The forging of metal is itself a massive leap forward in the manufacture of iron goods.
The blacksmith has always held a prominent place of eminence in society.
A blacksmith could create magic with fire and steel, conjuring weapons and tools for every profession which can be used to barter for other resources.
Starting out, you will need help with the basic concepts and access to a forge and tools. Research your area for a blacksmith and approach them to assist you to understand and come to grips with the concepts outlined below.
A few things to keep in mind before we begin:
- High-carbon steel is best
- Coal and gas forges are best
- Heat color is a good indicator of temperature
- An elementary knowledge of forging is required
- Basic tools are required at a minimum
- Work steadily, and with patience
- You are working with fire and high heat, safety is paramount
Working in a blacksmith’s workshop will save you the cost of purchasing the equipment.
You will be able to familiarize yourself with the equipment, the most effective way to use it, and acquire the forging skills you require under the tutelage of someone experienced.
The skills you gain here will be yours forever, and can be put to use in the future.
Table of Contents
The Parts of the Spear
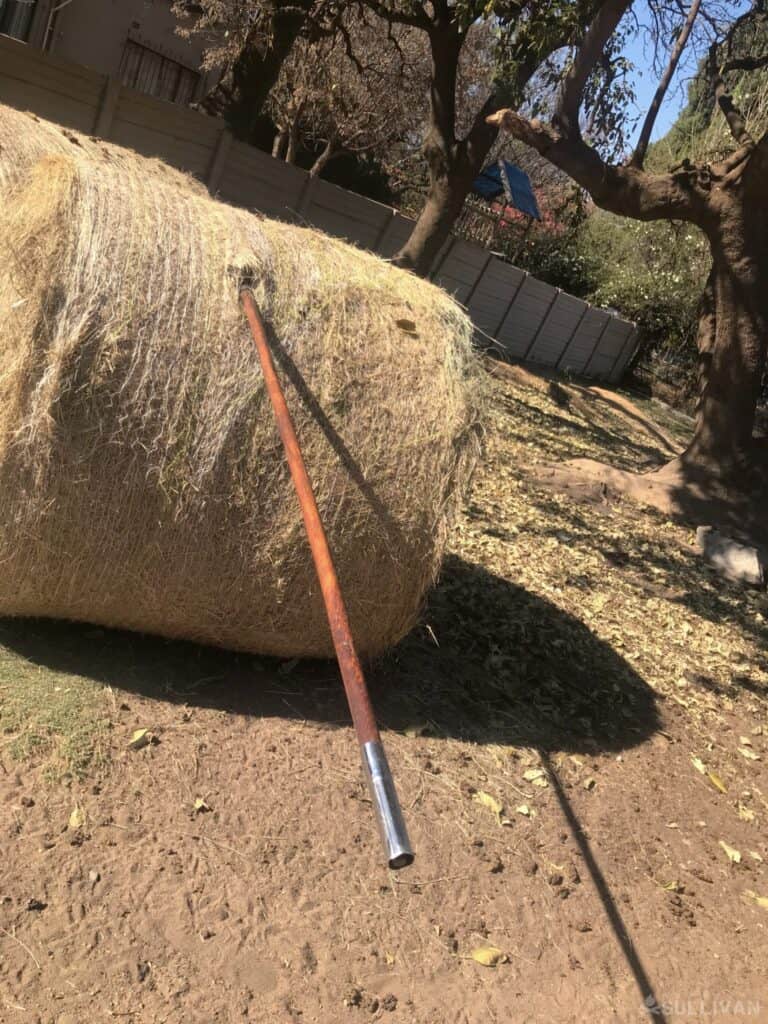
The spear is uncomplicated. It is similar to a knife in construction with a blade surface, and can fulfill a dual purpose of a knife and spear.
A spear will have a dual or double edge, allowing the head to cut into a target on both sides. This gives better penetration, maximizing the impact damage the spear is capable of.
Every spear will have a pointed tip to assist in the penetration of the target.
The socket is as important as the blade of the spear. It is a conically shaper hollow tube that will fit over the spear shaft.
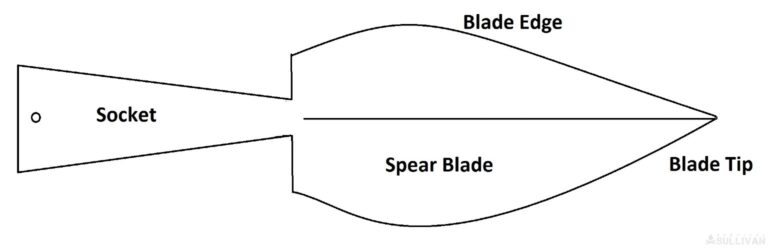
A socket fixes the spear head to the shaft. It is the most difficult art of the spear to forge. It requires the moving of metal into the shape, and then forge welding it.
As a novice blacksmith and using improvised heating it can be difficult to forge a spear from a blank piece of steel. Many times in a survival situation or a SHTF scenario you will have to use whatever you can find.
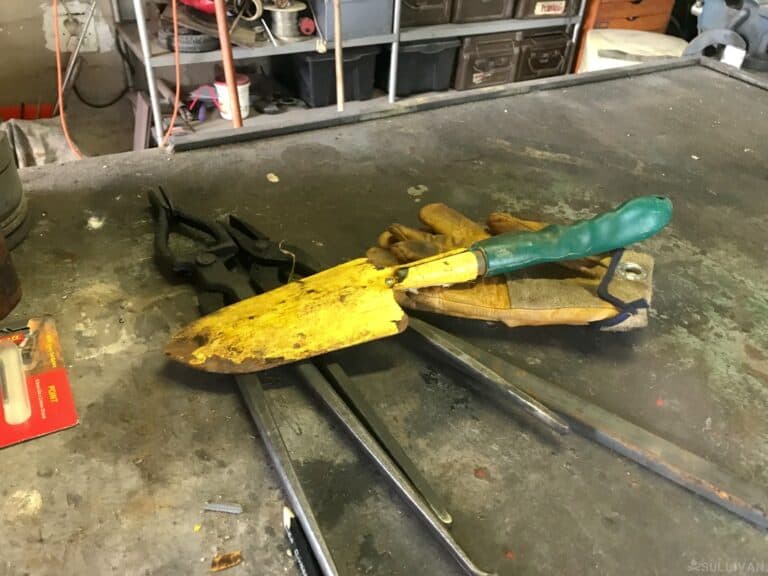
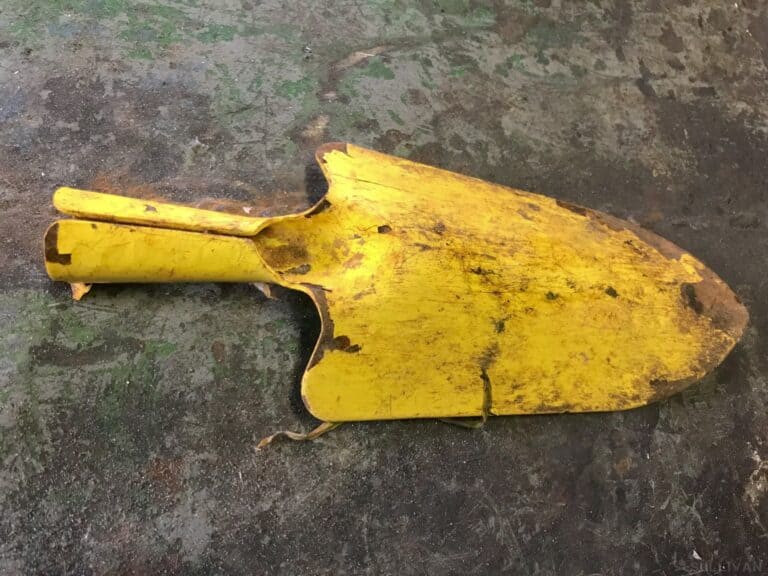
In this case the simple garden spade fulfills a dual purpose. It already has a good spear shape and the added benefit of an existing socket. Your mission, should you choose to accept it, is to shape this garden spade into a spear.
Not all steel is equal, and it can be daunting to research all the material covering the subject. A general rule of thumb is that high-carbon steel is better than low-carbon steel.
When running the steel over the grinder, high carbon steel will create a lot of sparks as it is ground, and low carbon steel will produce a low spark when ground.
High-carbon steel will harden and low-carbon steel will remain soft even when heated and quenched, cooled down quickly, or tempered in blacksmith terminology.
How Difficult Is To Forge the Spear
Anyone can forge, it is that simple, but it does require basic skills in order to operate a forge and hammer out the spear on and anvil.
As a beginner it is important that you have a tutor, an experienced blacksmith to assist you through the process of familiarizing yourself with the function of the forge’s equipment and the safety protocols that will ensure your safety.
Technique is an acquired skill, your mentor will guide you through the basics of using a hammer, how to move the heated metal, to form your blank piece of steel into the tool you wish to create.
Forging requires a number of skills:
- Strength and endurance to swing a hammer continuously for a period of time
- A basic understanding of working with fire, heat, cooling oil, and water
- Working with iron, a basic understanding of different iron types and their carbon density
- Hardening iron
Materials Need For Crafting the Spear
- Old garden hand spade
- A gas forge or a coal forge (or a fire pit or gas-fired torch for heating the metal)
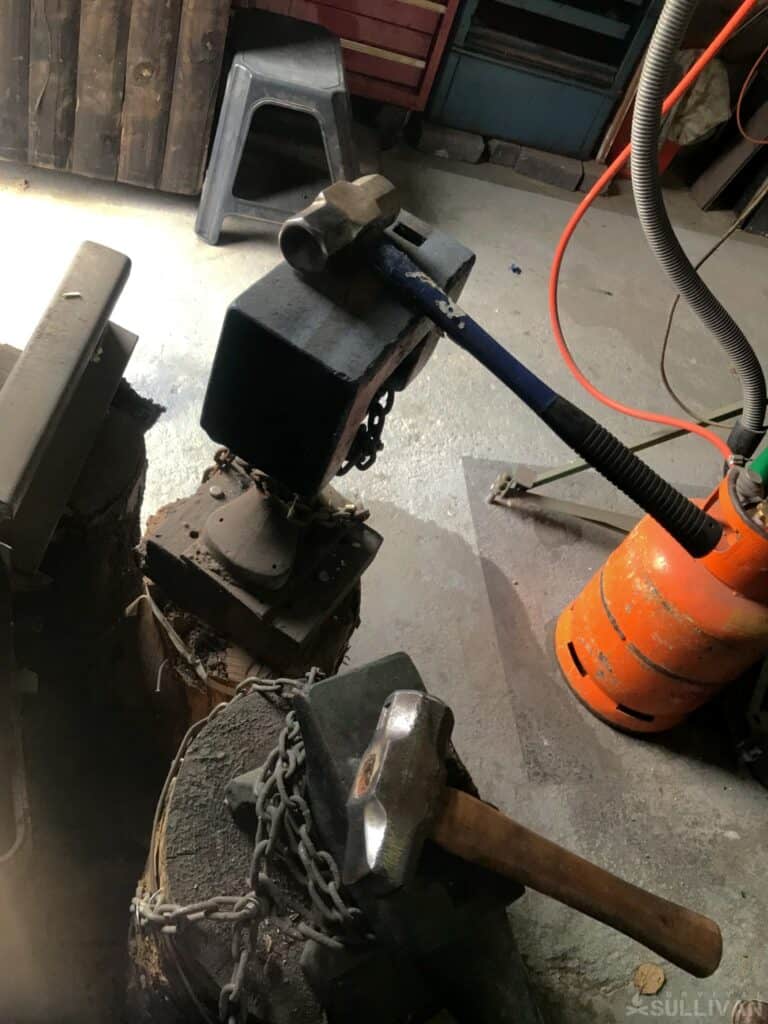
- Hammers – a minimum of a four-pound hammer and a two-pound ball peen hammer
- Anvil or solid and heavy surface (preferably metal) on which to beat out the shape from the heated metal.
- Tongs – to Place and Remove the spade in the forge
- Steel brushes for cleaning off the shale from the metal
- A workbench with a vice and bench grinder
- Drill with a 2/4 mm drill bit
- Small grinder with a cutting disk or a hacksaw
- Masking tape, Cardboard, Pencil
- Measuring Tape
- Bucket with water or quenching oil
- Metal file
- A solid set of gloves
- Safety Glasses
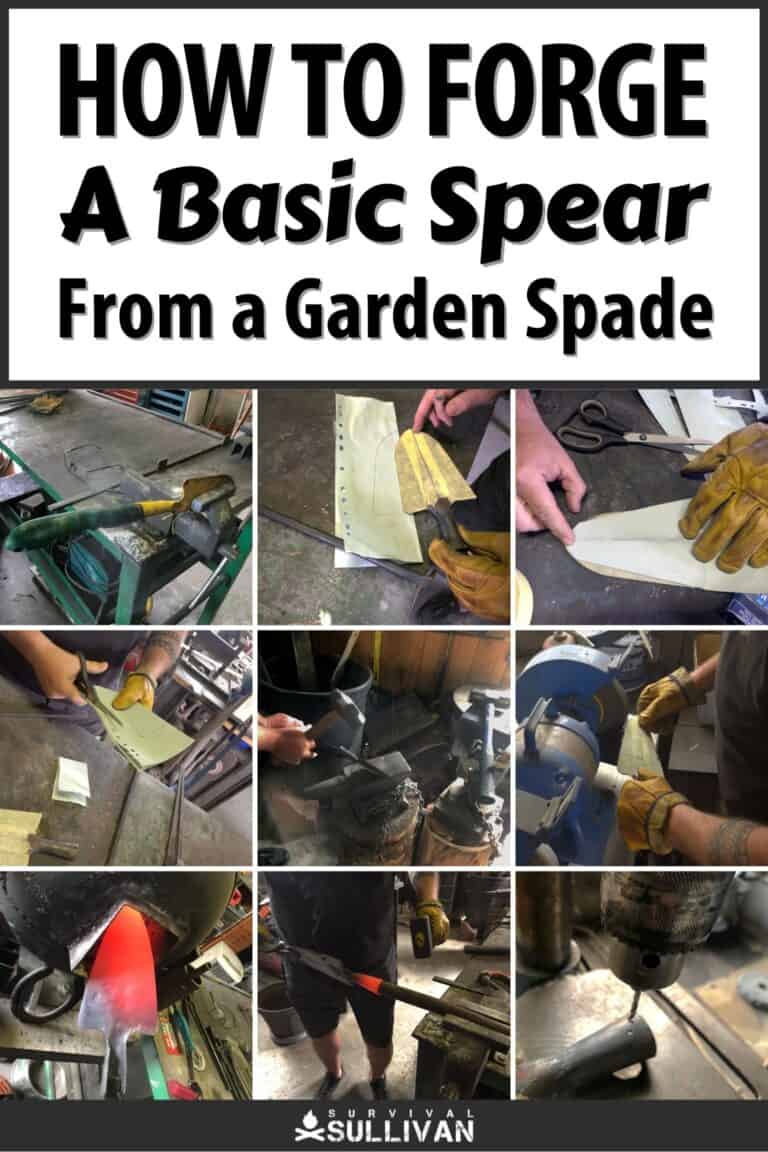
Here’s How to Make The Spear in 25 Steps
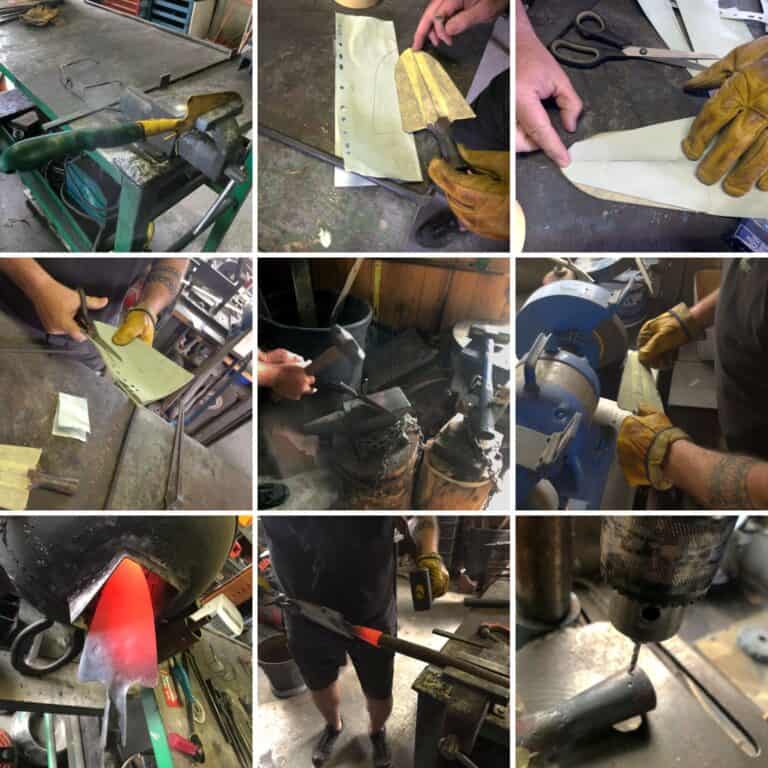
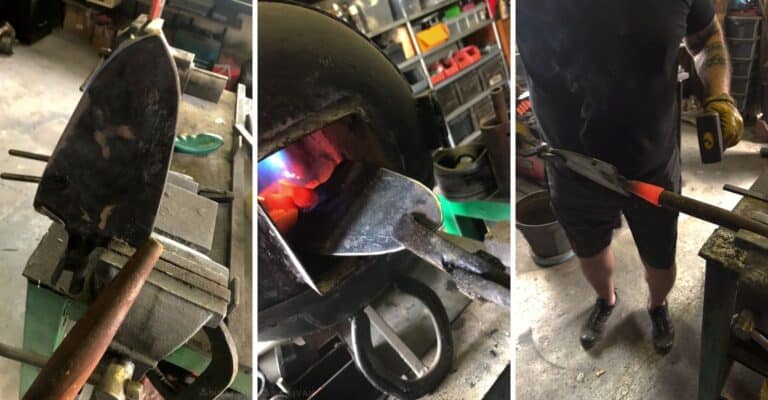
Step 1. Remove the handle from the spade. You will observe the socket housing once the handle is removed. This will become the housing for your spear shaft.
Step 2. Lay out the spade on the workbench. You will now be able to see the shape clearly, and plan out the spear you want to shape.
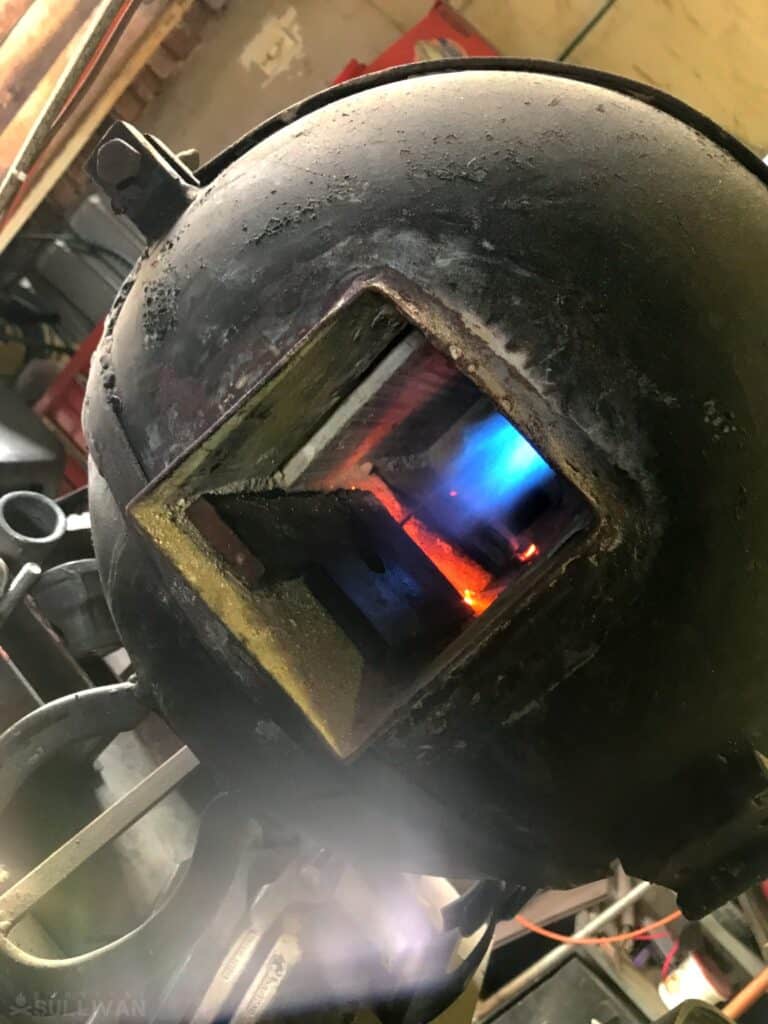
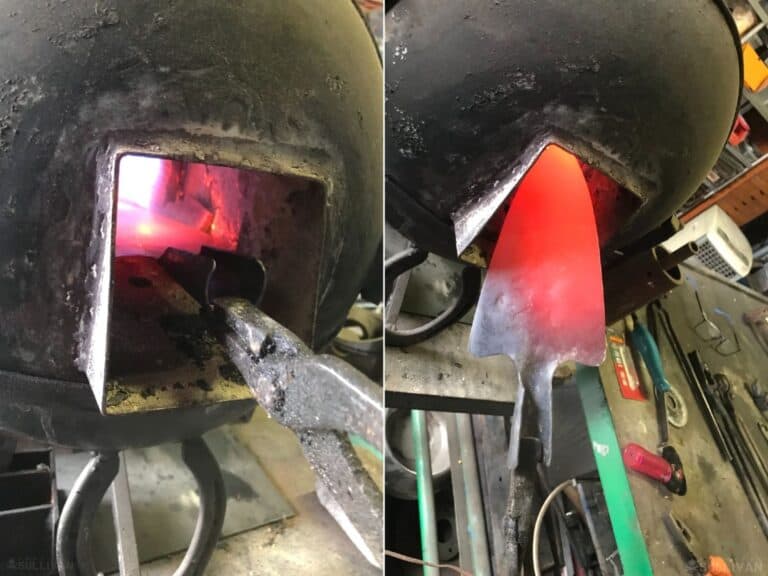
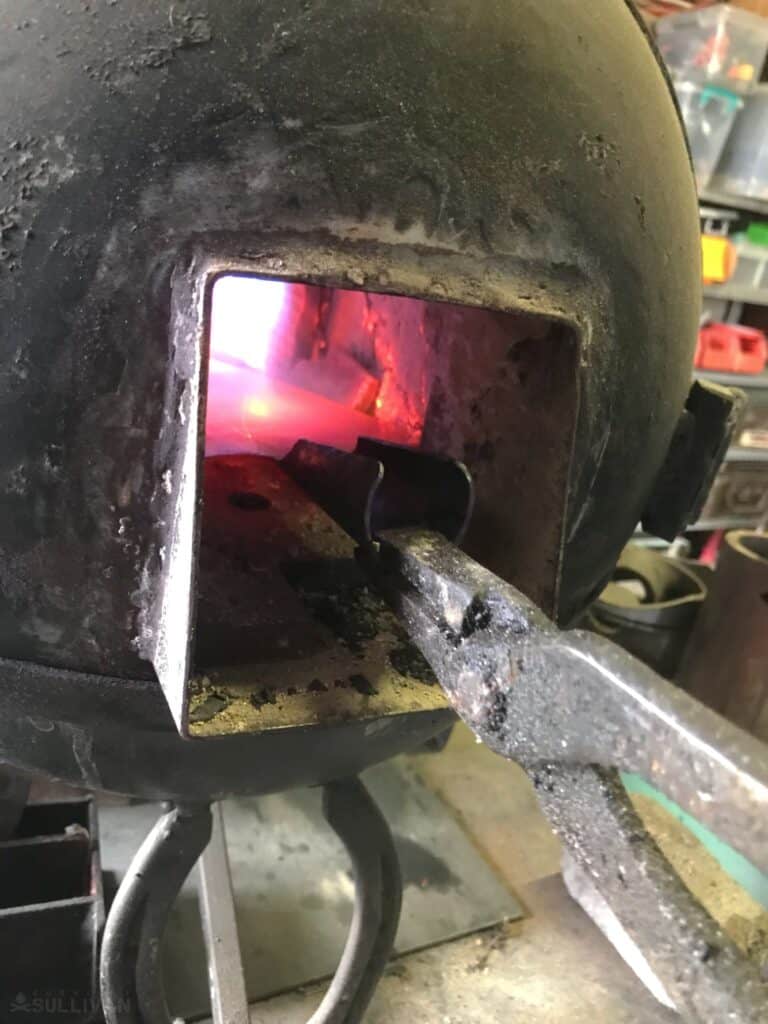
Step 3. Fire up the forge and insert the spade and wait for the metal to heat up.
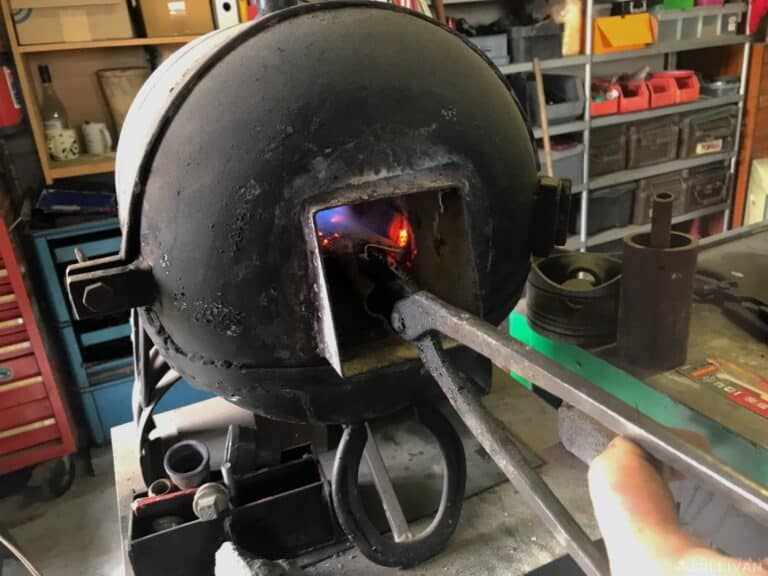
Step 4. The paint will burn off, so keep checking the blade color. Watch until it begins to change to a bright red, color – an indicator that your metal has achieved the right temperature to be moved and hammered into shape.
In this instance you are working with thinner metal and you will need to be more observant f the metal heat.
If it is too hot, the metal will “burn”, it will become soft as metal will have over-expanded.
Step 5. As the paint burns, use the steel brush to remove the remaining remnants of the paint.
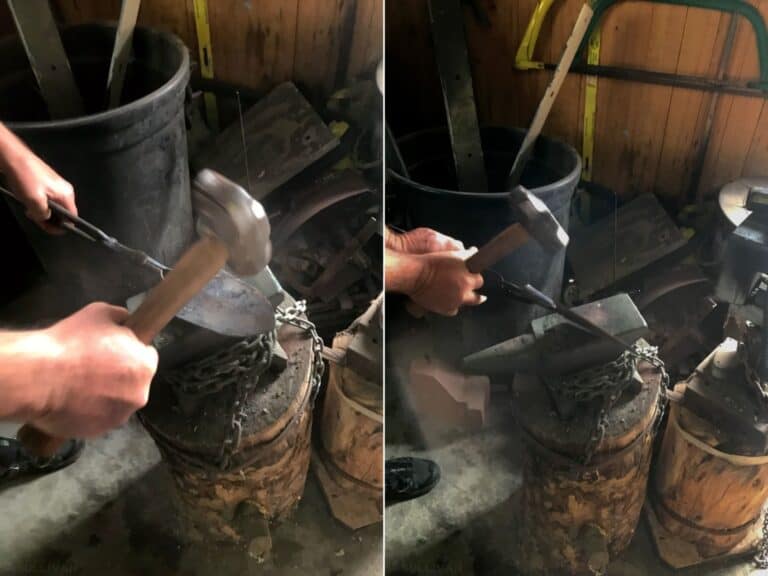
Step 6. Once you have achieved the right temperature between 1750 F (950 C) and 2300 F (1250 C), you will be able to begin to hammer out the flat profile shape of the spear.
Pro Tip: Warm the anvil surface it stops your metal cooling off to quickly.
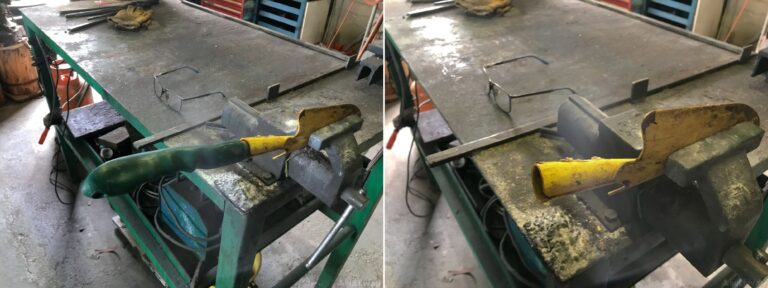
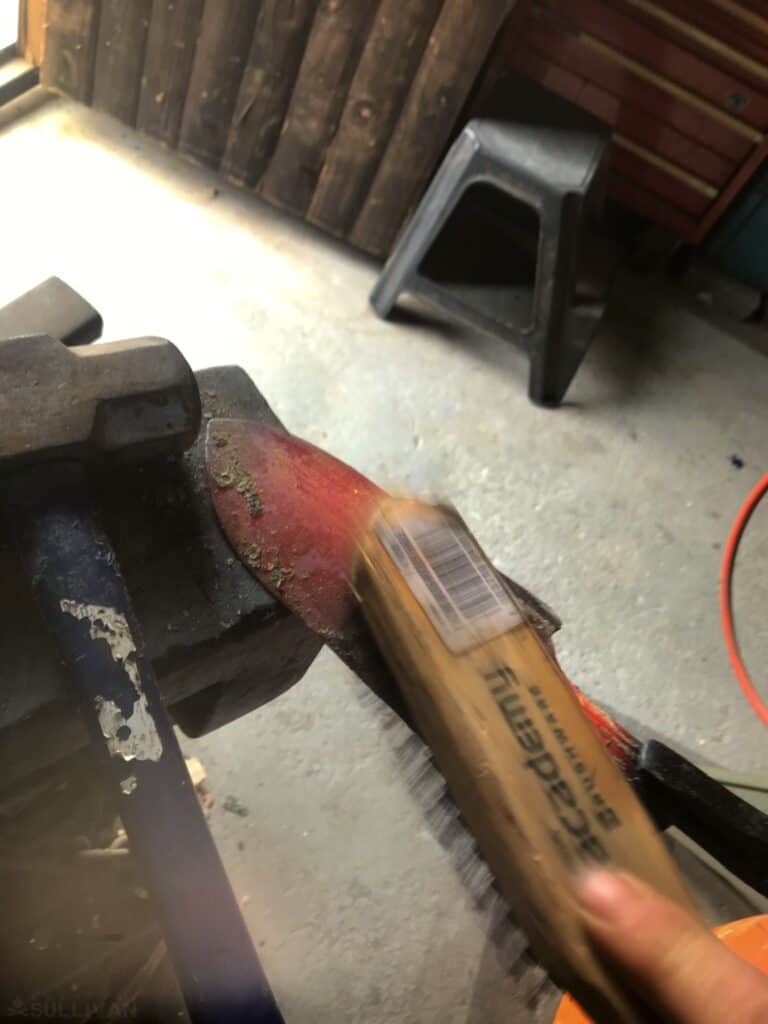
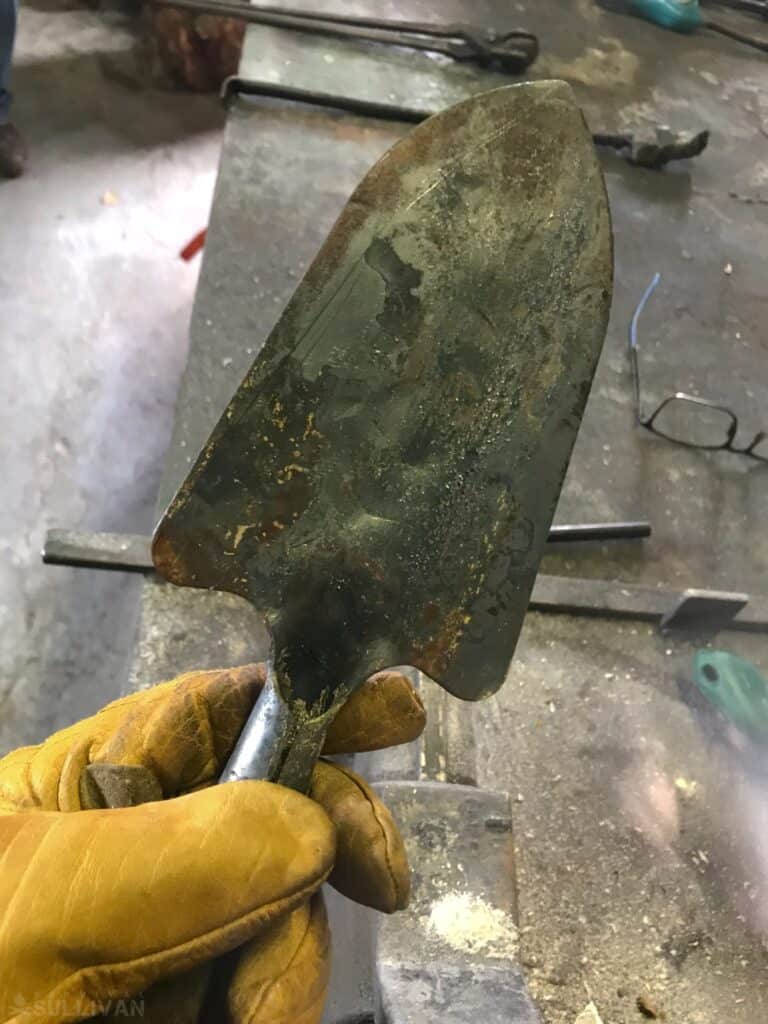
Step 7. Once the spade has been hammered out, use the wire brush on the bench grinder to clean off any stubborn paint before reinserting the metal into the forge.
Step 8. Now your metal is ready to be reheated for the final shaping before being annealed.
Step 9. Once an even heat across the metal is reached, flatten out the spade once more by hammering the blade and checking the profile.
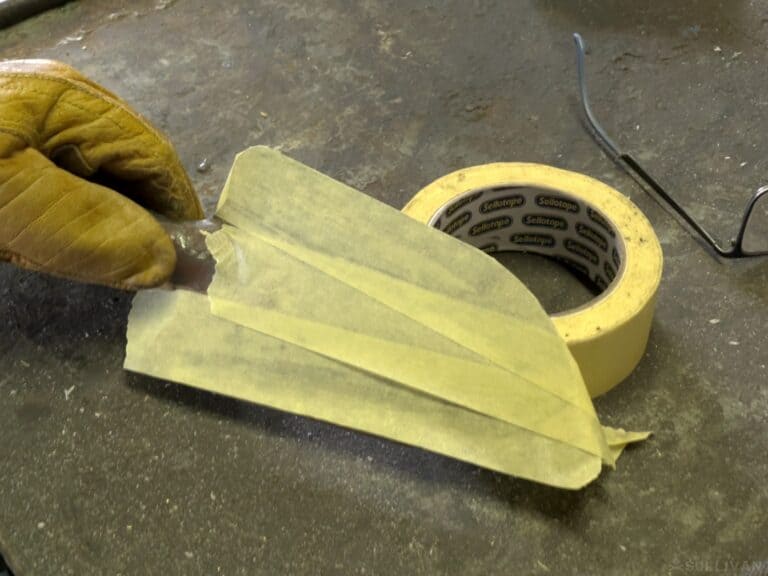
Step 10. Tape up one side of your spear with the masking tape. You can trace out the desired shape on the tape.
Step 11. Using a straight edge run a line exactly through the middle of the blade from the socket to the blade tip. Fold the cardboard sheet in half and trace the shape of the forged spear onto it.
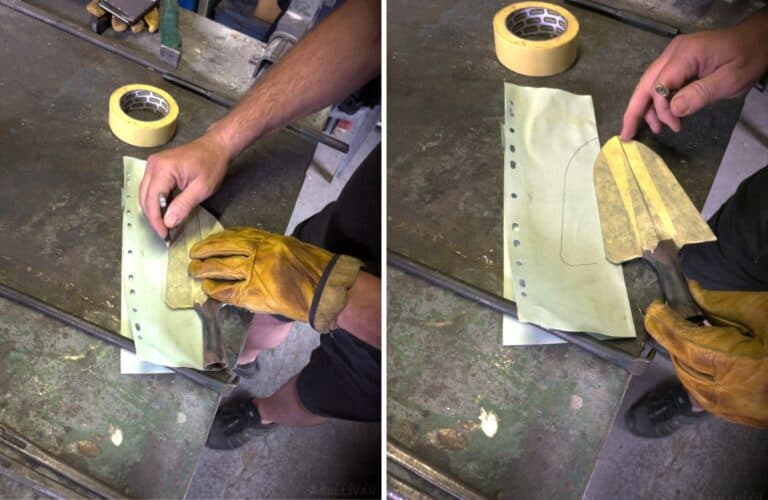
Step 12. Open the cut-out shape and trace out the shape of the spear that you require.
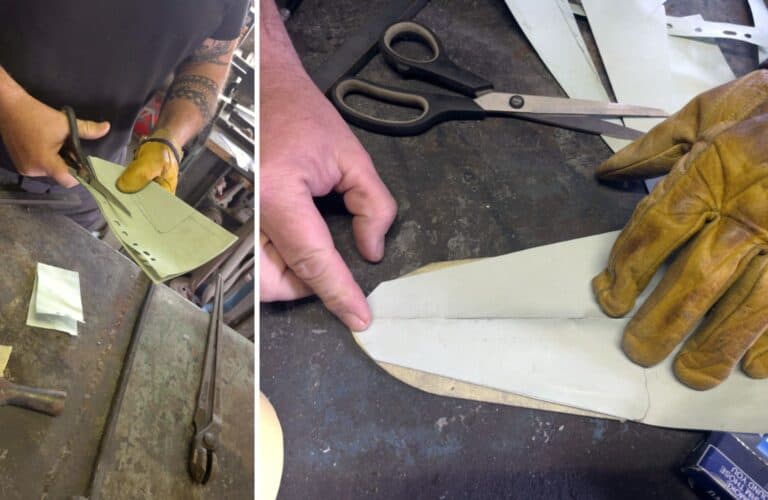
Step 13. Trace out the desired shape onto the spear blade. You are ready to cut this shape out now before the final tempering and the quench.
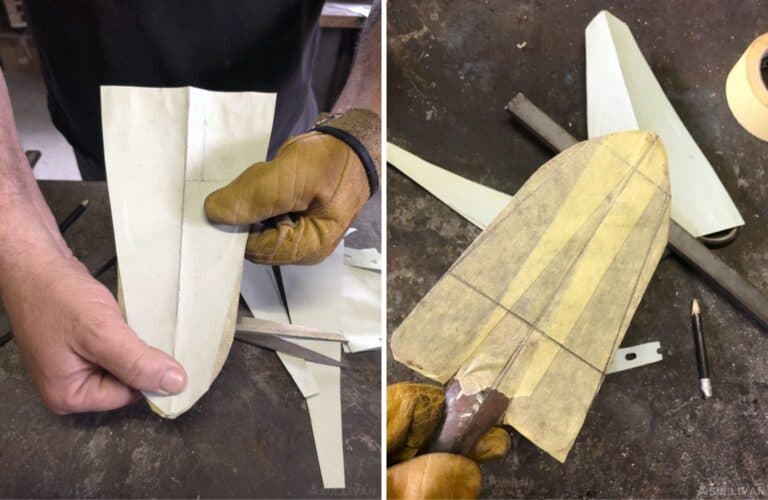
Step 14. Remove the excess metal by grinding it off, cutting it off with a cutting disk or hacksaw. This will produce the rough shape that will be the spear.
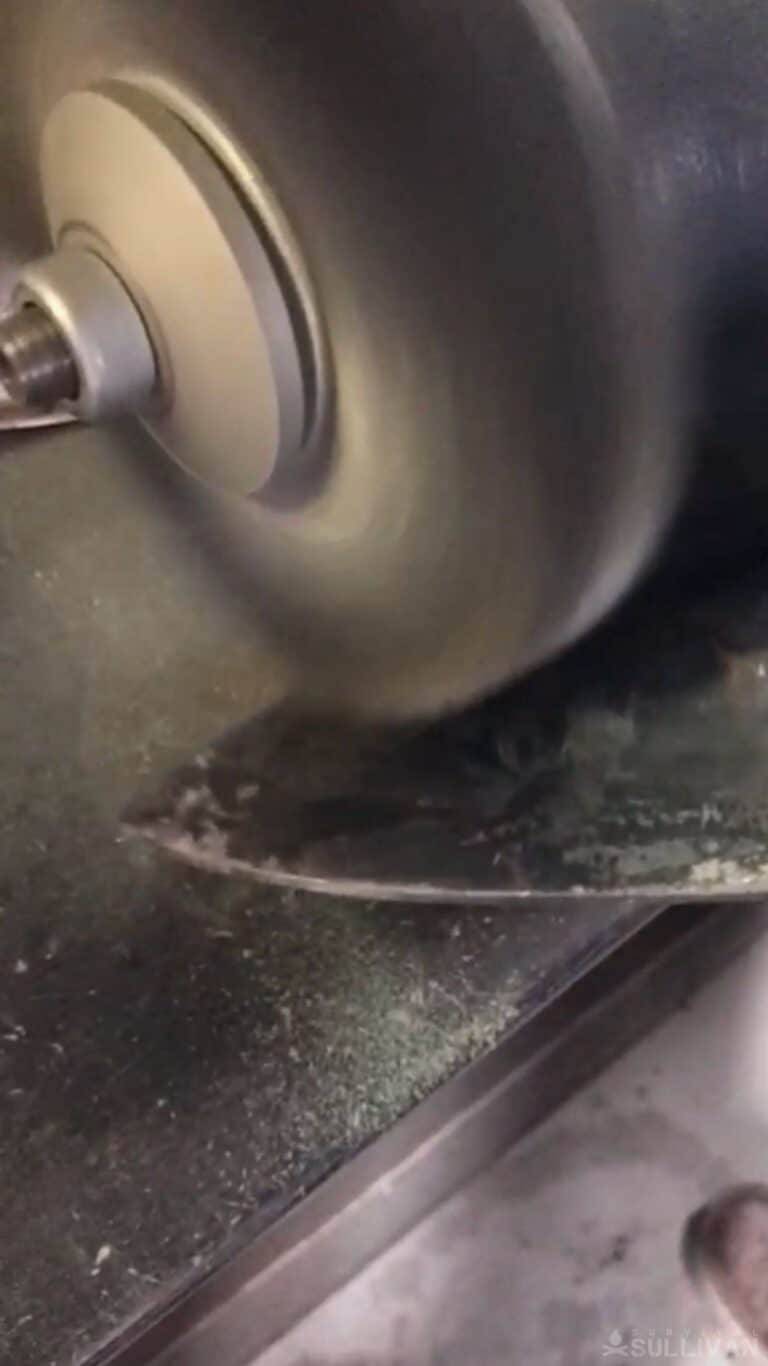
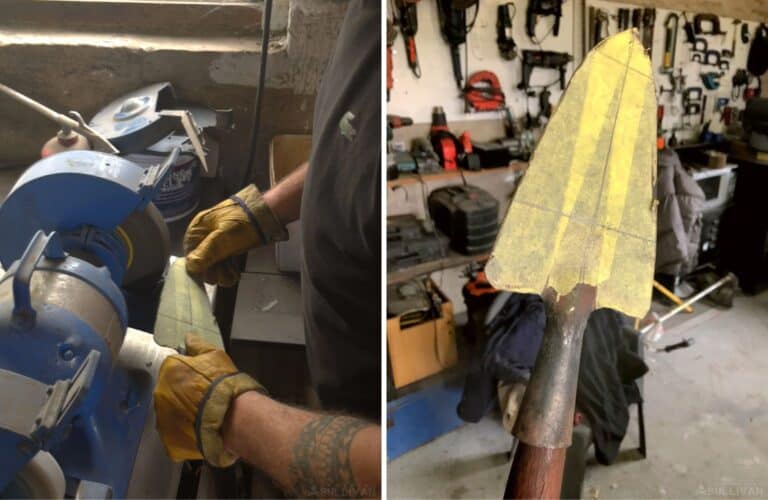
Step 15. Once you have cut both sides, use the bench grinder to clean up the edges and the lines.
Do not grind an edge onto the blade yet. At this time the metal is still soft, so the blade will not keep its edge. Once you have hardened the blade, then it will be time for the final edge.
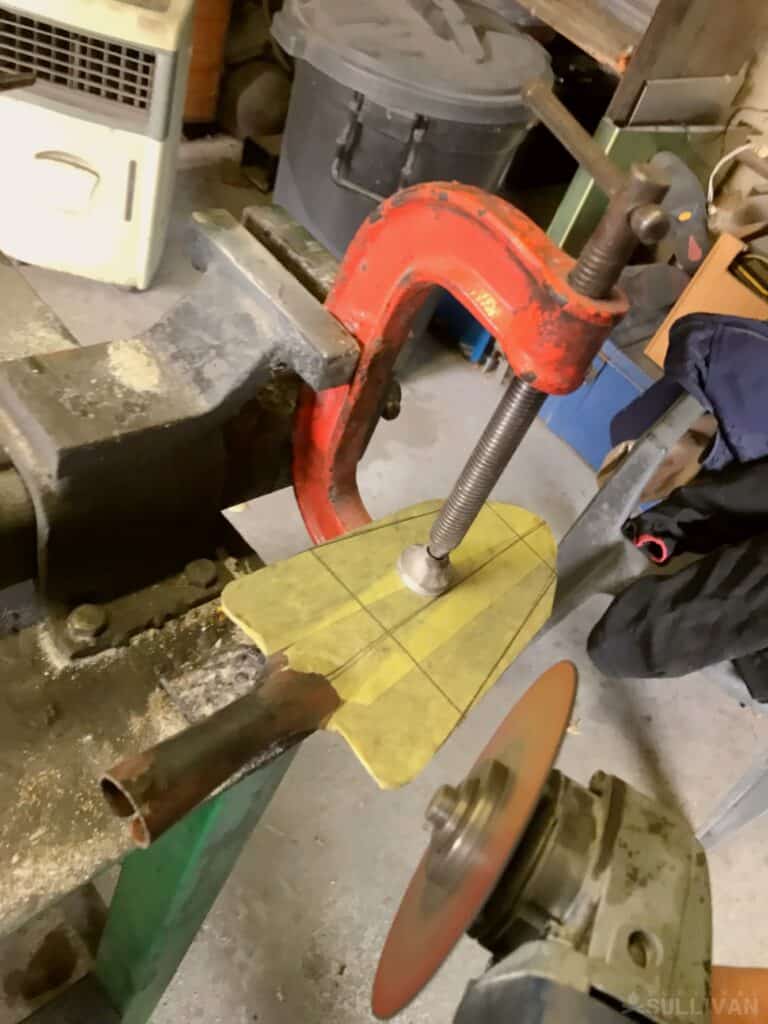
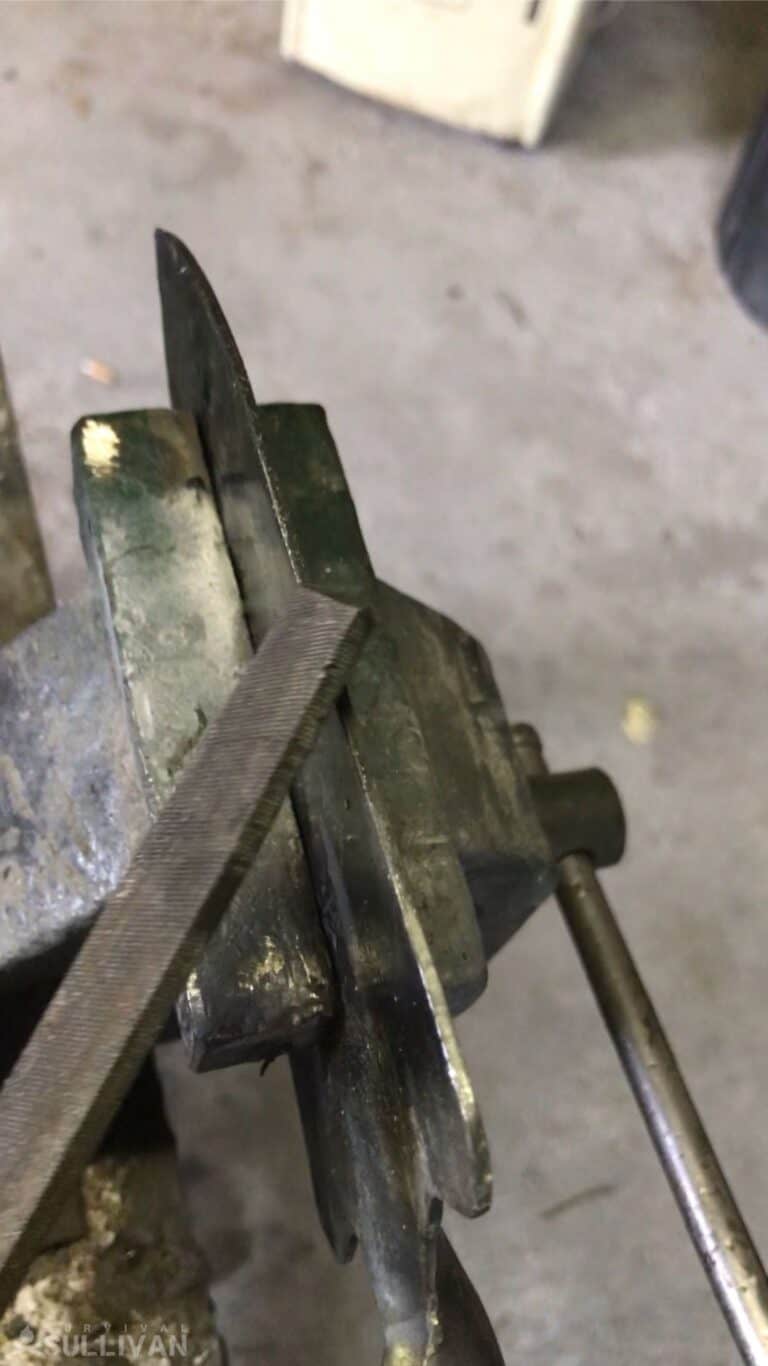
Step 16. Now you are ready to shape the socket to fit the shaft of the spear. The socket cannot be shaped around the wooden shaft, it will burn. I have a large railroad spike which I fit into the vice, and shape the socket around with the hammer.
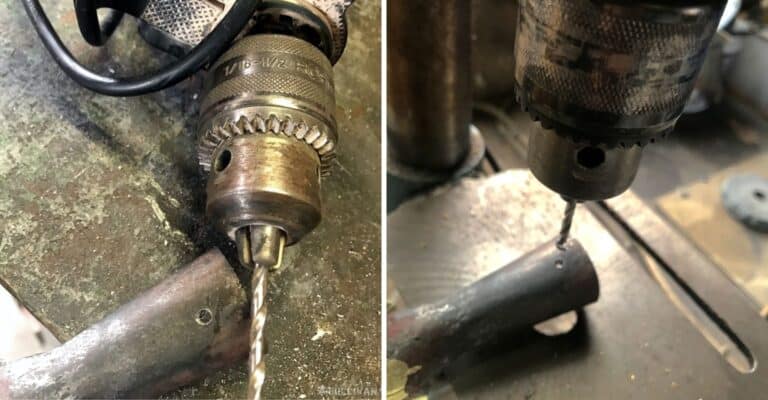
Step 17. Don’t forget to drill the hole in the socket before you harden the metal. Once hard it will be difficult to drill through the steel. The hole is important, it will be the point where the rivet is inserted through the hole and into the shaft to hold the spearhead in place.
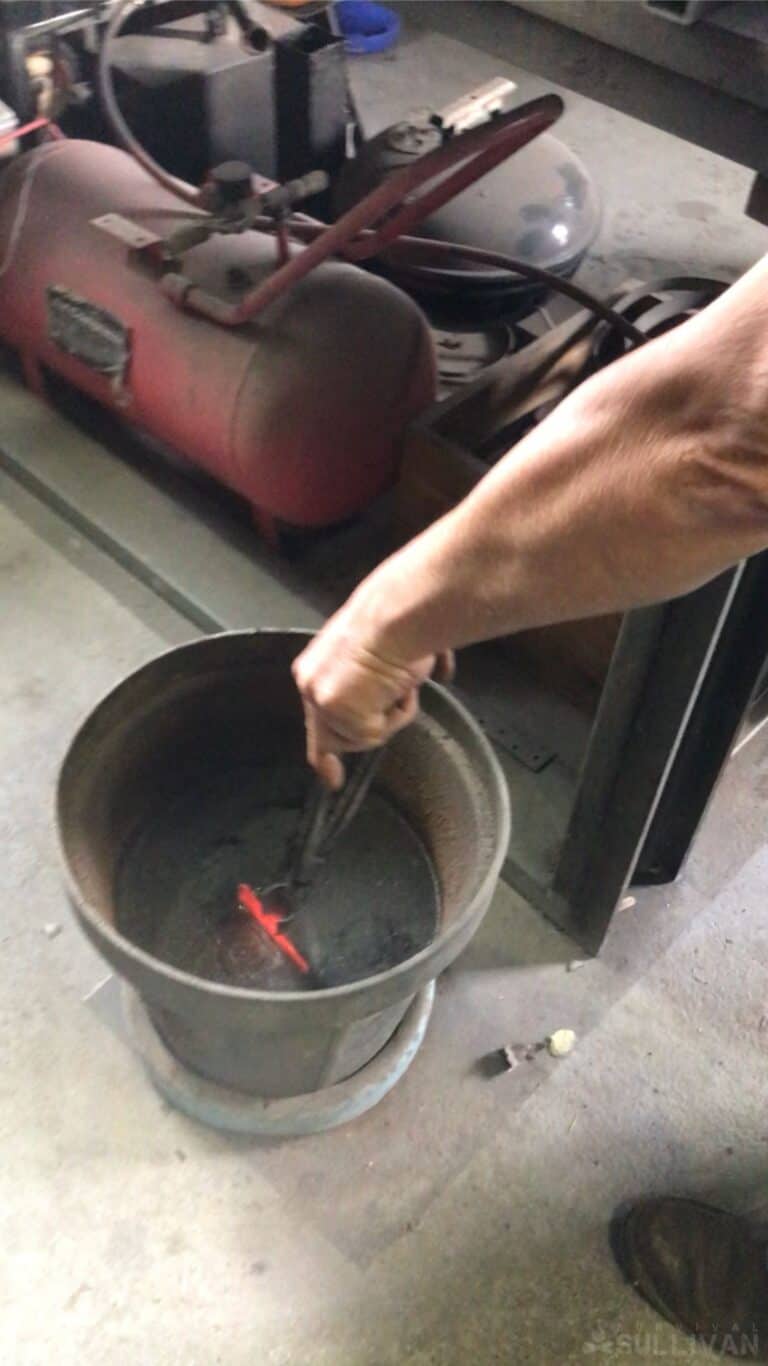
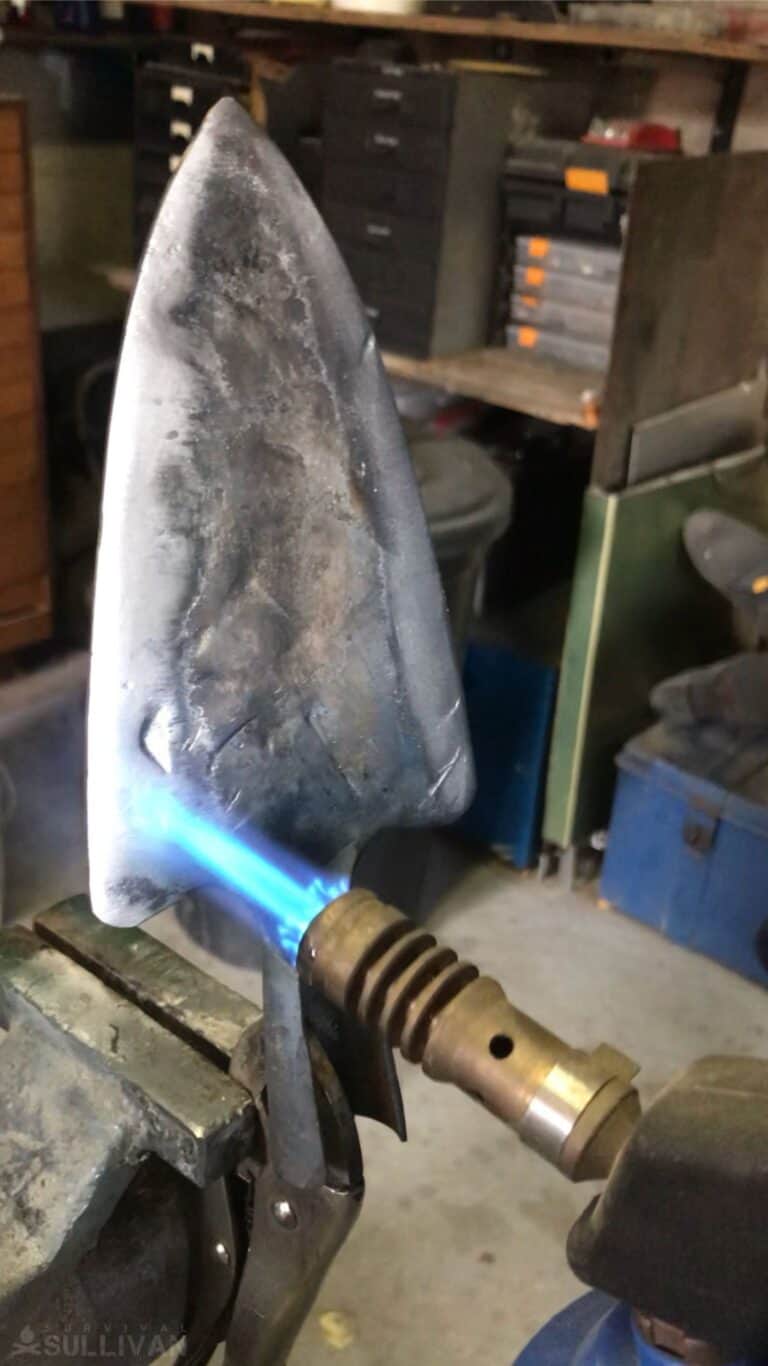
Step 18. The final shape has been ground out. It is time to reheat the blade for the last time to quench the blade by dipping it quickly into quenching oil or water. This will cool the blade quickly, in effect shrinking the grain of the metal.
At an atomic level, the steel’s molecular structure constricts, bringing the molecules closer together, so hardening the steel. The closer together the molecules are, the harder the steel. It is similar to when you close your hand to form a fist.
Step 19. The quench is the culmination of the forging process. The blade is tempered at this point. Your steel is heated to a point just below its critical point and quickly cooled to harden.
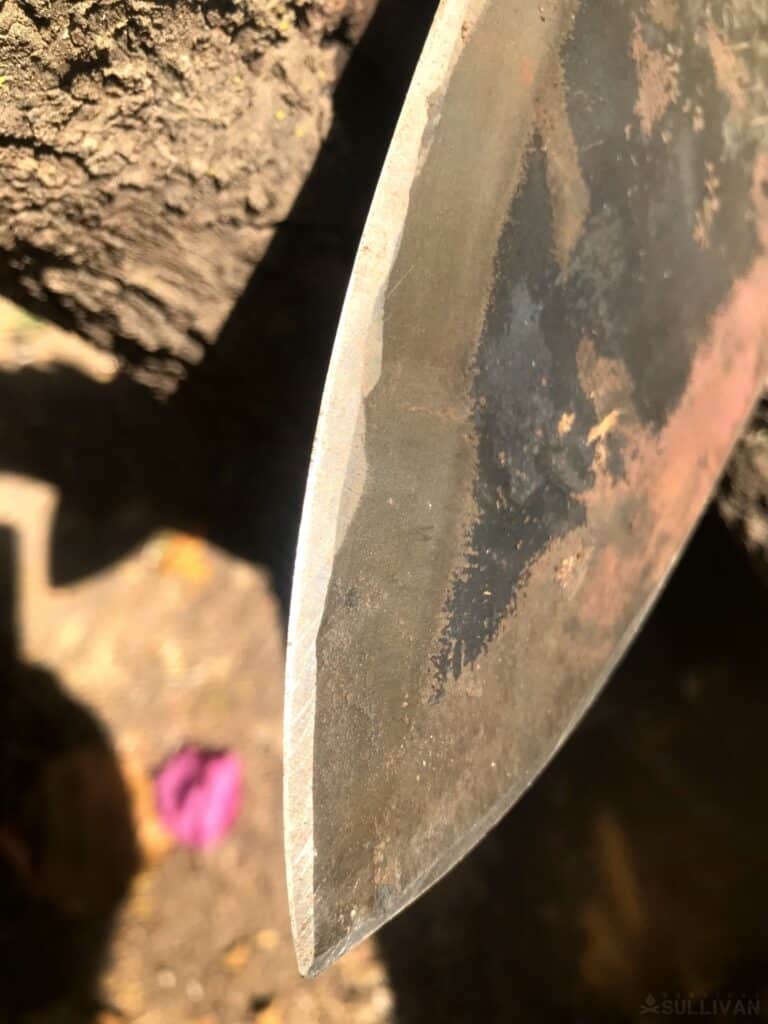
Step 20. Once cooled, place the blade in a vice, and run a file over the edges, if the file “bites” or sticks when it is run over the edge, the blade is not hard. If it runs smoothly over the edge, it is hard.
Step 21. If the blade is too hard, it will be brittle and can break on impact when striking the target.
To reduce the likelihood of this occurring the blade is annealed, by applying a mild heat to the blade surface for two to three minutes to “relax” the steel. Do not overheat the blade. Once it heated let the blade cool of its own accord.
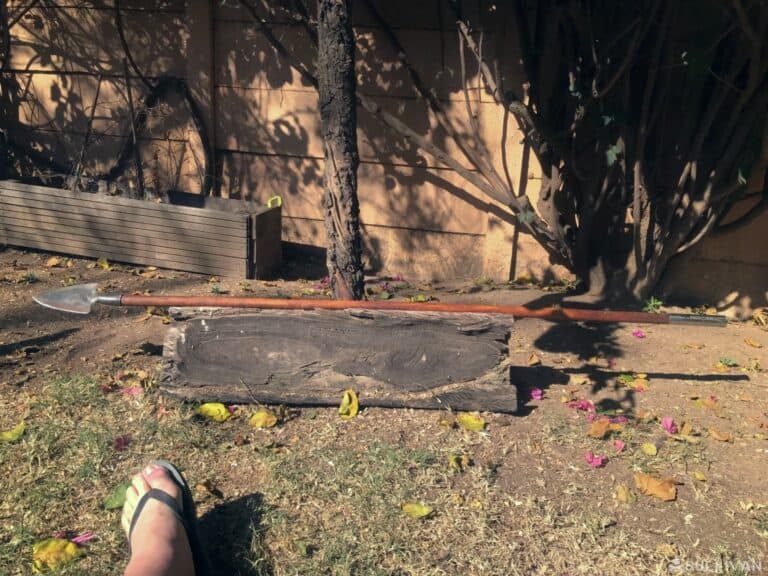
Step 22. The final edge can now be added to the blade, turning it into a fine-cutting weapon.
Step 23. Fit the blade to the shaft and pin it in place using the hole you drilled earlier. The socket can further be secured by wrapping it. Leather is ideal, wet it and then wrap the socket. Leather stretches when it is wet and shrinks when dry forming a secure binding.

Step 24. You can “cap” the other end of your spear. By adding a metal foot or tube to the end of the spear will protect the wooden end. The weighted end will help to balance out the heavier spear end.
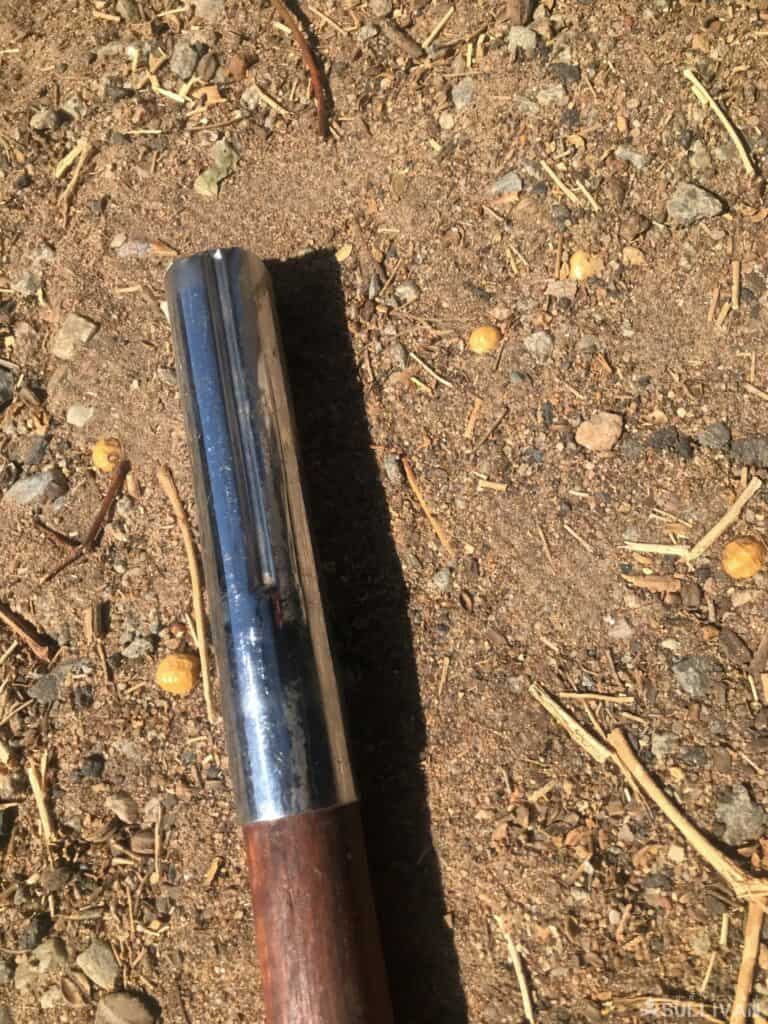
Step 25. The point of balance can be wrapped to keep your hand coming back to the same point without having to re-balance the spear every time you want to throw it. Using the spear regularly you will develop muscle memory and your body will “recognize” the point of balance instinctively.
Final Swing of The Hammer
Forging is a primitive skill that will stand you in good stead in any situation. Not only will you be able to build tools and weapons for yourself, but just as in days of yore you will be able to build and sell your products to your neighbors.
Starting out it is advisable to ask a blacksmith in your area to assist you in developing the skills needed to move metal and an understanding of the tools needed and used in the forging process.
You will become familiar with the workshop and the workings of different forge type.
A primitive spear from a spade will save you time in the forge and comes with a socket that can be formed to fit the spear shaft securely.
In a survival situation, the spade spear will enable you to hunt medium and large game with confidence. The spear point will be able to penetrate deeply into your quarry, finishing off the target effectively.
You will be able to defend yourself against large predators and other threats. Be safe and have fun!

Harrison Caine is a soldier, a hunter, a trained expert in hand-to-hand combat, hunting. He’s trained soldiers, fought wars, and provided defense services to refugees and U.S. officials. His experience in tough wilderness scenarios is unmatched